An open-source data modeling tool to facilitate relational database development
dbSpy是一个促进关系数据库开发的开源数据建模工具。
- Connecting to an existing remote PostgreSQL and MySQL database
- Renders an ER diagram of the existing database and provides an interface for users to both modify existing tables and create new tables. A log of changes is stored, and at any point, the user can generate a query containing the changes, such that they are reflected in the existing database.
- Uploading your database's SQL file
- Renders an ER diagram for the provided SQL file (db dump) and provides an interface for a user to both modify existing tables and create new tables. Changes are converted into the corresponding queries, which the user can view and execute on their own database outside of dbSpy.
- Seamlessly visualize relational databases
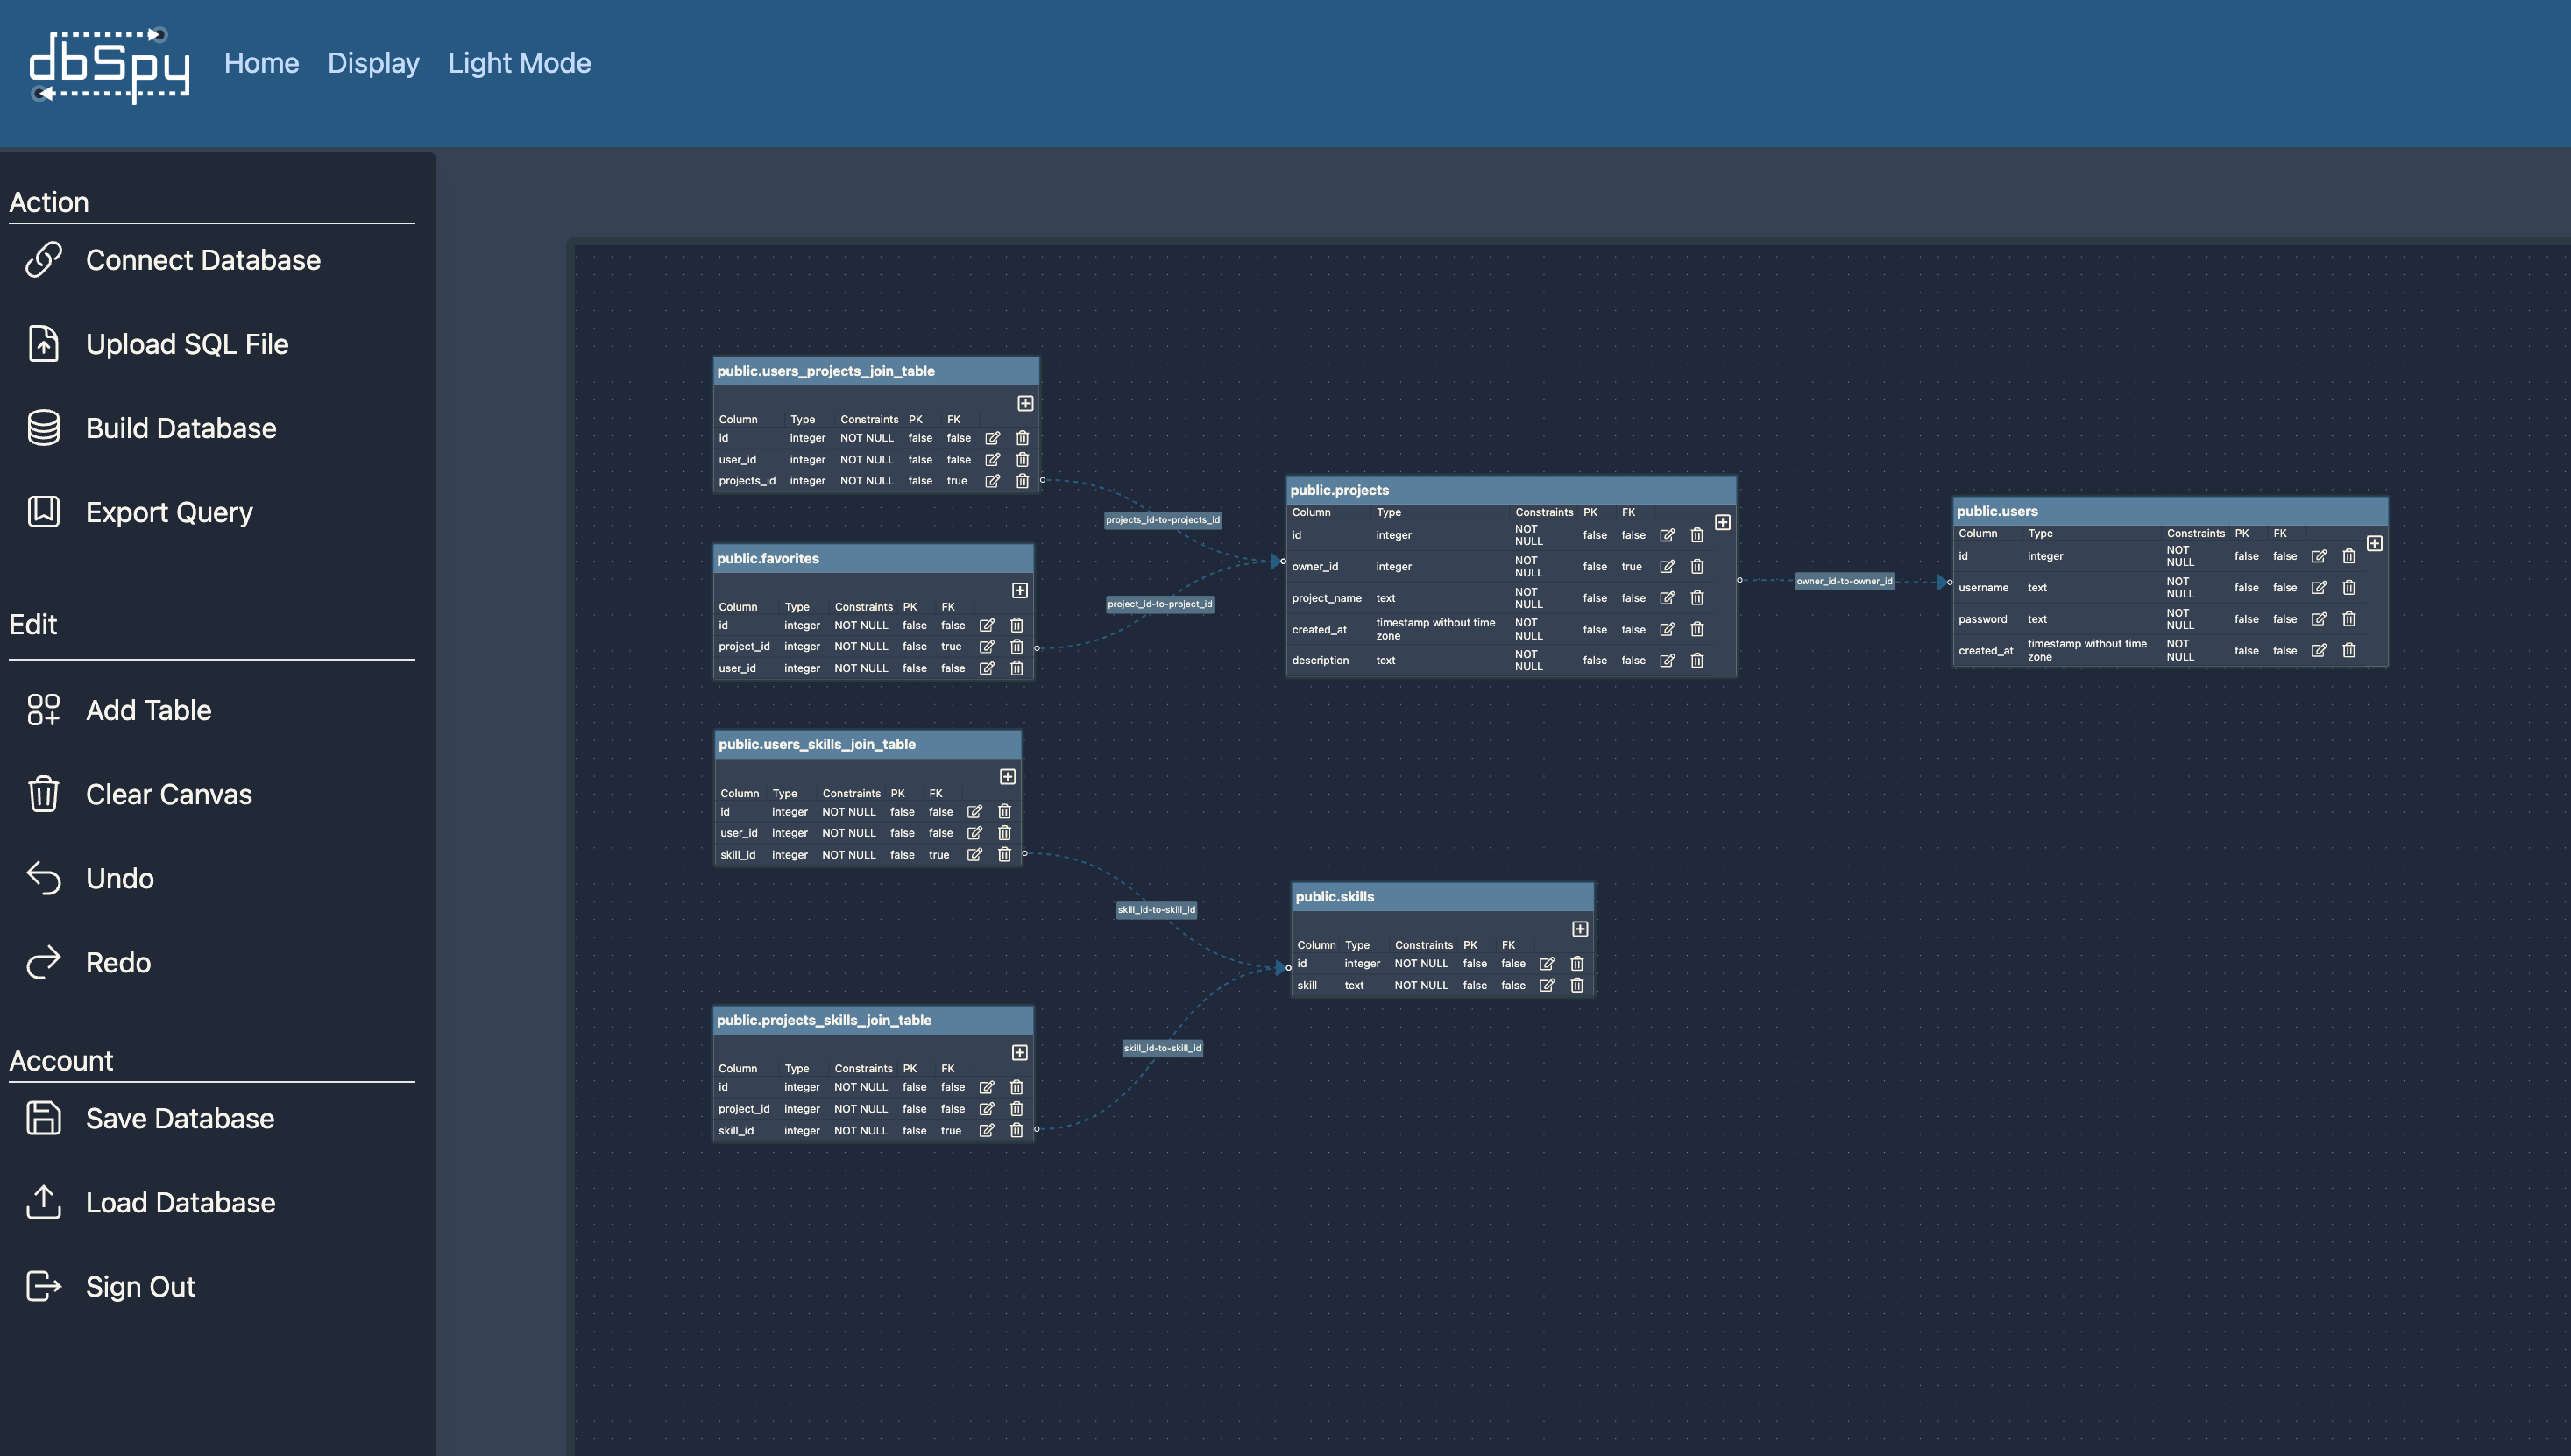
- After connecting database tables with one another, users are able to render the relationship connections of individual tables by clicking on the tables.
- Creating a database + ER diagram from scratch
- Provides a canvas for users to create a database by using ER diagrams, thus creating a blueprint for engineering database structures.
-
Database Uploads: Connect to remote SQL database or upload local SQL files
-
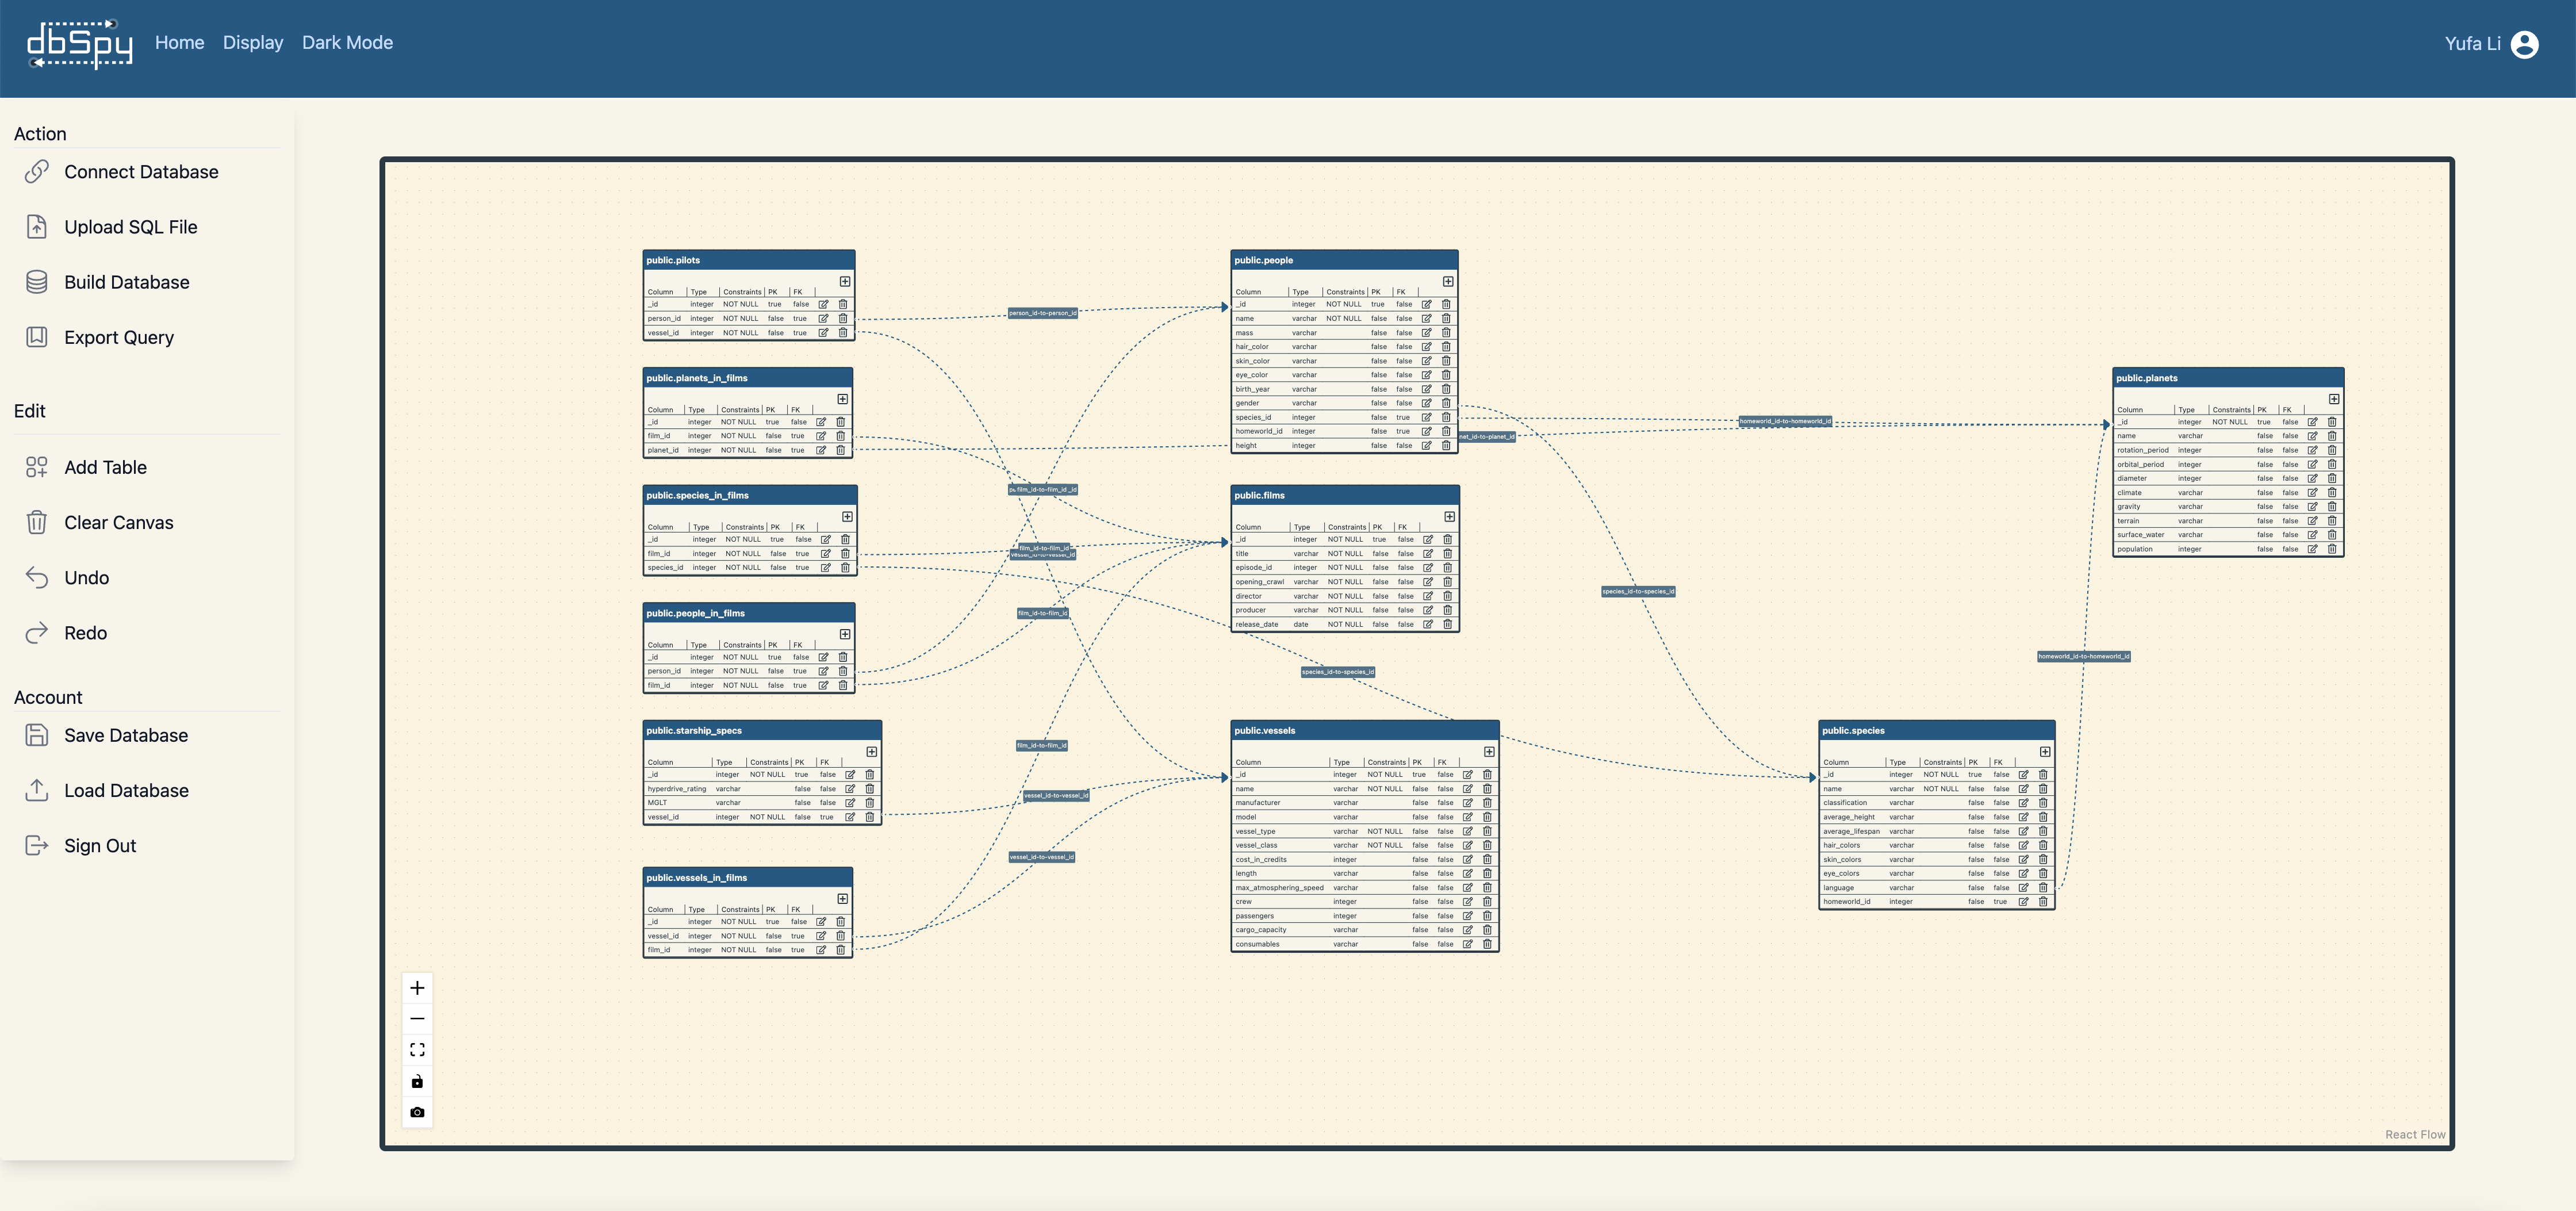
ER Diagram Visuals: Visualize the entity relationship diagram of a database with dynamic handle placement
-
Table Relationship Visuals Relationships of individual tables are easily identified when clicking on a table.
-
Schema Modification: Easily modify a database's schema through a simple UI
-
Guided Database Building: Create a new database from scratch using entity relationship diagrams to ensure the integrity of the database
-
Database Undo/Redo: Provides a history of edits for easier backtracking
-
Query Generator: Query generator generates executable SQL queries
-
User Sessions: Sign up/Log in securely with either Google OAuth or JWTs/Bcrypt
-
Save/Load: Store and reload recent database sessions through your user account
-
Dark Mode: Visual settings to provide a more comfortable viewing experience in low-light environements
You will need your own MySQL database for backend functions.
- Fork and clone this repo
- Add a db_schemas folder in server directory
- Add a .env file to the root directory with the information below:
# production environment variables
USER_DB_URL = <MySQL url for storing user data>
USER_DB_USER = <user string from USER_DB_URL>
USER_DB_PW = <password string from USER_DB_URL>
TOKEN_KEY = <any string>

# testing environment variables
## encoded SSL data required for GitHub Actions
SSL_KEY = <base64 encoded SSL key (see SSL Configuration)>
SSL_CERT = <base64 encoded SSL cert>
## MySQL and Postgres databases to test remote connection functionality
MYSQL_TEST_URL = <MySQL url for a test database>
MYSQL_TEST_USERNAME = <user string from MYSQL_TEST_URL>
MYSQL_TEST_PW = <password string from MYSQL_TEST_URL>
PG_TEST_URL = <PostgreSQL url for a test database>
PG_TEST_USERNAME = <user string from PG_TEST_URL>
PG_TEST_PW = <password string from PG_TEST_URL>
## test user with saved schema to test save/load functionality
TEST_USER_EMAIL = <email string>
TEST_USER_PW = <password string>- Run the following below:
$ npm install- Execute the following command to populate your mySql database with a users table:
$ npm run seed- Run the project in development mode:
$ npm run devTo connect with the SQL database, we must create and configure SSL certificates.
- Install mkcert; you can learn more about mkcert here
npm install -g mkcert- Run the following script
npm run cert- Check mkcert is up to date (v1.5.1 as of publishing)
mkcert --version- Run the following script
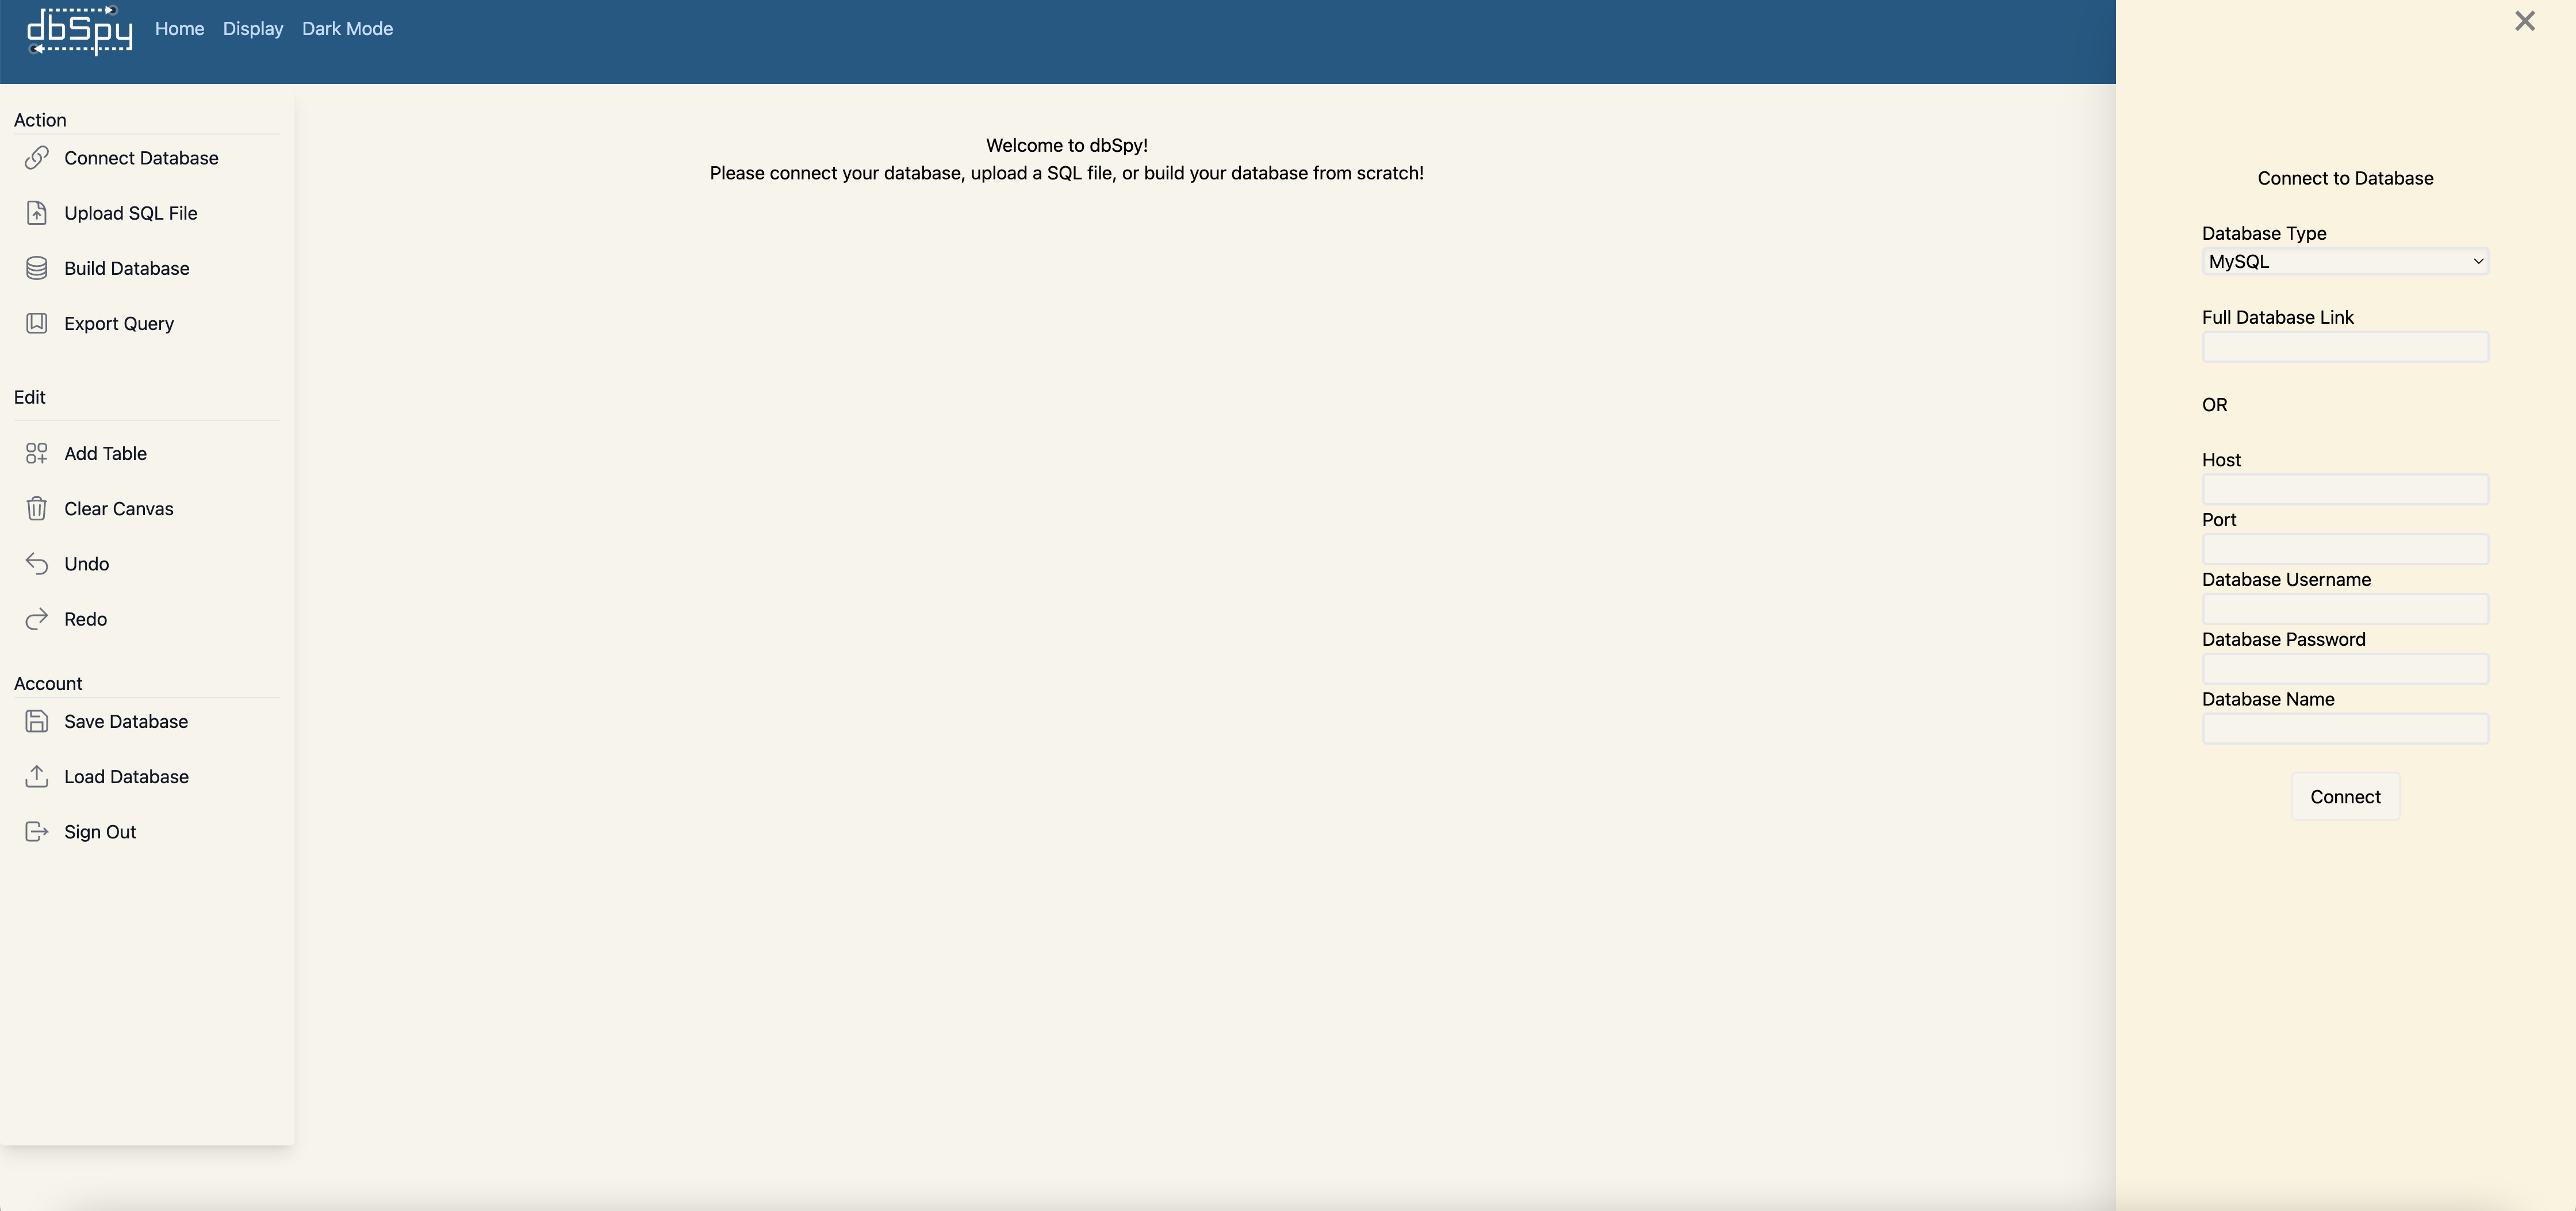
npm run cert:linux- Click on the "Connect Database" button under the Action section on the left side of the page. This will open a sidebar on the right side of the page.
- Select the database type from the dropdown.
- Input your database URI information OR database connection credentials and click on "Connect".
- Once the connection to your database is established, the canvas will render and generate the tables and their relationships.
- Locate and click on the "Upload SQL File" button under the Action section on the left side of the page. This will open a dialog box for you to select the SQL file you wish to upload.
- Once the file uploads, the canvas will render and generate the tables and their relationships.
- Locate and click on the "Build Database" button under the Action section on the left side of the page. This will render the canvas for you to create your database schema.
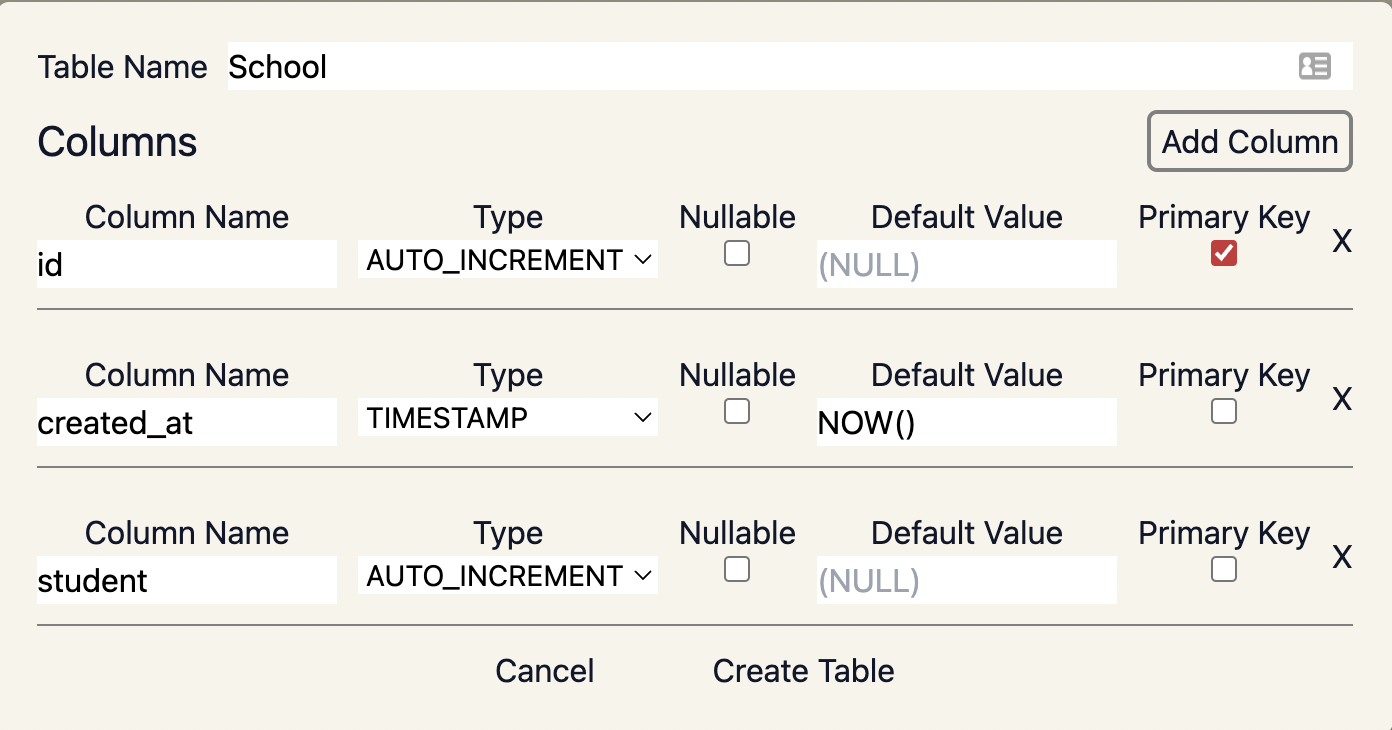
- Click on "Add Table" to name the first table and start building your database.
- To add a new column in a table, click on the add icon on the top right of the table node. This will render a new column in the table in edit mode.

- Click on the edit icon of the specific column that you want to edit.
- You can make changes to column fields based on the selections provided.
- Click on the save icon to keep your changes.
- Click on the cancel icon to cancel your changes.
- While editing a column, if setting Foreign Key (FK) to "true", the Foreign Key Reference sidebar will appear on the right side of the screen.
- In the Foreign Key Reference sidebar, use the displayed dropdowns to create references between tables.
- Click save or cancel to proceed.
- Click on the save icon to keep your changes or click on the cancel icon to cancel your changes.
- Click on the delete icon of the specific column that you want to delete.
- Click on the confirm icon to delete the column.
- Click on the cancel icon to cancel the deletion.
- Located on the bottom left corner of the canvas, you will find the canvas control panel.
- Zoom On [+] - this button zooms into the canvas.
- Zoom Out [-] - this button zooms out of the canvas.
- Fit View [[]] - this button zooms to fit all the tables in focus.
- Toggle Interactivity [lock] - this button toggles on and off all table and column interactivity.
- Screenshot [camera] - this button saves a .png file of the current canvas view.
- If you'd like to contribute, please find a list of possible contributions here
- If you have any requests, please submit an appropriately tagged GitHub issue
- PRs are welcome otherwise
- Alexander Tu • LinkedIn • Github
- Michael Costello • LinkedIn • Github
- Steven Geiger • LinkedIn • Github
- Yufa Li • LinkedIn • Github
- Angel Giron • LinkedIn • Github
- John Paul Adigwu • LinkedIn • Github
- Kevin Park-Lee • LinkedIn • Github
- Tarik Mokhtech • LinkedIn • Github
- Brett Guidry • LinkedIn • Github
- Emil Mebasser• LinkedIn • Github
- Mimi Le • LinkedIn • Github
- Samson Lam • LinkedIn • Github
- Adrian Reczek • LinkedIn • Github
- Anthony Al-Rifai • LinkedIn • Github
- Kevin Wang • LinkedIn • Github
- Kris Magat • LinkedIn • Github
- Santiago Gil Maya • LinkedIn • Github
dbSpy is developed under the MIT license.


