splitvent - Designs and Tools to help multiply available Ventilators
This project includes designs for 3D-printed ventilator "Y" splitters, 3D printed flow restrictors, and Raspberry Pi software to monitor per-patient respiratory flow with a Sensirion SFM-3x00 series inline flow sensor
We are releasing our work early and often, and in a form that we hope interested individuals can reproduce.
Contributors to this project submit their work under a Creative Commons ShareAlike 4.0 license. See LICENSE.md for more details
News
- 2020-03-29 7:30PM EST - Raspberry pi image now available for download
Video Updates
-
April 4th Video Update - Tobin discusses their progress testing the SplitVent system at the simulation lab at Indiana University.
-
SplitVent Daily Update March 30 - Showcase improvements to the UI, a 3D printed cap to the flow sensor, revisions to valves including larger handles that make it easier to operate.
-
SplitVent System Description March 29 - Demonstrate how restricter valves and flow monitoring can allow quality vantilation to multiple patients with one ventilator.
Quick Start
3D Printing Models
- Splitter and flow restrictor model dimensions are optimized for FDM, SLA, SPD and DLP printers.
- Print at best rsolution for your printer. FDM printers should use .2mm layer height and .12mm layer height for best results.
- TPU material can be used to print o-ring models or use ISO 3601-012 o-rings.
- Materials such as Med610, Dental SG/LT, and Teeth A2 should be considered for sterilization purposes.
- Models printed using an FDM printer should use 10-20% infill with supports touching buildplate and a brim or raft is suggested when printing the flow restrictor body for stabilization.
Monitoring Software
-
Fabricate a cable to connect to the sensor's connector surface contact lands.
-
Connect your RPi to the Sensirion sensor as shown in the image below:

-
Download the RPi disk image, unzip, and write to an 8GB or greater SD card. Follow the instructions here
-
Install the SD card into the RPi
-
Plug in an HDMI monitor
-
Power on the RPi
-
Hit ctrl-c a few times to stop the console app
-
run "git pull" to get latest GUI changes
-
logout
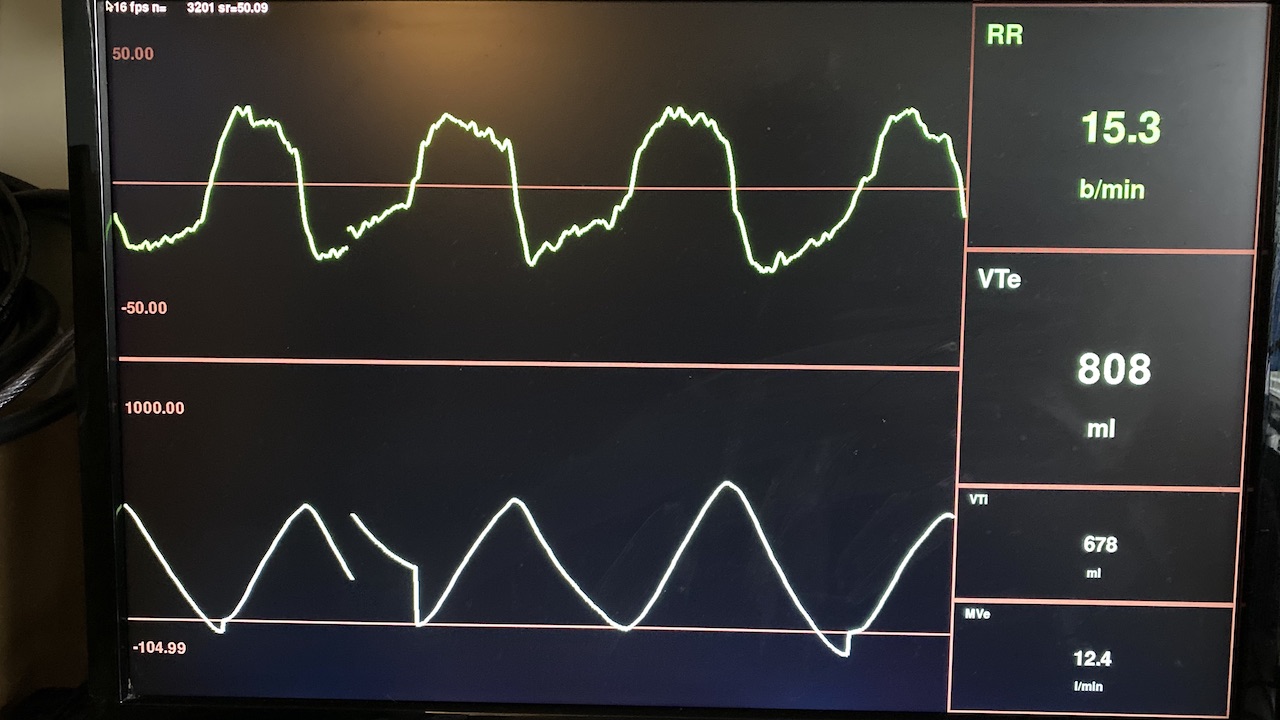
You'll see a UI like this:
Thanks to the following contributors:
- Tobin Greensweig
- Nate Surls
- Paul Holland
- Timothy Nisi
- Paul Yearling
- Brian Overshiner
- Joe Koberg
- Dan Lash
