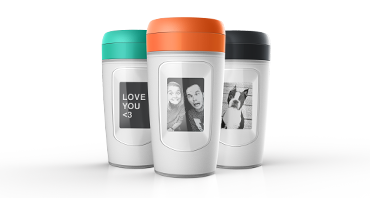
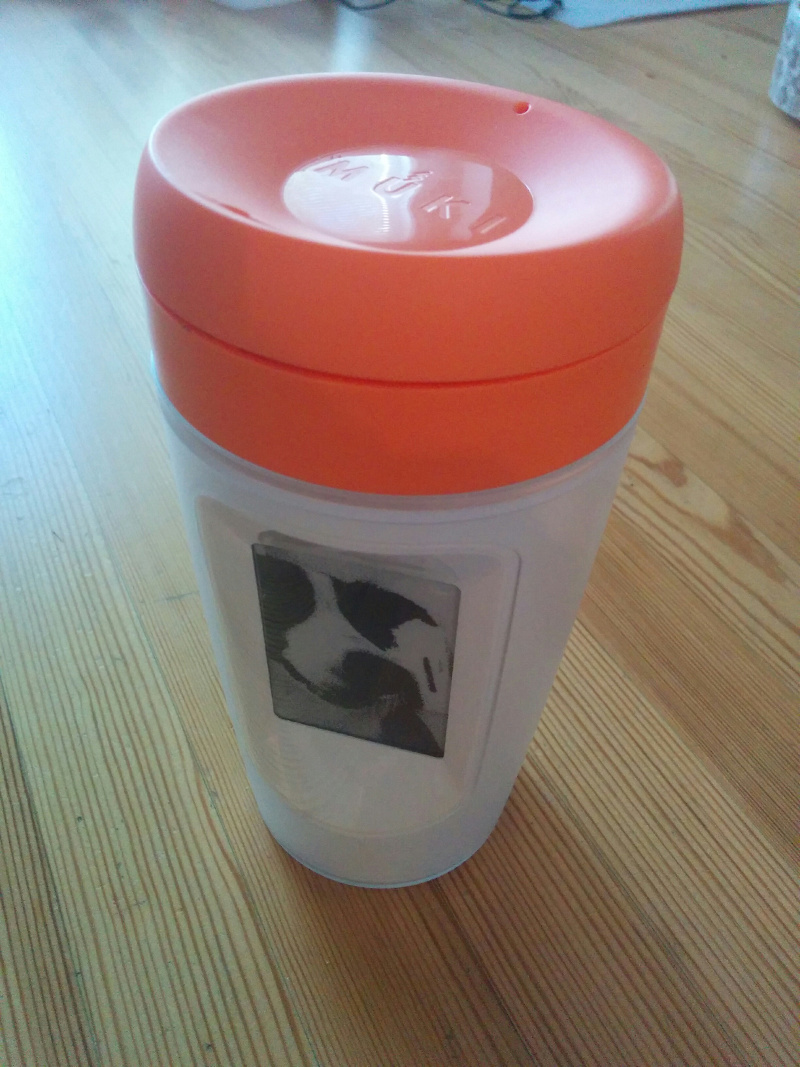
I got my hands on an IOT-enabled coffee mug, Muki from Paulig. There's an e-ink display on the side and you can use your phone to upload images to the mug. there's no battery or power plug: Instead a thermoelectric generator transforms heat of the coffee into electricity for the other components!
I did what one does with new IOT devices: had a look under the hood.
Sending images to the mug is pretty easy: there is no authentication or encryption. Bluez (the bluetooth stack) and ImageMagick (the image manipulation toolkit) do all the heavy lifting I needed on linux.
My python scripts are in the same repo as this writeup. ./muki filename will upload a photo to a nearby Muki.
There really is no authentication: anyone within Bluetooth LE distance can send any images they want to my coffee mug! I'm not sure I can bring the mug to the office after publishing this.
Muki documentation mentions it uses Bluetooth Low-Energy and I knew Android allows Bluetooth sniffing (see How to enable Bluetooth HCI snoop log). So I did that, used the Muki app to upload an image to the mug and then moved the log file to my laptop via Google Drive.
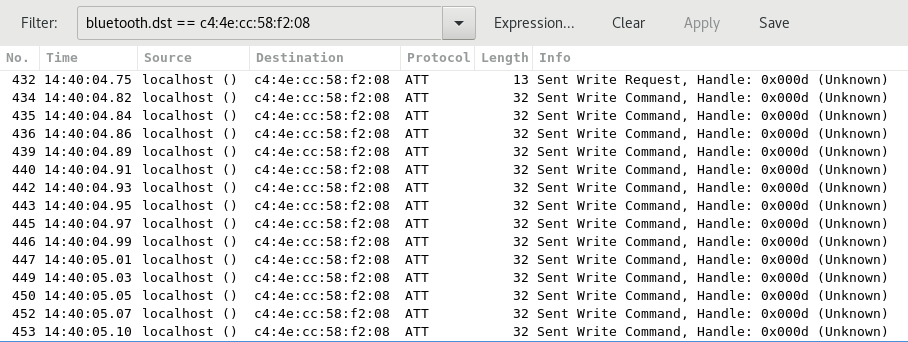
I had a look at the log with Wireshark: It contained about a thousand frames but scrolling through revealed only one remote Bluetooth address. This is the beginning of the log when filtering with just this address as destination:
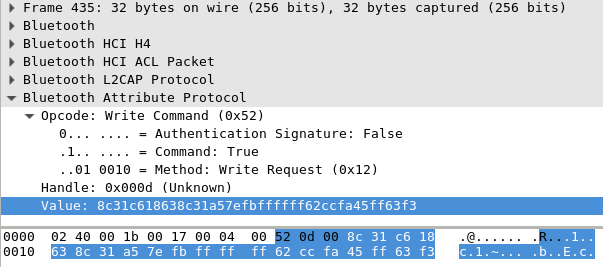
All of the events are Bluetooth attribute writes to one single handle. First and last write have a payload of a single byte (0x74 and 0x64 respectively). All the other 291 writes are 20 bytes each. Here's an example of a 20 byte payload frame:
At this point I did a bit of math: According to manufacturers Facebook page the screen is 176x264 pixels. At bitdepth 1 that's 46464 bits or 5808 bytes. If you divide 5808 bytes into 20 byte frames you end up with 291 frames, exactly as many as are sent over Bluetooth. That's unlikely to be a coincidence...
I decided to throw something on the wall and see if it sticks: Googling lead me to gatttool from Bluez project as a quick-and-dirty option on Linux. After a bit of reading it seemed clear that I only needed the Bluetooth address and a "ATT characteristic handle" to write with gatttool. Luckily I already had both from wireshark.
I tried entering some write commands manually with gatttool but that didn't work: I probably type too slowly and the device disconnects to save power. Next I wrote a gatttool-abusing script that uses the start and stop values from the sniffed log and otherwise just writes a lot of 0xF0 values:
console = pexpect.spawn('gatttool -I -t random -b C4:4E:CC:58:F2:08', timeout=3)
console.expect('\[LE\]>')
console.sendline('connect')
console.expect('\[LE\]>')

console.sendline('char-write-req 0x000d 74')
console.expect('\[LE\]>')
for i in range(0,291):
	console.sendline('char-write-cmd 0x000d F0F0F0F0F0F0F0F0F0F0F0F0F0F0F0F0F0F0F0F0')
	console.expect('\[LE\]>')

console.sendline('char-write-req 0x000d 64')
console.expect('\[LE\]>')
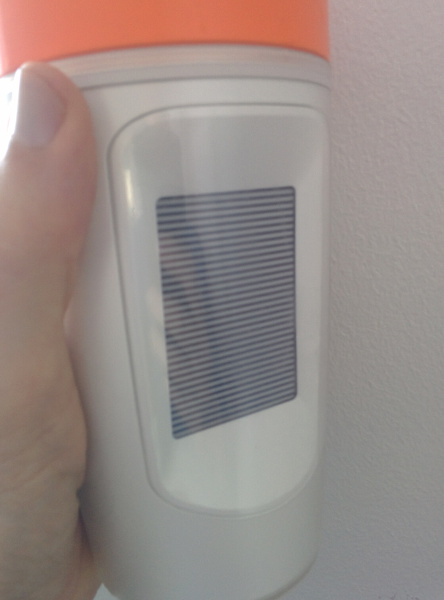
After a few failed attempts and bug fixes the screen flashed and updated to a striped image!
So the 291 frames are indeed for image data and the data seems to be simply binary pixel values one after the other: The data I was writing was 11110000 in binary and the stripes indeed seemed four pixels high.
Note: At around this time I happened to find some kind of Android and iOS library for Muki on Github: it's not an actual source release (even though it claims to be GPL!) but the Android files are easily decompilable. I took a long enough look at the decompiled sources to verify my findings so far but decided not to use the code for anything -- the uploader claims to be Paulig (the manufacturer) but the whole thing seems a little fishy...
So I knew how to send 1-bit images to the mug. Turning a typical photo into decent looking low resolution 1-bit image turned out to be tricky: it's really important to get the dithering (using the density of black dots to approximate the color density) right with such images, otherwise you end up with unrecognisable blobs.
Luckily the ImageMagick python bindings cover just enough of functionality to do this in just a few method calls:
# Resize so that image completely just fills whole
# viewport, still preserving aspect ratio
img.transform(resize='176x264^')

# Crop if the image aspect ratio is incorrect
img.crop(width=176, height=264, gravity='center')

# Turn image to black and white, with dithering
img.type = 'bilevel'

# Rotate 90 degrees clockwise
img.rotate(90)
Next I needed to turn the image data into an array of bytes so I could easily push 20 bytes at a time to the mug. I couldn't figure out how to make Imagemagick do that for me so I did it by hand. The method is ugly and slow but does the job:
pixels = bytearray(math.ceil(img.width * img.height / 8))

bit_index = 0
byte_index = 0
for row in img:
    for pixel in row:
        # modify the bit
        is_black = pixel.red_int8 == 0 and pixel.green_int8 == 0 and pixel.blue_int8 == 0
        pixels[byte_index] = pixels[byte_index] | (is_black << bit_index)

        bit_index = bit_index + 1
        if bit_index == 8:
            byte_index = byte_index + 1
            bit_index = 0
I did not want to continue abusing gatttool so read up on Bluez D-Bus API. There was now a little more to do: before writing I had to find the device, connect to it and then wait for the correct GattCharacteristic interface to appear. The device is still identified by the Bluetooth address but now I needed a service UUID to identify the characteristic. gatttool was helpful again:
# gatttool --characteristics -t random -b C4:4E:CC:58:F2:08 | grep 0x000d
handle = 0x000c, char properties = 0x04, char value handle = 0x000d, uuid = 06640002-9087-04a8-658f-ce44cb96b4a1
So the characteristic service UUID is 06640002-9087-04a8-658f-ce44cb96b4a1.
Finding the service is not too difficult for someone with D-Bus experience but it does take quite a bit of code -- I'm showing only some interesting bits in this document. All of the Bluez details are from the documentation or from example-gatt-client.
First I use the Bluez ObjectManager to find a Bluetooth device with an address that starts with 'c4:4e:cc':
objects = self.bluez_manager.GetManagedObjects()

for path, interfaces in objects.items():
    if 'org.bluez.Device1' not in interfaces.keys():
        continue
    address = interfaces['org.bluez.Device1']['Address']
    if address.lower().startswith('c4:4e:cc'):
        self.device = dbus.Interface(self.bus.get_object('org.bluez', path),
                                     'org.bluez.Device1')
The ObjectManager.InterfacesAdded signal will tell me when the device exposes a new service (this happens a short while after connecting to the device):
self.bluez_manager.connect_to_signal('InterfacesAdded',
                                     self._object_manager_interfaces_added)
self.device.Connect(timeout=3)
In the InterfacesAdded signal handler I just make sure it's the right kind of service and has the correct UUID before writing:
if 'org.bluez.GattCharacteristic1' not in interfaces.keys():
    return

char_object = self.bus.get_object('org.bluez', path)
props = char_object.GetAll('org.bluez.GattCharacteristic1',
                            dbus_interface='org.freedesktop.DBus.Properties')
uuid = props['UUID']
if uuid.lower() != '06640002-9087-04a8-658f-ce44cb96b4a1':
    return

self._write_to_muki(dbus.Interface(char_object, 'org.bluez.GattCharacteristic1'))
Finally in _write_to_muki() I use GattCharacteristic1.WriteValue() to write the start command (0x74), the image data, and the end command (0x64):
characteristic.WriteValue(_dbus_array([0x74]),
                          _dbus_dict({}))

# Write image in 291 chunks, 20 bytes at time
index = 0
for i in range(0,291):
    data = self.image[index:index + 20]
    # last one may be too short
    while len(data) < 20:
        data.append(0xFF)

    characteristic.WriteValue(_dbus_array(data),
                              _dbus_dict({}))
    index = index + 20

characteristic.WriteValue(_dbus_array([0x64]),
                          _dbus_dict({}))
Voilà:
