This is a demo app with some basic SPA functionality and with Appcues installed. It's built using create-react-app, and is frontend only, so is not the best option for testing anything that requires a backend or database work.
The idea behind it is to have a personal sandbox environment where you can publish any Appcues content you'd like without having to worry about stepping on anyone else's toes. Not quite sure how a checklist will behave? Publish it here and play around with it. Want to make some click-to-track events and use them for event triggering? Here you go! Want to try installing some integrations? This is the place!
In order to get this app up and running, you'll do most of your work from your computer's terminal. If you're unfamiliar with the terminal, this article gives a quick rundown. For basic terminal commands, check out this Tech Republic article. The commands cd, pwd, and ls are particularly useful.
If you'd like to see a working version of this app, check out https://elijah-demo-app.netlify.app/
If this is your first time working with code, you may need to first install a few other things to get started. If you've done dev work in the past, you might have already installed these.
What you need:
Homebrew is a free and open-source software package management system that simplifies the installation of software on Apple's operating system, macOS, as well as Linux. You can think of it a bit like an app store that you can access from your computer's terminal. If using Mac, I recommend first making sure it has been installed on your machine. You can check whether or not it's installed by typing which brew in your terminal. If it's installed, it should give you a local path that points to where it's been installed, something like /usr/local/bin/brew.
If you haven't installed it yet, you can follow the instructions on the Homebrew website. When installing, your computer will likely ask for a password. This should be the same as the password you use for logging in to your computer. Make sure to follow all the instructions that Homebrew gives you during the installation process, including following the next steps, which asks you to run two additional commands to add Homebrew to your PATH. These commands will look something like the following:
echo 'eval "$(/opt/homebrew/bin/brew shellenv)"' >> /Users/username/.zprofile
eval "$(/opt/homebrew/bin/brew shellenv)"
Git is an open source distributed version control system designed to handle everything from small to very large projects with speed and efficiency. If you're interested in learning more about it, check out What is Git. You're welcome to use an alternative to Git and Github if you prefer, but here's how to get started with Git.
Open your computer terminal and install Git. With Homebrew installed, you can do this with the terminal command brew install git. You can check if you already have Git installed with the command git version. For more detailed install instructions, check out Github's documentation.
You'll also want to make sure to register for an account on Github.
Node.js is a big beautiful thing, and if you're interested, check out their about page. For the purposes of this project, we're mainly interested in npm, which is a package manager that generally comes bundled with Node.js.
Install Node.js with the command brew install node or brew install node@version_number (recommended). This will also install npm. The first will install the latest released version of node, while the second will allow you to install whichever version you'd like. I recommend installing the most up-to-date stable version of Node, which you can find on Node's website.
Visual Studio Code is a powerful code editor with a ton of functionality. This allows you to open up all your code files and make edits as you please. There are a lot of other great code editors like Atom or Sublime Text, so feel free to use whatever suits your fancy.
Now that you've installed the above, it's time to get your demo app up and running!
Whenever you're trying to work on a project, you need to make sure you're in the correct location inside the terminal. When you open up a fresh instance of a terminal, by default it opens to your current user's root directory.
A word of caution: the terminal makes the assumption that you know what you're doing and you mean anything that you type into it. If you tell it to delete a file, it won't ask if you're sure. This means it's possible to seriously break things in your computer if you're not careful. That said, the following terminal commands are all mostly harmless.
To open a terminal, open your Spotlight Search and type terminal or select it from your list of applications.
Type pwd to see what your current path is.
- Return to your root directory:
cd
The change directory command, by itself, returns you to Users/username. Very useful if you navigate deep into a file tree.
- Go up a level:
cd ..
If you're at Users/username/desktop/project, change directory to Users/username/desktop.
- Go up 2 levels:
cd ../..
If you're at Users/username/desktop/project, change directory to Users/username.
- Go up 3 levels:
cd ../../..
If you're at Users/username/desktop/project, change directory to Users.
- Go down a level:
cd <folder-name>
If you're at Users/username, cd desktop will change directory to Users/username/desktop.
- Go down 2 levels:
cd <folder>/<sub-folder>/
If you're at Users/username, cd desktop/project will change directory to Users/username/desktop/project.
- See your current location:
pwd
If you ever forget where you are, print working directory!
- See contents at your current location:
ls
Generally the first thing I do after changing directory is list the files so I can see what's there.
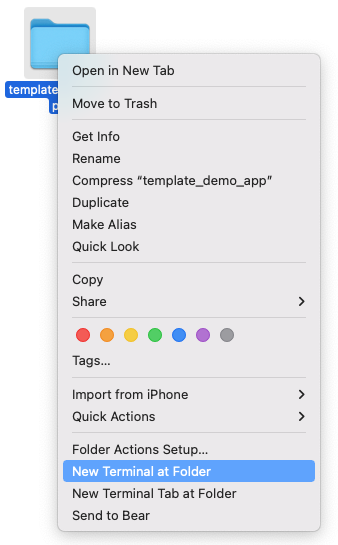
Alternately, if you want to simply open your terminal to the correct path right away, right click on the project folder and select new Terminal at Folder.
In the new terminal that opens, you can type pwd to see where in your computer you're located. It will look something like this:
Whenever you're running any of the below commands, it is assumed your terminal's working directory is the folder where your project is located unless stated otherwise.
Now that you know some basics of terminal use, it's time to actually get started with your project!
In the terminal, navigate to the folder where you'd like to save your project and then clone this project repository to your computer using the git clone command. For directions on how to use this command, check out this article.
For example, if you'd like to create a project folder on your desktop, you would want your working directory in the terminal to be Users/username/desktop. Then, when cloning this repository to your machine, it will create a new folder on your desktop titled appcues_demo_app.
After cloning the repo, you can then change directory with cd appcues_demo_app.
Following this example, if you print your working directory, you should now be located at Users/username/desktop/appcues_demo_app.
Run npm install to install other project dependencies.
Run npm start to begin a local development server. Once this starts, you should be able to see a live preview of your app running in your browser at localhost:3000.
Note you will first need to install Appcues using your account ID in the second step below.
And that's it! You've now got a locally hosted working app. Any changes you make in your code files should automatically appear in the local version of your demo app once the changed file has been saved.
If using VSCode:
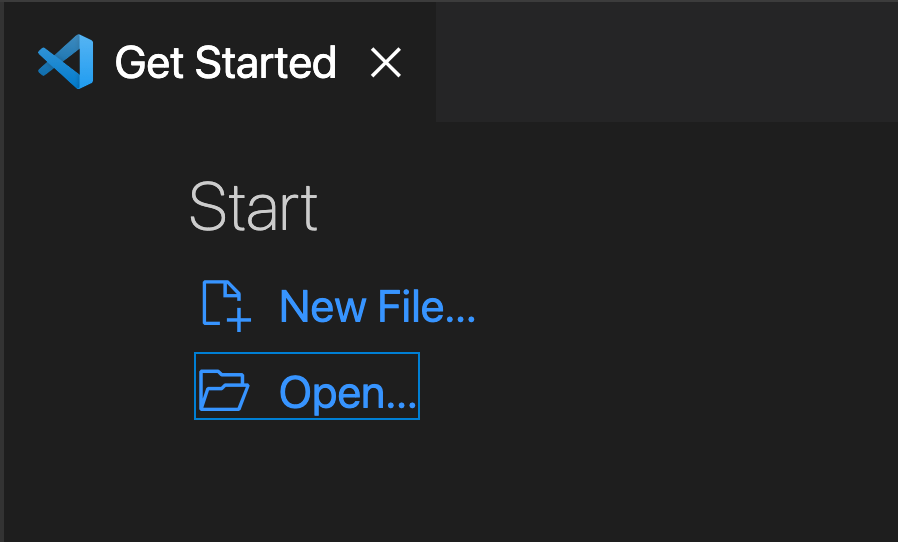
- In the Get Started tab in VSCode, select Open.
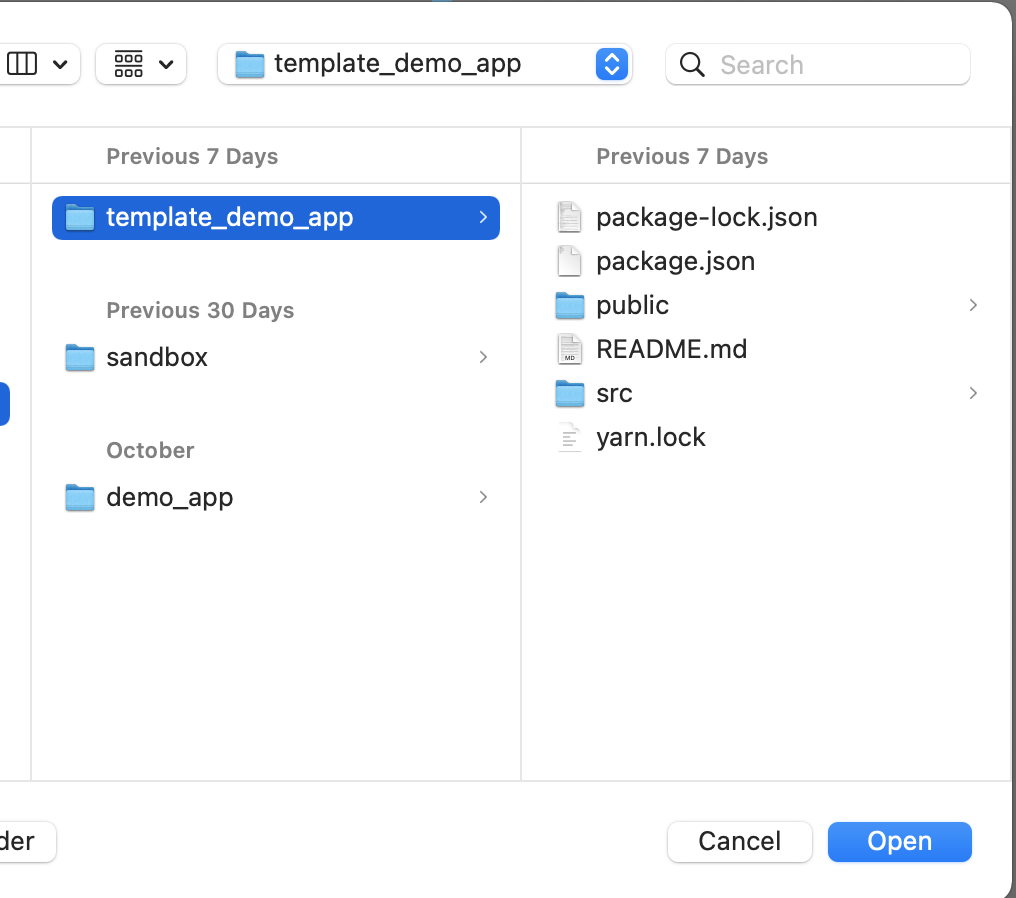
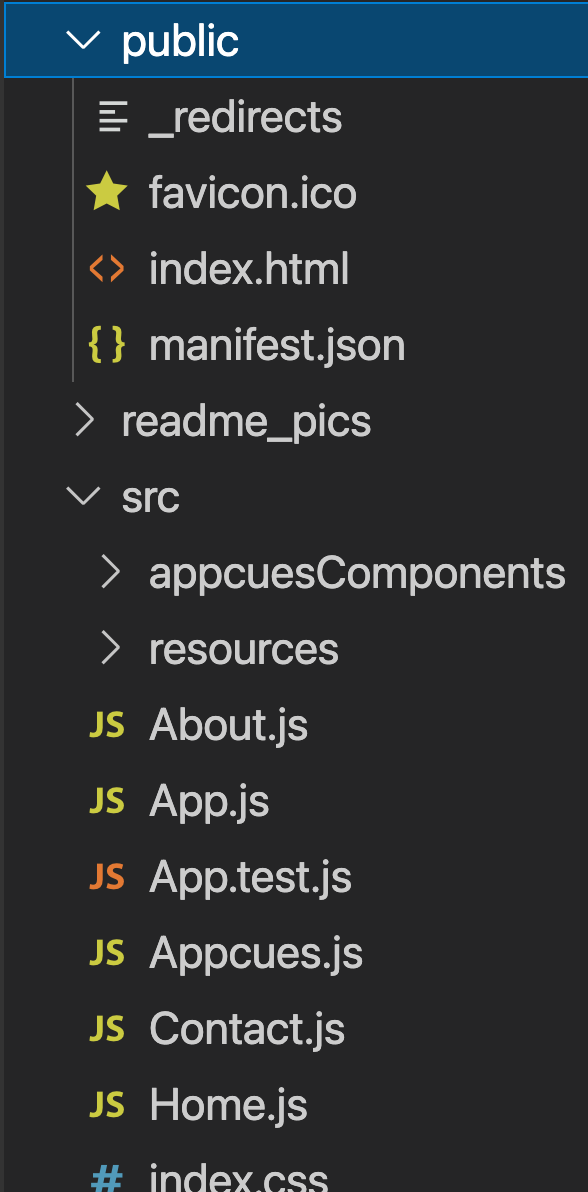
- Choose your project folder and open the entire thing. This will open all the project files in VSCode. You will see all of them listed in the left side of the editor. You can even read these directions there by opening the README.
- Click the
public > index.htmlfile. This will display the contents of the file for editing. Replace {account_id} in the Appcues snippet with your Appcues account ID. For example, if your Appcues account ID is 12345, your Appcues snippet src will be //fast.appcues.com/12345.js. Be sure to remove the curly brackets! And then make sure you save the changes withCMND + S.
- In
src > App.js, on the line of codewindow.localStorage.setItem("currentUser", "testUser"), replace the "testUser" ID to a different value if you'd like. This is the fallback ID that will be used the first time you load the app, as well as anytime you click the Appcues.reset() button in the toolbar.
- You can also add in any other user properties you would like sent into Appcues into the Appcues.identify() call in this file. By default, this currently includes two properties:
roleandsignupDate(a UNIX timestamp date property).
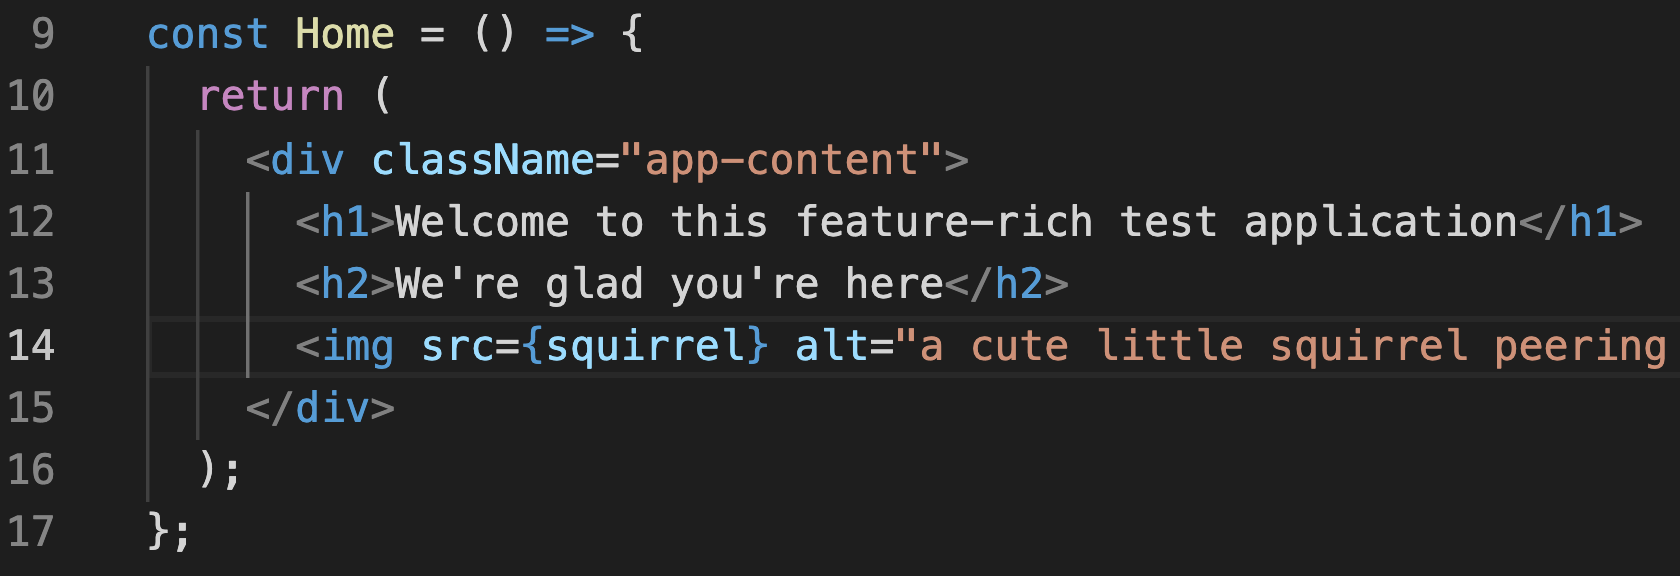
Feel free to add any additional HTML you would like. This should mostly be done with HTML added into the return section of any component. You can add in anything like photos, iFrames, lists, etc. You can also create entirely new components if you're feeling adventurous.
Everything in the return section should be wrapped inside a single element. In this example, everything is wrapped by the div with the class of app-content.
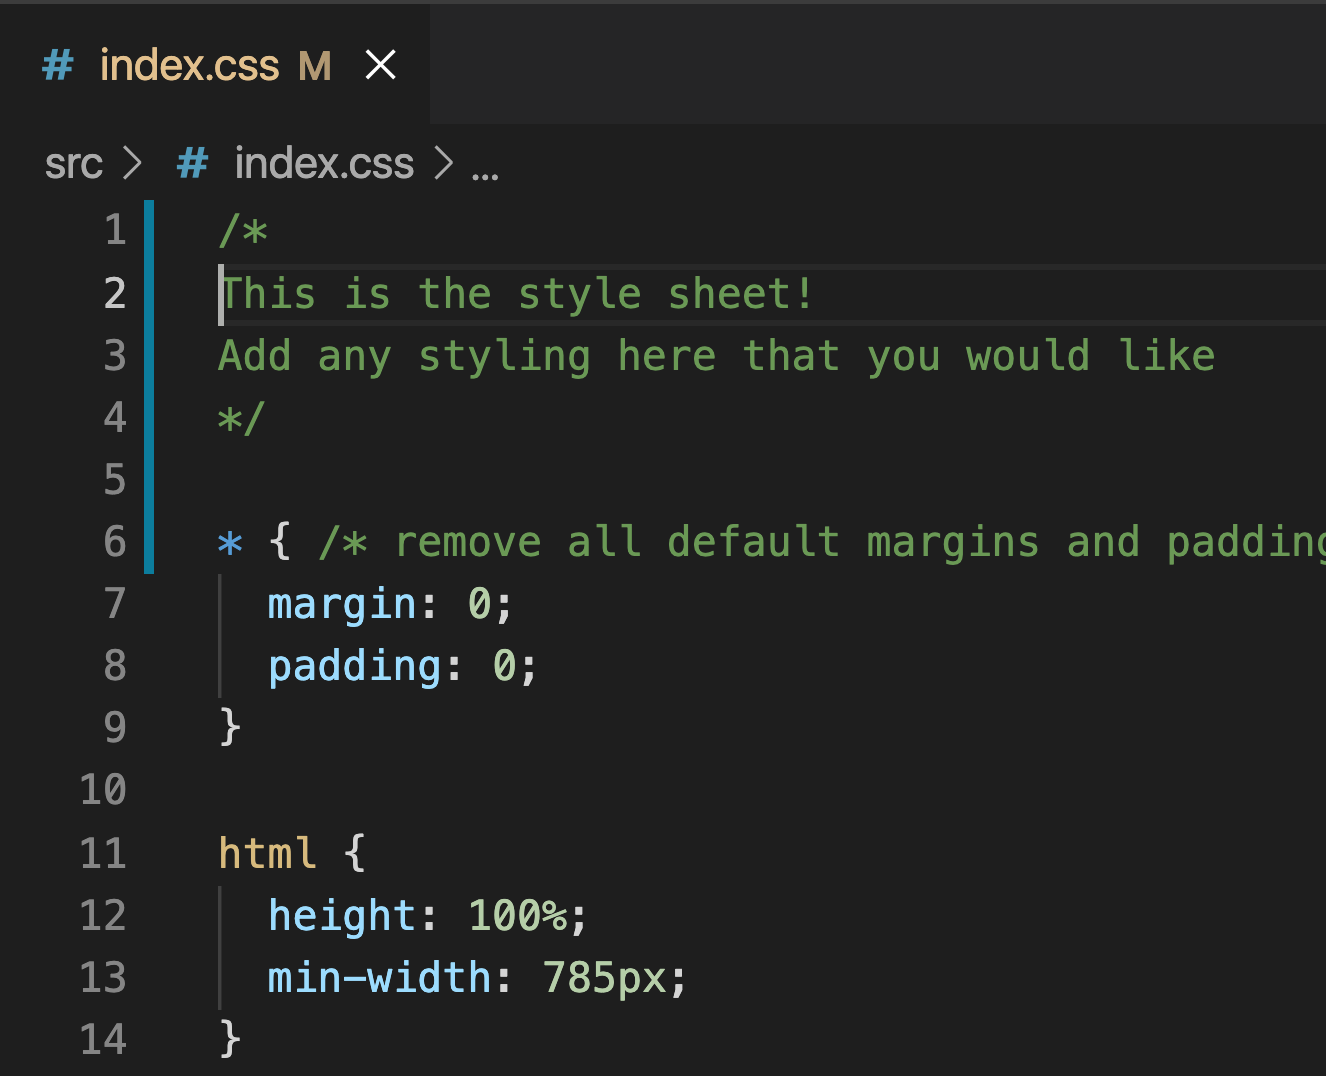
The app's CSS lives in src > index.css and can be changed as you please.
Note: I recommend leaving alone the files in the appcuesComponents folder, as these are what are used for making calls to the Appcues javascript API and running the event log.
You now have a working app, but it's currently only on your machine. Next you'll want to push the code to Github.
Remember that when working with your project in the terminal, you'll want to make sure your working directory is your project folder. If you're running a local server for local host, I recommend opening a second terminal for then pushing changes to Github.
Following the directions on Github, create a new repository to hold your demo app's files. You don't need to create a new README, gitignore, or license. Once you click the button to create the repository, you will then be redirected to another page with a few steps for uploading code to the repo. You'll want to follow the steps for pushing an existing repository from the command line, with one small change:
git remote set-url origin <repo_url>instead ofgit remote add origin <repo_url>git branch -M maingit push -u origin main
The first time you try to push code from your computer to Github, you will need to verify your Github credentials. In the terminal, it will ask for first your username, and then your password. Your username is straightforward enough.
Earlier this year, however, Github changed its verification requirements from password to token-based (check out this article if you're interested in reading more about it). Long-story short, instead of using your password here, you will first need to generate a personal access token following these directions. Once you have your token, paste it into the password field prompt in your terminal. Note that the characters entered into this field are invisible.
When you visit your repo page in Github, you should now see all your files present. Whenever you make any changes to the files, you'll want to make sure to push all these changes to the Github-hosted version so they match up. The 3 basic commands you'll want to use are:
This will add any file that has been changed to your staging area.
This commits the changes, sort of like a quick save. It's common practice to write these comments in short imperatives like "add login functionality" to give you a quick description of what changes you made. Here's an example of what a commit might look like:
git commit -m "add Captain Cues to the About page"
These comments will appear on the files in Github. You can commit as many times as you want before pushing your code changes. It's a good rule to commit early and often.
This pushes all your committed files to Github.
This command will give you a list of files that have been modified and need to be staged, as well as committed.
Note: these are just the very basics of Git. For a more complete rundown, this article from freeCodeCamp is a great place to start.
Now that your app is saved on Github, the last step is to host it somewhere so that you can access it from anywhere! Although there are many, many ways to do this, this app is currently configured to use Netlify.
-
Create an account at Netlify.
-
Follow the steps in this article. The build command in your build settings should be
npm run build. Once your site is deployed, you don't need to set up a custom domain unless you want a URL without netlify in the domain. If you'd like to personalize your domain, you can clickDomain settings, and then selectOptions > Edit site namein the custom domains section. -
You should now have a working demo app with Appcues installed!


