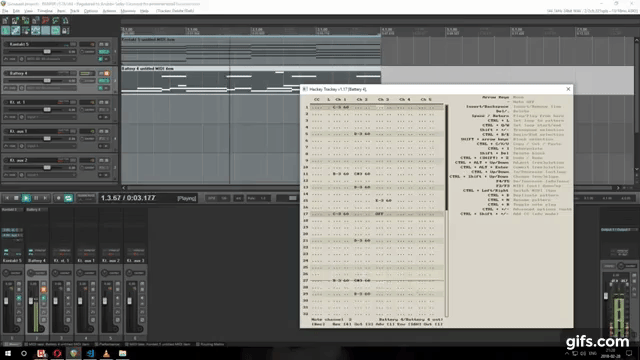
A lightweight tracker plugin for REAPER 5.x and up. Hackey-Trackey is a small
tracker for visualizing and editing MIDI data within REAPER. Originally developed
to mimick the pattern editor of Jeskola Buzz, this tracker is meant to enable
MIDI note entry and effect automation in a tracked manner. You can see it in
action here:
A sampler. Hackey-Trackey does not handle sample playback. For this you would need to add an additional VST that handles sample playback. Have a look at ReViSiT or linking a dedicated tracker program such as Renoise to REAPER if this is what you seek.
Hackey Trackey is still actively being developed. Not all planned features are finished yet and there may stil be bugs. Be sure to check back in the future if you want to be kept up to date with the latest features. Basic tracking functionality works (note entry, FX sequencing) and directly updates MIDI and automation data.
Add it in your Reapack repository list: https://raw.githubusercontent.com/joepvanlier/Hackey-Trackey/master/index.xml.
Eventually, the plan is to make the tracker part of the reapack scripts repository, so that this separate repo is no longer necessary.
- Press
?or selectActions > Action List - click the ReaScript:
Loadbutton
Select a MIDI object and start the script. Note that scripts can be bound to shortcut keys, which I'd recommend if you're going to be using it. This short tutorial assumes the default keymapping, but others are available in the options menu. In the default layout, options can be brought up with F11 and a small help file indicating all the options with F1 (same in all layouts).

The plugin remaps your MIDI data to different channels. New MIDI
data that was not tracked has to come in on channel 1. Hackey trackey
recognises notes which have not yet been assigned to a column by their
channel. Note also that by default the tracker remaps everything to MIDI
channel 1. The output channel (OUT) can be changed with the F1 (down)
and F2 (up) keys in the default layout or by clicking the OUT field
and dragging the mouse up or down. Setting the output channel to zero
(displays as C) maps each column to a separate MIDI channel. Note that
column one goes to MIDI channel 2 and so forth.

It is recommended to change the size of MIDI items from within Hackey-Trackey rather than by dragging them in REAPER's sequencer. You can do this by clicking the pattern length indicator in the bottom left and entering a new length. The reason for this is that HT will create new automation objects if it doesn't find ones of appropriate length that are correctly aligned. If you wish to edit the MIDI items in REAPER, then close the instance of Hackey Trackey, resize the item and glue the item before reopening HT.
Hackey Trackey is designed to mostly be used via keyboard shortcuts. That said, some mouse interaction has recently been added. You can click and drag Resolution (Res), Octave (Oct), Advance (Adv), Envelope (Env) and Out channel to set these values. Note that since the resolution or ticks per beat can be a destructive operation, this one needs to be confirmed by clicking, dragging and then confirming the new selection with the outer mouse button while still holding the left mouse button.
Recording status can also be toggled by clicking it, and the pattern size can be changed by clicking the pattern size. Removing the current size and confirming with return.
Yes! Parameters for which envelopes are active (see automation panel in image
below), will automatically show up in the tracker. The tracker will store the
tracked points in an automation take. Ctrl + Shift + Up/Down changes how the
values in the column will be interpolated.

Yes! There are two ways to work with CC commands. The first is a single column mode (which is good if you typically only use a single command or use commands) sparingly. Or multicolumn mode.
This is the default. The first two columns denote the CC command, the last two the value that's being sent.
This is activated when expanding the mod column (expand by going to the CC column and pressing CTRL + +). Now, every CC command type gets its own channel. You can remove a column with CTRL + Shift + -, which will delete all the CC data in that column as well as remove the column. You can add a new column with CTRL + Shift + + after which you have to enter a numeric value and hit RETURN. Custom names can be added in the CC column. Hint: If you want this to be the default mode, then edit the script and change tracker.modMode to 1.
Yes. They do not and this is considered out of scope for the tracker. If you wish to interpolate CC commands, I suggest you use ReaControlMIDI to map the CC commands to an FX envelope. These you can then use in the same way as the parameters.
If you want to hear notes you play, remember to arm the tracker by hitting CTRL + R. Note however, that this alters the recording status of your project. If you wish to always have HT enable recording, then enable "Always Enable Recording" in the options menu.
Yes, there are various themes to choose from. See the options menu (F11).

Yes. Click the pattern length indicator in the bottom left of the tracker. You can enter a new value here.
By default, tracked notes do not overlap. However, for some purposes, overlap may be desirable (some monophonic VSTs interpret this as glide/legato mode). For this, one can use the column L. Setting 1 in a row here, means that this note will be glided into. This is implemented by simpliy stretching the previous note. Legato is only applied to channel 1 in the tracker. Note that performing a legato from and to the same note will result in the second note not displaying in the tracker. This is not a bug, but a workaround to fix note OFF issues with the resulting MIDI item.
Yes, simply hit CTRL + N and type a new name followed by ENTER.
You can move left to right on a single track with CTRL + Left/Right.
You can edit the row resolution by entering CTRL + ALT + Up / Down. You will then notice that the resolution bit in the description bar becomes red. This means it is not committed. If you then hit commit (Ctrl + Alt + ENTER), the resolution will change.
Yes, but there is a catch. For note delays to work reliably, your MIDI settings have to be set in such a way that each row is a multiple of 256 MIDI pulses long. Otherwise, roundoff errors will occur which cause values to shift as you enter them.
You can set these in Options => Preferences => Media/MIDI => Ticks per quarter note for new MIDI items. The default here is 960, but 1024, 2048 or 4096 is recommended for Hackey Trackey. Once configured correctly, you can open the note delay column for any note by simply hitting CTRL + + for that column.
Yes you can. Hit CTRL + + twice on a note column to bring up the note length panel. This will allow you to edit the duration of the last tick of the note at a subtick level. The same caveats as with note delay apply.
Release 1.30 saw the addition of the Harmony Helper, this is an extension of Hackey Trackey to facilitate easier use of melodic scales. You can toggle the Harmony Helper by pressing F9.
The Harmony helper presents you with a selection of root notes and modes. You can pick your desired musical key by selecting the root note (top row) and scale (left column). After selecting a key, you are presented with chords that are present in that key.
If the track is armed (denoted by the red [REC] label), it will play the chord you click. To arm the track press CTRL + R.
To insert a chord from the harmony helper, press control while clicking the chord. Inversions can be obtained with other modifiers. Holding ALT will trigger an inversion of the first note, while SHIFT inverts the second.
Once a key is selected and the harmony helper is active, notes will transpose in a key-aware manner when transposed. Diatonic notes will map to diatonic notes when transposed, while accidentals will remain accidentals (as far as this is possible without an awareness which notes are flat or sharp).
To change the root of the key of a selection, simply select the notes and invoke CTRL + ALT + SHIFT + + or - for transposition up and down respectively. This will also update the root note in the harmony helper.

Yes. Just add: https://raw.githubusercontent.com/joepvanlier/Hackey-Trackey/master/index.xml
Sample offsets have to be achieved via the VST or JSFX and mapped onto reaper FX.
After loading an instrument hit the edit instrument button. If the instrument is locked then I'm afraid you cannot achieve sample offsets with this instrument.

Switch the sampling mode from DFD to sampler. Note that this will increase memory consumption of the instrument as well, so it's best to only do this when you really need it for an instrument.

Go into the scripts editor and find the first empty script. In this script paste the following code:
on init
declare ui_knob $sampleStart (0,1000000,1)
set_text ($sampleStart, "S. Start")
set_control_par(get_ui_id($sampleStart),$CONTROL_PAR_AUTOMATION_ID,0)
set_control_par_str(get_ui_id($sampleStart),$CONTROL_PAR_AUTOMATION_NAME,"Sample offset")
end on
on ui_control ($sampleStart)
set_knob_label ($sampleStart, $sampleStart/10000)
end on
on note
ignore_event ($EVENT_ID)
play_note($EVENT_NOTE,$EVENT_VELOCITY,$sampleStart,-1)
end on
Don't forget to hit apply!

Now offset should be available as an FX in REAPER which you can automate with Hackey Trackey.
Hackey-Trackey has a few options to allow for some customization in workflow. Pressing F11 opens the options dialog, where themes and keymappings can be chosen. Additionally, the following options can be checked or unchecked.
Auto resize determines whether Hackey Trackey should resize whenever a new pattern is selected. The resizing in this case refers to the height of Hackey Trackey.
When this is enabled, Hackey Trackey will always load the pattern currently selected in the sequencer. Note that this means that you cannot open multiple Hackey Trackey's anymore to look at different patterns simultaneously.
This makes the info at the bottom of the pattern remain fixed at the bottom, even when the pattern is shorter than the window. Alternatively, it will be at the end of the pattern.
This will automatically add columns to be visible whenever Hackey Trackey is resized.
This will make Hackey Trackey always enable recording when opened. Note however that this changes the recording status of your project and is therefore disabled by default.
CTRL + F will toggle Hackey Trackey to follow the song position. It will attempt to find MIDI items at the current position on the current track and update the view so that you see them. Note that the status of this can be seen next to the [Rec] button.
Enable cheesy CRT effect. Works best with Hacker theme.
These are just the default key bindings when you download the script. They are optimized for a QWERTY layout. If you wish to change the shortcuts, edit the keys table. If you wish to edit the note keyboard, edit the keys.pitches table. If you wish to know what keystroke particular key has, set printKeys to 1 and start typing. Note that control modifies keystroke values.
| Key | Action |
|---|---|
| Any key on the virtual keyboard | Enter a note and advance |
| Shift + Key on the virtual keyboard | Enter a note go to the next column |
| Arrow keys | Navigate |
| Backspace | Delete item and shift rows up |
| Del | Delete item |
| Insert | Shift all items down by one |
| - | Place note OFF |
| ENTER | Start play at cursor position |
| Space | Start/Stop |
| CTRL + Z | Undo |
| CTRL + SHIFT + Z | Redo |
| CTRL + B | Start selection block |
| CTRL + E | End selection block |
| SHIFT + Del | Delete block |
| CTRL + I | Interpolate block |
| CTRL + X | Cut (To do) |
| CTRL + V | Paste (To do) |
| CTRL + C | Copy (To do) |
| CTRL + /\ | Shift current octave up |
| CTRL + \/ | Shift current octave down |
| SHIFT + CTRL + /\ | Switch envelope mode (FX automation) |
| SHIFT + CTRL + \/ | Switch envelope mode (FX automation) |
| Shift + Numpad + | Shift selection up (e.g. C-1 -> C#1) |
| Shift + Numpad - | Shift selection down |
| F1 | Help |
| F2 | Decrease output channel |
| F3 | Increase output channel |
| F4 | Decrease advance amount |
| F5 | Increase advance amount |
| F8 | Stop playing |
| F11 | Options screen (theme etc) |
| F12 | MIDI Panic (stop all notes) |
| CTRL + L | Set loop to pattern bounds |
| CTRL + Q | Set loop start before current row |
| CTRL + W | Set loop end after current row |
| CTRL + ALT + Up | Increase row resolution |
| CTRL + ALT + Down | Decrease row resolution |
| CTRL + ALT + Enter | Commit row resolution (WARNING: Destructive) |
| CTRL + -> | Next MIDI item on track |
| CTRL + <- | Previous MIDI item on track |
| CTRL + D | Duplicate MIDI item |
| CTRL + N | Rename MIDI Item |
| CTRL + R | Arm (plays notes) |
| CTRL + +/- | Enable/disable advanced options for this column |
| CTRL + Shift + +/- | Add CC column (only possible when in advanced mode for CC programming |
| Harmony Helper keys | |
| F9 | Open harmony helper |
| CTRL + Click chord | Insert chord at current position |
| ALT + Click chord | Invert first note of chord |
| SHIFT + Click chord | Invert second note of chord |
| Shift + CTRL + ALT + Numpad + | Shift root note up (e.g. C-1 -> C#1) |
| Shift + CTRL + ALT + Numpad - | Shift root note down |
Feature requests are always welcome, preferably with an idea of how to achieve it with the Reaper API. If you've implemented a feature yourself and want it added to the trunk, submit a pull requests. If possible, try and make sure that the pull request is up to date with the latest version. I will do my best to review and incorporate these.
Hackey trackey maps already existing MIDI data to a tracked format and allows editing of such data in a tracker-based manner. If the MIDI data was entered via another method than Hackey Trackey, the default behaviour is to map the notes to non-overlapping channels. Once this is done, the channels for the MIDI data are remapped such that the column in which a note appears is stable from that point on. Note that if your instruments use the MIDI channel information for specific purposes then this plugin is not useful to you. Note that depending on what you are doing, the plugin may also add text events to your MIDI data to keep track of information Hackey Trackey needs to preserve the tracked layout.
The plugin uses the MIDI note channel property to store which column a note is in. OFF note termination symbols not associated with a normal note end and legato symbols are stored in text (OFF+channel and LEG respectively).
Because the plugin remaps the channel, non-tracker input should be created with channel 0. The plugin remaps data in channel 0 to MIDI channel 1-16, automatically assigning new incoming notes to a column where enough room is available. Notes in channel 1-16 are assigned first, to keep anything that was made in the tracker stable.
The location of the notes in the tracker view will be stable as long as no data is entered into MIDI channels other than zero via the piano roll or other methods.
Because typically, it is preferred to have MIDI data go to a specific out channel, the plugin optionally maps all the MIDI data to a specific channel via the out-channel property.
There are some things which are unfortunately not possible as far as I am aware. Voice stealing when placing overlapping tracked patterns is one of them. In Jeskola Buzz it was possible to play different patterns on the same row in the sequencer. This would cause notes that came from one pattern to stop notes coming from another pattern. This adaptive merging is not possible in this tracker since the different tracker instances are unaware of each-other's existence and overlapping MIDI elements act independently.
There is a second annoyance that comes with this, which is that for notes to be held over a pattern, they must be restarted at the start of the new pattern. The tracker has no way of seeing what notes may still be playing at the end of previous MIDI items. It may be possible to find a workaround for this in the future by scanning the timeline for previous MIDI items and adding such notes automatically.
Velocities can only be entered at a note start. Whereas in a tracker, every row can have its own velocity (modulation the notes velocity over time), it is not possible to assign multiple velocities to a single MIDI note. By default, when entering a velocity in a new line, the last MIDI note on that tracked channel will be copied to mimick the same end behaviour.
Note that when using the legato mode, it is no longer possible to have the same note
be repeated on channel 1. Doing so would cause problems when playing the MIDI. Hence
1 D-2
1 D-2
would be merged into one single MIDI note. I have not found a good workaround for this
so far, but if you have a good idea, please contact me.
- Cutting/Copying to MIDI editor clipboard.
- Adding HT to the MIDI menu via a configuration script.