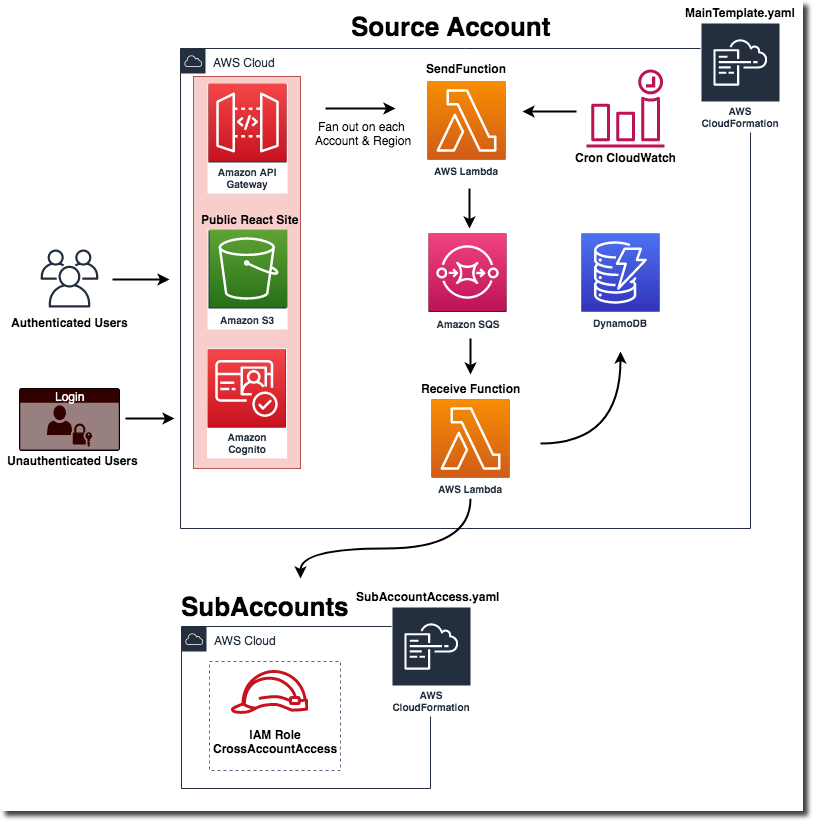
Serverless app designed for any customer with two or more accounts to view resources across accounts/regions in simple single pane of glass website. It's split into 2 customizable parts:
- Back-End (CloudFormation templates and Python Lambdas)
- Front-End (React with Amplify)
some of the current examples are:
- All AWS Accounts in Organizations
- All EC2, Lambdas, ODCR, EC2 Reserved Instances, RDS
- All IAM Users, Roles, Policy’s
- All VPCs, Subnets
- All S3 Buckets
- Architecture
- Requirements
- Install Overview
- Deploying the Solution
- Adding New Services
- Troubleshooting
- License
- Python 3.7
- Node.js 8.10+
- Yarn
- At least 2 AWS accounts.
Administrator account is the account you will use to access all sub accounts and where you will store everything. SubAccounts only requires the SubAccountAccess template to be created.
- Clone repo.
- Run CloudFormation template in your sub accounts (SubAccountAccess.yaml).
- Run CloudFormation template in your main account (MainTemplate.yaml).
- Run React App.
- Note the Account number for your Administrator Account and put it into the SubAccountAccess template.
- Edit the SubAccountAccess.yaml with your Administrator Account Number (this account number will be your Administrator account that will have access to view all the sub accounts from)
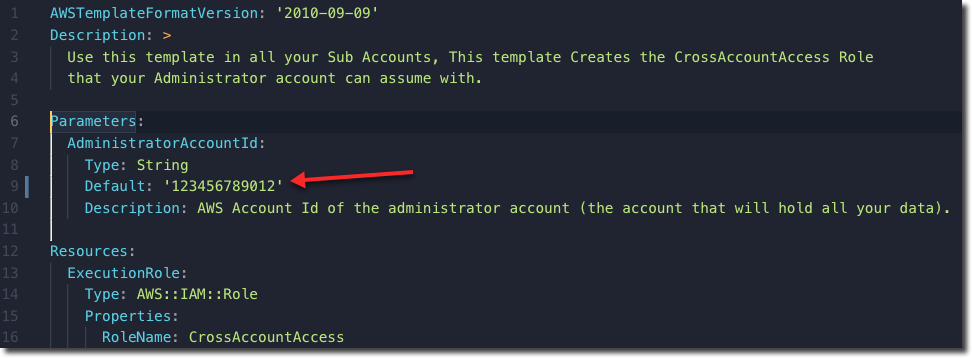
- Save and Run the SubAccountAccess.yaml in all your sub accounts you want to view. (I recommend using StackSets if you have them enabled otherwise manual is fine)
- Create a new S3 bucket to store the lambda zip files
aws s3 mb s3://your-unique-bucket-name --region ap-southeast-2-
Package up all the lambdas into one zip file (e.g functions.zip): see example below or doco here
-
The only external python modules: boto3
cd /aws-multi-account-viewer/Back-End/lambdas
python3.7 -m venv .venv
source .venv/bin/activate
cd build
pip install -r ../requirements.txt --target .
zip -r9 ../functions.zip .
cd ../
zip -g functions.zip list_table.py receive_sqs_message.py send_sqs_message.py
deactivate- Copy the functions.zip file you just packaged into the s3 bucket you created earlier.
aws s3 cp functions.zip s3://your-unique-bucket-nameEveryone's accounts and regions vary so this example is set to the free tier for DynamoDB, Start slowly and ramp up accounts/regions to see how many RCU's you will need.
- Update all the parameters to match your config/accounts/bucket in MainTemplate.yaml
- DynamoDB is set to the free tier of 25 RCU/WCU (for large accounts/regions you will probably want this around 200+)
- Deploy the CloudFormation template in the admin account once you have updated the paramaters
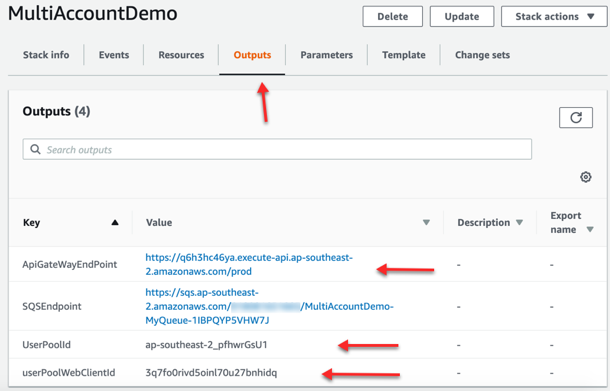
- Once the CloudFormation has completed copy the details in the outputs:
- ApiGateWayEndPoint
- UserPoolId
- userPoolWebClientId
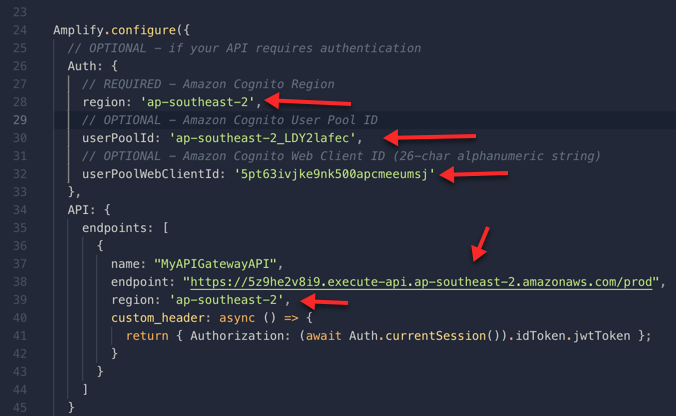
- Paste the outputs into /aws-multi-account-viewer/Front-End/src/App.js
- Create a user account for the Cognito User Pool (sign up is disabled, so users have to be created manually)
- Cognito > User Pools > {YourStackName} > Users and groups > Create User.
- Now navigate to Front-End and Install dependencies
cd /aws-multi-account-viewer/Front-End/
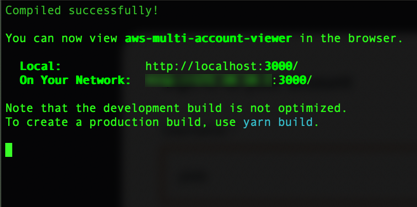
yarn- Start React Page
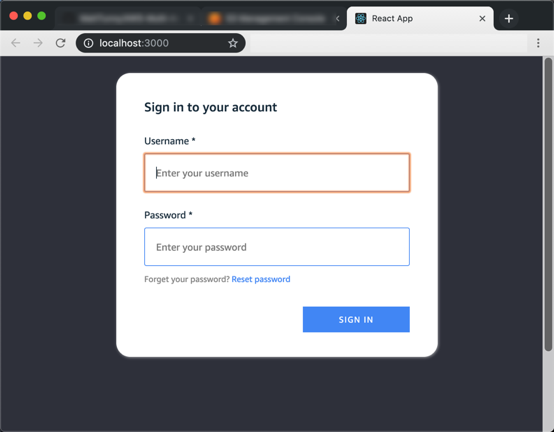
yarn start- You should now see a login page from React
- Log in with the user you created earlier.
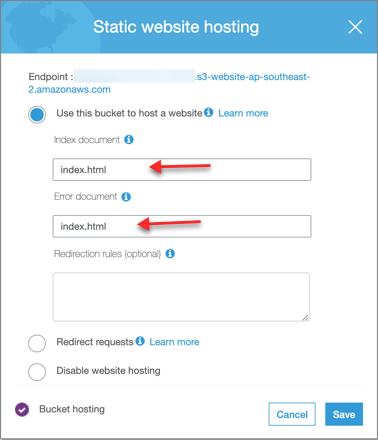
- You now have a local version up and running, you could now safely host as a public s3 bucket. (not covered in this project but you can see examples online on how to set it up: S3-Public-Website)
- A really good article on setting React up with S3 by Antoine Sauvage: Here
To add a new services, you need to updating 2 sqs lambdas and creating a new page in the Front-End.
- Example coming soon.
- EBS unallocated across accounts.
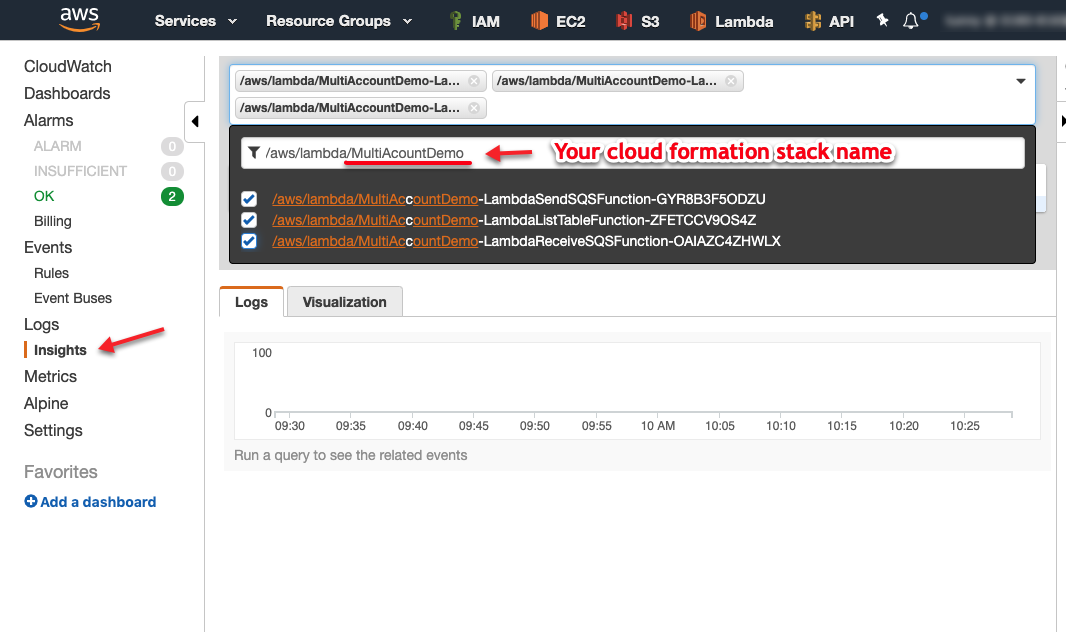
- Check SQS to make sure the messages are going through to lambda
- If there’s lots of messages in the queue then there’s an issue with the lambda or DynamoDB is throttling the requests.
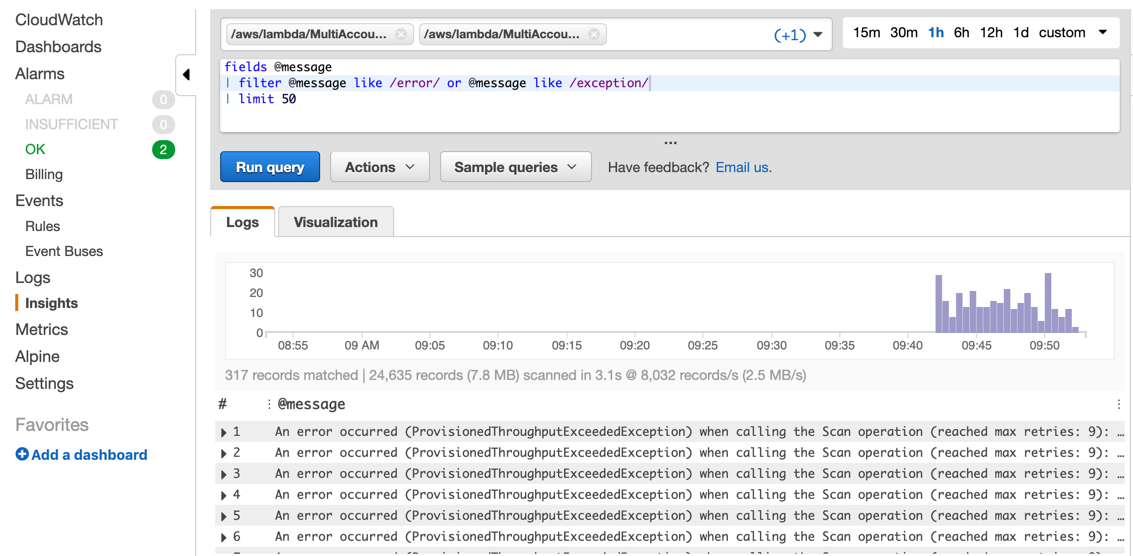
Copy and paste query below to only see Errors & Exceptions: (this example is showing throttle requests on DynamoDB because its set too low):
fields @message
| filter @message like /error/ or @message like /exception/
| limit 50- Organizations isn't part of the cron job that normally goes, you need to manually refresh it.
- Go to Refresh Checks > Organizations > Send to SQS
- You should now see Organizations populated.
This sample code is made available under the MIT-0 license. See the LICENSE file.


