Teachers:
- Kristie Lim, Connie Chen, Rajeshwari Jadhav
- Code by Galen Wong
HTML elements are the basic building blocks of web pages.
Even the most complex and large web applications are built on simple tags like h1, img, p, button etc.
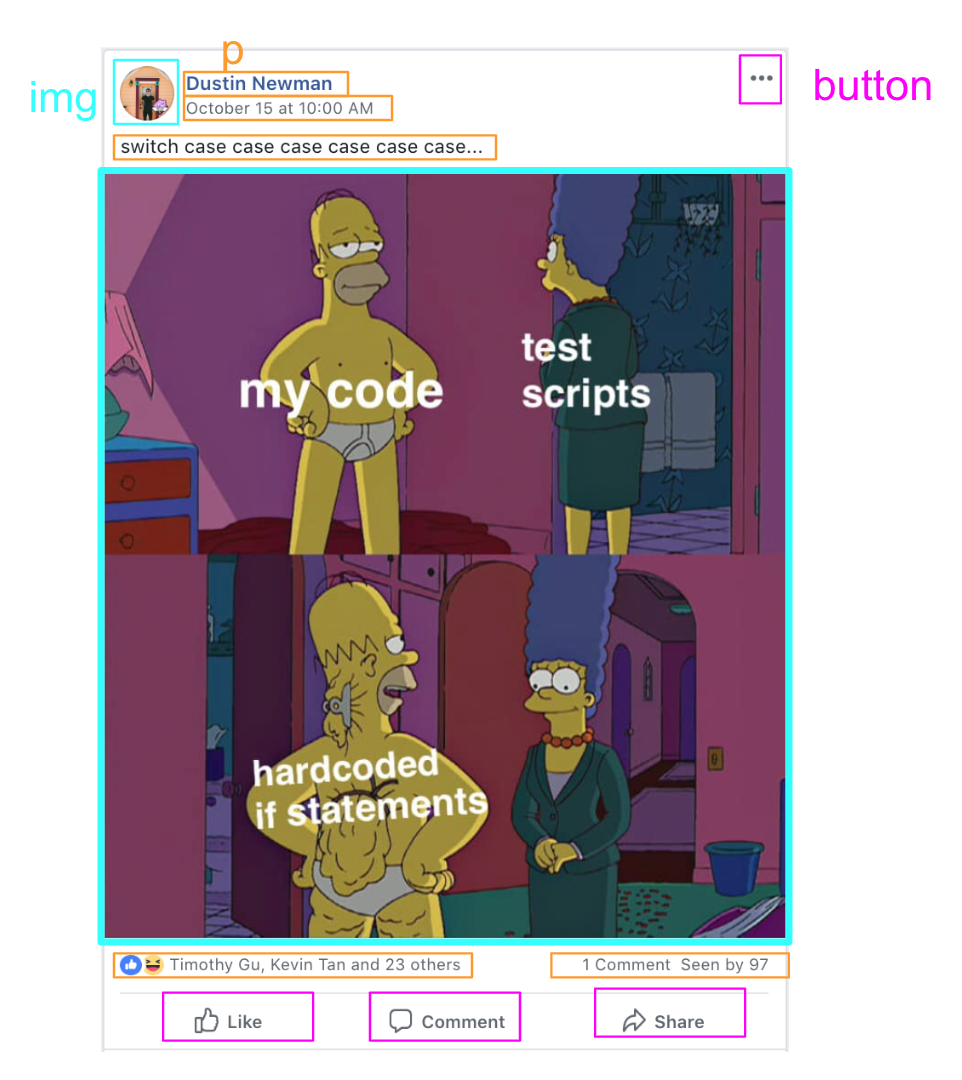
For instance, a typical Facebook post looks like this.
All the things in the post are very basic HTML elements. It can possibly be represented like this.
<div>
    <img src="profile.png">
    <p> Dustin Newman </p>
    <button> … </button>

    <p> switch case case … </p>

    <img src="meme.png">

    <p>Timothy Gu, Kevin Tan, and 23 others </p>
    <p>1 Comment Seen by 97</p>

    <button> Like </button>
    <button> Comment </button>
    <button> Share </button>
 </div>
However, on your Facebook feed, there are always multiple posts. They all inherit a similar structure. There is a user name, user profile picture, time of posting, "like", "comment", and "share" buttons, etc.
To code out multiple posts, we would have to copy and paste. There is repeated code. We don't like that.
What if we can define a complex html tag? A tag that can encapsulate the structure of a Facebook Post and we only worry about its content?
<!-- Imagine a complex tags that looks like this -->
<MyPostTag
	profile="profile.png"
	name="Dustin Newman"
	date="October 15 at 10:00AM"
	text="switch case case case..."
	image="meme.png"
	reax="Timothy Gu, Kevin Tan and 23 others"
	comments="1 Comment"
	seen="Seen by 97"
/>
That is exactly what React enables you to do. You can define your own HTML-like tags that can be accessed through JavaScript. These are called components.
Once you define a component, you can easily reuse it.
<!-- First Post -->
<MyPostTag
	profile="profile1.png"
	name="Galen"
	date="November 7 at 10:00AM"
	text="I love react"
	reax="Timothy Gu, Kevin Tan and 23 others"
	comments="1 Comment"
	seen="Seen by 97"
/>
<!-- Second Post -->
<MyPostTag
	profile="profile2.png"
	name="Tim"
	date="November 7 at 6:00PM"
	text="I love react"
/>Before we dive into React, we have to learn the syntax of Class in JavaScript.
class Person {
    constructor(name, age) {
        this.name = name;
        this.age = age;
    }

    sayHello() {
        console.log('Hi, my name is ' + this.name);
    }

    changeAge(newAge) {
        this.age = newAge;
        console.log(this.name + ' is now ' + this.age + ' yo.')
    }
}- The
constructorfunction is a function called when we create a new instance of a class. An instance is an object based on the format of the class definition. constructorusually defines the proterties of instance within the class too.this.nameandthis.ageare both properties in both instances of classPersonsayHelloandchangeAgeare both function within the instances.- The
thiskeyword specifies that it is referring to itself, the instance of the class.
// Inside a JavaScript Interactive Environment
// (e.g. Chrome DevTools)
let me = new Person("Galen", 18);
me
// Output: Person {name: "Galen", age: 18}
me.sayHello();
// Output: Hi, my name is Galen.
me.changeAge(19);
// Output: Galen is now 19 yo.
me
// Output: Person {name: "Galen", age: 19}
let berg = new Person("berg", 105);
berg
// Output: Person {name: "berg", age: 105}
me
// Output: Person {name: "berg", age: 19}
berg.changeAge(100);
berg
// Output: Person {name: "berg", age: 100}
me
// Output: Person {name: "berg", age: 19}
Changing the age of berg will not change the age of me.
We can see that the this keyword specifies which person's age we are changing, namely the "current object/instance" itself.
Make sure you have node.js installed.
Execute this in your terminal/CMD.
npx create-react-app demo
cd demo
npm start
npx is a node package runner.
It runs a package called create-react-app.
It creates a react web app in a directory demo.
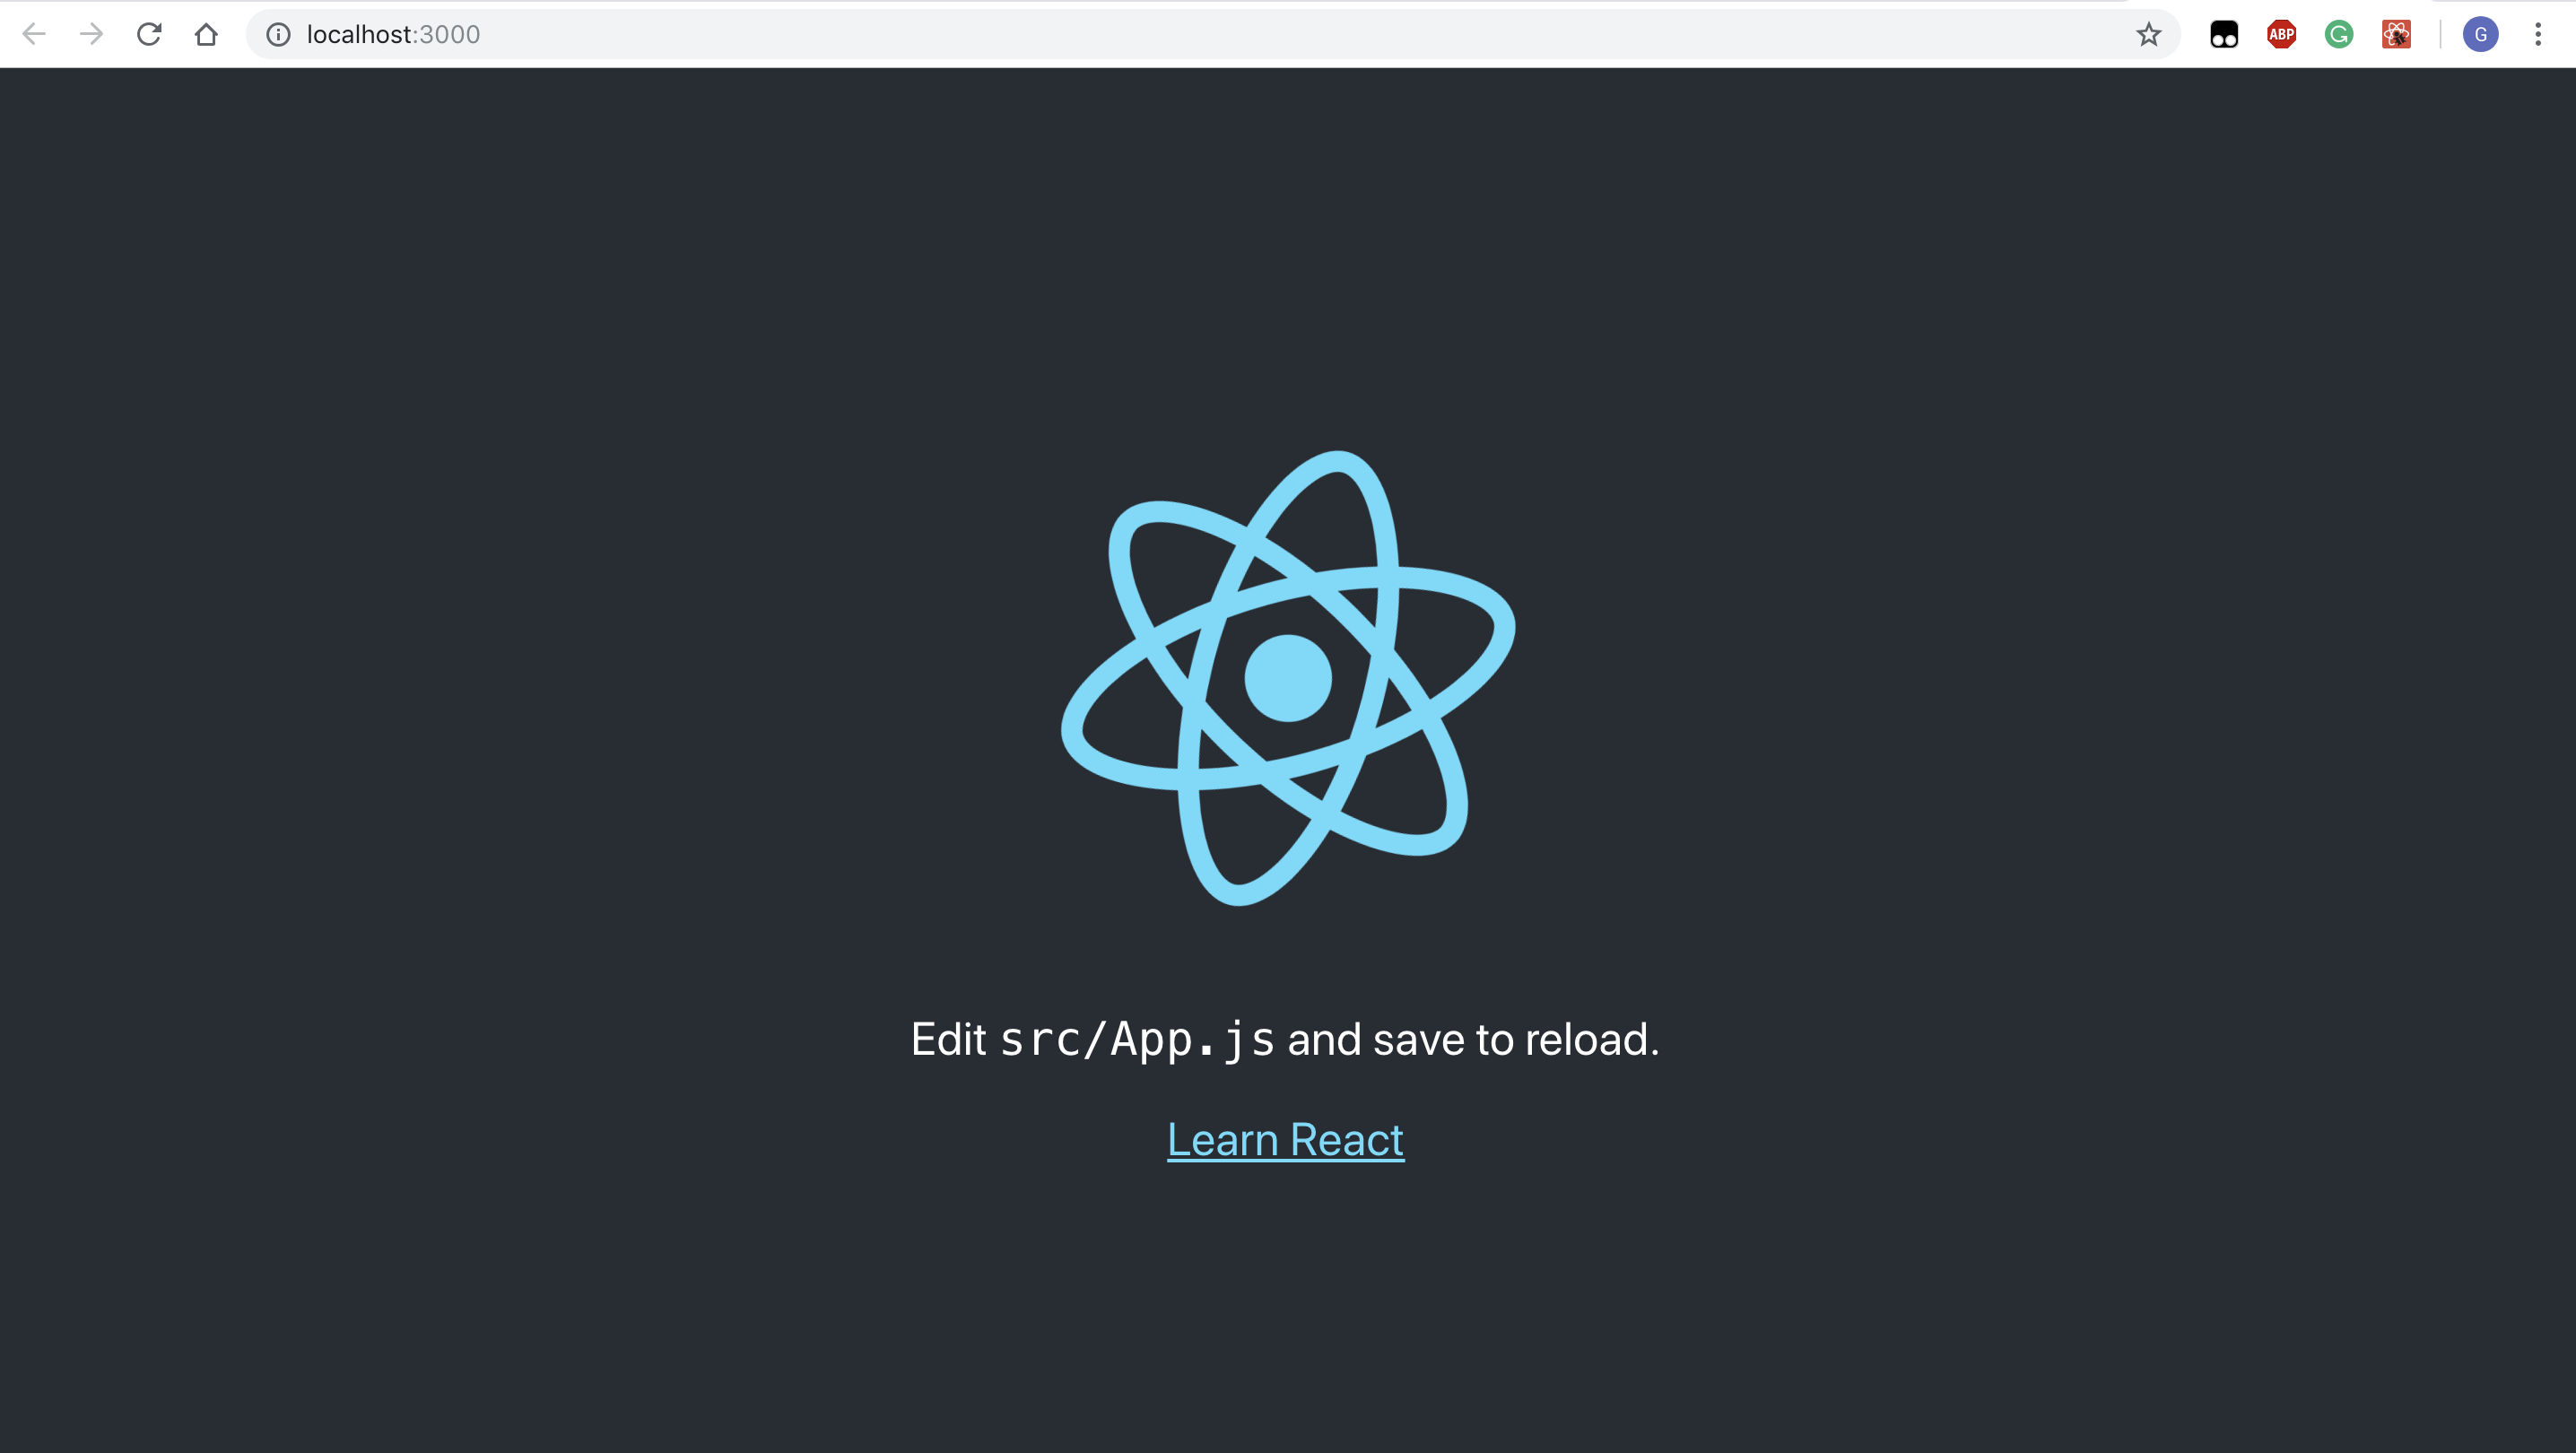
This sets up a react web app for you with everything. To access the page, go to localhost:3000.
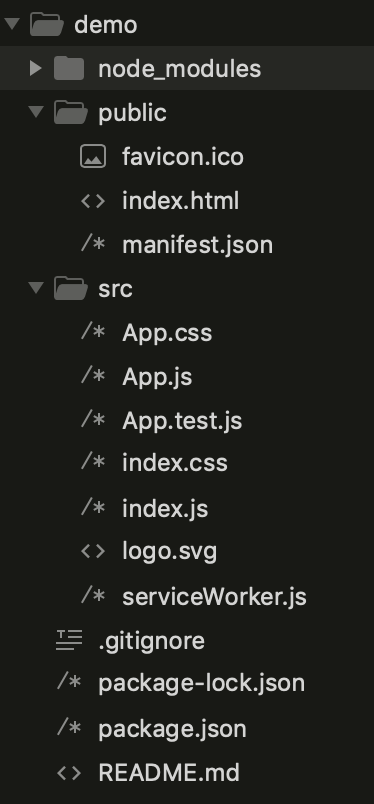
Now, let's check our demo directory
The only html file in the directory is index.html. Let's check out 3 files: index.html, App.js, index.js.
<!-- index.html -->
<head>
    <!-- scripts -->
</head>
<body>
    <noscript>
        You need to enable JavaScript to run this app.
    </noscript>
    <div id="root"></div>
    <!-- comments.... -->
</body>
We see the body contains nothing. Then, why is it showing the page with text and images?
Let's check App.js. If you're using Sublime, follow this tutorial to get correct syntax highlighting: https://gunnariauvinen.com/getting-es6-syntax-highlighting-in-sublime-text/
class App extends Component {
  render() {
    return (
      <div className="App">
        <header className="App-header">
          <img src={logo} className="App-logo" alt="logo" />
          <p>
            Edit <code>src/App.js</code> and save to reload.
          </p>
          <a
            className="App-link"
            href="https://reactjs.org"
            target="_blank"
            rel="noopener noreferrer"
          >
            Learn React
          </a>
        </header>
      </div>
    );
  }
}
The syntax is extremely weird. It looks like a mix of JavaScript and HTML. This syntax is called JSX, which is JavaScript-XML. XML is kind of similar to HTML but slightly different. See here. JSX is made to make writing React easier.
However, JSX is not JavaScript. You cannot execute or write JSX in your browser. It is only allowed in React. When we ran the package create-react-app, we automatically set up everything that will convert JSX into the HTML, CSS, and JavaScript that the browser will understand.
App is a complex React component containing multiple simple HTML tags. Notice that App is a class. It extends Component which is defined in React. Like any other class we've seen, App has some properties and methods. One method that each React component must have is render. render returns a single React element. If you want to use multiple lines, you must wrap the element in parentheses.
One of the main concepts of React is to introduce reuseable components into front-end. There is another way to define a component with some differences from class-components, but we'll just use class-componenets for this workshop. Read more here if interested.
Also, notice the import statements. It imported App.css and if you check that file, we can see the styling applied to the page.
Well, how does it get loaded into the HTML page? Let's check index.js
import React from 'react';
import ReactDOM from 'react-dom';
import './index.css';
import App from './App';
import * as serviceWorker from './serviceWorker';

ReactDOM.render(<App />, document.getElementById('root'));

// If you want your app to work offline and load faster, you can change
// unregister() to register() below. Note this comes with some pitfalls.
// Learn more about service workers: http://bit.ly/CRA-PWA
serviceWorker.unregister();
It imported App, which is the App.js file in the the same directory.
Notice that we did not specify the file type of App.
JavaScript assumes that you will be using .js file by default.
Look at the line
ReactDOM.render(<App />, document.getElementById('root'));ReactDOM.render function takes in 2 things, a React Component that we defined, and an element from the page.
What it does is that it calls the render function of the App Component,
and replace the element with id=root with whatever HTML is returned from render.
That means that if we change App, it changes whatever is shown in the page.
Let's try to modify App
  render() {
    return (
      <div className="App">
        <header className="App-header">
          <img src={logo} className="App-logo" alt="logo" />
          <p>
            {/*Edit <code>src/App.js</code> and save to reload.*/}
            This is my first React app.
          </p>
          <a
            className="App-link"
            href="https://reactjs.org"
            target="_blank"
            rel="noopener noreferrer"
          >
            Learn React
          </a>
        </header>
      </div>
    );
  }
After you save the file, your browser should refresh automatically.
Fantastic. Let's go ahead and delete all the stuff in App and start our own app.
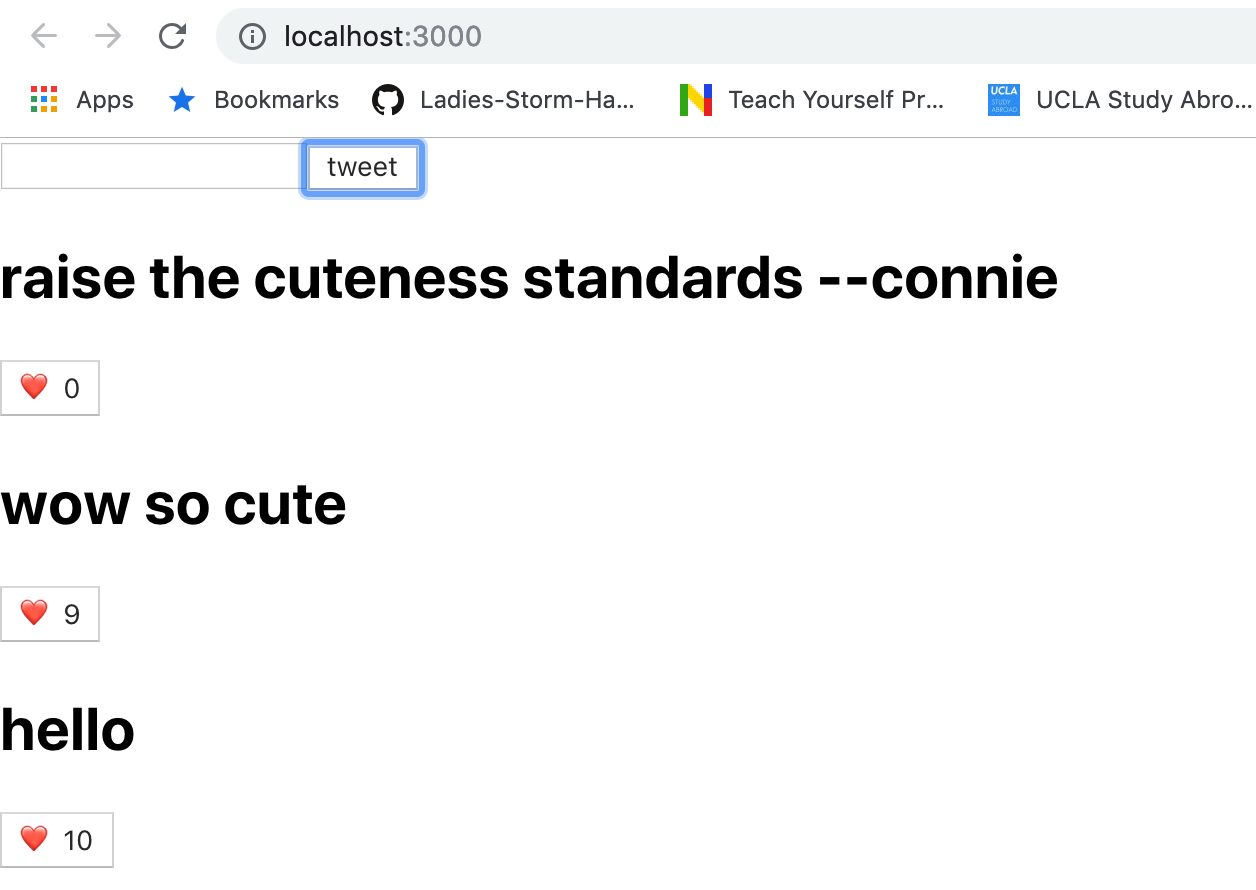
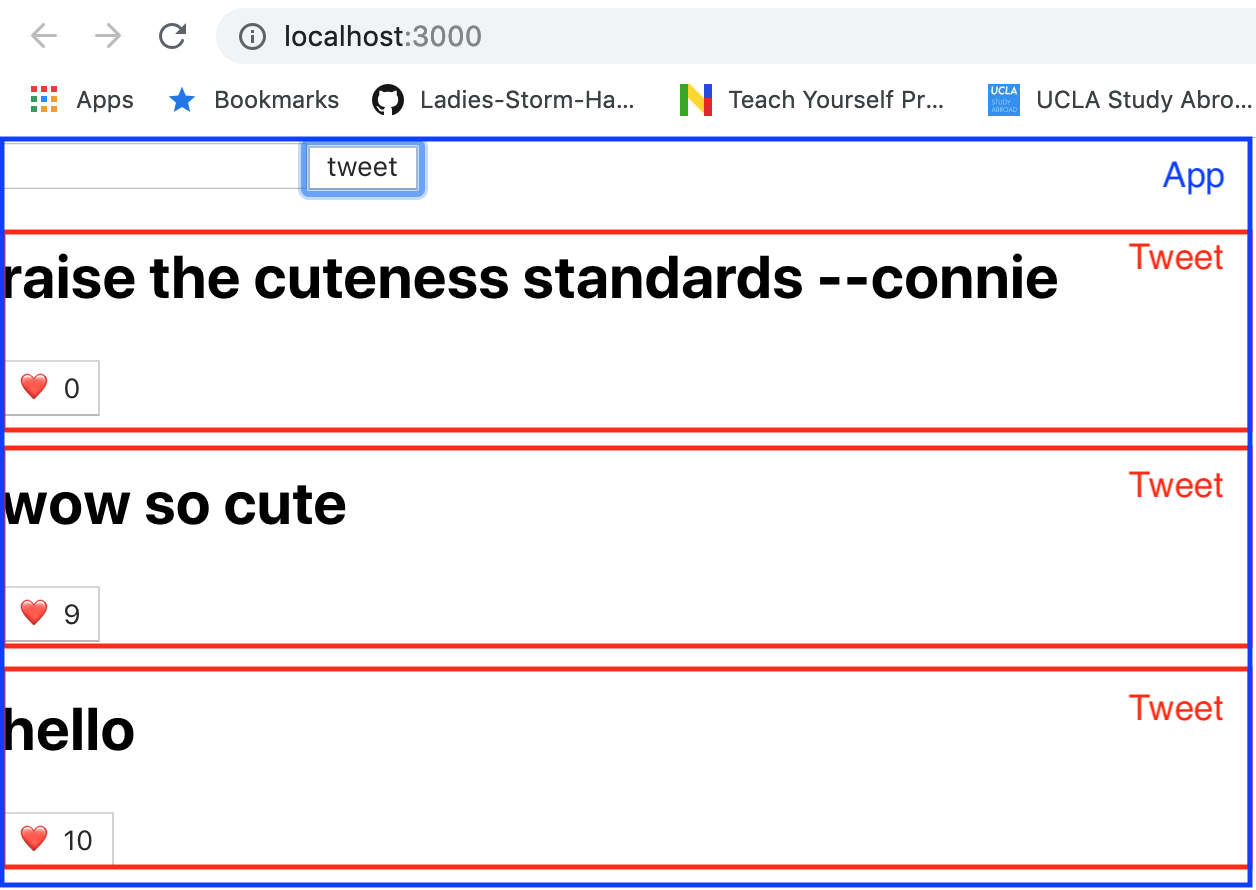
Let's make a twitter app for yourself. The only functionality that we care about is being able to add a tweet, display tweets, and like each tweet. This is what the app will look like:
Remember that in React we organize our app into components. Each component has certain properties and state. So before we dive into the code, think about the following:
- What makes sense to turn into a component?
- What properties does each component have? (Properties being data that doesn't change)
- What state does each component have? (State being data that does change)
Note that we could have made the input bar its own component or the like button its own component, but for simplicity, we're going to make the input bar part of the App component and the like button part of the Tweet component.
In a separate file called Tweet.js, let's define a Tweet component. Note that we could define this component in the same file as App.js but this is bad practice. Especially when you're working on a team, it's nice to have components in separate files so different people can work on different components.
class Tweet extends React.Component {
  render() {
    return (
    <div>
      <h2> I love hacking! </h2>
      <button>❤️</button>
    </div>
    );
  }
}

export default Tweet;
The last line allows us to use this code in other files. App.js will need to import this code so add the following line to the import statements at the top of App.js
import Tweet from './Tweet';Let put Tweet into App so we can see it.
class App extends Component {
  render() {
    return (<Tweet />);
  }
}
See that we can use our defined components in App.
Right now, we've just hardcoded the text in our tweet. This is not going to work well if we have many different tweets. We can actually pass in our text for the tweet with something called props.
//In Tweet.js
class Tweet extends React.Component {
  render() {
    return (
    <div>
      <h2> {this.props.tweet} </h2>
      <button>❤️</button>
    </div>
    );
  }
}

//In App.js
class App extends Component {
  render() {
    return (<Tweet tweet="I love hacking!"/>);
  }
}
This tweet looks like attribute in HTML.
e.g. <h1 id="title">.
Whatever "attributes" are being passed into Tweet would be store in an object called props. A component should never modify its own props.
Notice another thing. this.props.tweet is a JavaScript syntax in a bunch of HTML codes.
We make clear that it is JavaScript by surrounding it with { }.
Let's render multiple tweets.
class App extends Component {
  render() {
    return (
      <div>
        <Tweet tweet="I love hacking. "/>
        <Tweet tweet="I'm hungry. "/>
        <Tweet tweet="I like donuts. "/>
      </div>
    );
  }
}
Notice that all the tweets are wrapped in a single enclosing tag. We do this because React components are only allowed to return a single element, and we would get a JSX syntax error otherwise.
We can actually use an array to help us store these tweets.
class App extends Component {
  render() {
    const tweets = ["I love Rende", "I hate BPlate"];
    const lists = tweets.map((text) => <Tweet tweet={text} />);
    return (
      <div>
        {lists}
      </div>
    );
  }
}
We put tweets and lists inside render() because they are local variables of that function.
map is a function of arrays. It iterates through the array tweets,
and forms a new array with each element defined by the function we passed to map.
In this case, we passed in (text) => <Tweet tweet={text} />.
text represents each element.
It returns a Tweet component with the tweet attribute set to text.
This was the reuse part of React.
We reuse the component Tweet without worrying about the structure inside Tweet.
Another important concept in React is state. Let's add a counter next to the button.
class Tweet extends React.Component {
  constructor() {
    super();
    this.state = {
      numLike: 0
    };
  }

  render() {
    const numLike = this.state.numLike;
    return (
      <div>
        <h2>{this.props.tweet}</h2>
        <button>❤️ {numLike}</button>
      </div>
    );
  }
}
In constructor, we set a variable state to hold an object with a key numLike. Its value is initialized to 0.
We accessed the state using this.state in render.
What is super()?
To understand this, you will have to know what inheritance is in
Object Oriented Programming.
It initializes the parent class React.Component.
We want to increment this.state.numLike everytime we click the button. Let's define a function to do that.
class Tweet extends React.Component {
  constructor() {
    super();
    this.state = {
      numLike: 0
    };
  }

  incrementLike = () => {
    const previousLike = this.state.numLike;
    const newState = {
      numLike: previousLike + 1
    };
    this.setState(newState);
  }

  render() {
    const numLike = this.state.numLike;
    return (
      <div>
        <h2>{this.props.tweet}</h2>
        <button onClick={this.incrementLike}>❤️ {numLike} </button>
      </div>
    );
  }
}
There are 3 things that we changed.
- We defined the
incrementLikefunction. The reason it has to be an arrow function is so it is properly bound tothiswhen we pass it intoonClicklater. See here for more. Instead of directly assigning a new object tothis.state, - we used a function
this.setStateto help us set state. See here for more. - We set the
onClickattribute to the functionthis.incrementLike.
Save and check your page. Now your like button should work.
At this point, you might have noticed that React has been yelling at us all the time for some warning like
Line 24: Emojis should be wrapped in <span>, have role="img", and have an accessible description with aria-label or aria-labelledby
telling us we should wrap our emoji in a span tag.
The reason for doing this is for accessibility.
To a person using a screenreader, however, he/she may not be aware that this content is there at all. By wrapping the emoji in a , giving it the role="img", and providing a useful description in aria-label, the screenreader will treat the emoji as an image in the accessibility tree with an accessible name for the end user.
src: accesible-emoji
Let's go ahead and make it more user-friendly!
render() {
  const numLike = this.state.numLike;
  return (
    <div>
      <h2>{this.props.tweet}</h2>
      <button onClick={this.incrementLike}>
        <span role="img" aria-label="Love">❤️</span> {numLike}
      </button>
    </div>
  );
}
You might also wonder why we are keeping data in state?
Can we instead just keep numLike in the class like this.numLike instead of this.state.numLike?
this.state is a specially reserved class variable in a React component.
It is responsible to keep track of the data that we display on the webpage.
And we are using setState to update it so that React knows the data on the page changed so it needs to call render again.
state is a super duper important concept in React.
Make sure you understand it well.
Before we move on, make sure you understand what props and state are, and their differences. props are variables passed to a component by its parent component. You should never modify props within the child component. state on the other hand, is a variable initialized and managed by the component itself. You can modify state with the setState function.
Let's add an input box so you can add new tweet from your app instead of hardcoding the tweets.
The idea is that we use the state of the App component to keep track of our tweets that are being inputted by the users, so that we can update the state every time a new tweet is added and make our web app more dynamic.
class App extends Component {
  constructor() {
    super();
    this.state = {
      tweets: [],
      currTweet: ''
    };
    this.tweetIndex = 0;
  }

  updateCurrTweet = (event) => {
    const newState = {
      currTweet: event.target.value
    };
    this.setState(newState);
  }

  addTweet = () => {
    if (this.state.currTweet === '') {
      alert('Input something first');
      return;
    }
    const currTweetObj = {
      index: this.tweetIndex,
      content: this.state.currTweet
    };
    this.tweetIndex += 1;

    const prevTweets = this.state.tweets;
    const newTweets = [currTweetObj, ...prevTweets];
    const newState = {
      tweets: newTweets,
      currTweet: ''
    };
    this.setState(newState);
  }

  render() {
    const tweets = this.state.tweets;
    const lists = tweets.map((tweetObj) => <Tweet tweet={tweetObj.content} key={tweetObj.index} />);
    return (
      <div>
        <input value={this.state.currTweet} onChange={this.updateCurrTweet}/>
        <button onClick={this.addTweet}>tweet</button>
        {lists}
      </div>
    );
  }
}
Let's first look at updateCurrTweet. We passed (event) => this.updateCurrTweet(event) to the onChange attribute of the input tag.
Every time we type in the input box, it calls the function and passes in an "event" object, which holds information about the "change" event.
We can access the value of the event's target, which is the input box.
We take that value and put that in the state in updateCurrTweet.
Notice how we set the value attribute of the input tag to this.state.currTweet. It means whatever is in currTweet will be displayed in the input box.
Now, we examine the addTweet function.
We represent each tweet as an object with a number index and the content of the tweet content.
It pushes a new tweet to the beginning of this.state.tweets array and update the state.
The strange operator ... is to expand/spread an array.
What does it mean?
Since prevTweets is an array, we expand it inside [ ] for JavaScript to know that we are trying to take all elements in the prevTweets and put it after currTweetObj.
Why do we use an object to represent a tweet then?
Shouldn't a string itself be enough?
Why are we keeping an index?
We see that we pass the index to an attribute key in Tweet.
This is neccessary so that React can distinguish the elements from each other.
There you have it. A working twitter.
Does this look good? Not at all. It needs some serious styling. But due to limited time. We cannot teach you how to style in React. However, CSS stills works in React. Please look it up online and try to apply CSS to React.
