Creating your own GitHub Account is similar to creating acoounts on most social media websites we see today. You can join GIHub by using the following link.
Now we have to create a repository where all the documentation of all your work will be done. The detailed guidelines in creating a repository and adding the README.md file are given in the link.
Note: While creating the repository for the program's purpose make sure you name the repository in "<Your Name>_STP" format and it must be a private repository with "Synopsys University Program - MEC" as the collaborator.
Now we have to clone the repository to our local machine. The detailed guidelines in cloning a repository are given in the link.
Now we have to save our work and push it to the remote repository. This is done using the git add , git commit and git push commands. All of which are explained in the git cheatsheet given in the following link.
Note: All the basic commands required to work with git is given in the cheatsheet and the link to the same is given below. Link to the cheatsheet
Markdown is a lightweight markup language that is easy to read and write. It is a plain text format that is used to create HTML and XML documents. GitHub and all other git plaform has great Mardown rendering systems that can be utilized for documentation. Here also we'll be using markdown for the documentation your progress in the course.
Markdown is easy to learn and understand and is really close to HTML. Here instead of tags we use alternative syntax for font adjustments. The syntax rules are for using markdown can be easily learnt using any of the following links:
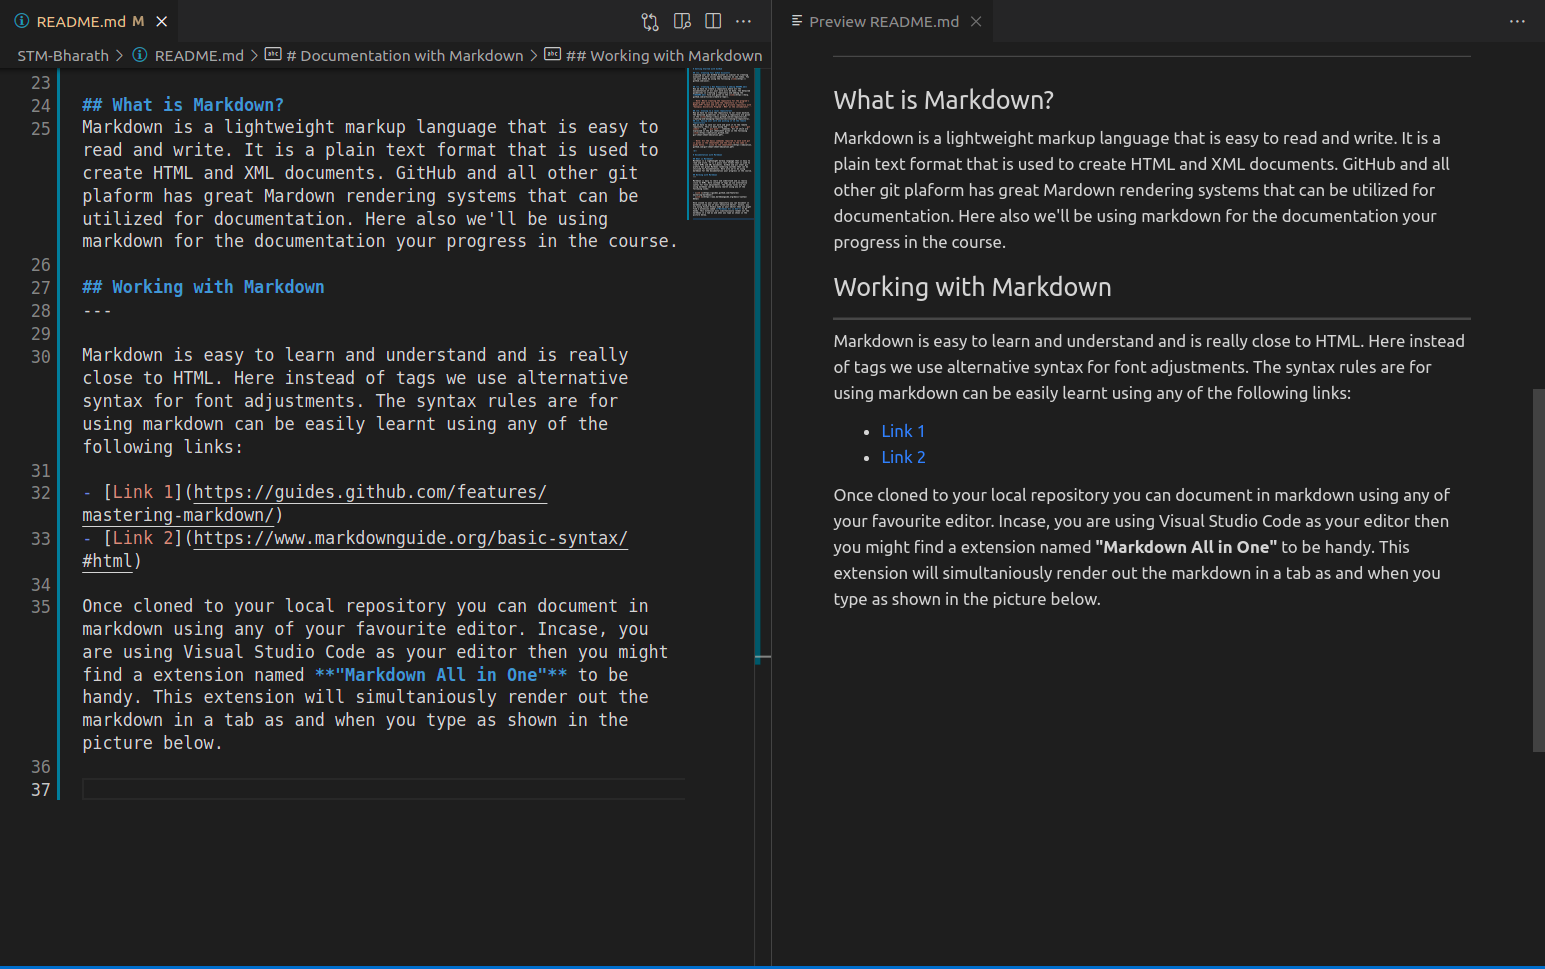
Once cloned to your local repository you can document in markdown using any of your favourite editor. Incase, you are using Visual Studio Code as your editor then you might find a extension named "Markdown All in One" to be handy. This extension will simultaniously render out the markdown in a tab as and when you type as shown in the picture below.
CentOS is Red Hat Enterprise Linux (RHEL) based linux distribution which is the preffered OS for this training program.
-For systems with RAM <= 4GB Dual Booting is preferred
-Dual booting is a bit of a tedious procedure and should be done with caution.
-CentOS 8 ISO Image for Dual Boot Following is the Centos 8 ISO Download file.
-Please refer to youtube tutorials/blogs on the same before dual booting.
NB: -Ensure that you allot a minimum of 80GB space for CentOS while partitioning.
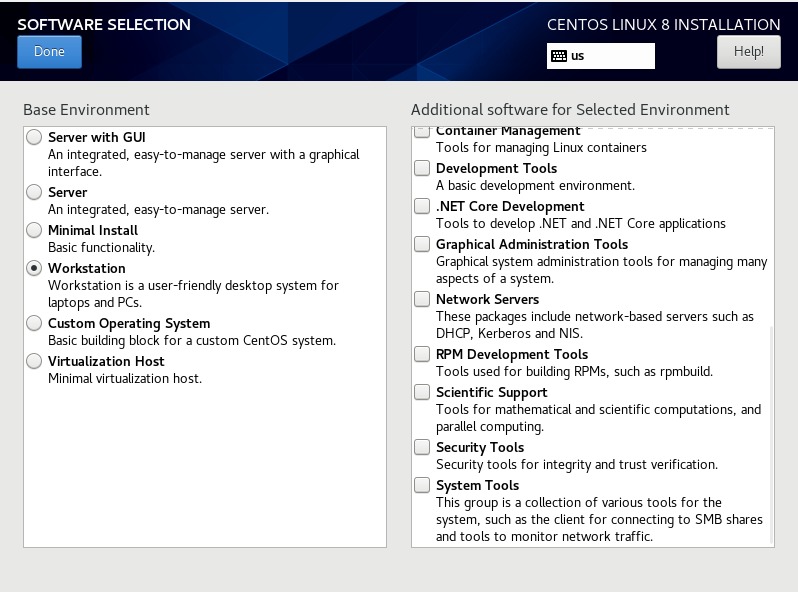
-Also select GNOME Desktop in the software selection part of installation.
-For systems with RAM >=8 GB ,the preferred method is to use CentOS 7/8 on Virtual Box as a virtual machine.
-Please refer this video for installing CentOS 8 on Virtual Box Video
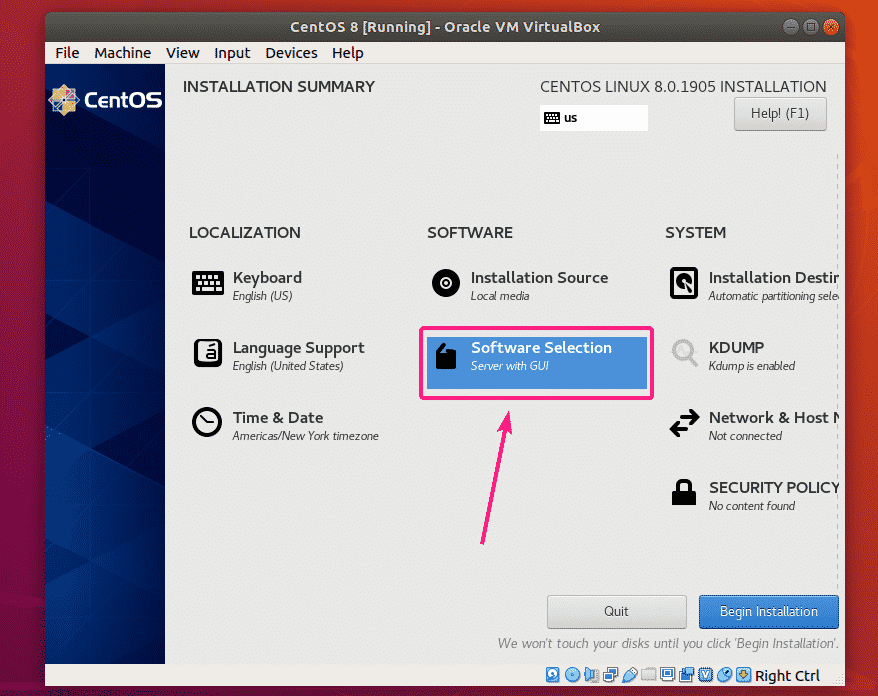
While installing,make sure to select "Workstation" in software selection area which is not shown in the video
-Key Points:
-
Allot memory size(RAM) in virtual box based on your system spec and the host OS. eg. For Windows users with 8GB RAM you may allot upto 4GB. Note that bare minimum of 2 GB is recommended for smooth performance.
-
Recommended size for Virtual Hard Disk is 60 GB


