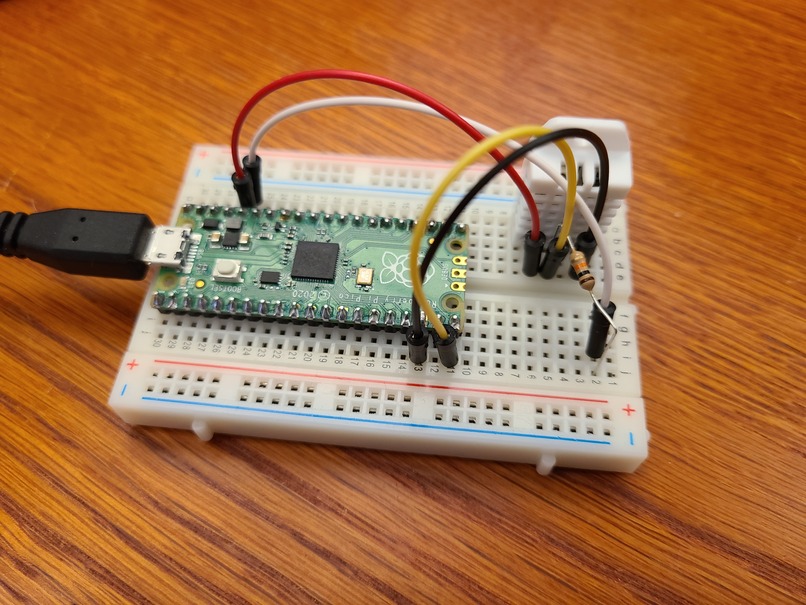
This repository contains hints and tips on how to configure your Fedora workstation to cross compile Raspberry Pi Pico C/C++ programs.
The Raspberry Pi Pico board and RP2040 microcontroller are an interesting MCU for hardware and software engineers. I recently purchased several Pico boards and soldered headers onto the PCB.
Since I run Fedora Linux on my laptop, I wanted to cross compile the RP2040 example programs using the Raspberry Pi Pico C/C++ SDK. The SDK guide provides instructions on how to install the SDK and examples on a Raspberry Pi. While I have lots of Raspberry Pi devices, I don't use them as a development platform for obvious performance reasons. The installation scripts assume a Raspberry Pi OS running on a Raspberry Pi 4 or an equivalent Debian-based Linux distribution. The goal of this tutorial is to document how to use the Pico C SDK on a Fedora development system.
My Fedora 33 system has most of the dnf grouplist "C Development Tools and Libraries" packages
already installed, so this guide doesn't cover how to install binutils, gcc, gcc-c++, cmake, make, doxygen, git toolchains.
If you're new to C/C++ development on Fedora, there are better guides for those steps.
This section of the tutorial details how to install the ARM cross compiler packages.
There's a great Fedora Embedded wiki that provided helpful hints.
Here's a minimal list of dependencies that will pull in additional required packages. You will need approximately 1GB of disk space.
sudo dnf install gcc-arm-linux-gnu \
 arm-none-eabi-gcc-cs-c++ \
 arm-none-eabi-gcc-cs \
 arm-none-eabi-binutils \
 arm-none-eabi-newlib
The pico-examples repository (https://github.com/raspberrypi/pico-examples)
provides a set of example applications that are written using the
pico-sdk (https://github.com/raspberrypi/pico-sdk).
Run the following commands to clone the pico-sdk and pico-examples repositories
to an appropriate development subdirectory on your system.
git clone git@github.com:raspberrypi/pico-sdk.git
git clone git@github.com:raspberrypi/pico-examples.git
There is a tinyusb git submodule directory that you should clone too.
cd ./pico-sdk/src/rp2_common/tinyusb
git submodule update --init
cd -
The next step will take a few minutes.
cd pico-examples
cmake -DPICO_SDK_PATH=../pico-sdk .
make
The compiler generates a .uf2 binary for each sample program.
The simplest method to load software onto a RP2040-based board is by mounting it as a USB Mass Storage Device. Connect your Fedora laptop to your Raspberry Pi Pico using a Micro-USB cable, making sure that you hold down the BOOTSEL button to force it into USB Mass Storage mode. You can drag the .uf2 file onto the board to program the flash. The RP2040 will reboot, unmounting itself as a Mass Storage Device, and start to run the flashed code.
There's a nice little animated gif.
The pico-examples repository contains a variety of sample programs. The Raspberry Pi Foundation team and community have created some great examples that showcase the capabilities of the RP2040. I flashed and wired up a few of them on a breadboard.
Start off with the Hello World program for Pico.
-
Hold down the BOOTSEL button to force it into USB Mass Storage mode.
-
Drag or copy the
pico-examples/hello_world/usb/hello_usb.uf2to the RPI-RP2 mounted volume. -
Open a serial terminal on
/dev/ttyACM0$ miniterm.py /dev/ttyACM0 115200 --- Miniterm on /dev/ttyACM0 115200,8,N,1 --- --- Quit: Ctrl+] | Menu: Ctrl+T | Help: Ctrl+T followed by Ctrl+H --- Hello, world! Hello, world! Hello, world! Hello, world! Hello, world! --- exit ---
Blink the onboard LED by flashing the Blink program for Pico. For more tips you can read the Raspberry Pi Blog "How to blink an LED with Raspberry Pi Pico in C"
- Hold down the BOOTSEL button to force it into USB Mass Storage mode.
- Drag or copy the
pico-examples/blink/blink.uf2to the RPI-RP2 mounted volume.
The DHT Temperature / Humidity sensor program reads a DHT-11 / DHT-22 via GPIO pin 15.
-
Hold down the BOOTSEL button to force it into USB Mass Storage mode.
-
Drag or copy the
pico-examples/gpio/dht_sensor/dht.uf2to the RPI-RP2 mounted volume. -
Wire a DHT sensor on a breadboard. (The Raspberry Pi Pico C SDK Guide pg73 has a nice wiring diagram.)

-
Open a serial terminal on
dev/ttyACM0$ miniterm.py /dev/ttyACM0 115200 --- Miniterm on /dev/ttyACM0 115200,8,N,1 --- --- Quit: Ctrl+] | Menu: Ctrl+T | Help: Ctrl+T followed by Ctrl+H --- Humidity = 22.8%, Temperature = 18.6C (65.5F) Humidity = 22.9%, Temperature = 18.6C (65.5F) Humidity = 22.7%, Temperature = 18.6C (65.5F) Humidity = 22.5%, Temperature = 18.6C (65.5F) Humidity = 22.6%, Temperature = 18.6C (65.5F) --- exit ---
Every IoT hobbyist has a Neopixel and loves a fully addressable blinky light. Use the ws2812 program to blink an external RGB LED.
-
Hold down the BOOTSEL button to force it into USB Mass Storage mode.
-
Drag or copy the
pico-examples/pio/ws2812/pio_ws2812.uf2to the RPI-RP2 mounted volume. -
Wire a Neopixel to your Raspberry Pi Pico.
If you want to use the picotool to inspect / load programs onto the RP2040, Appendix B of the SDK guide details the installation instructions. You will need to install these Fedora packages:
sudo dnf install libusb1-devel libusb1
Enjoy! Give me feedback if you have suggestions on how to improve this tutorial.
This tutorial is licensed under the BSD License.
