So, you want to 3D print your own brain? The following is a step by step guide that will tell you how to 3D print a brain. All coming from a structural image (T1) like this:
Note: To create a 3D surface model of your brain we will use FreeSurfer and meshlab. Therefore you should make sure that those two softwares are already installed on your system.
Let's first specify all necessary variables that we need for this to work:
# Main folder for the whole project
export EXPERIMENT_DIR=/users/mnotter/3dbrain

# Path to the FreeSurfer folder
export SUBJECTS_DIR=$EXPERIMENT_DIR/freesurfer

# Name of the subject
export subject=sub001

# Path to the structural image
export subjT1=$EXPERIMENT_DIR/${subject}/struct.nii.gzAssuming that you have your structural image in NIfTI format, run the following code:
mkdir -p $SUBJECTS_DIR/${subject}/mri/orig
mri_convert ${subjT1} $SUBJECTS_DIR/${subject}/mri/orig/001.mgz
recon-all -subjid ${subject} -all -time -log logfile -nuintensitycor-3T
Note: This step might take some time. Between 6-18h. If you want to run recon-all in parallel and speed-up the whole process, add -openmp N to the end of the recon-all command, where N stands for the number of CPUs to use.
The following code will take the reconstructed surface model of both hemisphere's, concatenate them and save them under cortical.stl
mris_convert --combinesurfs $SUBJECTS_DIR/${subject}/surf/lh.pial $SUBJECTS_DIR/${subject}/surf/rh.pial \
             $SUBJECTS_DIR/cortical.stl
Now let's look at the data with meshlab. Therefore use the following code:
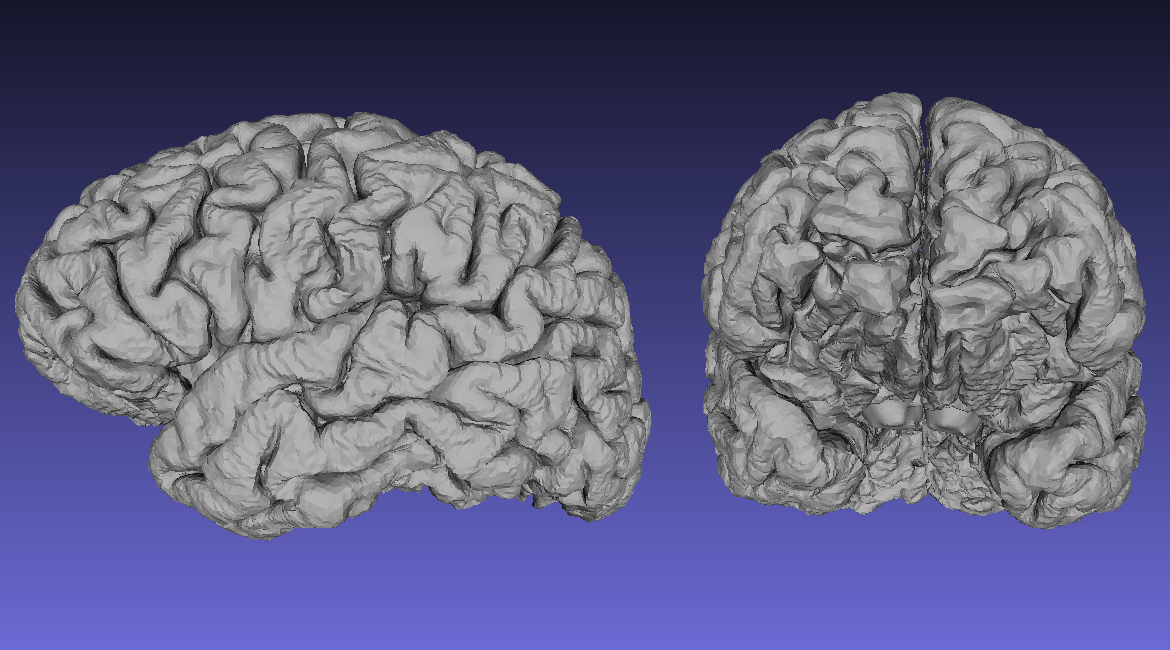
meshlab $SUBJECTS_DIR/cortical.stlYou should see something like this:
Note: If you have the following display message, just accept with OK.
This version of your surface reconstruction is still rather rough. So lets smooth it abit. Therefore, go to
Filters
    > Smoothing, Fairing, and Deformation
        > ScaleDependent Laplacian Smooth
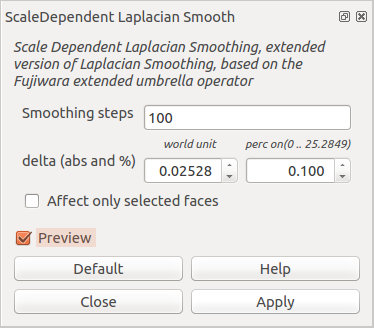
This should open up the following window:
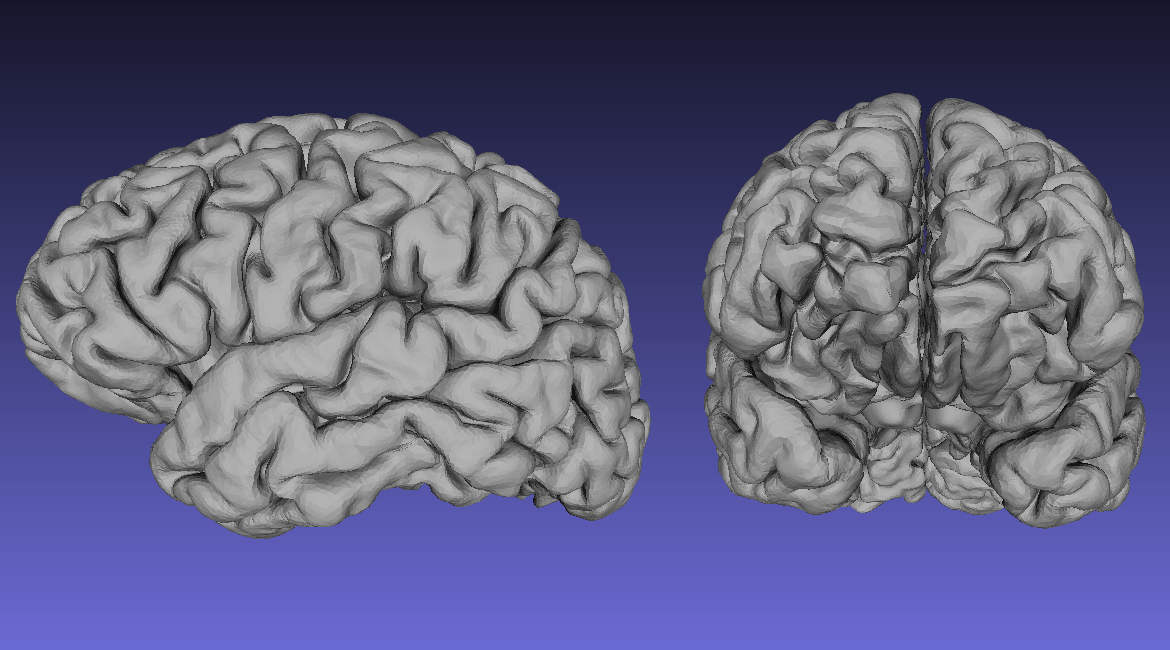
Just set Smoothing steps to 100 and perc on under delta (abs and %) to 0.100. And finally press Apply. You should now have something that looks like this:
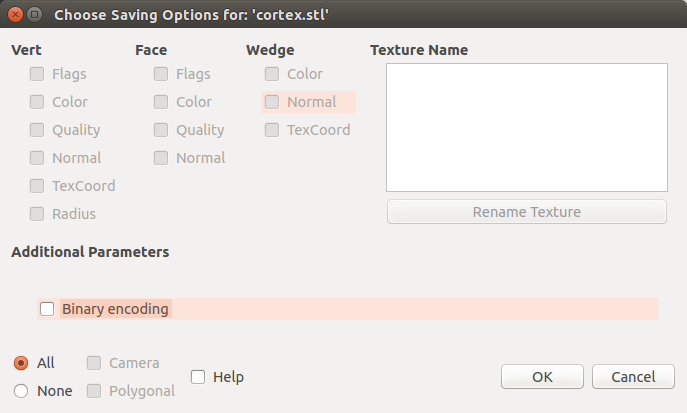
After this step, click on File and Export Mesh and save the whole thing without Binary encoding, i.e.:
Press OK and close meshlab again.
Now, FreeSurfer creates a very nice 3D model of the surface. Which unfortunately it doesn't do for subcortical structures, cerebellum and brainstem. Assuming that you want to print those areas too, we have to create a 3D surface model of them first. One way to do this is to use FreeSurfer's segmentation file aseg.mgz.
# First, convert aseg.mgz into NIfTI format
mri_convert $SUBJECTS_DIR/${subject}/mri/aseg.mgz $EXPERIMENT_DIR/subcortical.nii

# Second, binarize all Areas that you're not interested and inverse the binarization
mri_binarize --i $EXPERIMENT_DIR/subcortical.nii \
             --match 2 3 24 31 41 42 63 72 77 51 52 13 12 43 50 4 11 26 58 49 10 17 18 53 54 44 5 80 14 15 30 62 \
             --inv \
             --o $EXPERIMENT_DIR/bin.nii

# Third, multiply the original aseg.mgz file with the binarized files
fslmaths $EXPERIMENT_DIR/subcortical.nii \
         -mul $EXPERIMENT_DIR/bin.nii \
         $EXPERIMENT_DIR/subcortical.nii.gz
Note: To figure out the value of the areas of no interest in the second step open aseg.mgz in the NIfTI viewer of your choice. With FreeSurfer it would be as follows: freeview -v $SUBJECTS_DIR/${subject}/mri/aseg.mgz -colormap lut
After this step you'll have a NIfTI file that only contains the areas you were interested in. It should look something like this:
The next step is now to turn those subcortical regions into a 3D model.
# Copy original file to create a temporary file
cp $EXPERIMENT_DIR/subcortical.nii.gz $EXPERIMENT_DIR/subcortical_tmp.nii.gz

# Unzip this file
gunzip -f $EXPERIMENT_DIR/subcortical_tmp.nii.gz

# Check all areas of interest for wholes and fill them out if necessary
for i in 7 8 16 28 46 47 60 251 252 253 254 255
do
    mri_pretess $EXPERIMENT_DIR/subcortical_tmp.nii \
    $i \
    $SUBJECTS_DIR/${subject}/mri/norm.mgz \
    $EXPERIMENT_DIR/subcortical_tmp.nii
done

# Binarize the whole volume
fslmaths $EXPERIMENT_DIR/subcortical_tmp.nii -bin $EXPERIMENT_DIR/subcortical_bin.nii

# Create a surface model of the binarized volume with mri_tessellate
mri_tessellate $EXPERIMENT_DIR/subcortical_bin.nii.gz 1 $EXPERIMENT_DIR/subcortical

# Convert binary surface output into stl format
mris_convert $EXPERIMENT_DIR/subcortical $EXPERIMENT_DIR/subcortical.stl
Next, open subcortical.stl with meshlab and apply ScaleDependent Laplacian Smooth as under step 3.
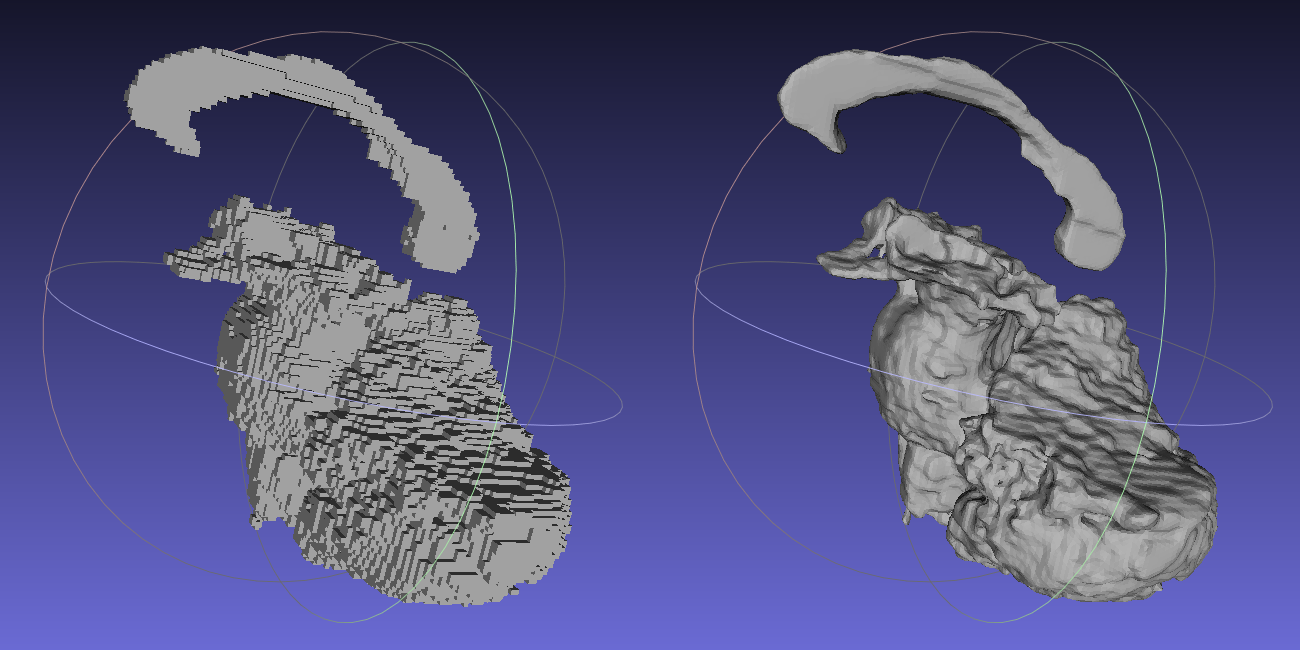
meshlab subcortical.stlThe output you get should be as follows:
On the left you see the surface reconstruction before smoothing, just after the tesselation and on the right you see the smoothed subcortical surface model after scale dependent laplacian smoothing.
Now, as before: Click on File and Export Mesh and save the whole thing without Binary encoding.
Now it's a short thing to concatenate the two files, cortical.stl and subcortical.stl into one final.stl file:
echo 'solid '$EXPERIMENT_DIR'/final.stl' > $EXPERIMENT_DIR/final.stl
sed '/solid vcg/d' $EXPERIMENT_DIR/cortical.stl >> $EXPERIMENT_DIR/final.stl
sed '/solid vcg/d' $EXPERIMENT_DIR/subcortical.stl >> $EXPERIMENT_DIR/final.stl
echo 'endsolid '$EXPERIMENT_DIR'/final.stl' >> $EXPERIMENT_DIR/final.stlrm $EXPERIMENT_DIR/bin.nii \
$EXPERIMENT_DIR/subcortical_bin.nii.gz \
$EXPERIMENT_DIR/subcortical_tmp.nii \
$EXPERIMENT_DIR/subcortical.nii \
$EXPERIMENT_DIR/subcortical.nii.gz \
$EXPERIMENT_DIR/subcorticalUse again meshlab to load final.stl.
meshlab final.stlNow, as a final step: Export the mesh again, but this time use Binary encoding. This will reduce the data volume dramatically and will make it easier to send or upload the 3D model.
So, now to the final steps. If you're lucky enough and you have you have your own access to a 3D printer, than you probably no what to do next. Lucky you!
If you don't have access to a 3D printer, than there are many options on the internet. I personally used www.shapeways.com. It's very easy to use, you can choose from many different materials and it gives you also the option to resize your model, as well as correct for flawed surface areas.
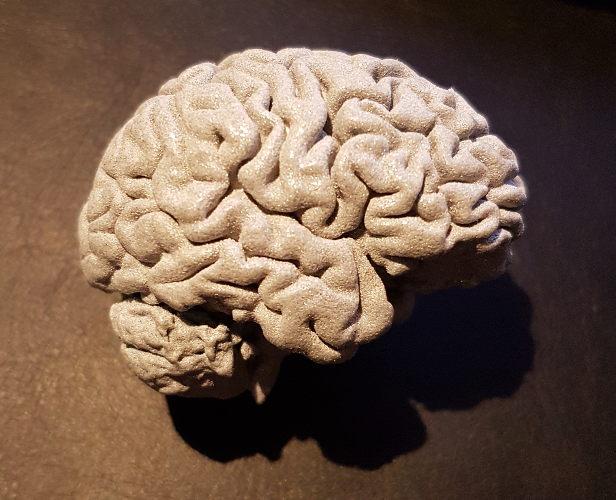
And this is how the final product might look like:
I'm happy to point you to a nice alternative to this guide, written by Christopher Madan. Make sure to also check out his article!

