Evalutating the ROSA (Redhat OpenShift on AWS) service
What is ROSA?
Red Hat OpenShift Service on AWS (ROSA) is a fully-managed OpenShift service, jointly managed and supported by both Red Hat and Amazon Web Services (AWS). Having your clusters maintained by this service gives you the freedom to focus on deploying applications. (see https://docs.openshift.com/rosa/rosa_architecture/rosa-understanding.html)
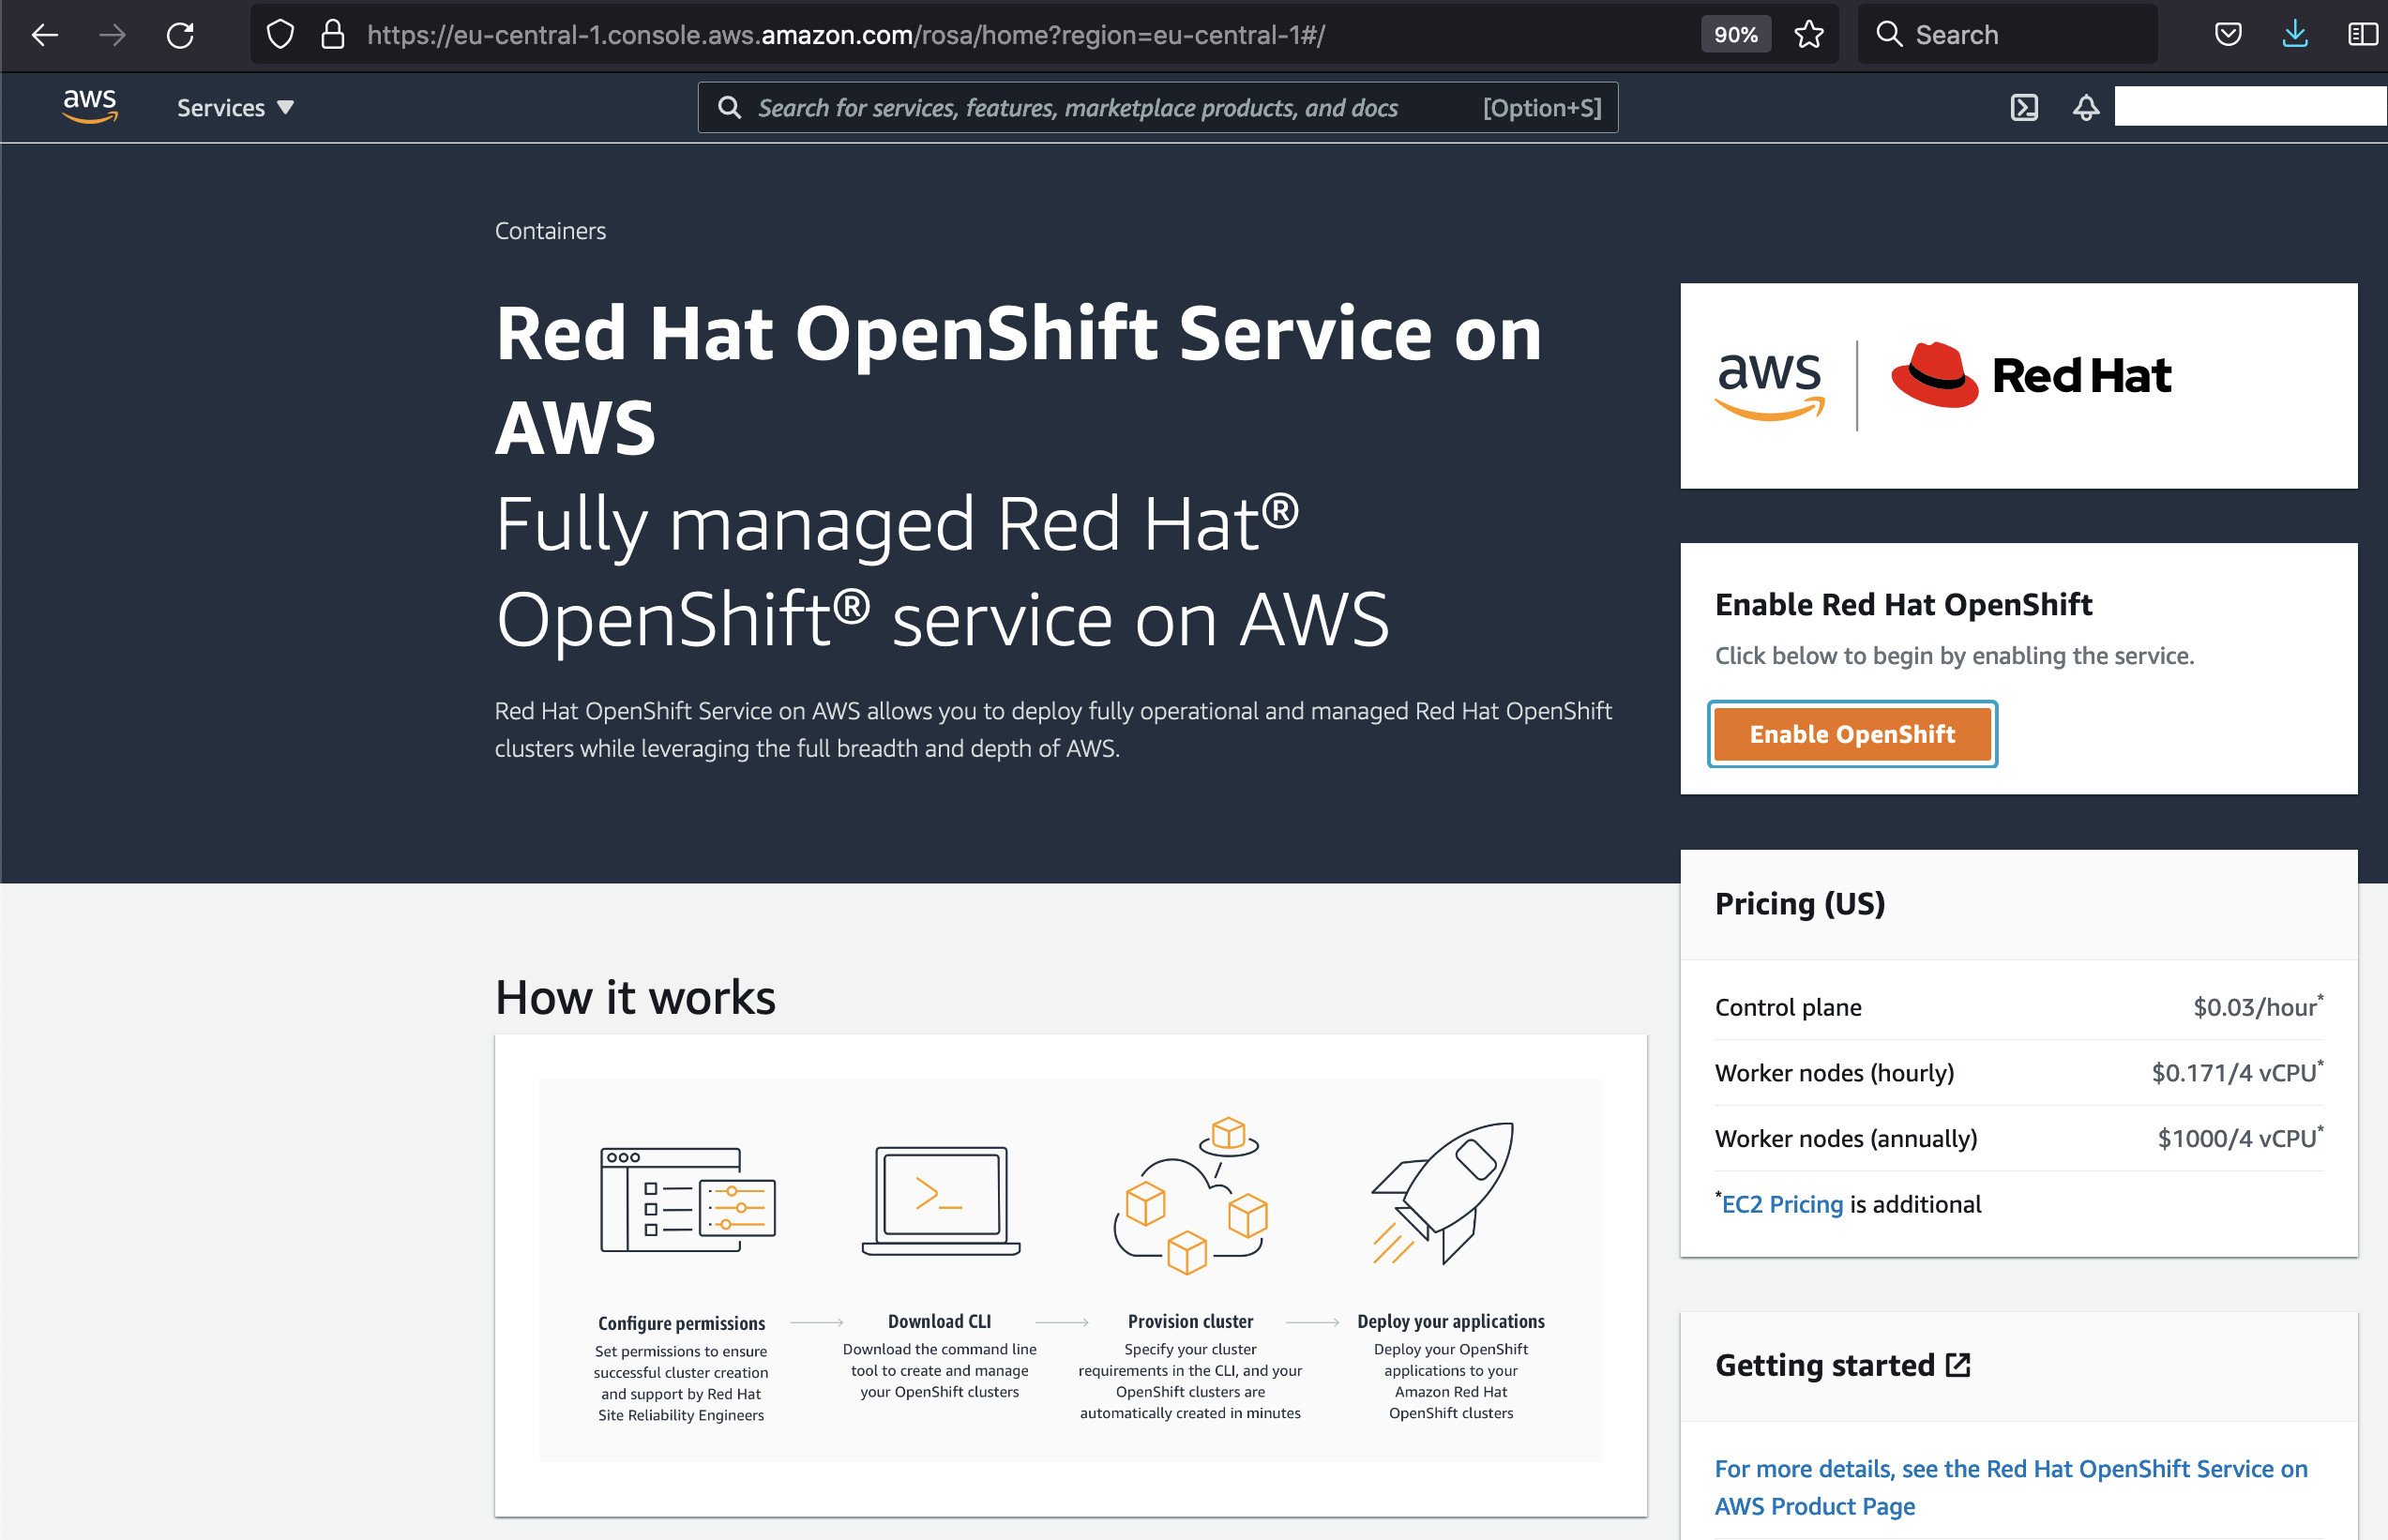
There's no free lunch - so here's the pricing: https://aws.amazon.com/rosa/pricing/
As of writing this is:
1.) hourly fee for the cluster, which is $0.03/cluster/hour**
2.) pricing per worker node, which is $0.171 per 4 vCPU / hour for On-demand consumption
3.) EC2 pricing comes on top
To create a new cluster, start from the AWS Management console using ROSA. This integrates with the new rosa CLI and API to provision clusters in your AWS account. The new API for cluster creation alleviates the burden of manually deploying the cluster in your existing VPC and account.
So let's have a look into the AWS console and search for rosa:
Now in the ROSA AWS service overview we need to click on Enable Red Hat OpenShift:
This might take a while and will also share your contact information with Red Hat, since the cluster will be managed by Red Hat's SRE team.
Now when the ROSA service is enabled for our account, we need to install the rosa CLI:
The docs state in order to download the rosa CLI, we need to create a Red Hat account first.
But on a Mac we can simply use brew to install it:
brew install rosa-cli
Now before proceeding with creating a offline access token we'll need for the rosa login command, we finally need a Red Hat account. Head over to https://console.redhat.com and create your account (or log in if you already have one).
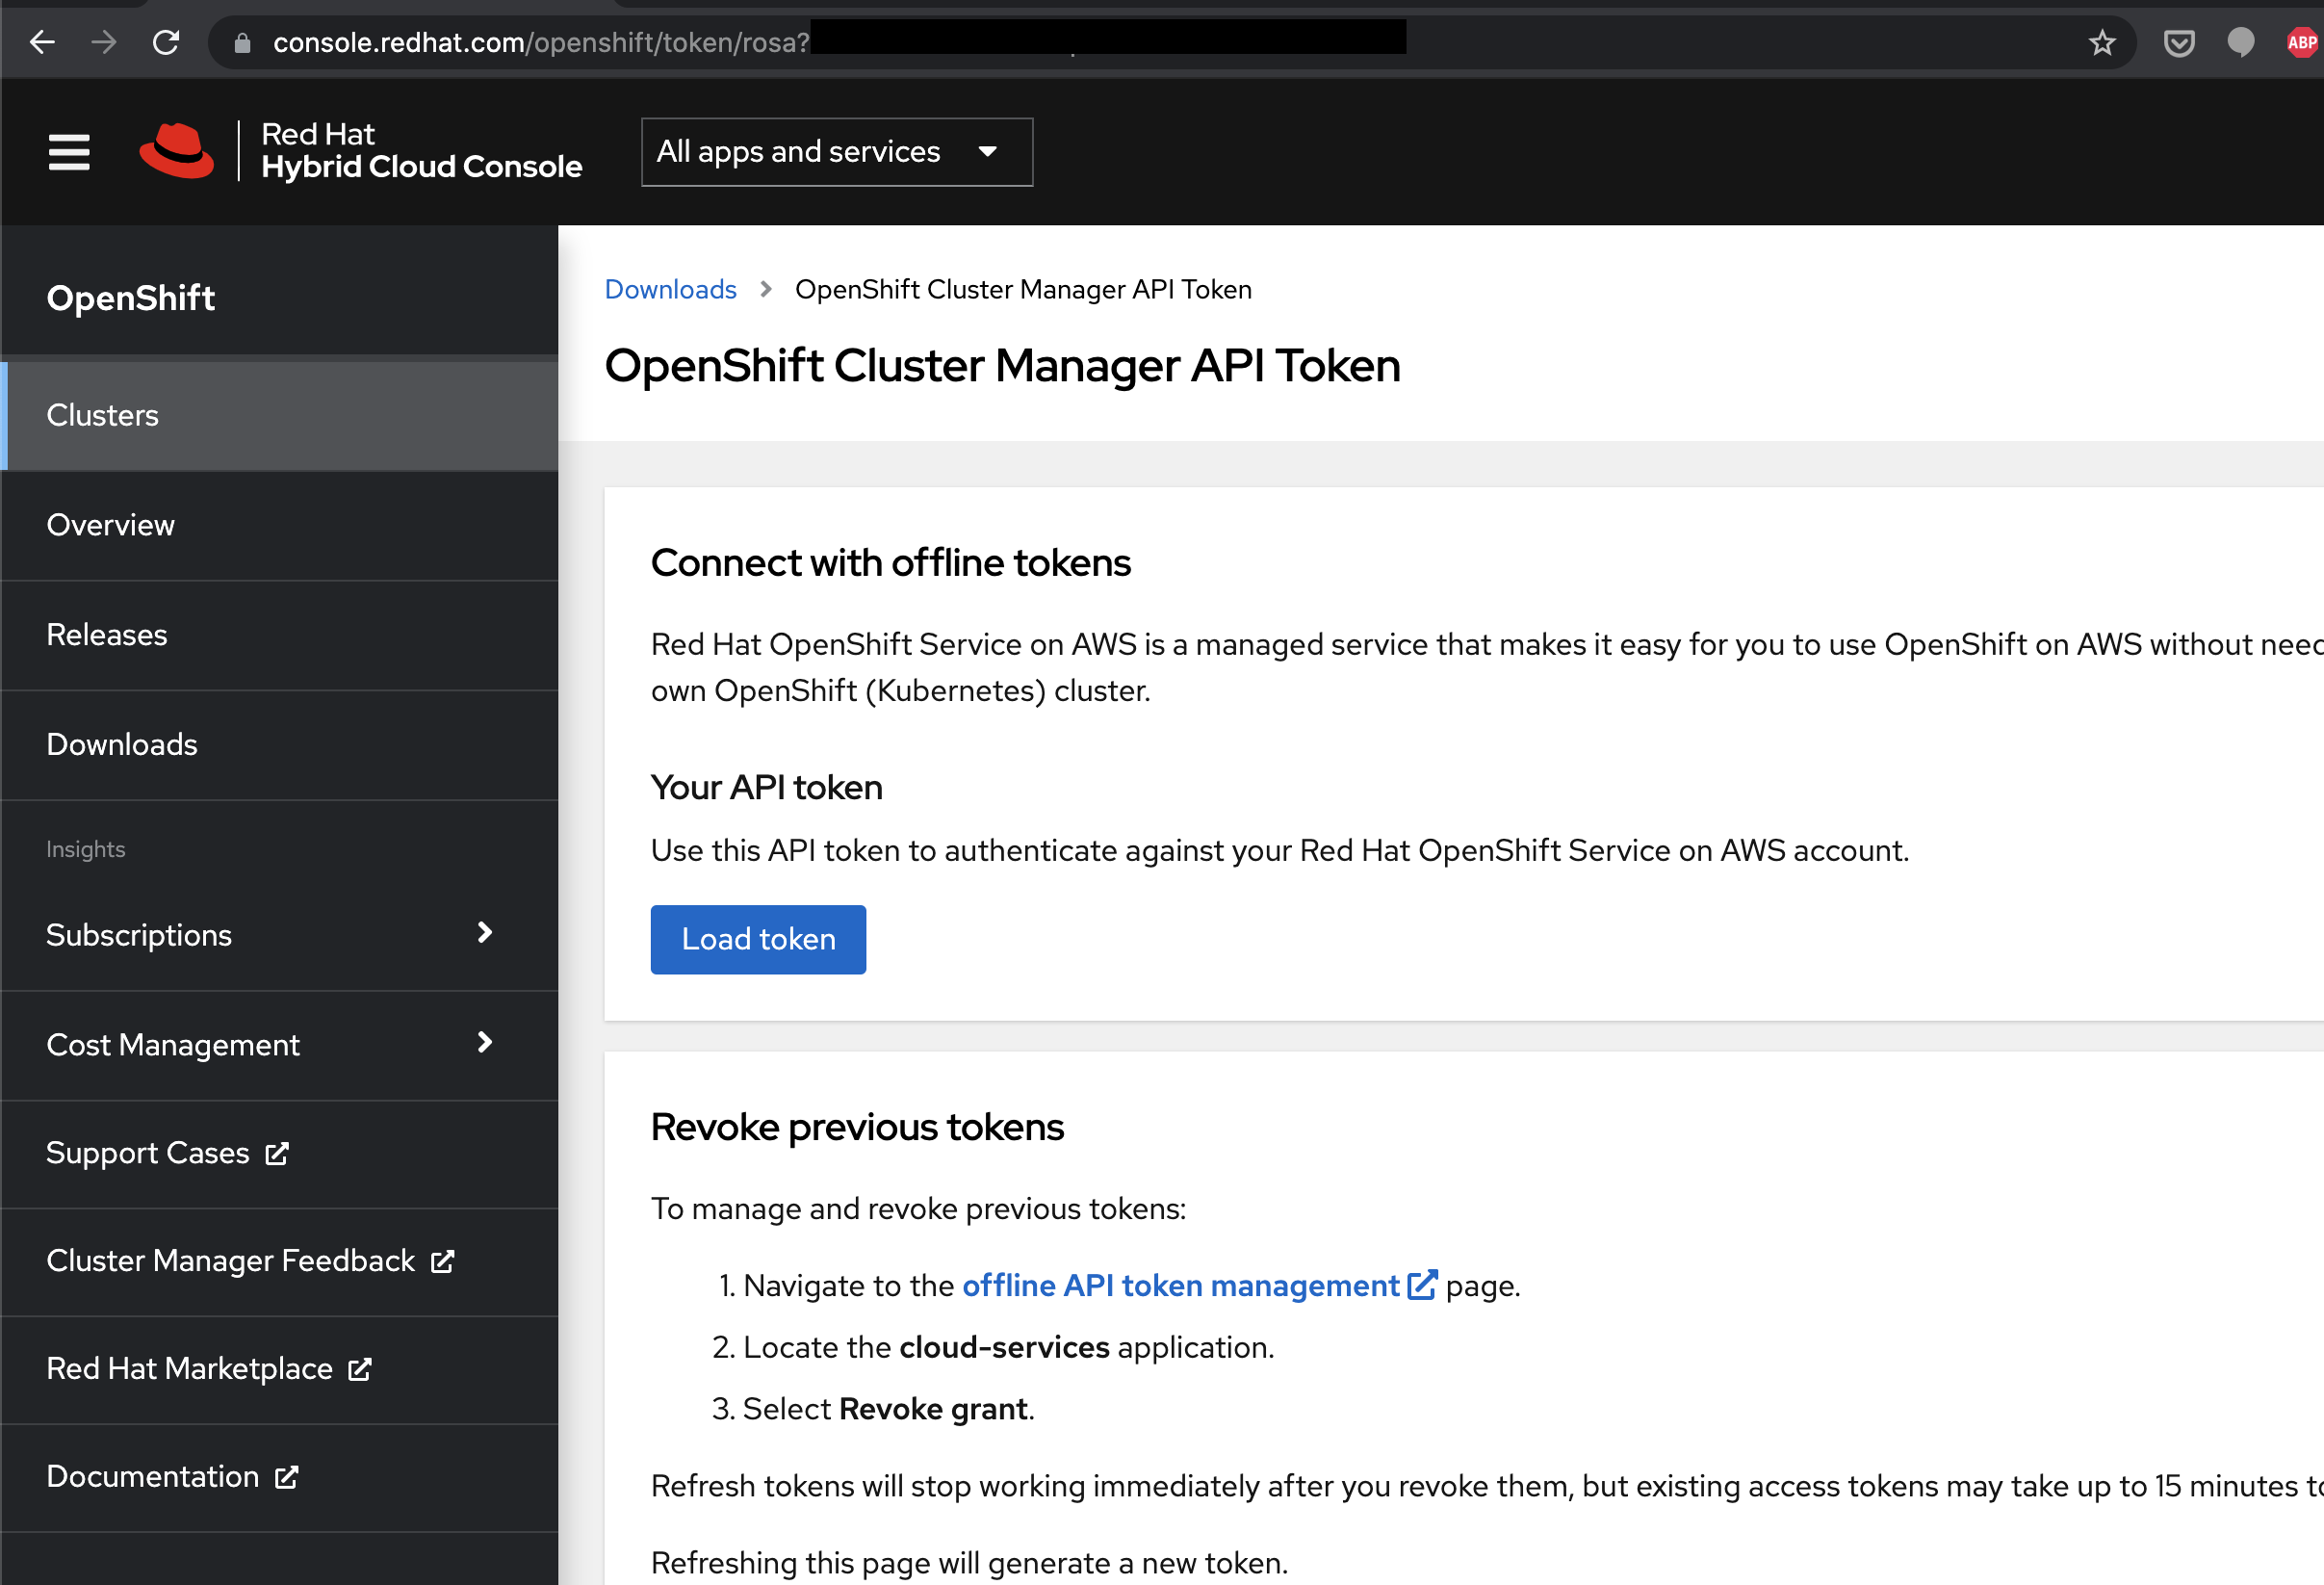
If we have an account we can create the needed offline access token at https://console.redhat.com/openshift/token/rosa
Click on Load Token to create one:
Now head over to the rosa CLI and login with the token:
rosa login --token="yourTokenHere(multiplelines)"
After running the command something like this should be printed out:
...
I: Logged in as 'jonashackt' on 'https://api.openshift.com'
See https://docs.openshift.com/rosa/rosa_getting_started/rosa-installing-rosa.html
Be sure to have the AWS account configured in your aws CLI in which you enabled ROSA using the console. Therefore check your Access Key and Secret:
aws configure
Now we need to check if our AWS account & Red Hat account are ready to run ROSA.
rosa whoami
Finally initalize the cluster with
rosa init
That should output something like:
$ rosa init
rosa init
I: Logged in as 'jonashackt' on 'https://api.openshift.com'
I: Validating AWS credentials...
I: AWS credentials are valid!
I: Validating SCP policies...
I: AWS SCP policies ok
I: Validating AWS quota...
I: AWS quota ok. If cluster installation fails, validate actual AWS resource usage against https://docs.openshift.com/rosa/rosa_getting_started/rosa-required-aws-service-quotas.html
I: Ensuring cluster administrator user 'osdCcsAdmin'...
I: Admin user 'osdCcsAdmin' created successfully!
I: Validating SCP policies for 'osdCcsAdmin'...
I: AWS SCP policies ok
I: Validating cluster creation...
I: Cluster creation valid
I: Verifying whether OpenShift command-line tool is available...
W: OpenShift command-line tool is not installed.
Run 'rosa download oc' to download the latest version, then add it to your PATH.
Sadly simply running brew install openshift-cli isn't enough, because this will result in rosa CLI complaining about the oc version like this:
rosa verify oc

I: Verifying whether OpenShift command-line tool is available...
W: Current OpenShift Client Version: v4.2.0-alpha.0-657-g51011e4
W: Your version of the OpenShift command-line tool is not supported.
Run 'rosa download oc' to download the latest version, then add it to your PATH.
And if we have a look at the brew formulae at https://formulae.brew.sh/formula/openshift-cli & https://formulae.brew.sh/api/formula/openshift-cli.json, we'll soon find the problem: The last release in the used repo is from June 2020: https://github.com/openshift/oc/releases :(((
So we have to do what the ROSA or OpenShift docs tell us - we need to download the binary and add it to our PATH manually. There's a rosa CLI shortcut for downloading the latest and matching oc version:
rosa download oc
This will download the oc binary inside a tar.gz from https://mirror.openshift.com/pub/openshift-v4/clients/ocp/latest/ into the current directory. Unpack it and put the oc binary somewhere your $PATH is configured to look into (run echo $PATH to see these folders). On a Mac I simply moved (only!) the oc binary to /usr/local/bin.
If everything went fine a oc version should print something and the rosa verify oc should stop complaining:
$ rosa verify oc

I: Verifying whether OpenShift command-line tool is available...
I: Current OpenShift Client Version: 4.8.11
see https://docs.openshift.com/rosa/rosa_getting_started/rosa-creating-cluster.html
Finally we're where we wanted to be in the first place. Let's create our cluster:
rosa create cluster --cluster-name=my-first-rosa
This should print something like this:
rosa create cluster --cluster-name=my-first-rosa
I: Creating cluster 'my-first-rosa'
I: To view a list of clusters and their status, run 'rosa list clusters'
I: Cluster 'my-first-rosa' has been created.
I: Once the cluster is installed you will need to add an Identity Provider before you can login into the cluster. See 'rosa create idp --help' for more information.
I: To determine when your cluster is Ready, run 'rosa describe cluster -c my-first-rosa'.
I: To watch your cluster installation logs, run 'rosa logs install -c my-first-rosa --watch'.
Name:                       my-first-rosa
ID:                         somecoolidhere
External ID:
OpenShift Version:
Channel Group:              stable
DNS:                        my-first-rosa.dt1y.p1.openshiftapps.com
AWS Account:                12345678
API URL:
Console URL:
Region:                     eu-central-1
Multi-AZ:                   false
Nodes:
 - Master:                  3
 - Infra:                   2
 - Compute:                 2
Network:
 - Service CIDR:            172.30.0.0/16
 - Machine CIDR:            10.0.0.0/16
 - Pod CIDR:                10.128.0.0/14
 - Host Prefix:             /23
State:                      pending (Preparing account)
Private:                    No
Created:                    Sep 14 2021 08:16:54 UTC
Details Page:               https://console.redhat.com/openshift/details/s/9827354903759375
Show the status of the cluster with
rosa list clusters
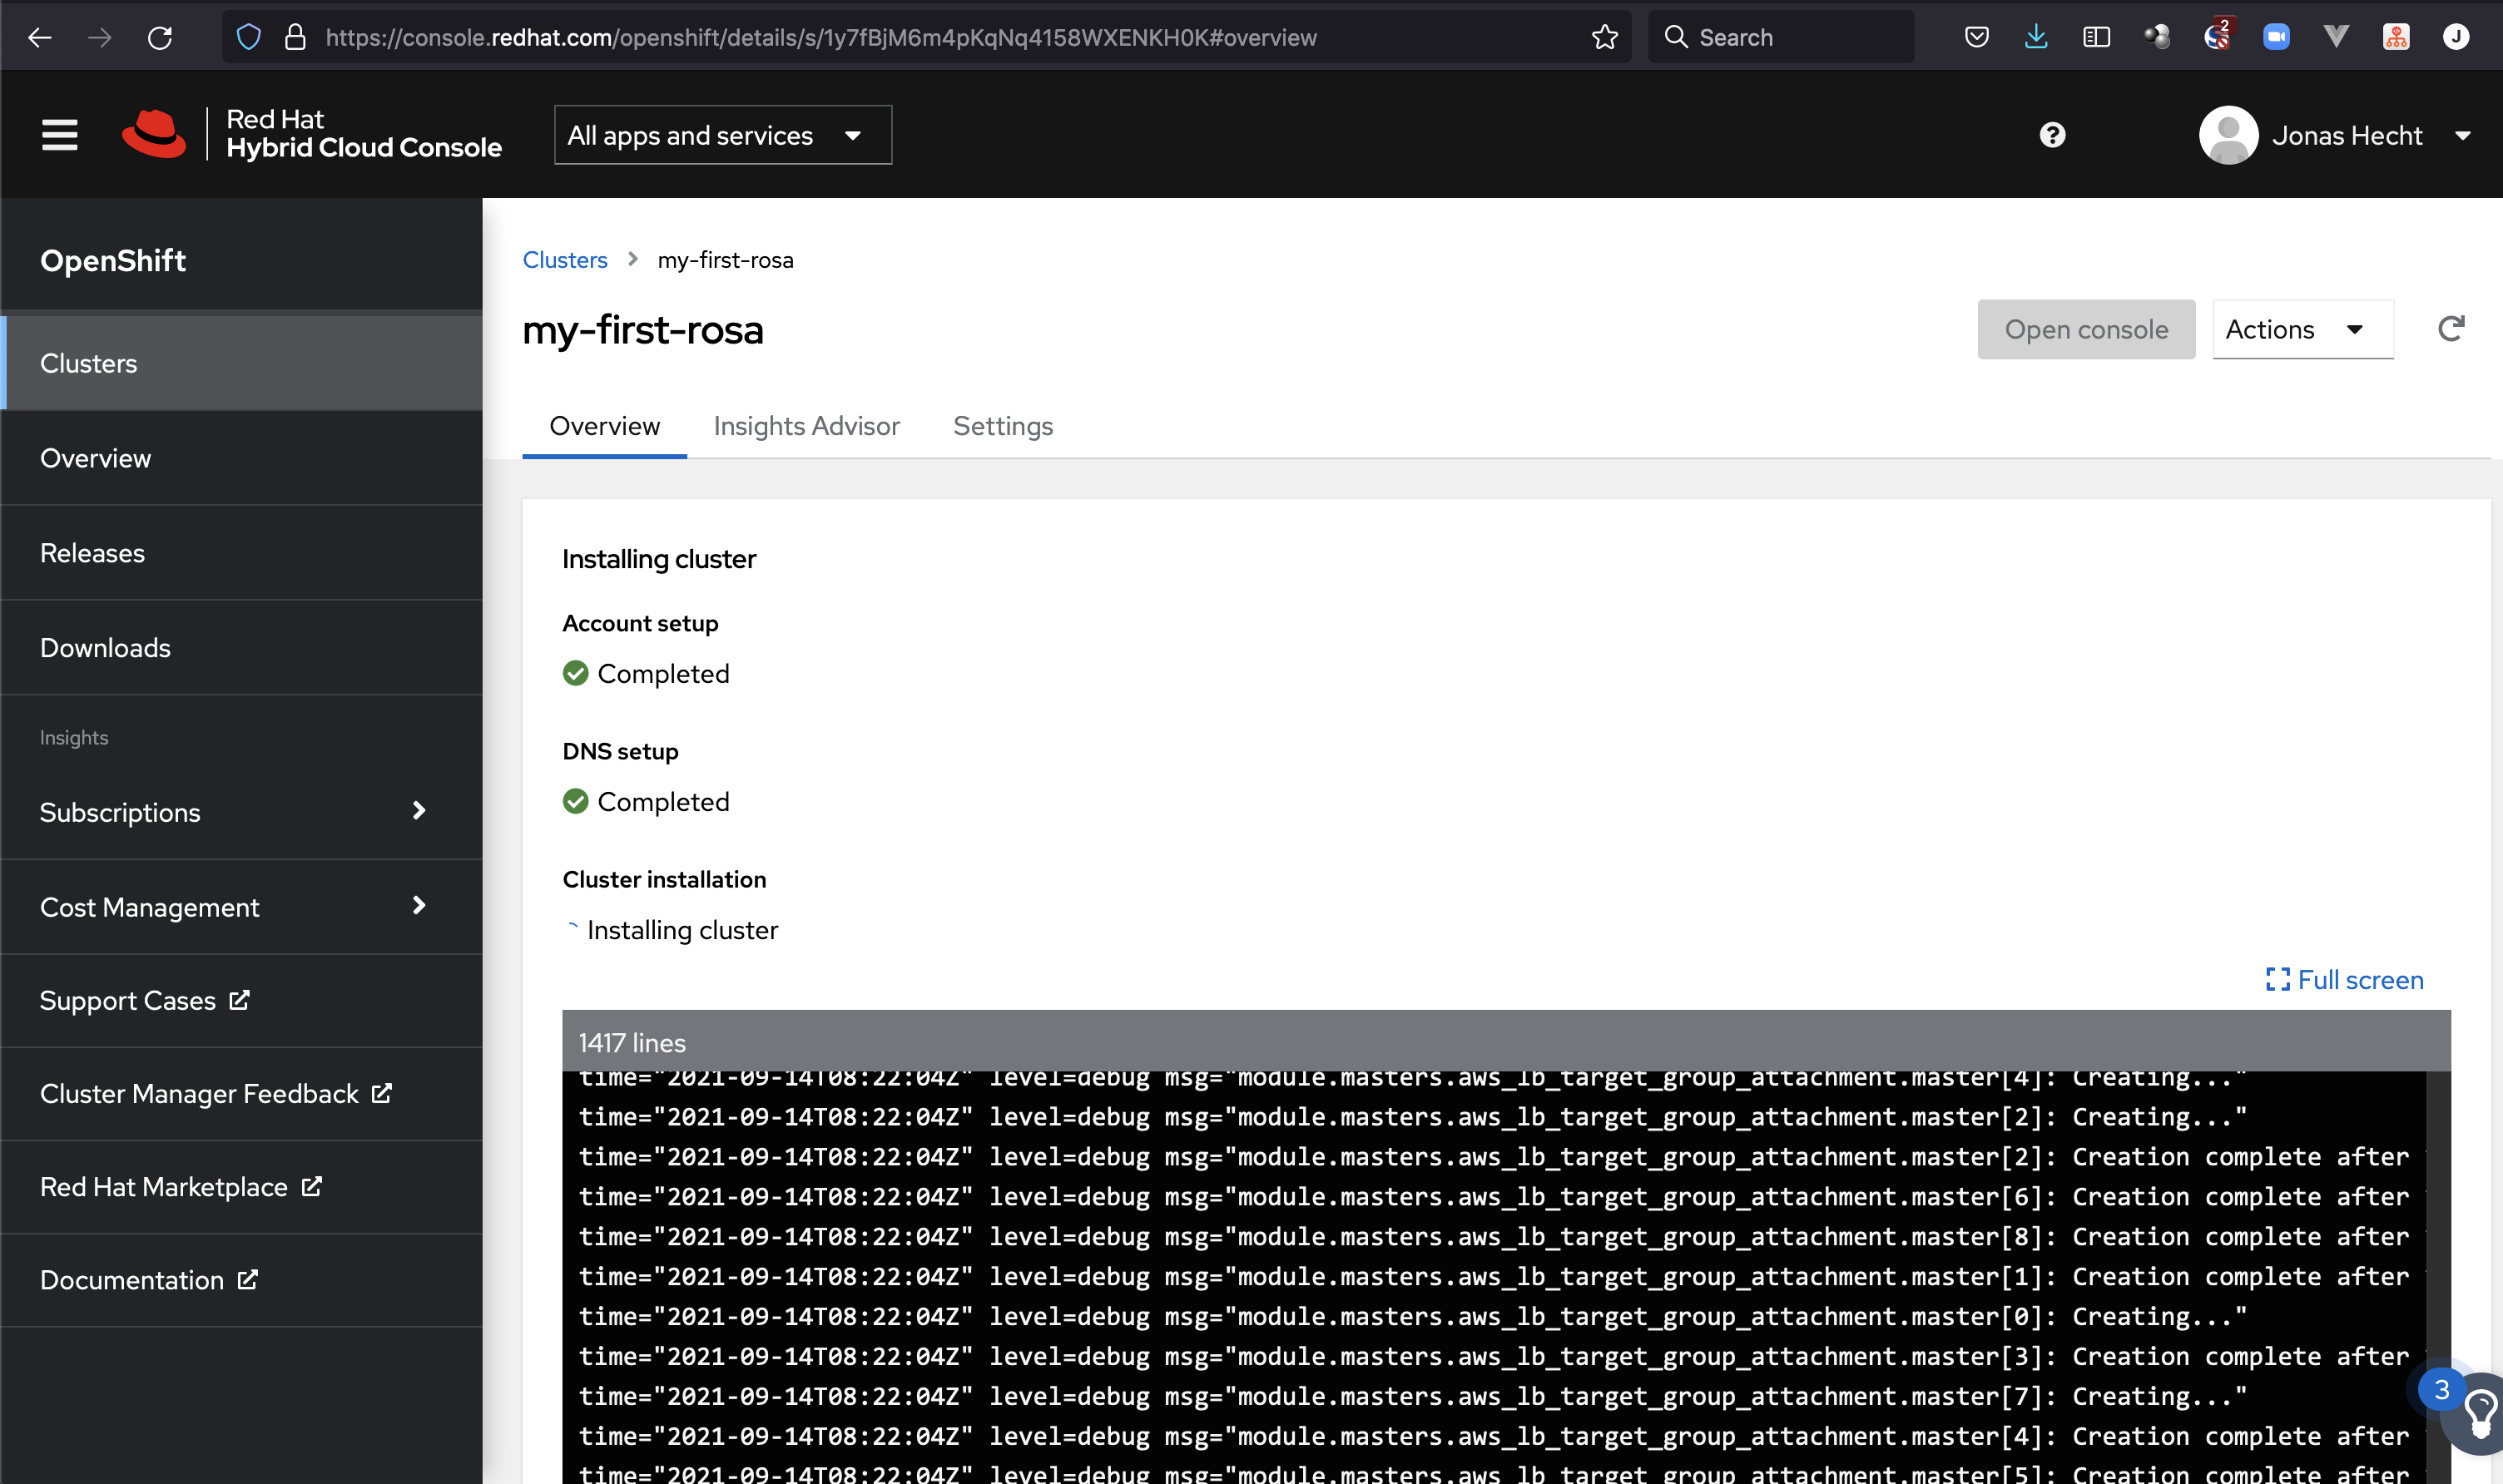
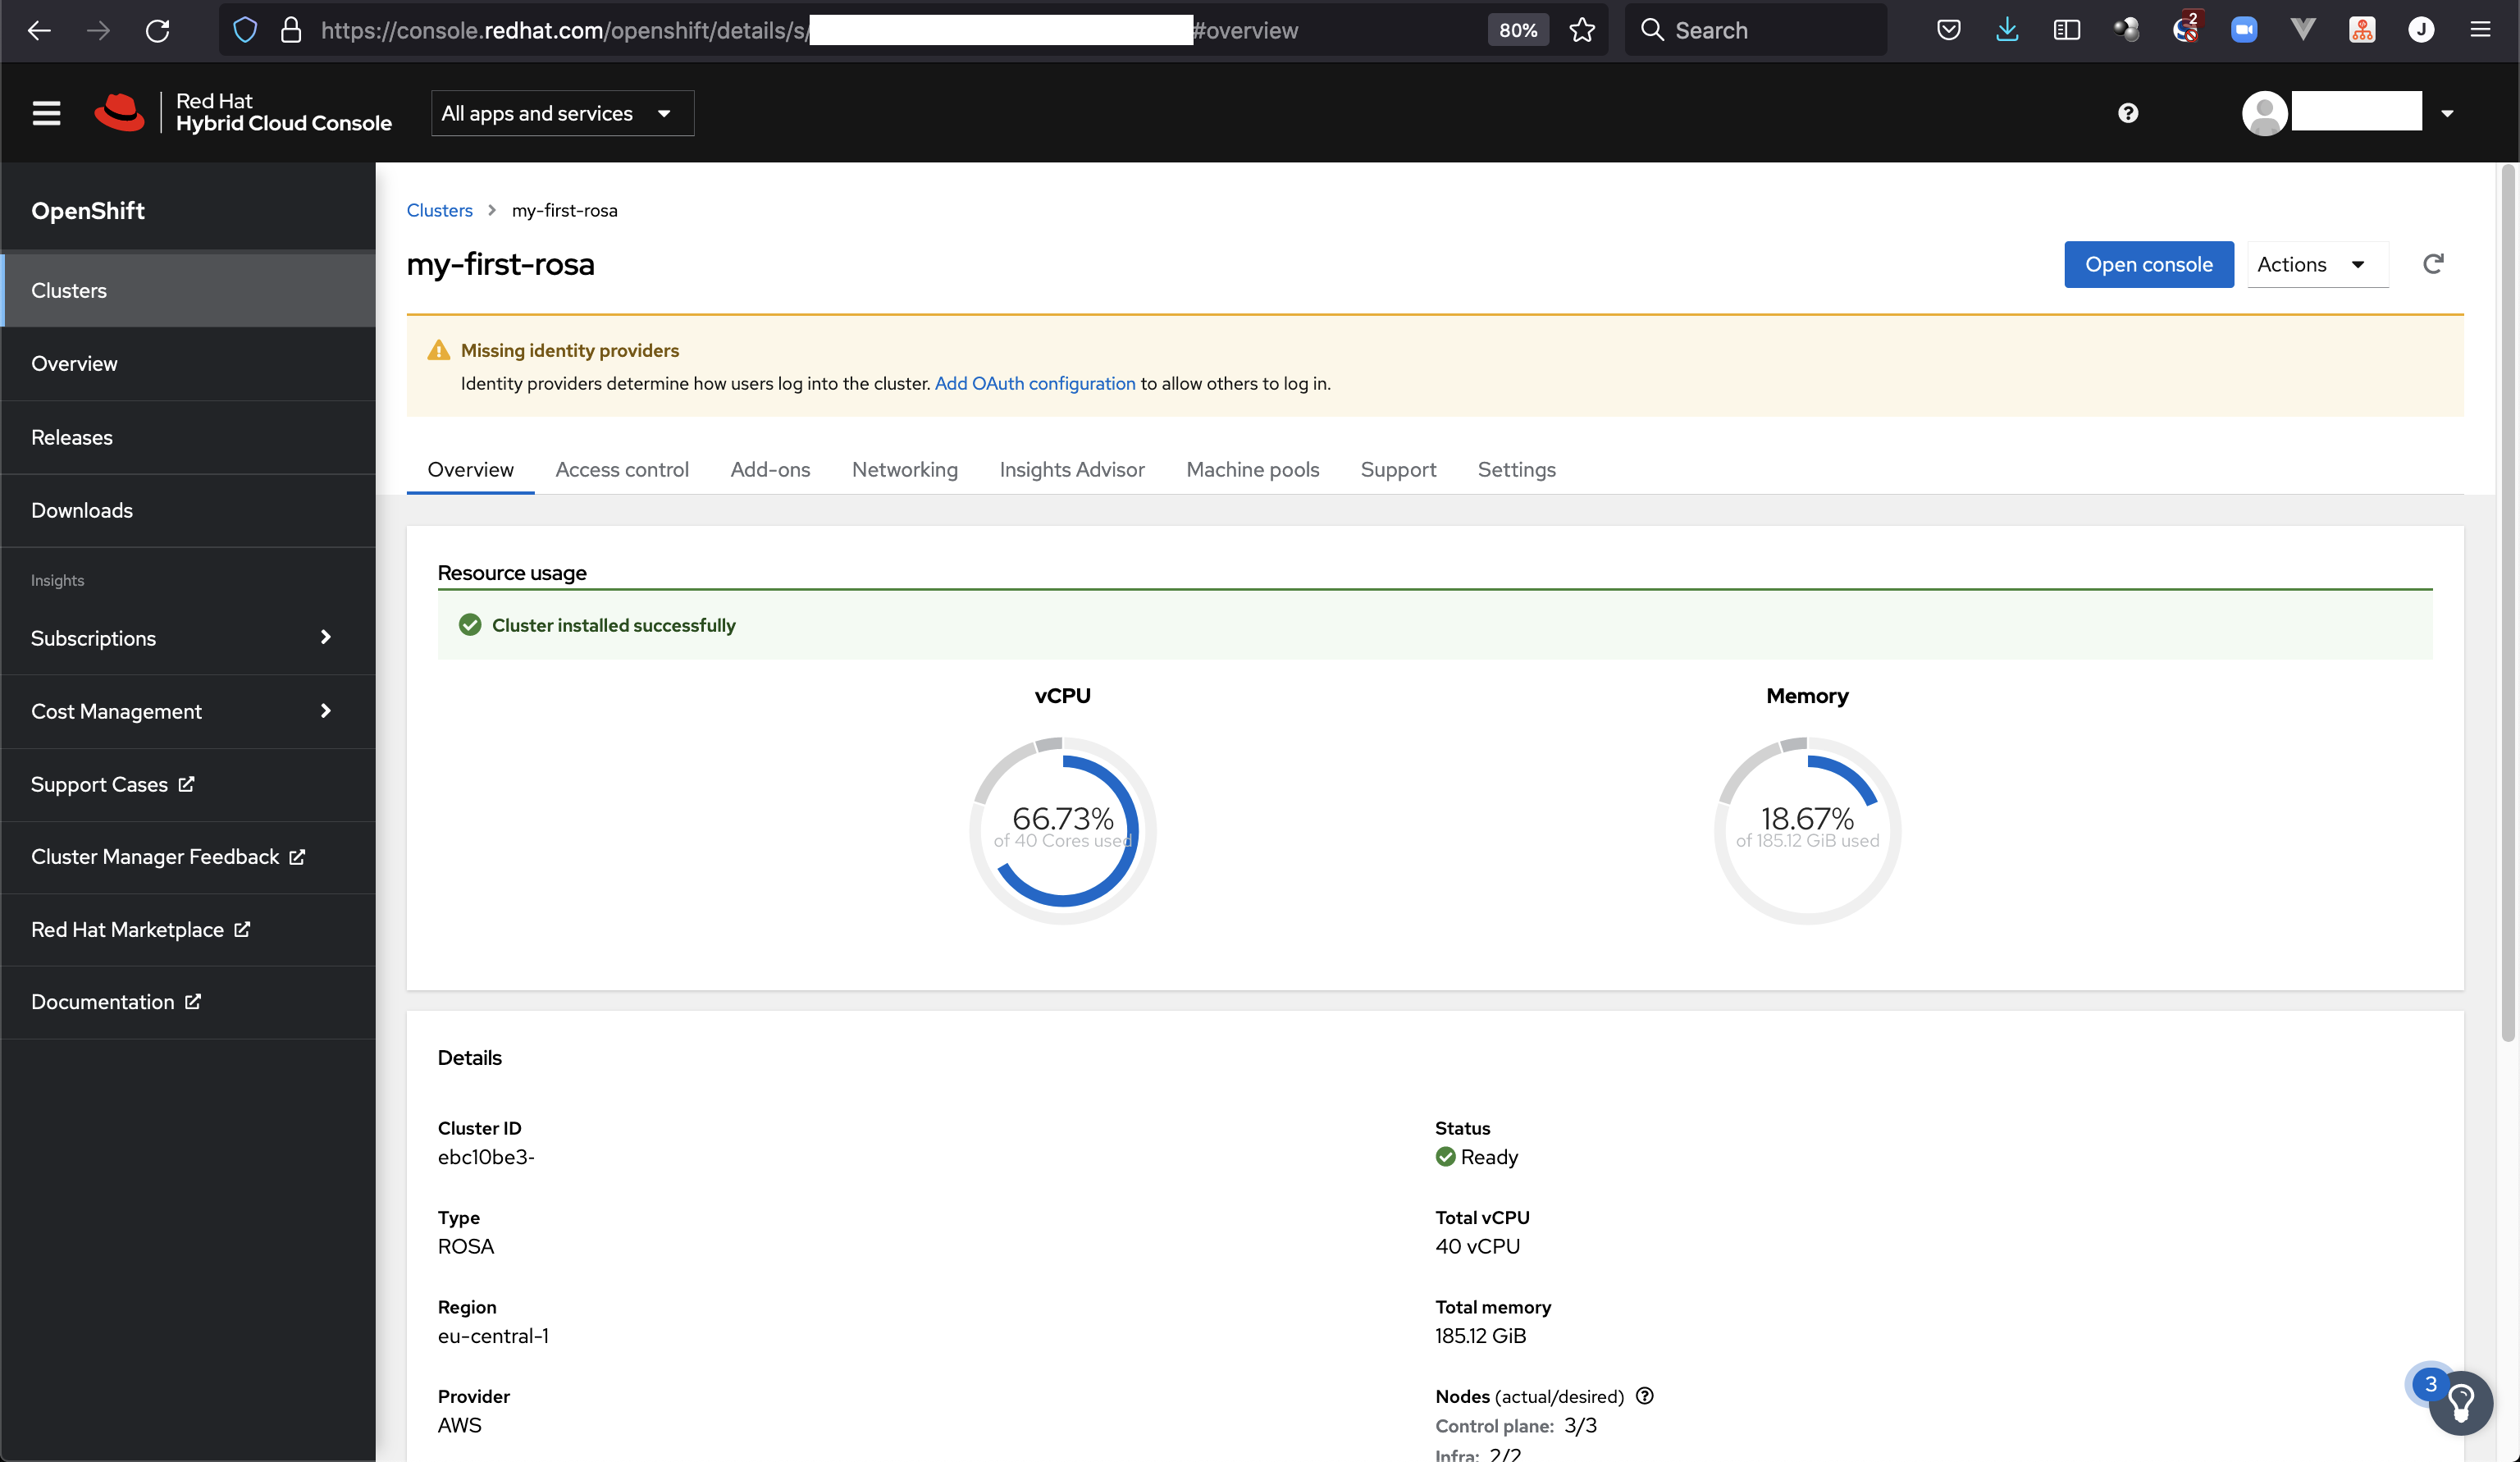
We can also use the link from the output presented in Details Page to watch the cluster creation process inside the RedHat console:
Also checking back into our AWS account at https://eu-central-1.console.aws.amazon.com/ec2/v2/home we can see the EC2 instances beeing prepared:
The cluster creation process will take it's time. My cluster needed around 30min+ to be ready. We can also follow the OpenShift installer logs using rosa CLI:
rosa logs install --cluster=my-first-rosa --watch
You will see if the installation has finised if rosa list clusters gives a ready state. Also the RedHat console switches the view like this:
See https://docs.openshift.com/rosa/rosa_getting_started/rosa-accessing-cluster.html
As a best practice, access your Red Hat OpenShift Service on AWS (ROSA) cluster using an identity provider (IDP) account. However, the cluster administrator who created the cluster can access it using the quick access procedure.
So let's create a cluster admin for conveniance:
rosa create admin --cluster=my-first-rosa
This will output a oc command to login to our new ROSA cluster with the admin user:
W: It is recommended to add an identity provider to login to this cluster. See 'rosa create idp --help' for more information.
I: Admin account has been added to cluster 'my-first-rosa'.
I: Please securely store this generated password. If you lose this password you can delete and recreate the cluster admin user.
I: To login, run the following command:

   oc login https://api.my-first-rosa.dt1y.p1.openshiftapps.com:6443 --username cluster-admin --password nice-password-here

I: It may take up to a minute for the account to become active.
Note this password - you'll need it later :)
With that we can access our new ROSA cluster via oc or kubectl CLIs as we're used to from any other cluster.
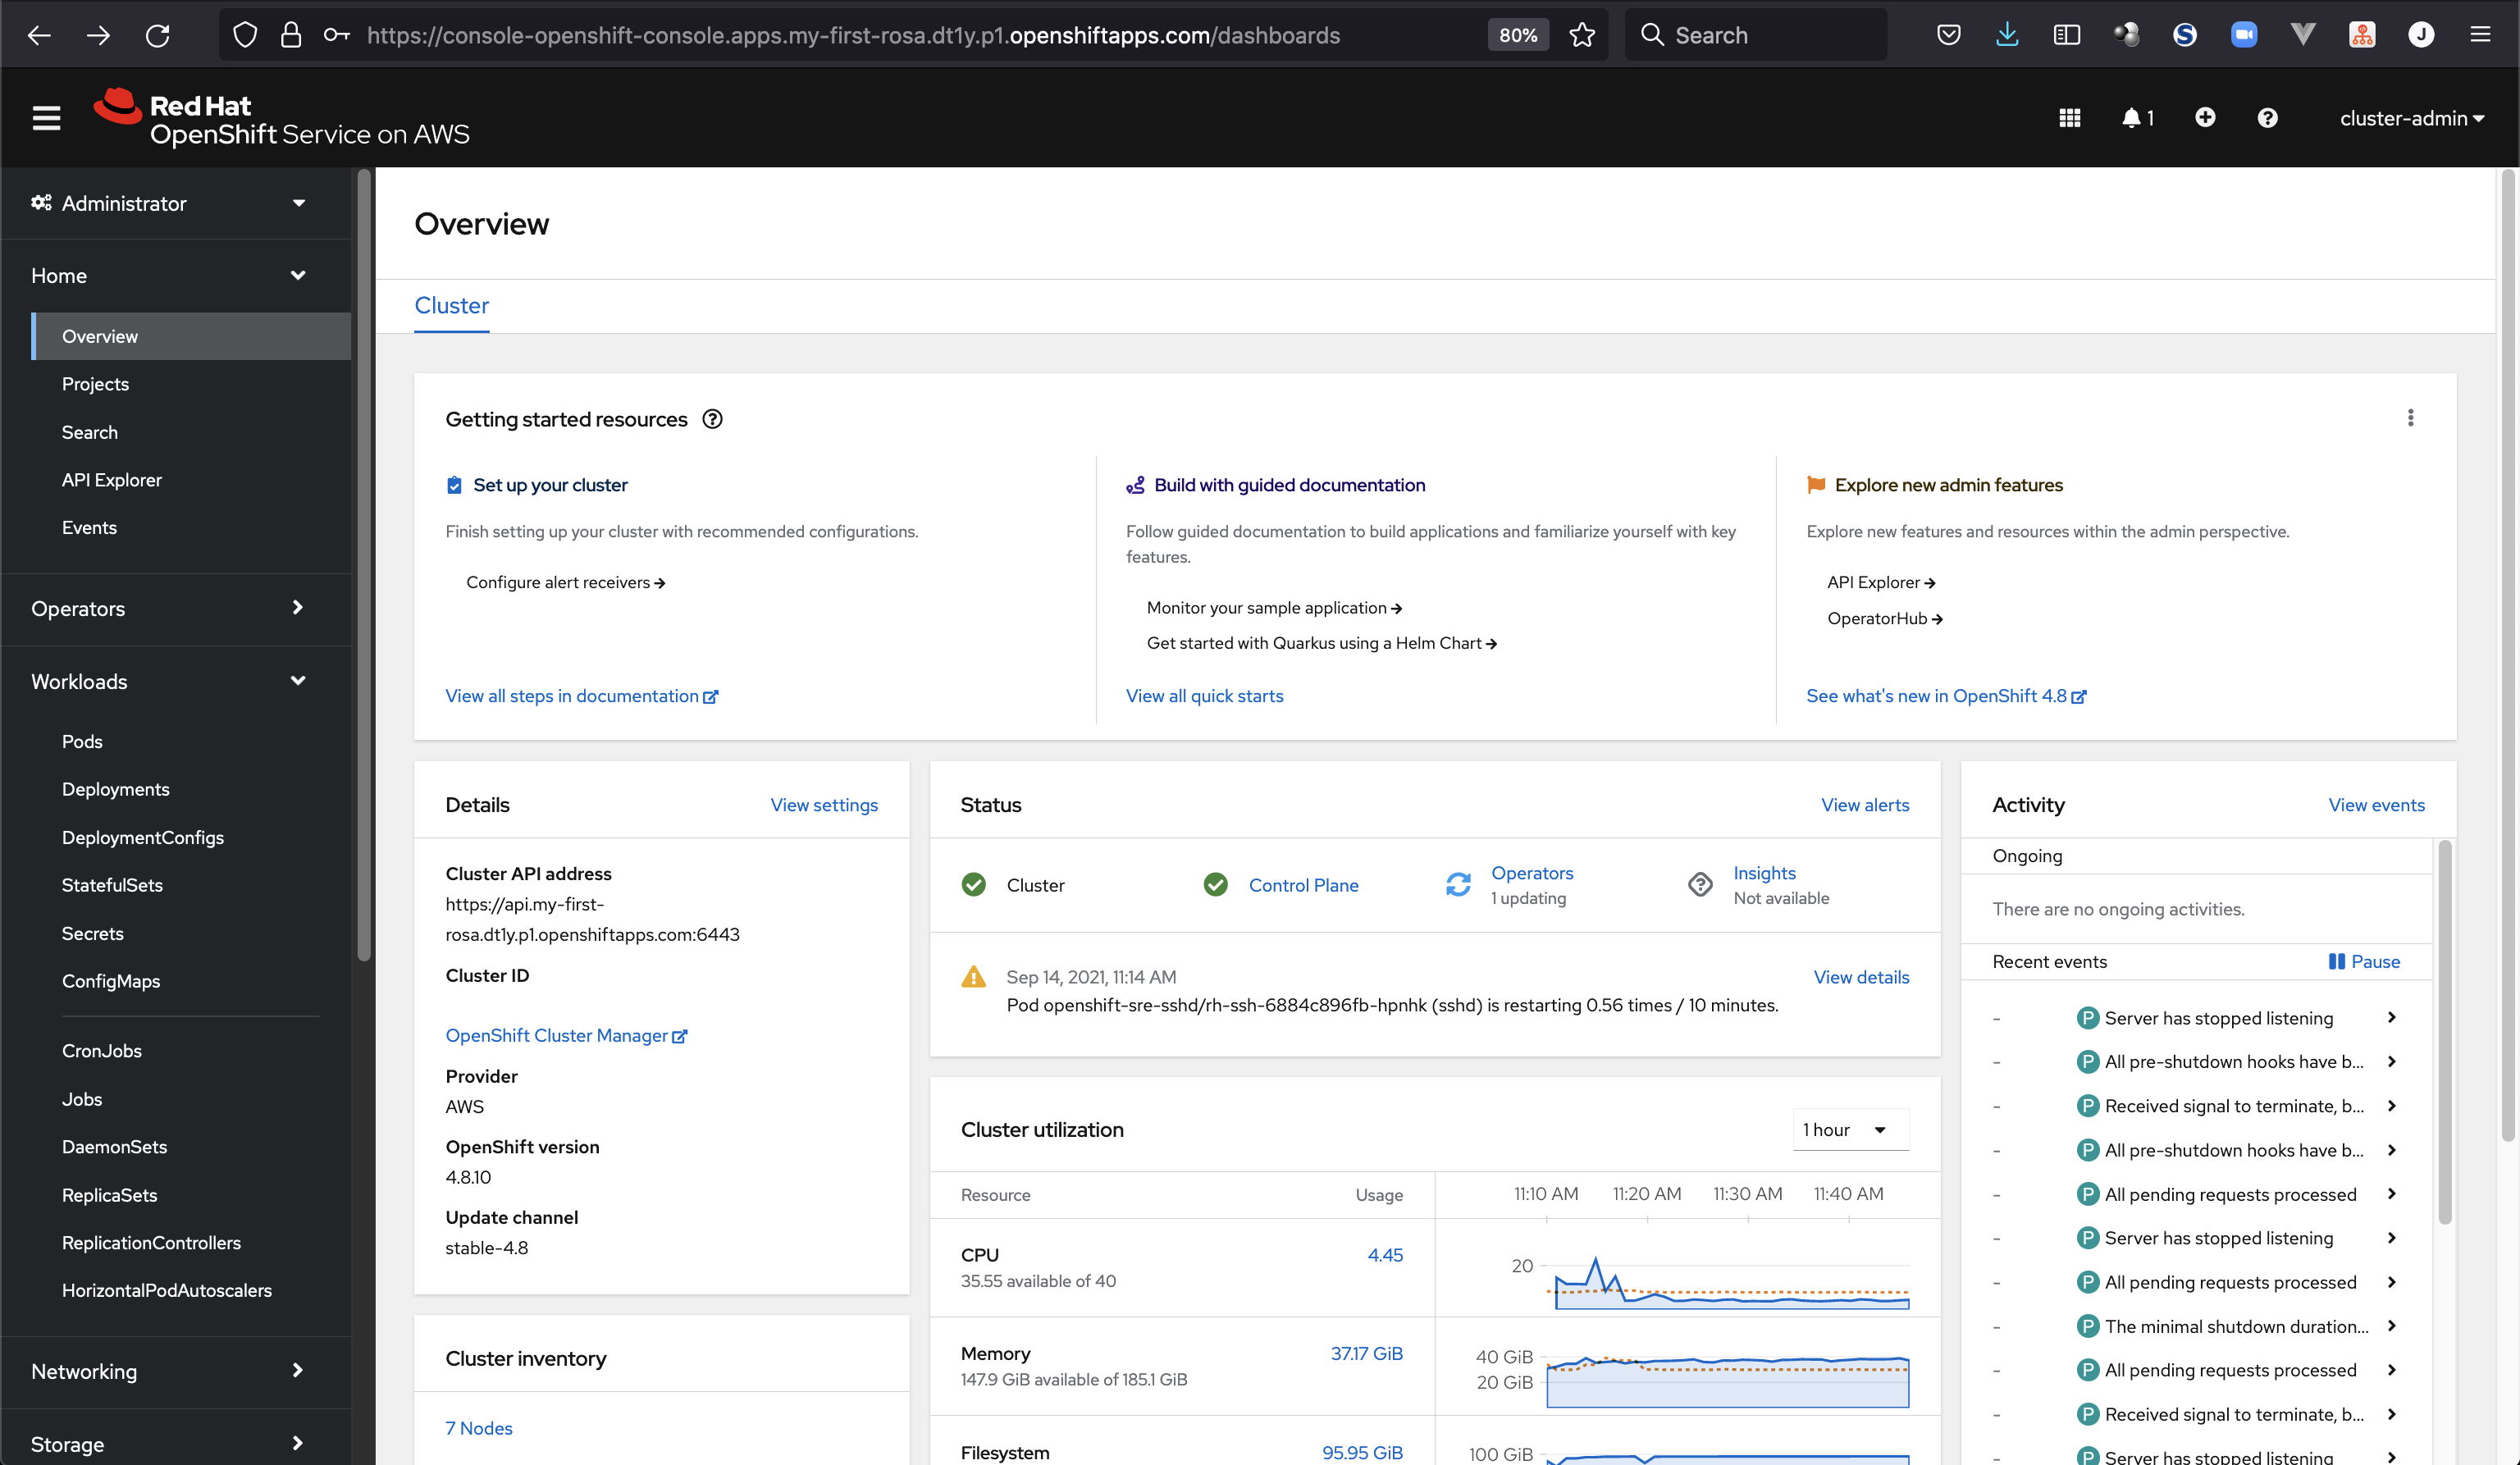
We can also open our Browser to have a look into the cluster dashboard at https://console-openshift-console.apps.my-first-rosa.dt1y.p1.openshiftapps.com/
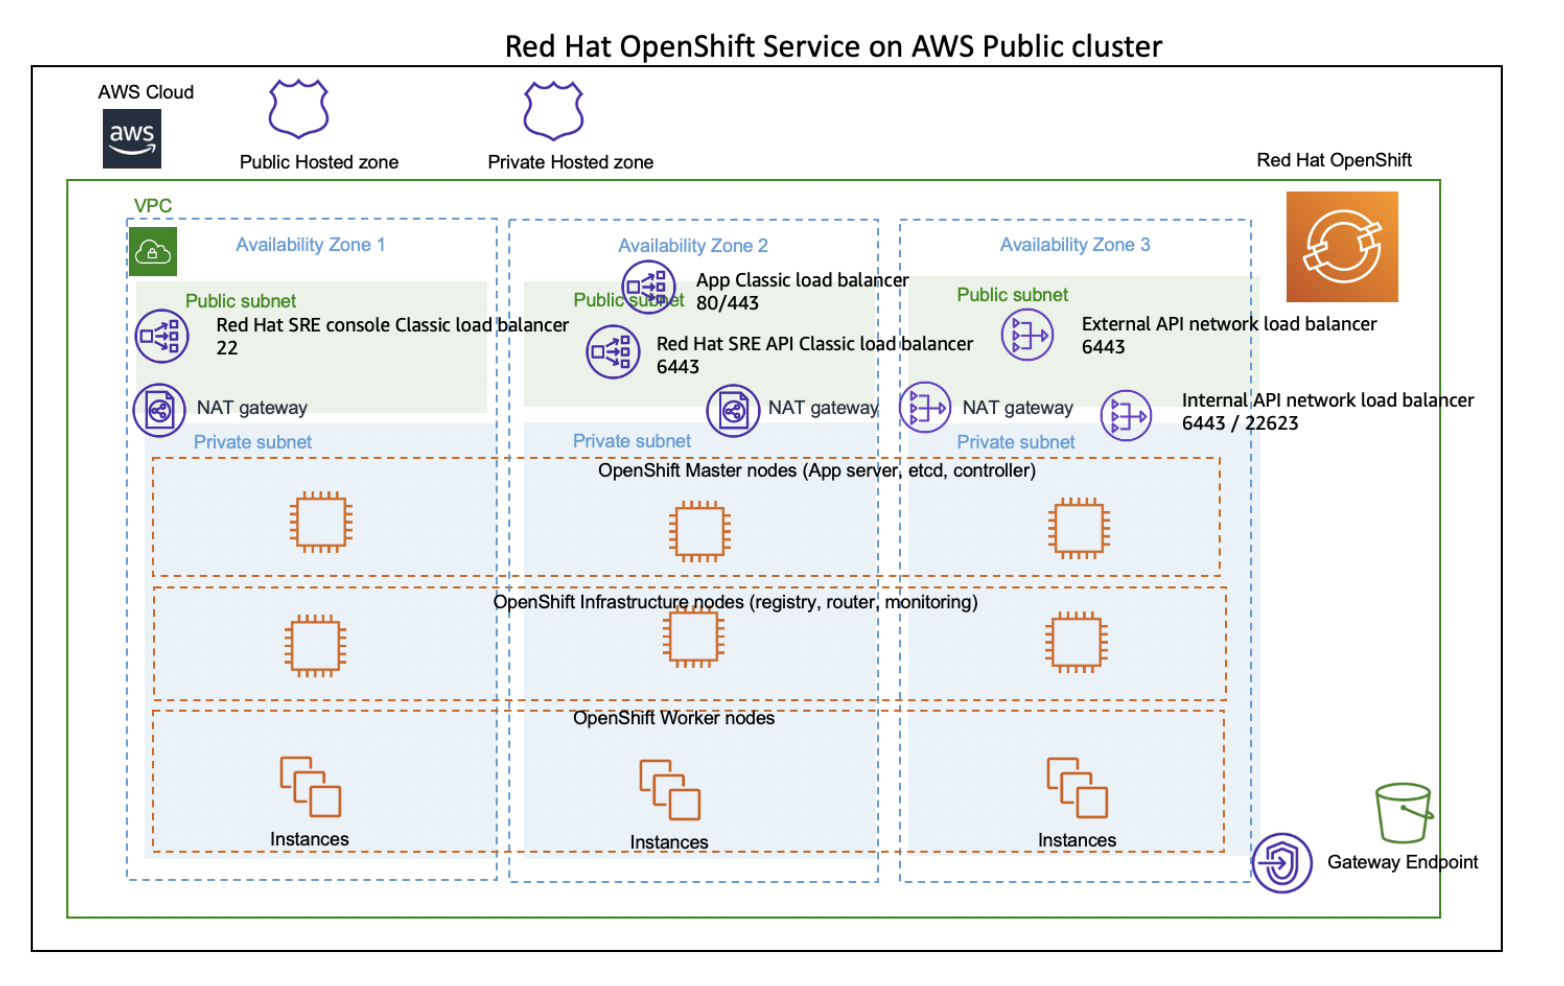
If you wonder, which types of nodes the rosa CLI installes - here a good overview blog post: https://aws.amazon.com/blogs/containers/red-hat-openshift-service-on-aws-architecture-and-networking/
The diagram tells us, that infrastructure nodes provide "Registry, Router & Monitoring":
rosa delete cluster --cluster=my-first-rosa --watch
ROSA docs: https://docs.openshift.com/rosa/welcome/index.html
https://aws.amazon.com/blogs/containers/announcing-red-hat-openshift-service-on-aws/
https://aws.amazon.com/quickstart/architecture/openshift/
Every step with rosa CLI https://docs.openshift.com/rosa/rosa_cli/rosa-get-started-cli.html#rosa-using-bash-script_rosa-getting-started-cli
