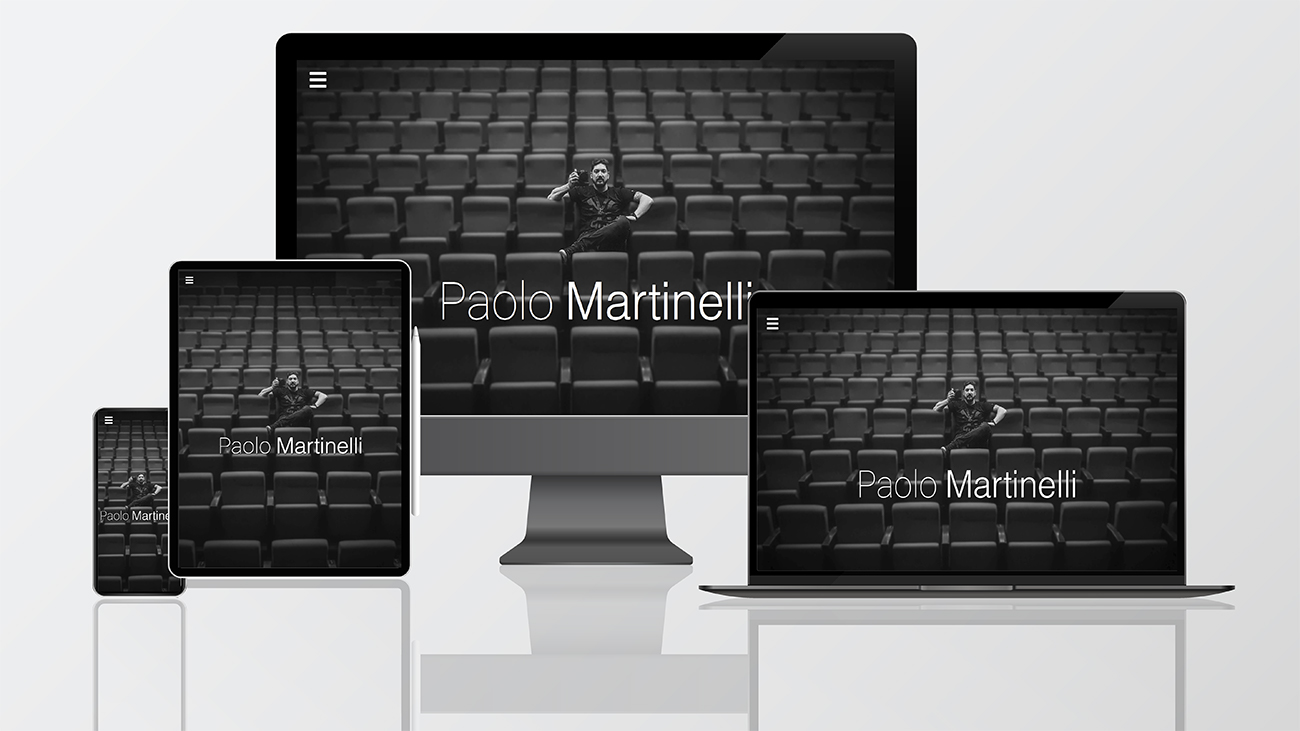
For my Full Stack Framework Milestone Project at the Code Institute, I chose to work with a real project by a Brazilian photographer. This project consists of a complete career portfolio, with photo and video work of the photographer, page of services on demand, such as video editing and photo editing service quotation. This is a project that, after evaluation at the Code Institute, will receive other technologies for the integration of new services.
You can access the website here.
- UX
- Design
- Features
- Technologies Used
- Testing
- Deployment
- Credits
- Acknowledgements
- Access the platform from your favorite equipment, such as smartphones, tablets, laptops or PCs, without loss of content.
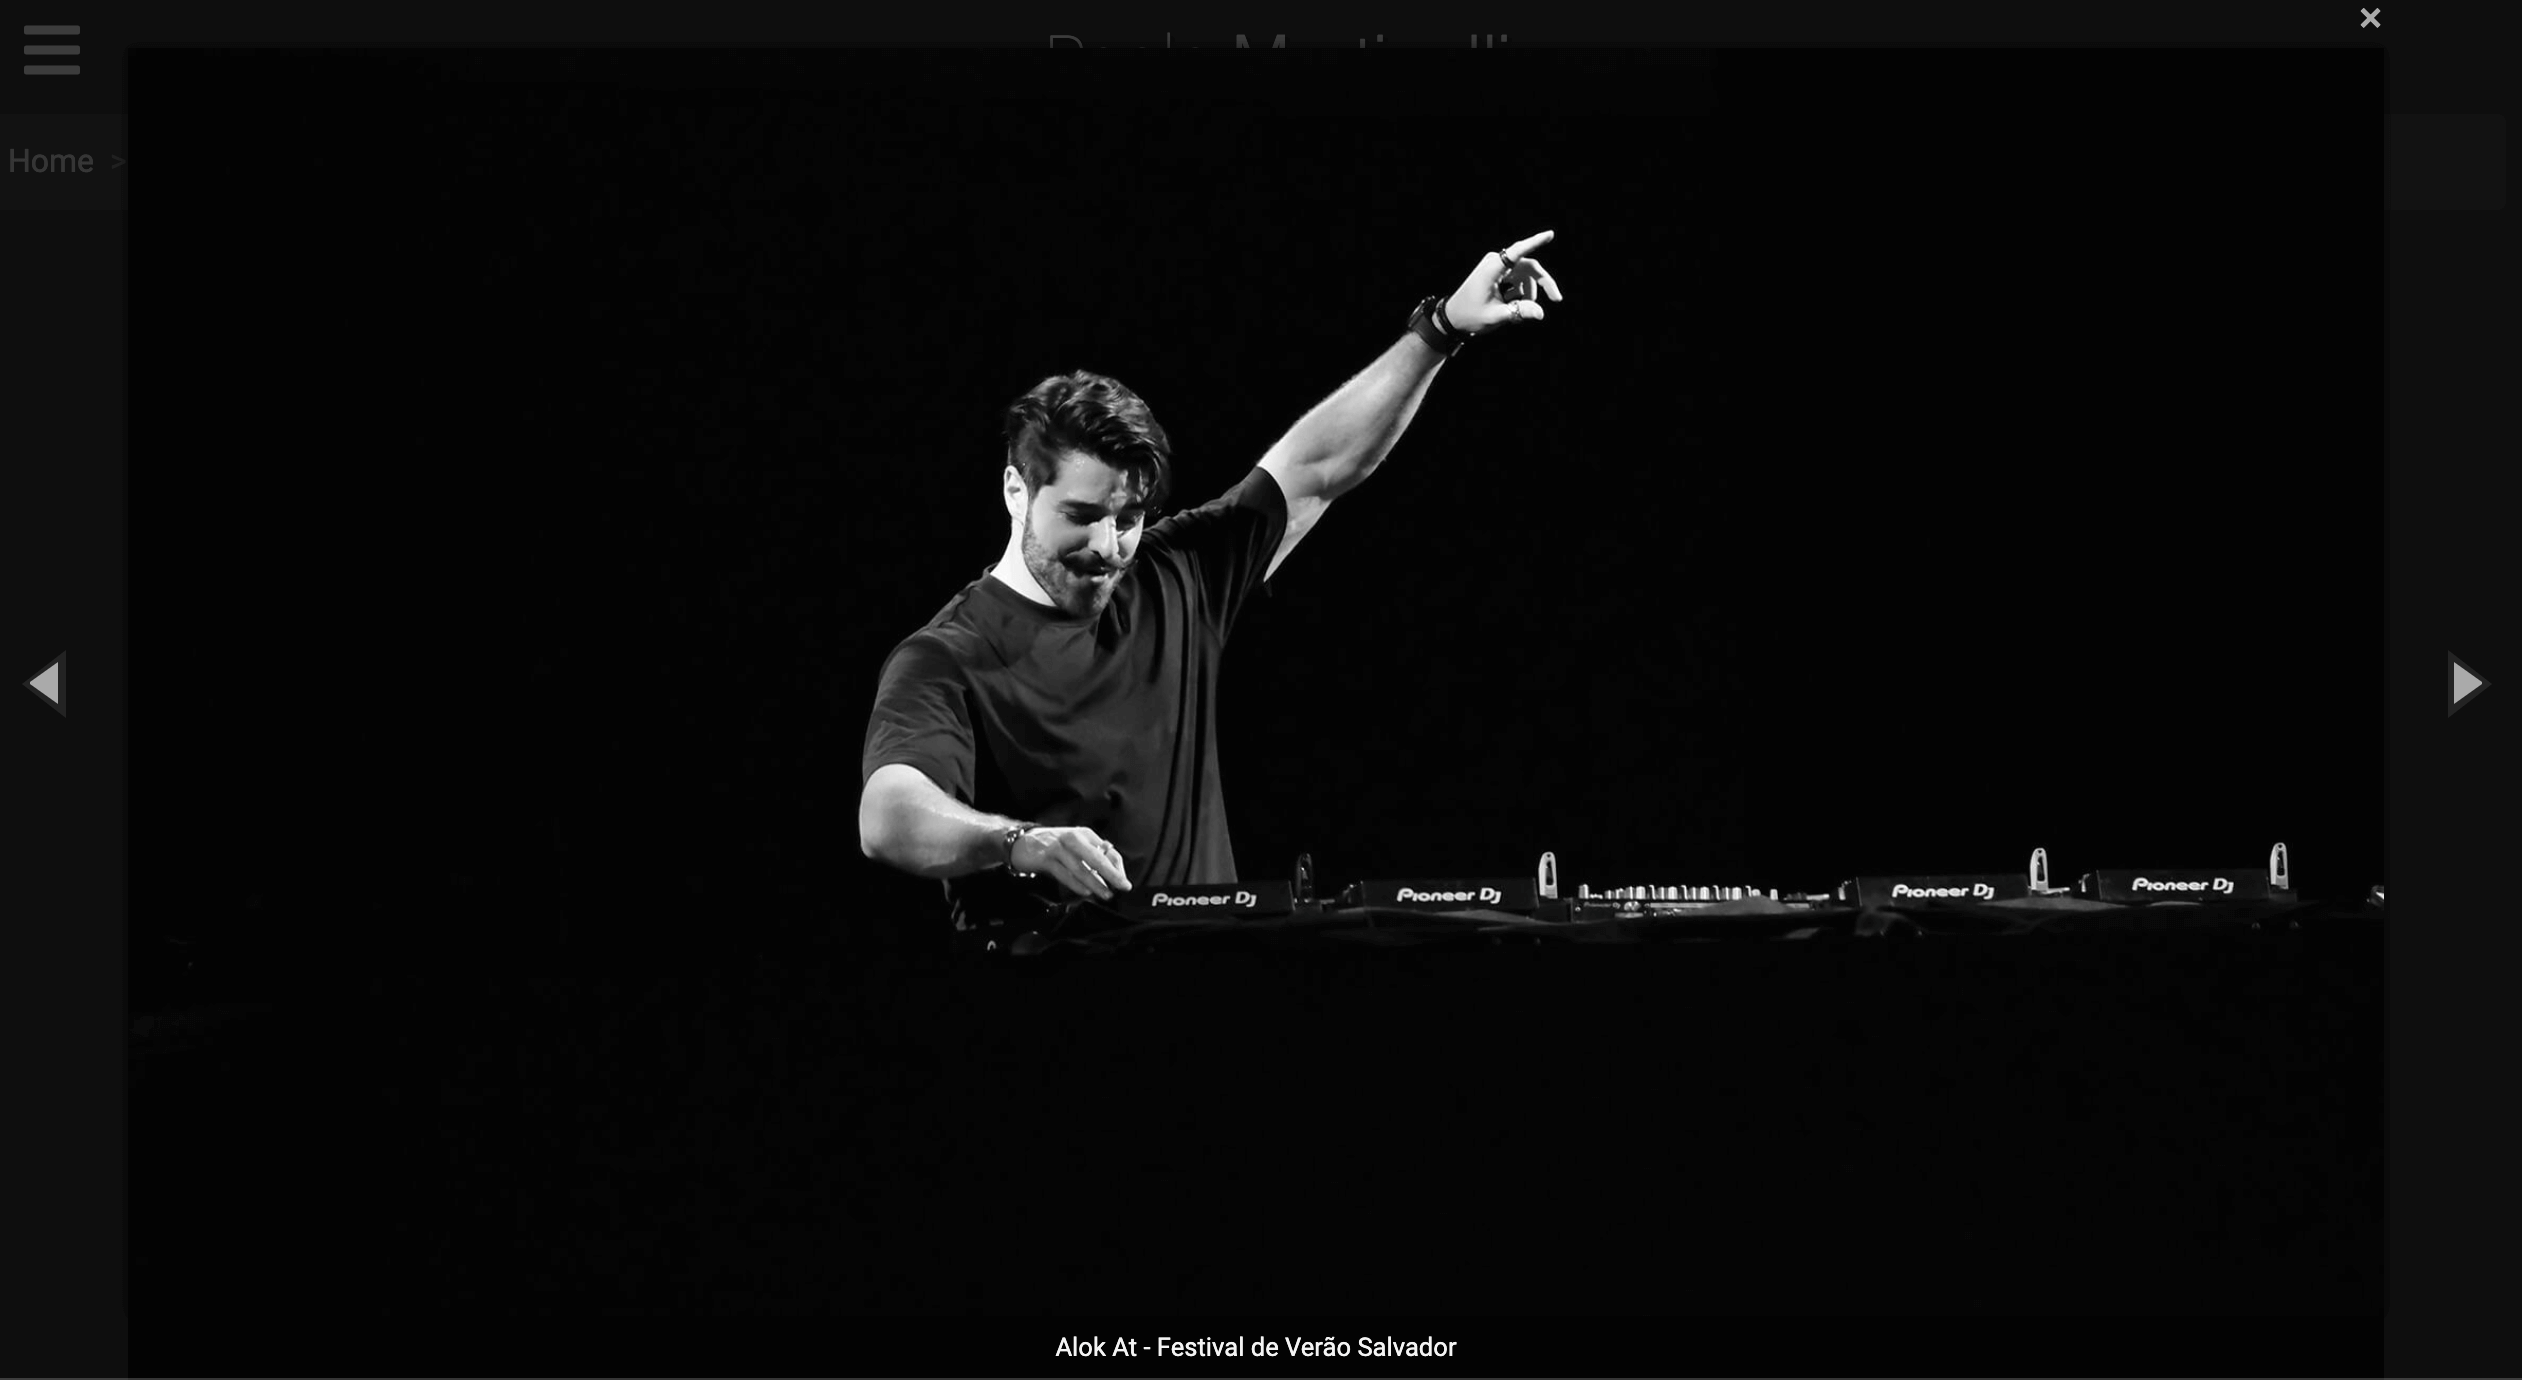
- Access the photographer's portfolio of photos, divided by category. When clicking on a photo it will be displayed in large size and caption with information about the photo.
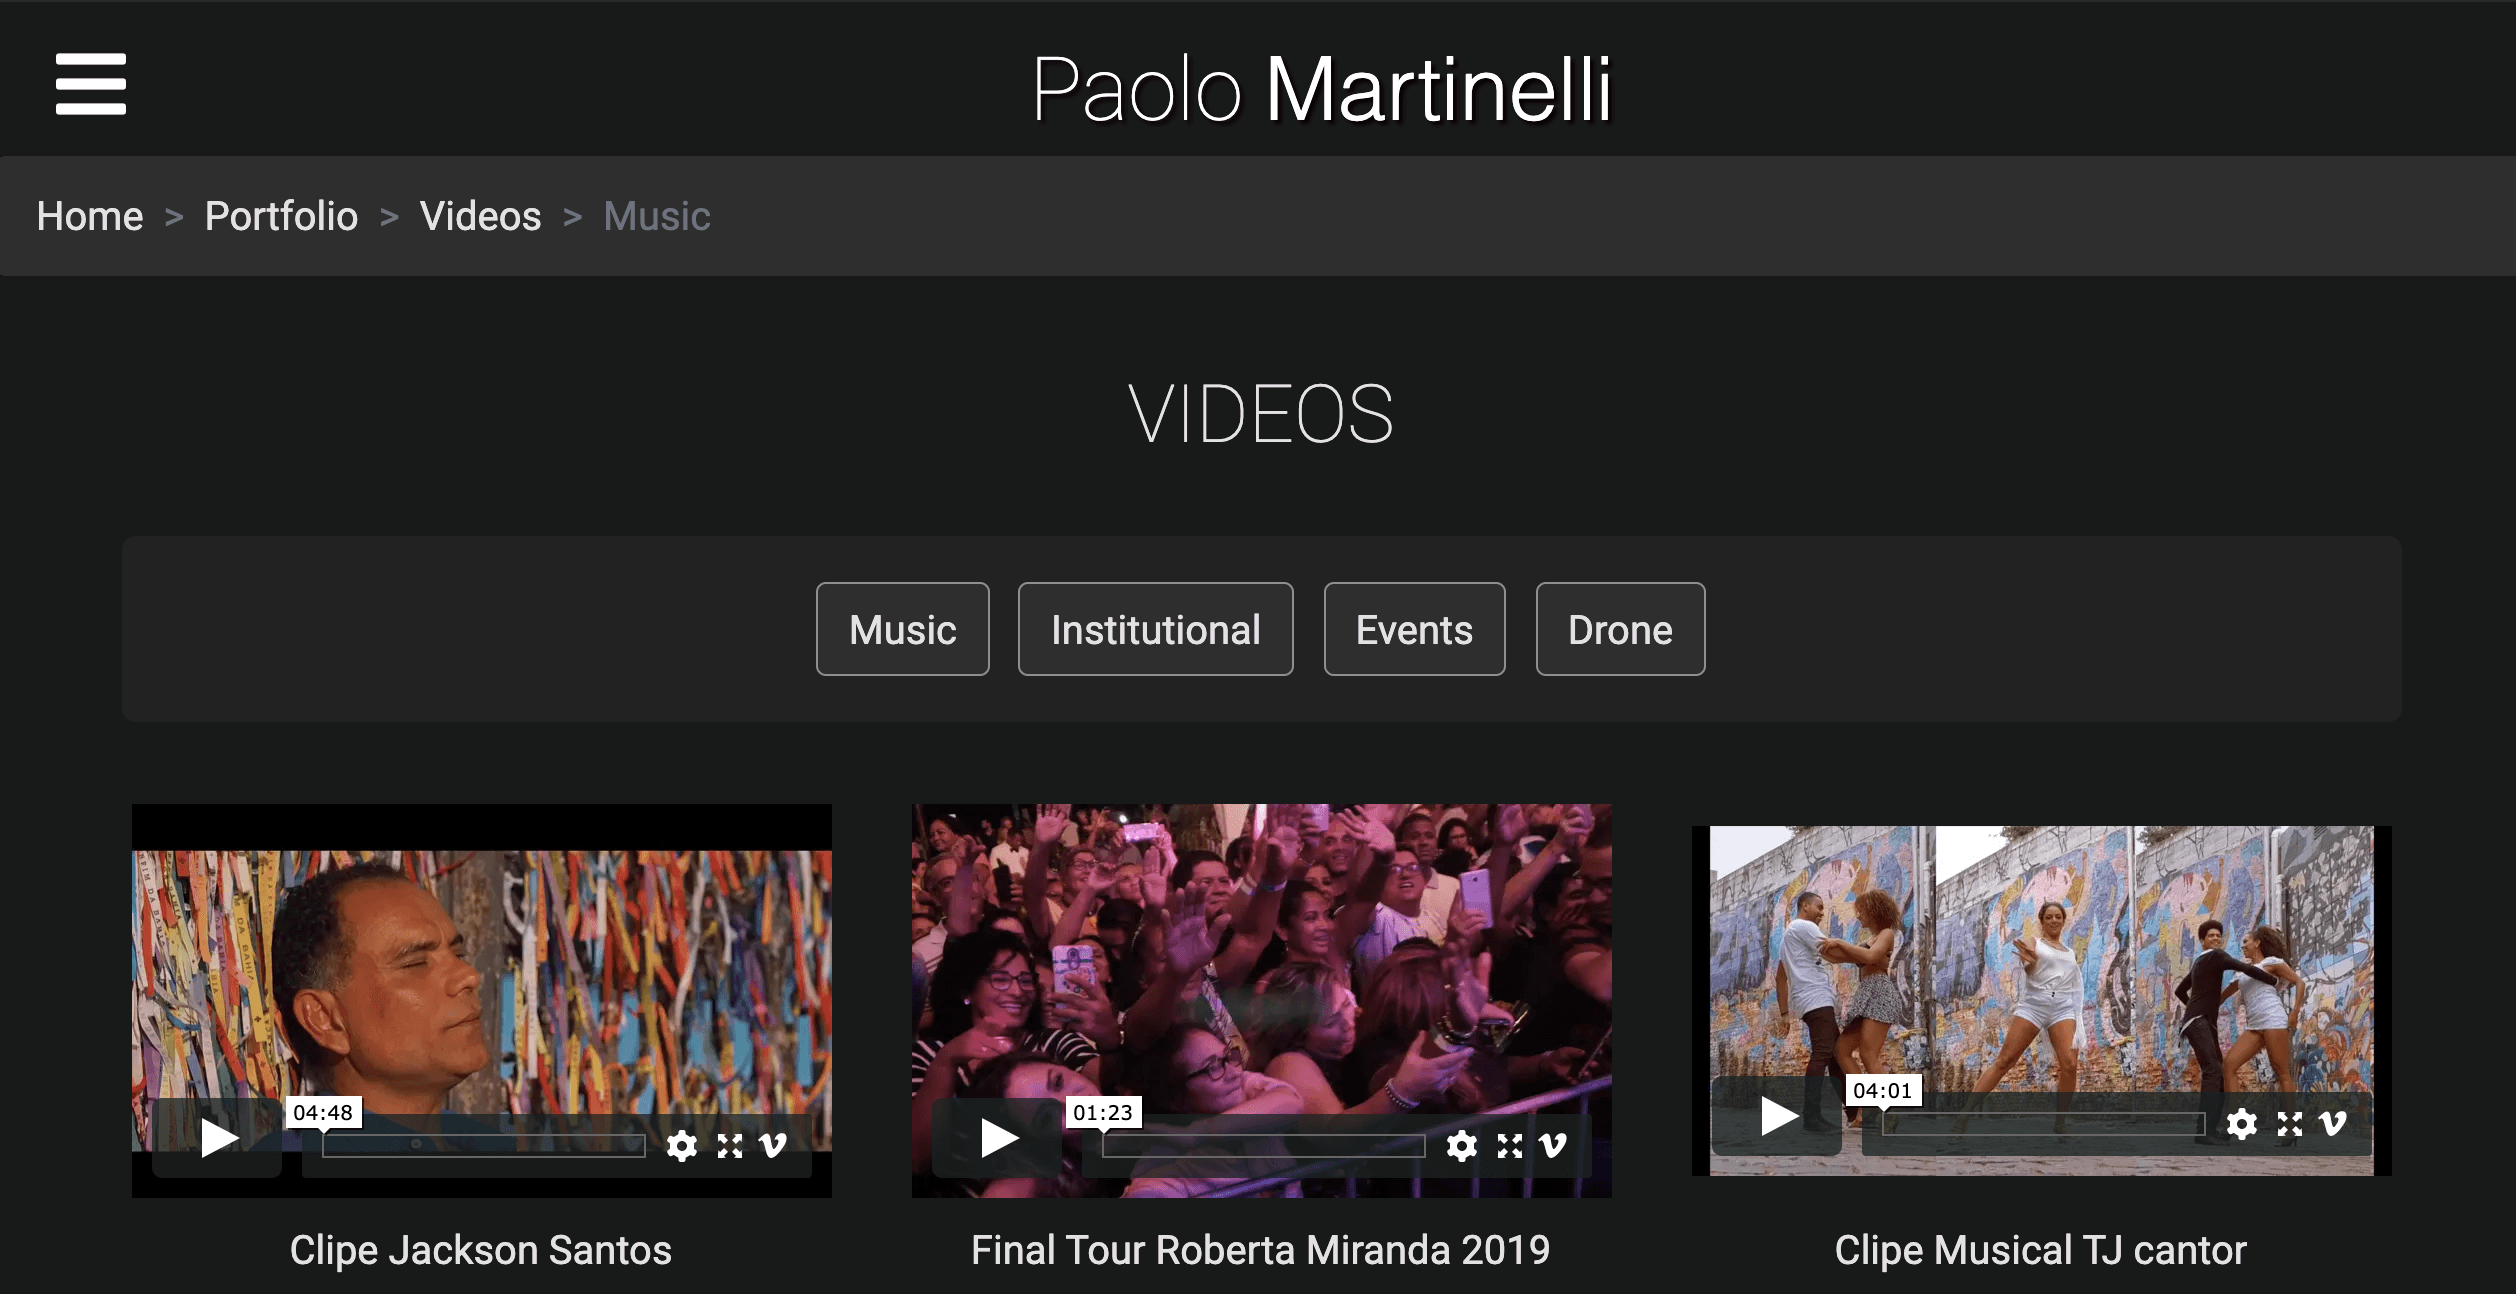
- Access the portfolio of videos produced by the photographer, divided by category. When clicking on the chosen video it will be reproduced in reduced size with the option to maximize to full screen.
- In the section ABOUT ME, the user can read information about the photographer and the history of his work.
- Register a user account, log in to the system and recover a password with a link sent by email if it has been lost.
- A logged-in user can subscribe to one of the 3 video editing plans available to YouTubers.
- Securely pay for a subscription using the Stripe API payment platform
- Send to the photographer a quote request for photo editing using the form on the services page.
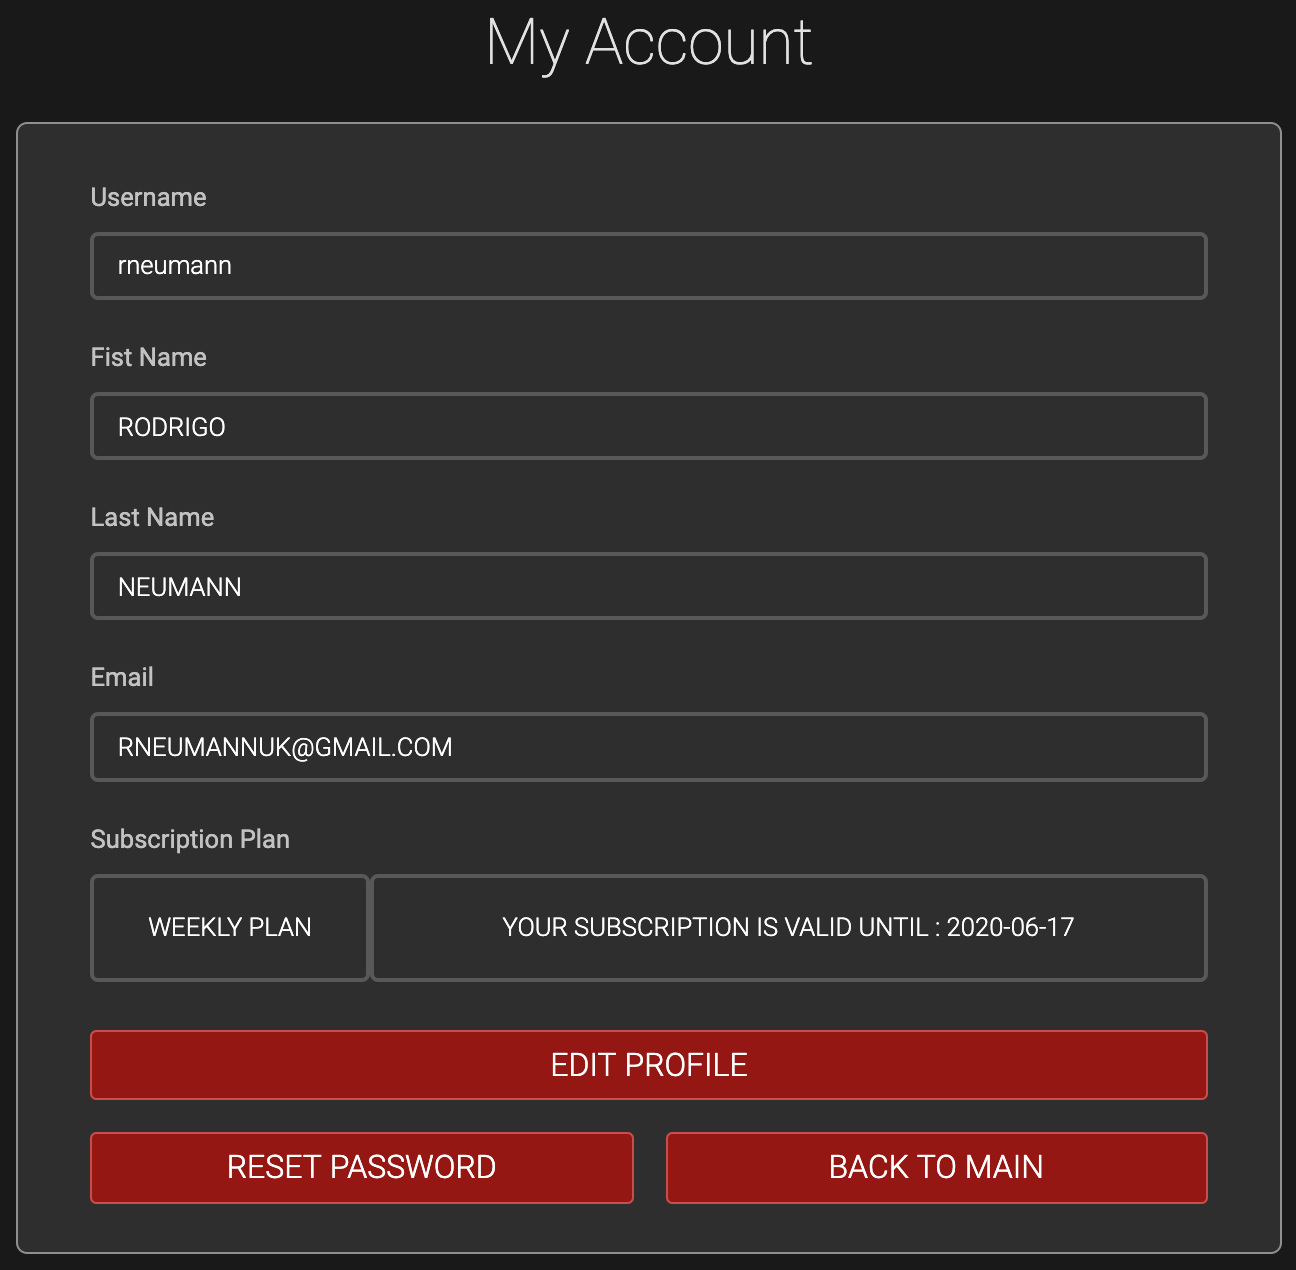
- Access the user's profile page, update data such as name and email and view the current subscription type, if you have an asset, and its expiration date (weekly and monthly plans only)
- Reset my password.
- Delete my user account.
- Send messages to the photographer from the form on the contact page.
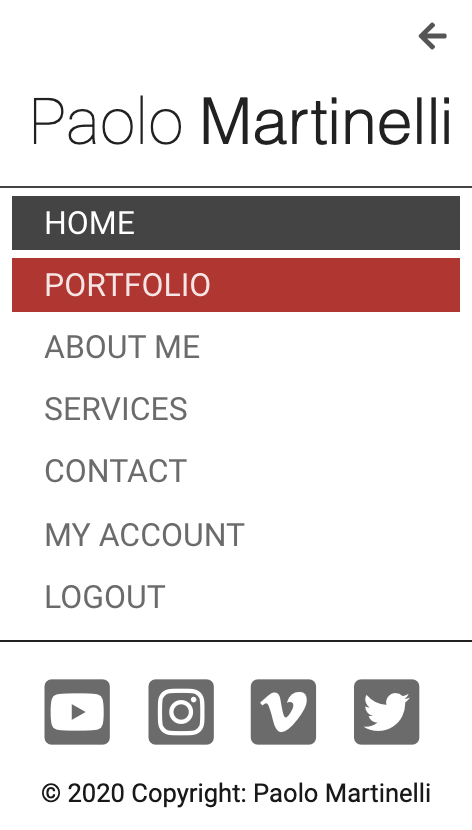
- Access the photographer's social networks from the icons on the bottom of the page or through the side menu.
- Have access to all the functionalities available as a simple user.
- Add new photos, with title, description and upload image directly to the remote server.
- Add new videos with Title, Description and Url for the video embed on vimeo.
- Update title, description or photo of an existing entry.
- Update title, description or url of the video embed on Vimeo.
- Delete an existing photo or video entry from the system.
This project was developed with a focus on a mobile approach first. However, with full responsiveness on other screen sizes. I chose to use the dark theme throughout the website so that the photos and videos of the photographer's work were more prominent on the dark background, as this is the main focus. The main idea for the design of this project was to have a serious and professional appearance at the same time, which convey sophistication and provide a pleasant user experience.
- The main font used in this project is Robotto. I think that's a well designed and easy to read font. An extra reason for using this font is the excellent display on small screens.
- In the main titles of the site this font-weight of 100 was used, and font-weight of 200 for the text-body.
- In the color scheme was used shades of white, with only differences in opacity.
- I used the white background with letters in a dark grey tone, In the Sidebar, giving a greater contrast for the logo and menu options. And a darker shade of red for the hover effect.
- A slightly lighter shade of black was used in the background #191919
- In order to give an elegant highlight, a border in white tone with opacity was added to the boxes, in addition to the variation of shades of grey.
- The same shade of red in the sidebar was used for the buttons, however, a slightly brighter effect and a darker red border have been added, creating an interesting effect that contrasts with the white colour font.
- A shadow effect with a white tone with blur was used in the portfolio photos.
The icons used in this project are provided by Font Awesome 5.13.0. The icons were used on the main page in the services section, social media icons on the footer and sidebar.
These wireframes were designed with Balsamiq Mockups 3. These were the first version of scope and some minor things have changed during the development for the final version.
All pages have the sidebar with the logo with links and footer.
- User not logged in
The non-logged-in user has access to all content on the site as a portfolio, about me and contact. Registration and login buttons are available.
- User logged into the platform
The user connected to the system has access to all the content of the website and also the MY ACCOUNT page, in addition to the logout button also being available.
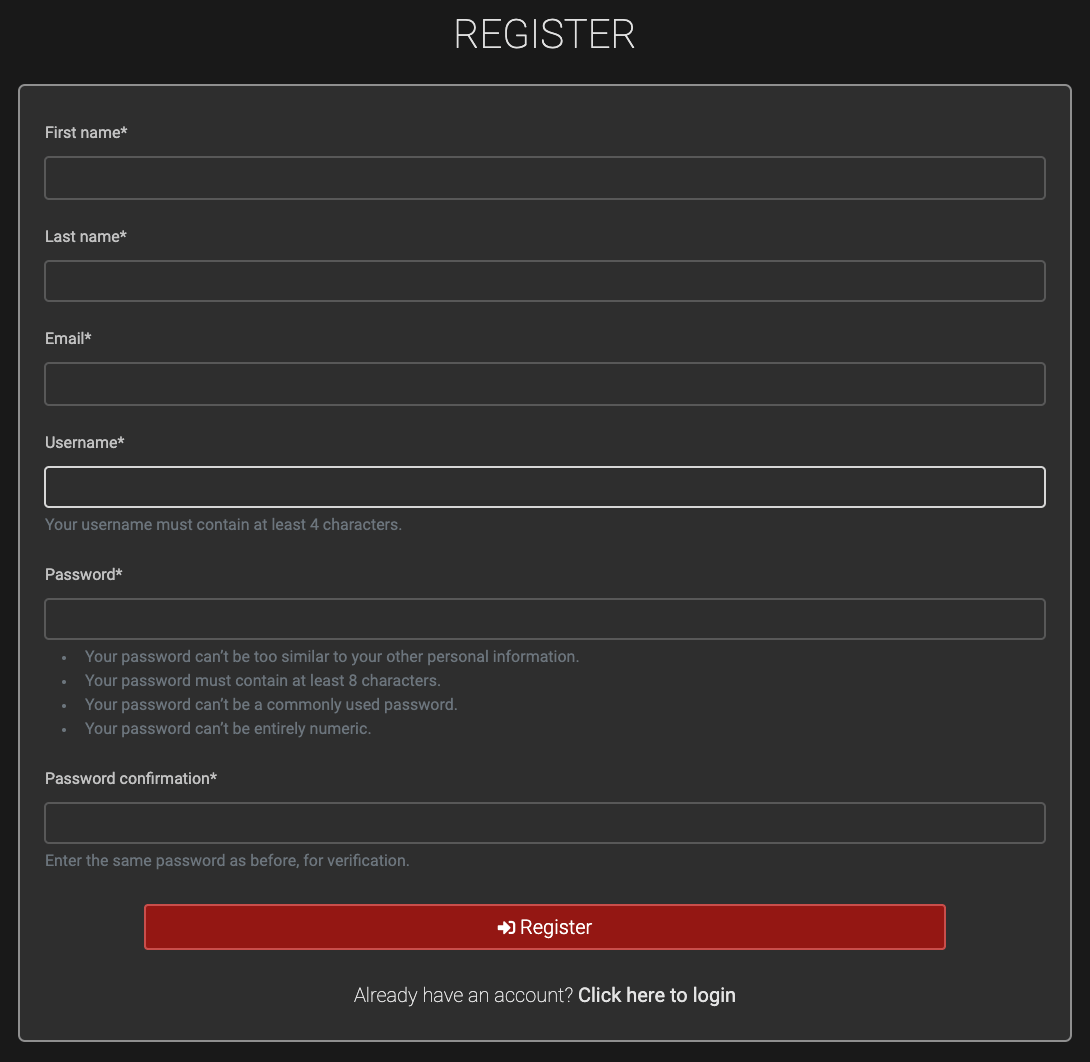
When accessing the registration screen, the user must to fill in his/her first name, last name, email and choose a username and password for the platform. Some checks are made on the database before the new inclusion,such as if the username already exists in the database (in this case, an error message is displayed). It is also necessary that the password meets the minimum security requirements defined by the Django authentication system. A link that promptly directs registered users to the login page is available below the registration button.
On the login screen, the user is asked to fill in his/her login and password for access. If the user does not remember the password, he/she can request a password reset at the FORGOT PASSWORD link. A link to access the registration page is provided immediately below if the user does not already have it.
After logging into the system, the user can access the profile screen via the MY ACCOUNT button on the sidebar. There are three buttons, one that takes you to the page to change the profile, one to reset the password, and other to return to the main page.
It is possible to change the user's first name, last name and email acessing the edit profile screen. Three buttons are available on this page: one to return to the main page, one to save changes and the last one to delete the user account. ** It will only be possible to delete the user if he/she does not have an active subscription plan.
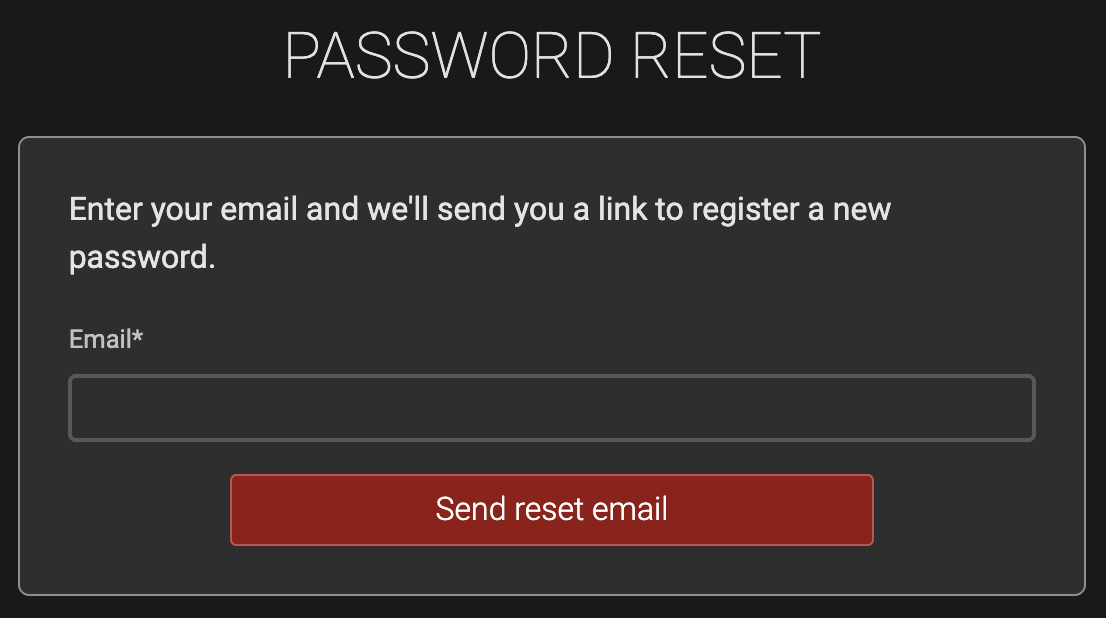
On the password reset page, the user's registration email will be requested so that an email with the password reset link will be sent.
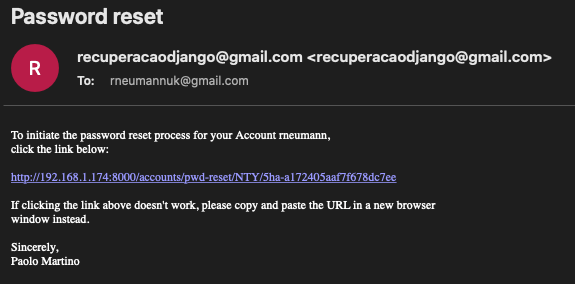
Upon opening this email and clicking on the link sent, the user will be redirected to the new password registration screen.
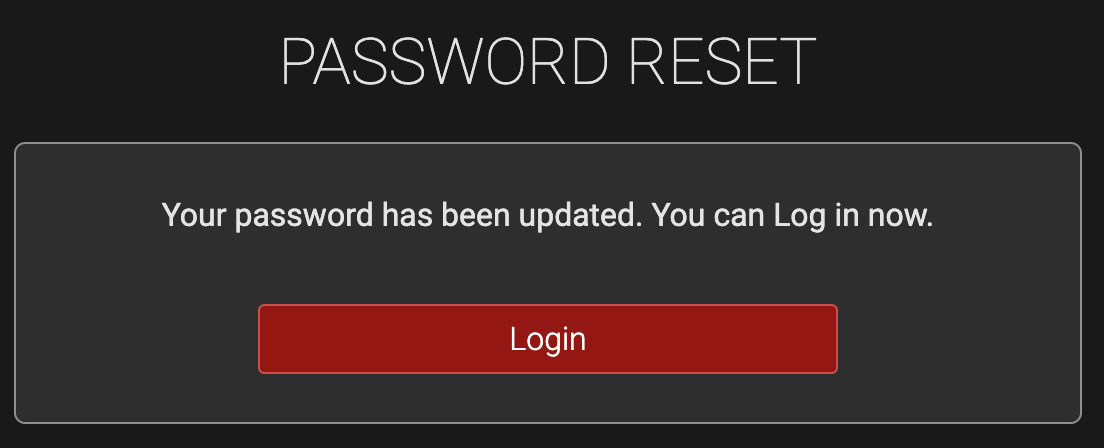
After clicking update, a confirmation screen will be displayed and the redirect button will be displayed for the login screen
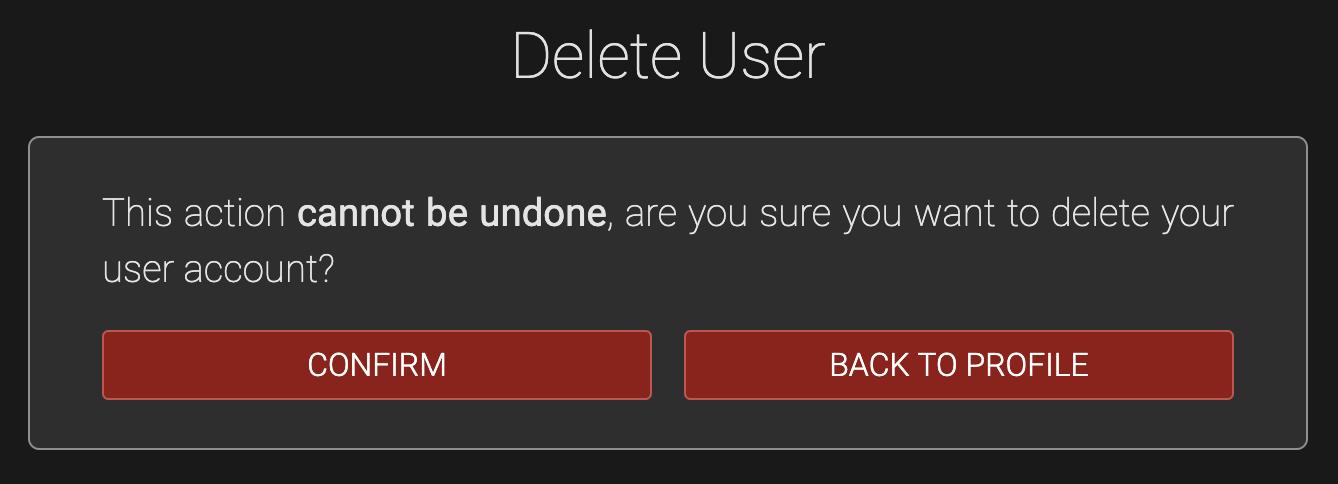
When clicking on the button to delete the account, a message is displayed alerting the user that this action will be permanent and cannot be undone. If the user wishes to continue, the account will be deleted. A button is also displayed to return to the profile page.
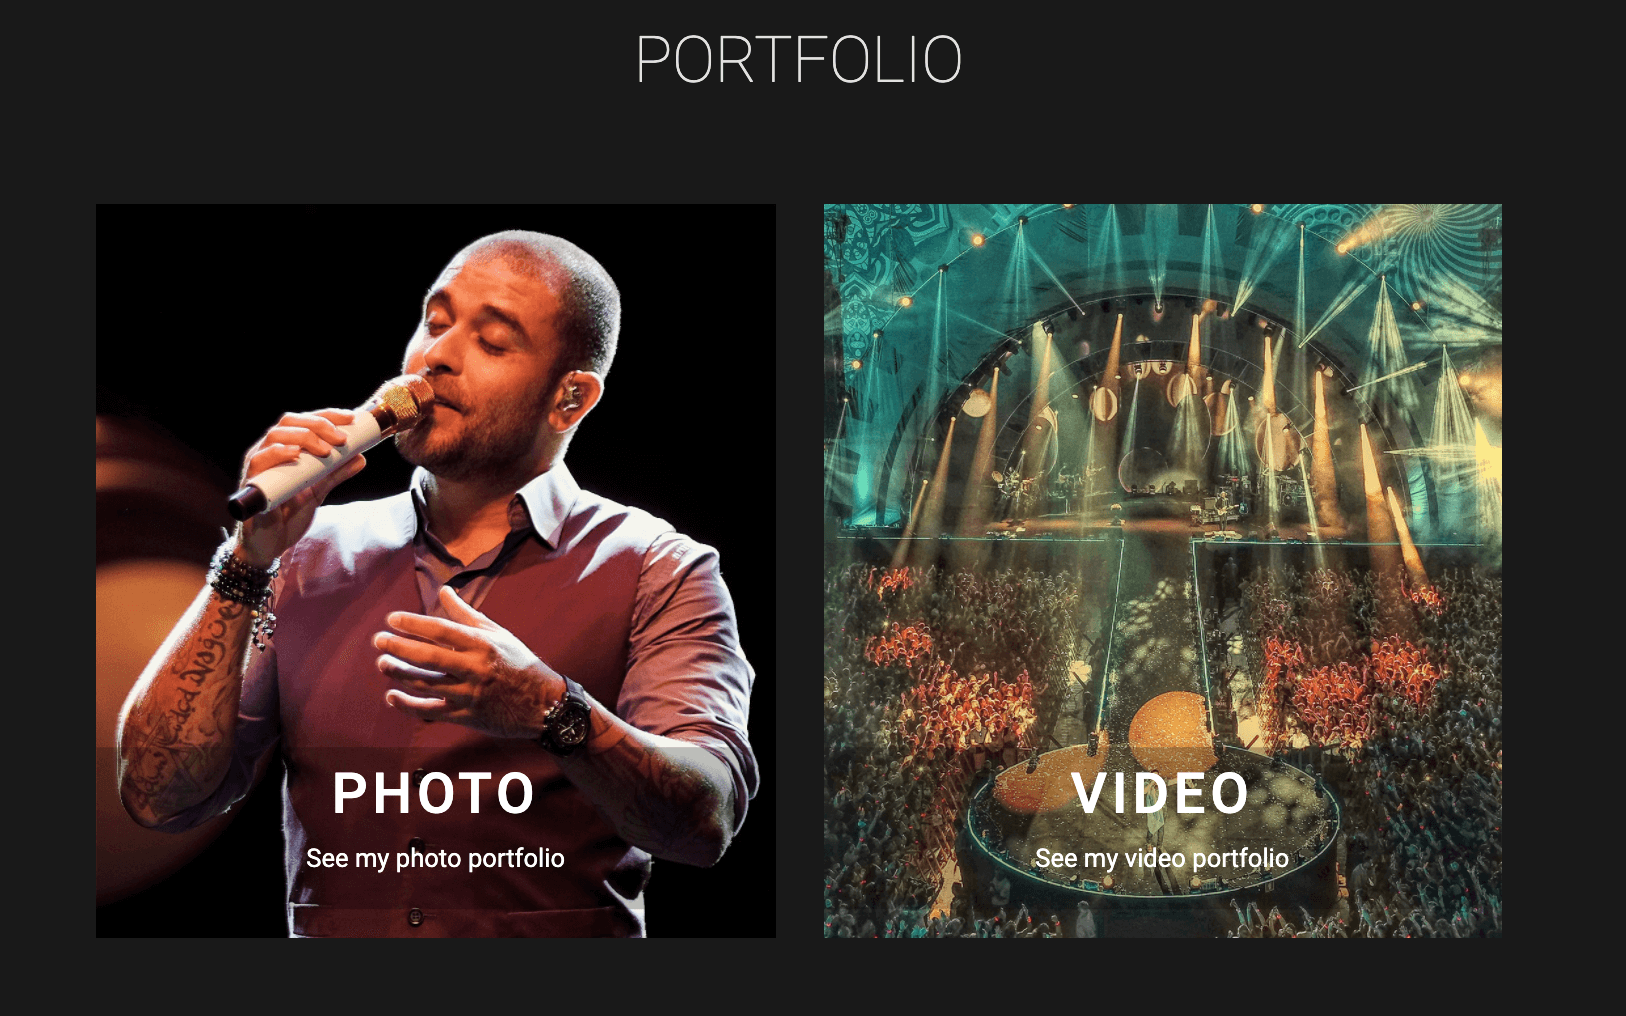
When accessing the portfolio page, the photo or video option is displayed. When you click on one of the two options, the listing page is displayed.
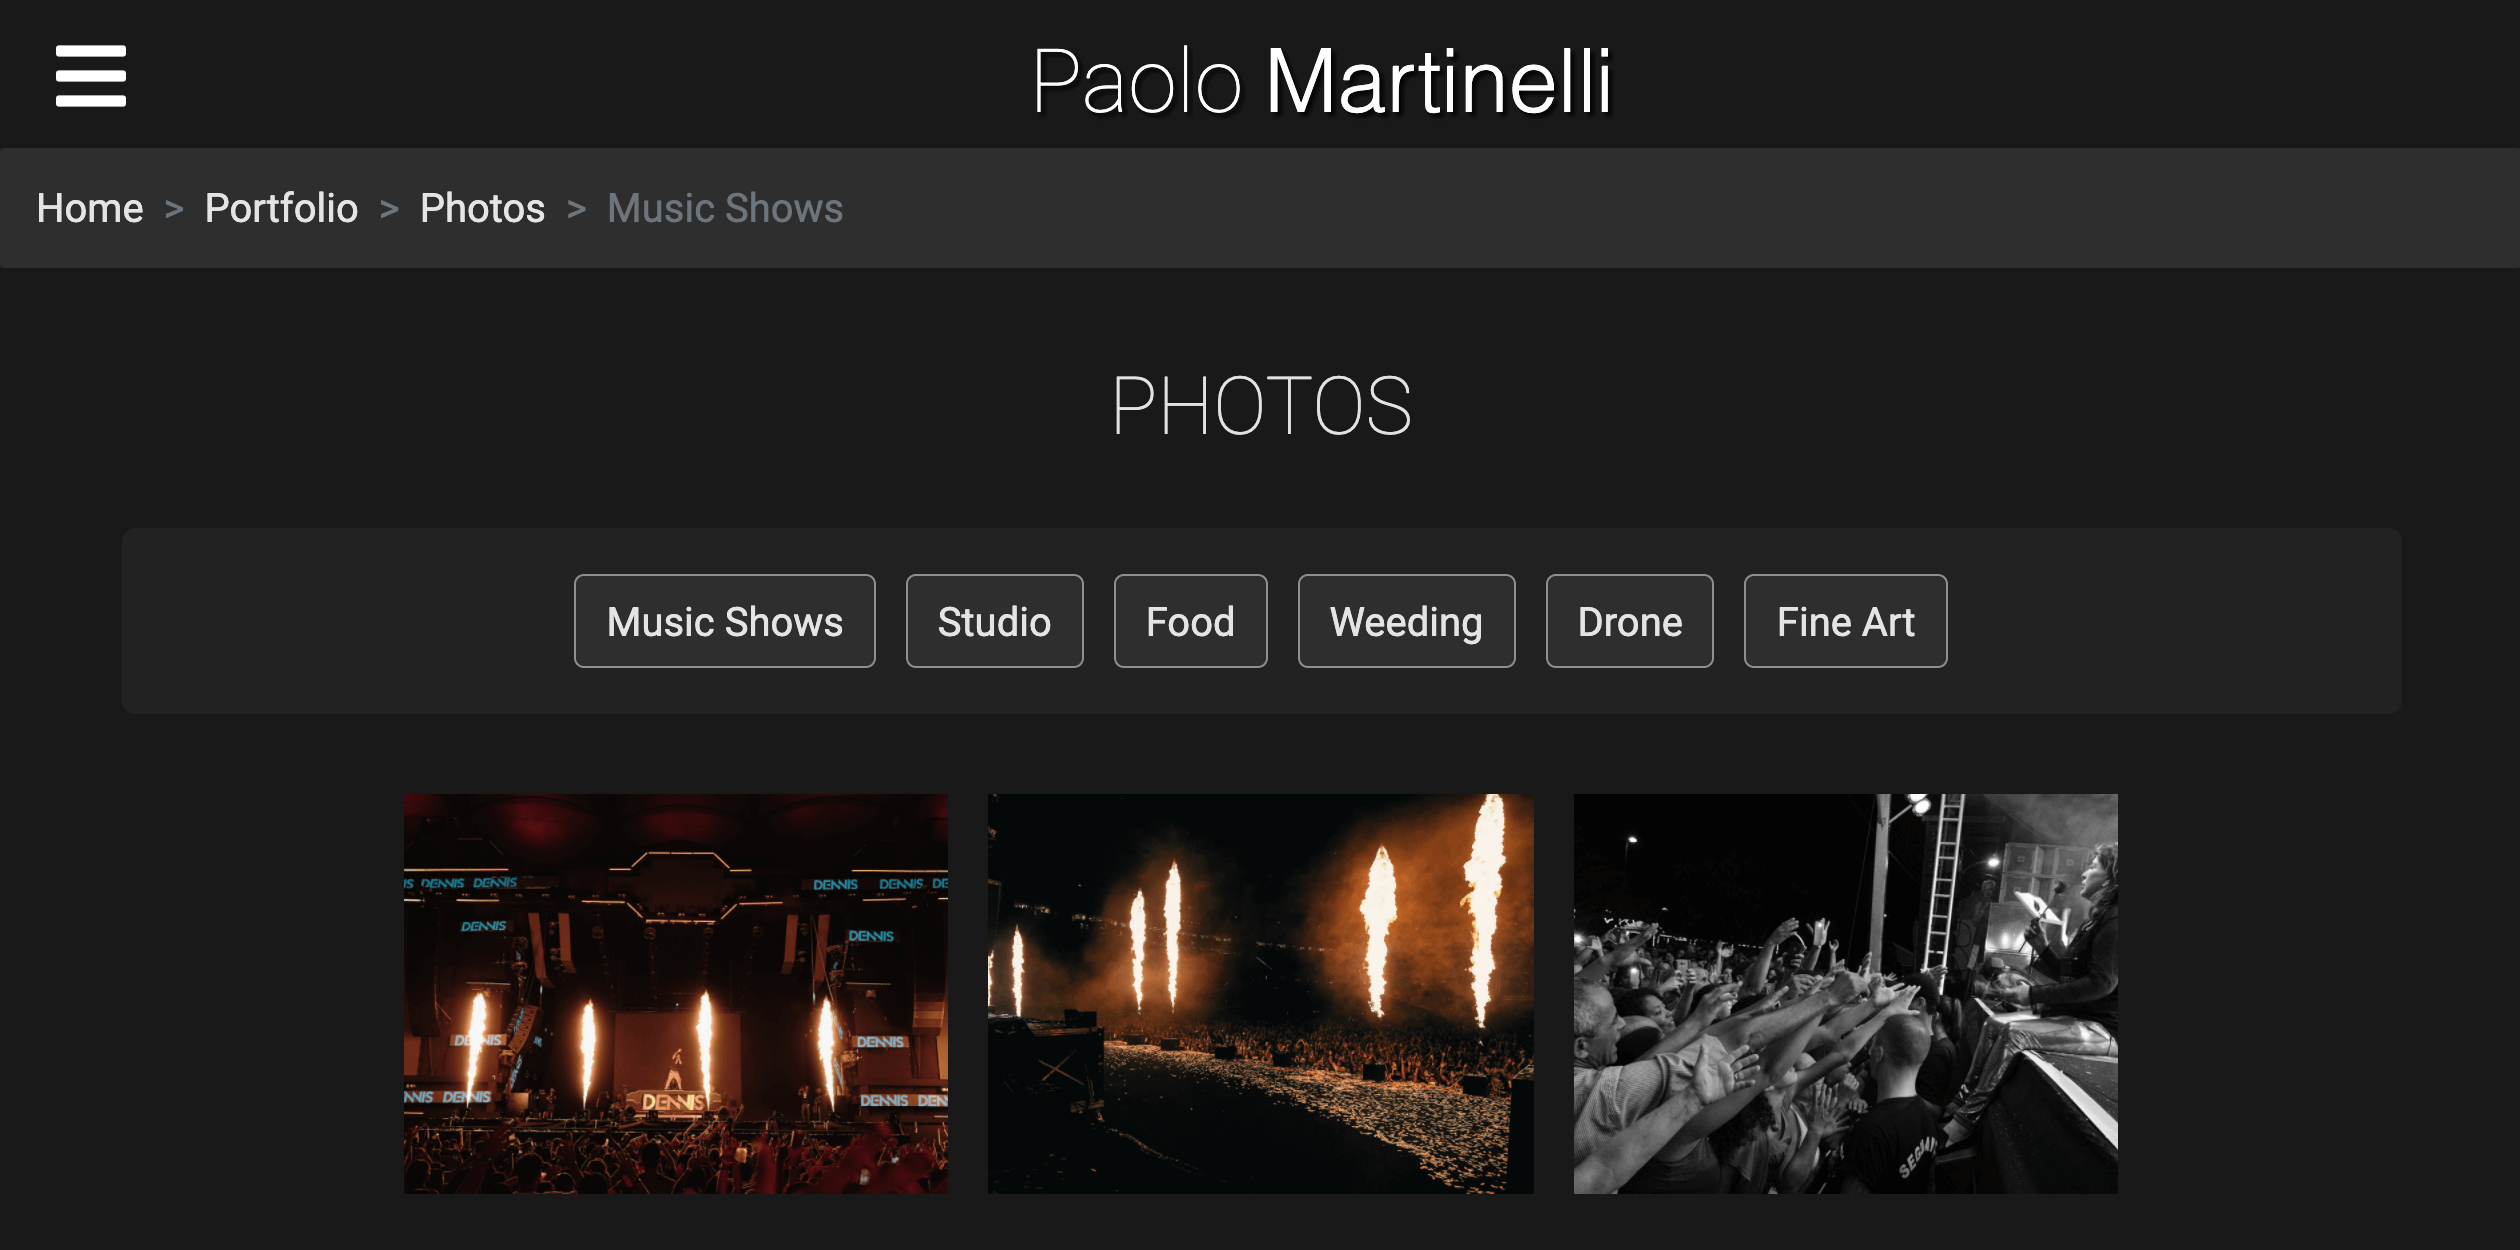
The page that lists photos and videos has a menu to filter the chosen categories.
The Photo portfolio has 6 categories - Music Shows, Studio, Food, Weeding, Drone and Fine Art.When clicking on a photo in the listing, the photo will appear in full size with details about the work
Video portfolio has 4 - Music, Institutional, Events and Drone. When clicking on a video in the list, the video will be played in thumbnail, with the possibility of watching it in full screen.On the page ABOUT ME, there is a short history about the life and several works already done by the photographer. Three photos were included among the texts to generate a more pleasant visual impact for the user.
Three plan options are available for YouTubers in the services page, in the video editing section:
Single Job: Which consists of a single edited and revised video.
Weekly plan: Which consists of one week of subscription with up to 3 videos edited and reviewed.Monthly plan: Which consists of a month of subscription with up to 20 edited and reviewed videos.
After choosing the plan, it is necessary to click on the Hire Me button, which redirects the user to the payment screen.
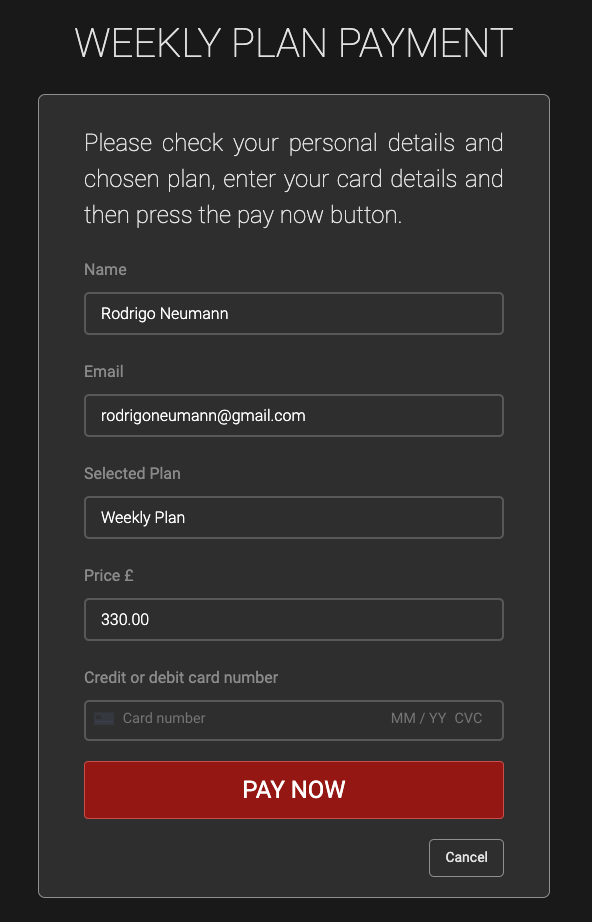
**The user must be logged in the system before going to the payment page, otherwise, he/she will be taken to the login page.Data such as name and email of the logged-in user, the selected subscription plan and the price are automatically filled in on the payment page. The only field available to be filled in by the user is the card number, expiration date, security code and postcode. After filling in without typing errors, the customer can click on PAY NOW to complete the payment.
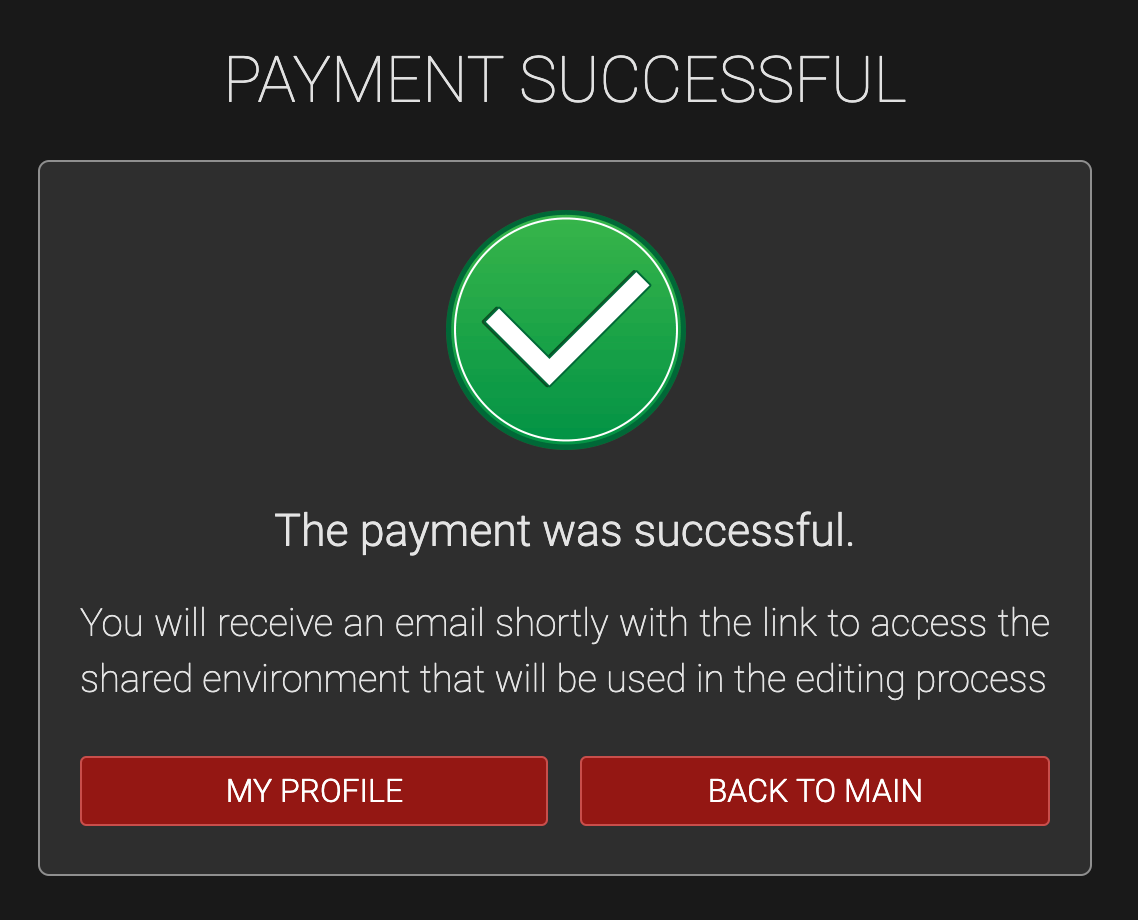
After the payment is made successfully, a successful page is displayed and buttons to go to the profile or to take the main page are displayed.
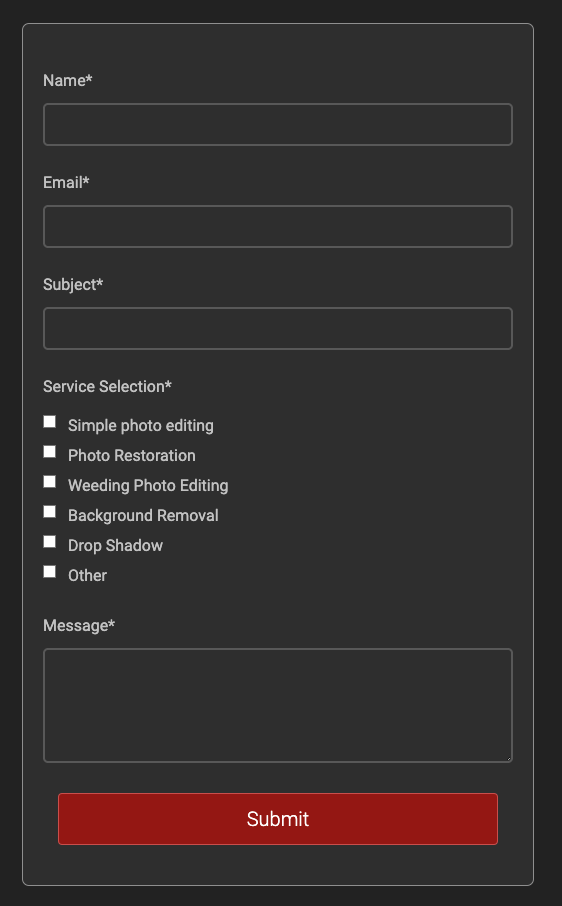
In the photo editing section of the services page, a form is made available for the user to submit a price quote request for photo editing services. The available fields are Name, Email, Subject, the type of service (simple photo editing, photo restoration, wedding photo editing, background removal, drop shadow or others), and a field for entering the message.
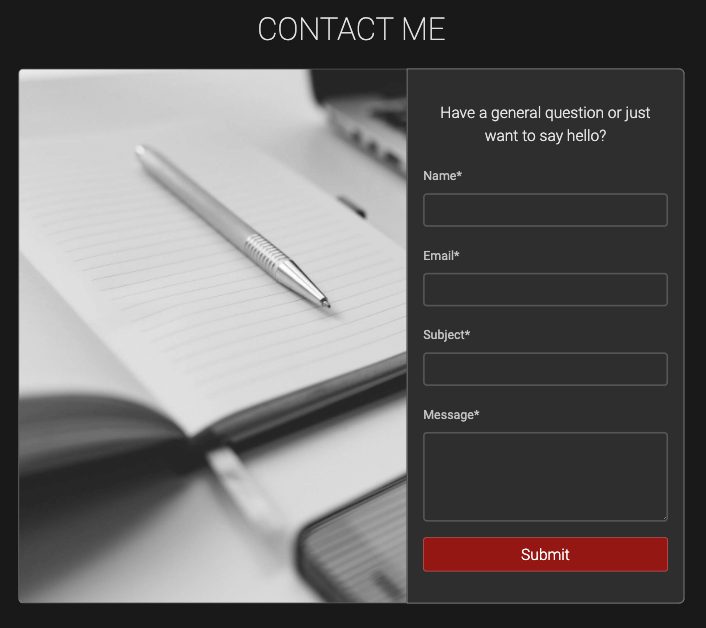
On the contact page, a form is available for the user to send messages to the photographer containing the fields Name, email, subject and message. If the user is logged in, their data such as name and email will be filled in automatically. - Django send_mail module is fully functional.
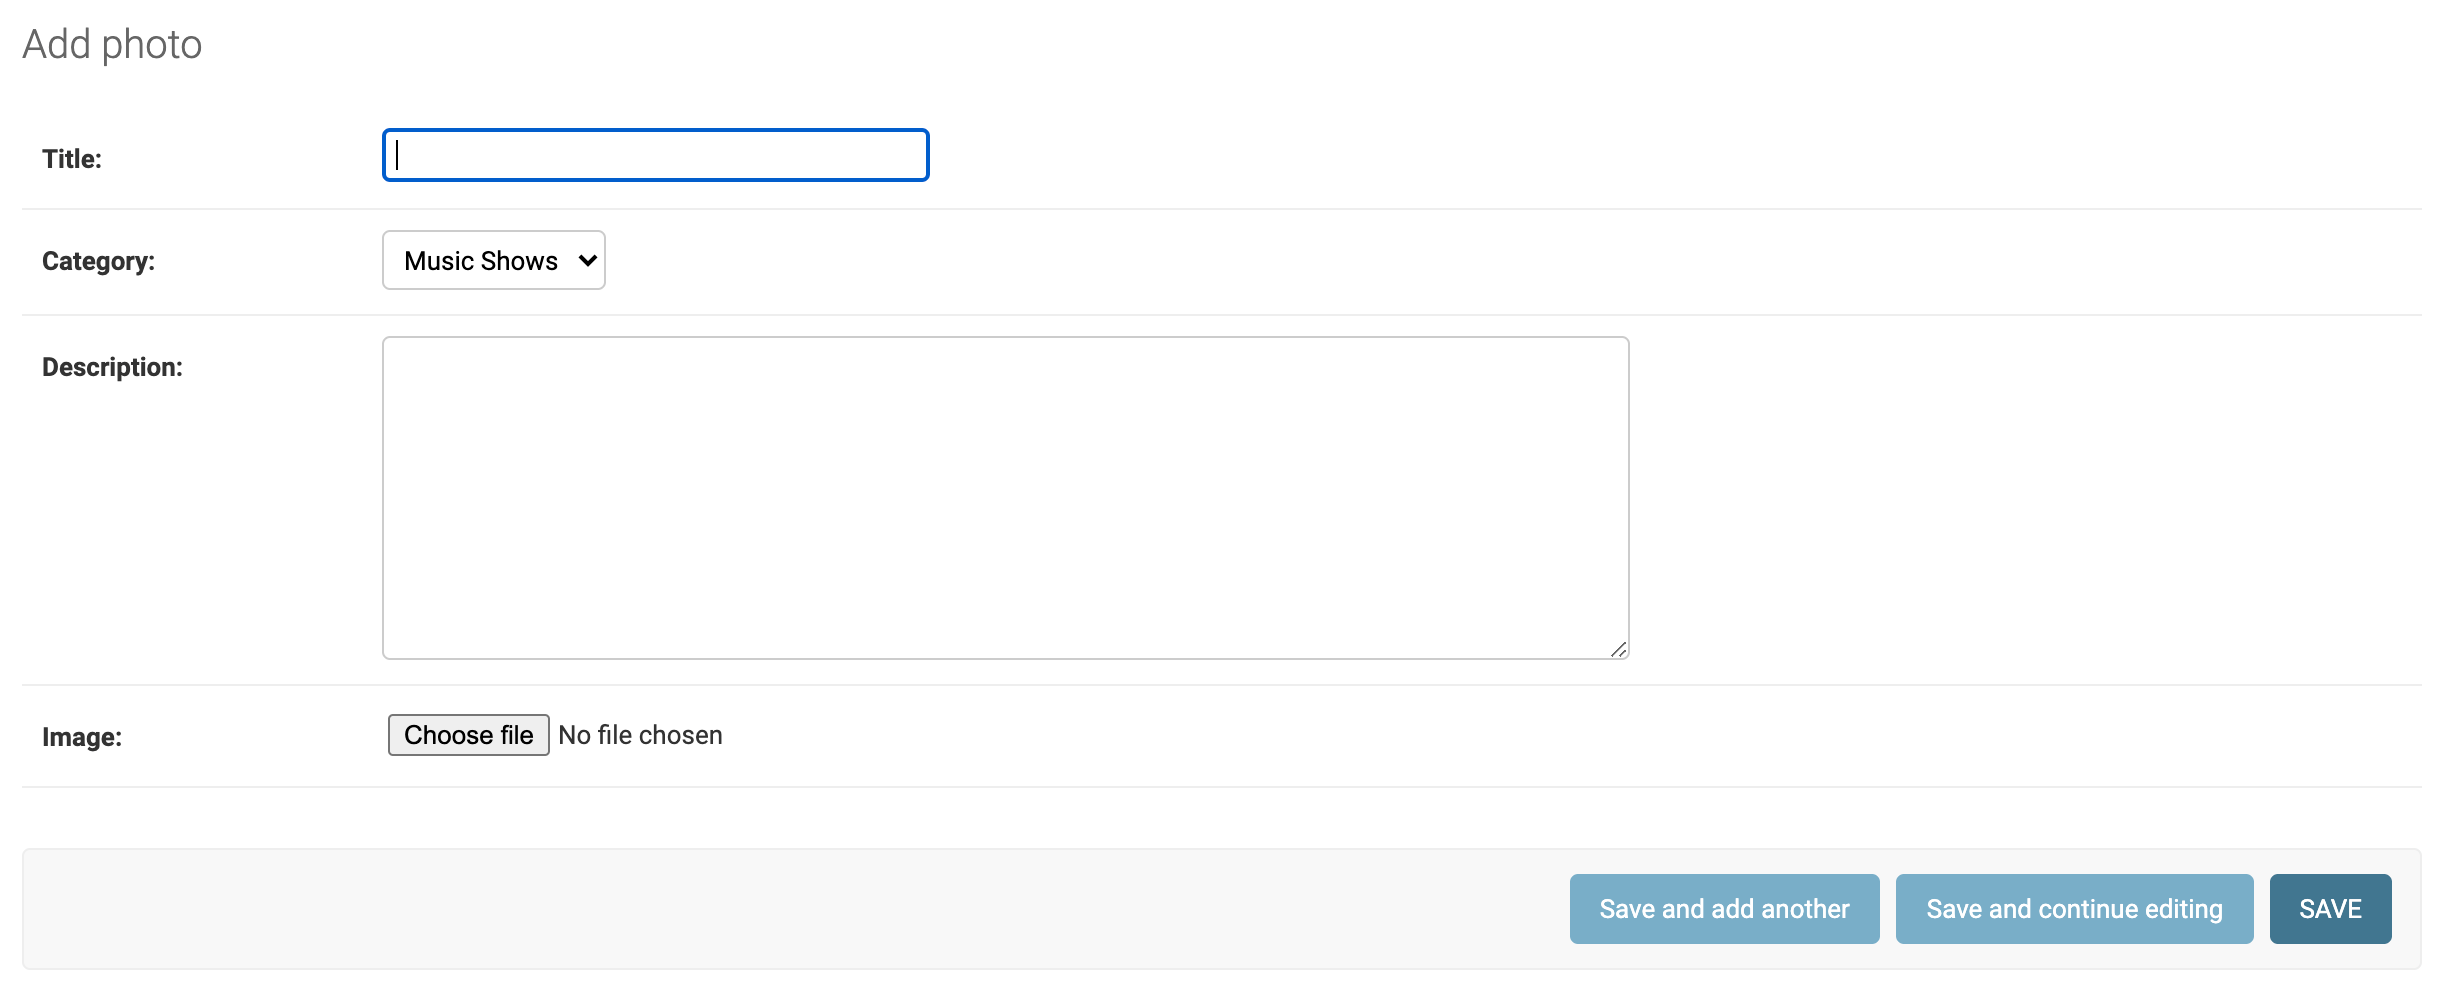
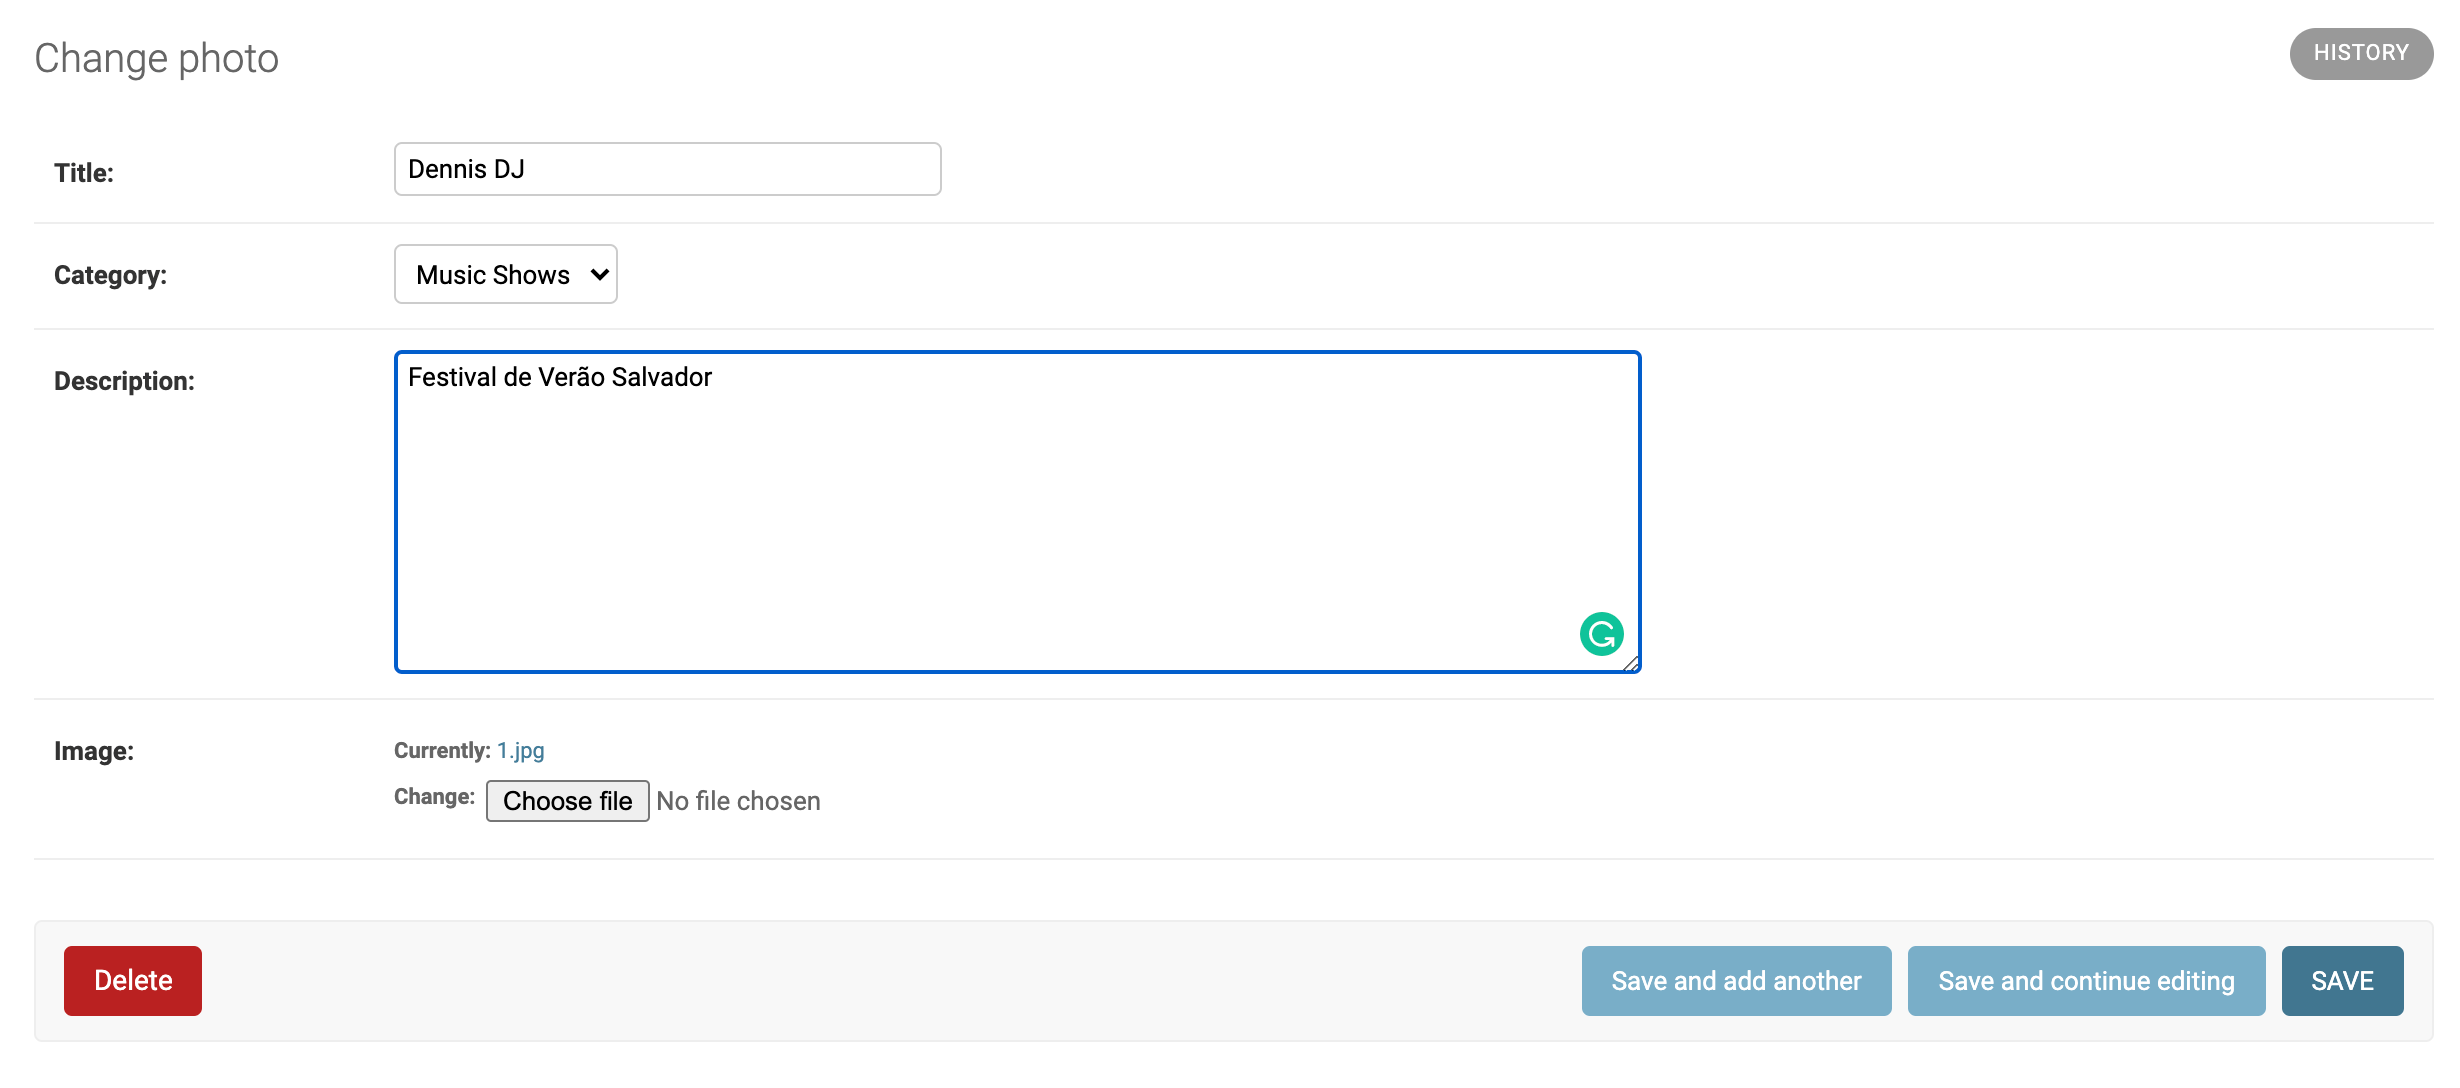
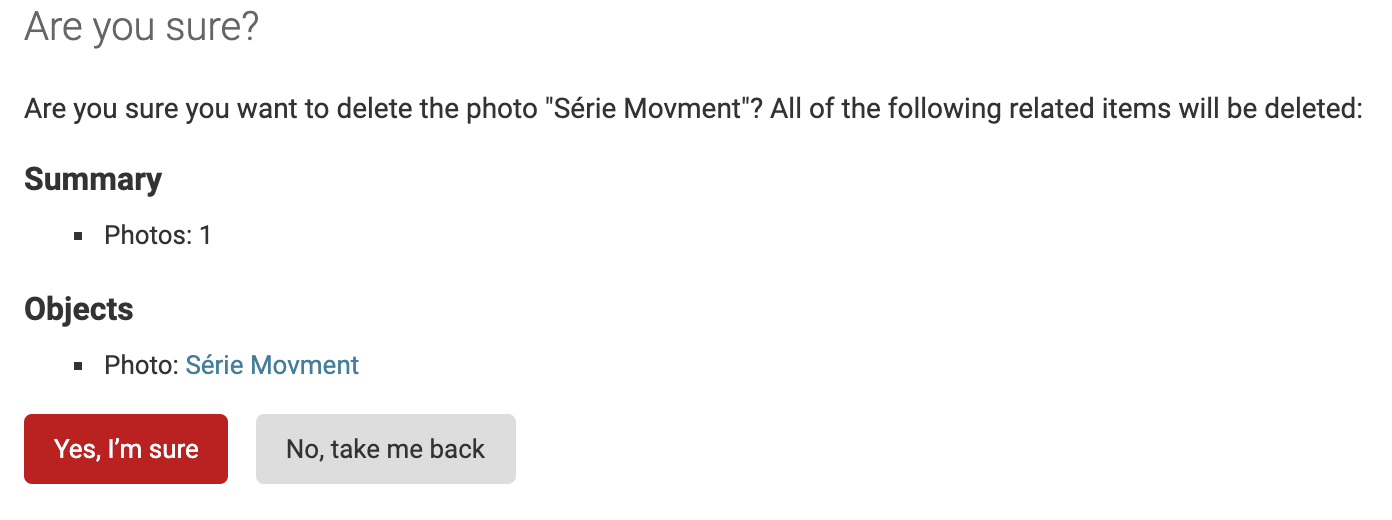
The content of photos and videos on the website will be easily managed by users with specific permissions just to add, edit or remove photo and video content from the website, by Django Admin.
It is possible to add a title, category, description and upload a photo, in the photo portfolio or a video url embed for video portfolio.
It is possible to edit the title, category, description and change the photo, in the photo portfolio or a video url embed for video portfolio.
It is possible to delete a photo or video entry just by clicking the delete button on the photo or video change page. After that just confirm on the warning screen.
A 404 error page will be displayed if the user tries to access any page that does not exist in the app. A button that redirects the user to the main page will be shown.
As this is a real project for a real client, my next steps will be:
-Change all front-end content to a framework like React.
-Use Django Rest Framework integrated with React.
-Change the payment system to a more integrated platform to the Brazilian market, which is the customer's focus market.
-Translate all the content of the website into Portuguese and offer the option of displaying the website in PT-BR and EN-GB.
-Present to the client a section of testimonials - this idea was initially denied by the client.
-Create an administrative environment for administrator users to manage messages and testimonials (if approved).
-Move all the content of the website to a definitive server, with the photographer's own domain.
Any other extra functionality will be discussed in the future with the customer.
- Visual Studio Code
- IDE used for development of this project.
- Balsamiq Mockups
- Used to create the wireframes and planning this project
- Dev Tools
- This project used the Dev Tools from 3 browsers: Chrome, Firefox and Safari. They were necessary to keep track and test the code during the development.
- Heroku
- Used for app hosting and deploying.
- GitHub
- This project uses GitHub to store and share all project code remotely.
- Git
- It is used for version control
- Stripe
- Payment platform to validate and accept credit card payments.
- PostgreSQL
- It is the relational database used for this project, provided by Heroku.
- AWS S3
- Cloud storage used to store media and static files for this project.
- Photoshop 2020
- This project used Photoshop 2020 to edit all the images.
- Illustrator 2020
- This project used Illustrator 2020 to edit the Readme main image.
- Travis CI
- For continuous integration.
- Tinypng
- Used to compress the size of images.
- Bootstrap 4.4.1
- This project uses Bootstrap for better responsiveness and organization. It was also used for some CSS attributes and effects.
- FontAwesome
- The project uses Font Awesome to provide some icons.
- Google Fonts
- The project uses Google fonts to provide 'Roboto' font.
- JQuery
- Used to simplify DOM manipulation.
- Django 3.0.7
- Back-end Python Framework.
- Django-crispy-forms
- To style django forms with Bootstrap 4.
- Django-environ
- To configure the Django application with environment variables.
- Django-storages
- collection of custom storage backends for Django. Used with Boto 3 for AWS S3 Buckets.
- Psycopg2
- PostgreSQL database adapter for Python.
- Boto3
- AWS SDK for Python to use with S3 Buckets
- Jinja
- It is the default templating language for Django used for display data from the python application in Html templates.
- Magnific-Popup
- JS Library used to view the portfolio photos in a maximized size, with captions on the footer and carousel.
- Animate On Scroll
- Animation effect JS library when scrolling the mouse used in the portfolio photos and in the portfolio selection page.
- In this project Is used HTML5, CSS, JAVASCRIPT and PYTHON as programming languages.
-
During the development of this project, I had the experience of facing some problems, exhaustively testing the functionality of each part of the platform and managed to solve most of the problems that arose before writing this document.
-
I received help from some family and friends to do the tests on the website resources and all the problems presented were solved without problems.
-
The tests were performed with either a user logged in or not into the platform.
-
All models and forms related to the addition of new photo and video entries, as well as the integration of views with templates were tested. All these functions worked smoothly as expected.
-
The entire subscription plan payment process was thoroughly tested, until all problems were resolved during the development process.
-
The entire subscription plan payment process was thoroughly tested, until all problems were resolved during the development process.
-
Stripe API payment tests can be done with the following data:
Card Number - 4242 4242 4242 4242 Expiry - 12 / 23 CVC - 123 POST CODE - 23232 -
All the functionalities in user's profile, such as changing user data, were tested, as well the process of deleting the user from the system, taking into account the matter of the user already having a subscription plan or not. Everything also worked without problems.
-
The display of the subscription plan time in the user's profile is also working smoothly.
-
All error or success flash messages are also running smoothly.
-
The Python scripts were checked with pep8online. Almost all the errors were solved, the only remaining errors were a few lines over 80 characters, but almost all of them have less than 90 characters.
-
The errors verified with the HTML and CSS W3C validators have all been fixed.
-
The check with the JSHint validator returned no errors.
-
HTML
-
CSS
-
JavaScript
-
Python
-
The Chrome and Firefox browser development tools were used to check for responsiveness and scaling issues on different screen sizes.
-
This project was tested across multiple browsers (Chrome, Opera, Safari, Firefox, and IE) in different simulated and real devices.
-
Phones
- Galaxy Note 8
- Galaxy Note 9
- Galaxy Note 10 Plus 5G (real device)
- Galaxy S5
- Galaxy S7+ (real device)
- Galaxy S9/S9+ (real device)
- Galaxy S10 (real device)
- iPhone 5/SE
- iPhone 6/7/8
- iPhone 8 Plus (real device)
- iPhone X (real device)
- iPhone XR (real device)
- iPhone XS
- iPhone XS Max (real device)
- Huawei P30 Pro (real device)
- Nexus 5X
- Nexus 6P
- Pixel 2
- Pixel 2 XL
-
Tablets
- iPad 4gen (real device)
- iPad Pro 10.5-inch
- iPad Pro 12.9
- Kindle Fire HDX
- Nexus 10
- Nexus 7
-
Laptops
- MacBook Pro 13" (real device)
- MacBook Pro 15" (real device)
- Asus Swift 3 (real device)
-
Windows 10 computer
- Philips 1080p Full HD (real device)
Some display issues with discontinued browsers such as IE and obsolete versions of Chrome and Opera were found.
You will need the following tools installed on your system:
- Python 3.x
- An IDE such as Visual Studio Code
- Git
The following instructions are based on use on a Windows 10 OS and IDE VS Code. If your OS is different, the commands may be different, but the process, in general, remains the same.
In order to have all features working locally, ensure you have created an account on the following services:
- Stripe
- AWS and S3 bucket
- Gmail - Configure the option Allow access to Less secure apps
-
Save a copy of the Github repository located at https://github.com/rodrigoneumann/photographer-ms4
- Unzip the repo into the chosen folder.
-
If you have Git installed on your system, you can clone the repository with the following command.
git clone https://github.com/rodrigoneumann/photographer-ms4 -
Within the chosen directory, create a virtual environment with the command:
python -m venv venv -
Activate the virtual environment with the command:
.venv\Scripts\activate -
Install all required modules with the command:
pip install -r requirements.txt -
Create a
.envfile with your credentials, this file must be located inside the main app. I provided a .env-example, just fill in the fields with your data and change the name to .env:SECRET_KEY=YOUR_SECRET_KEY HOSTNAME=127.0.0.1 DEBUG=True EMAIL_HOST_USER=YOUR_CREATED_EMAIL_FOR_THIS_PROJECT EMAIL_HOST_PASSWORD=EMAIL_PASSWORD AWS_ACCESS_KEY_ID=YOUR_AWS_ACCESS_KEY_ID AWS_SECRET_ACCESS_KEY=YOUR_AWS_SECRET_ACCESS_KEY STRIPE_SECRET_KEY=YOUR_STRIPE_SECRET_KEY STRIPE_PUBLISHABLE_KEY=YOUR_STRIPE_PUBLISHABLE_KEY -
Migrate the admin panel models to create your database template with the terminal command
python manage.py migrate -
Create a superuser to access the django admin panel and then follow the steps to add your admin username and password:
python manage.py createsuperuser -
You can now run the program locally with the following command:
python manage.py runserver -
For the services page to be accessible, without returning an error, it is necessary to access http://127.0.0.1:8000/admin/ , in the PROSERVICES / User editing plans it is necessary to add a value for each of the three plans. for example: Single Plan - £ 100.00, Weekly Plan - £ 300.00 and Monthly Plan - £ 500.00
-
After adding the items from the previous item, the local site will run smoothly.
To deploy this website to Heroku you need to follow the steps below:
-
After the site is deployed locally, It will not be necessary to create a Procfile or requirements.txt file as these will already be available in the cloned repository.
-
Add the line .env to .gitignore to not have the personal data exposed in the remote repository.
-
Send the content of the site deployed locally to your github account.
-
You have to create a free account on the Heroku website.
- Login to the account, click on new and then create a new app. In the following screen, you need to give a name and choose the Europe region.
- On the dashboard, click the RESOURCES. From within the ADDONS input field start typing POSTGRES until can select HEROKU POSTGRES and select it.
- In the plan box select HOBBY DEV - FREE, then click PROVISION.
- Once set up, click the Postgres database, select the SETTINGS tab and DATABASE CREDENTIALS. Make a note of the URI value.
- On the Dashboard of the APP, click on Settings and then click on the option Reveal config Vars.
- See that the DATABASE_URL entry will already be applied to the APP
- Now you need to add the following variables to Reveal config Vars:
- HOSTNAME: The URL you are deploying to, for example photographer.herokuapp.com - SECRET_KEY: your chosen secret key - EMAIL_HOST_USER: your created email for this website - EMAIL_HOST_PASSWORD: email password - AWS_ACCESS_KEY_ID: your aws access key Id - AWS_SECRET_ACCESS_KEY: your AWS secret access key - STRIPE_SECRET_KEY: Stripe secret Key - STRIPE_PUBLISHABLE_KEY: Stripe secret Key - Now that the Heroku app is set up, you need to add the remote database to the website in your local IDE:
In the .env file, you need to add data from the remote database, with the data you took note of when setting up on Heroku, for example:
DATABASE_URL: postgres://........ - Now your local deployed site is set up to the remote Postgres db so you need to run:
python manage.py migrate - And then create a superuser to the remote data base:
python manage.py createsuperuser - After completing all the steps above, return to the Heroku Dashboard and click on DEPLOY option menu, scroll down until Deployment method and select Github and then Connect to Github.
- Just below provide the information from the website repository on GitHub and select the option Enable Automatic Deploy.
- Wait for the application to be created and, once completed, click on the "OPEN APP" button at the top of the page to open the website in the browser.
Most of the texts presented on the website were based on information provided by the photographer and written in English by me.
- All images on the main page and portfolio were produced and supplied by photographer Paolo Martinelli.
- The images on the contact page, services and the third photo, almost on the footer on the About me page were sourced from Pixabay.
- The main README banner with the device screens is a mockup sourced by FreePik and edited by me.
- All videos on portfolio were produced and supplied by photographer Paolo Martinelli.
-
The sidebar was inspired by the model available at https://azmind.com/bootstrap-sidebar-menu/. It has been changed and adapted to my needs.
-
Vitor Freitas at https://simpleisbetterthancomplex.com - this blog helped me solve some of the bigger problems I encountered. Excellent material very well explained.
-
Max Goodridge at https://www.youtube.com/watch?v=Fc2O3_2kax8&list=PLw02n0FEB3E3VSHjyYMcFadtQORvl1Ssj - This playlist about Django helped me a lot with many questions about forms and to understand some weird things about Django Framework.
-
The fade up animation in the portfolio photos was used from this library Animate On Scroll
-
The code for adding the correct prefixes to CSS was created using AutoPrefixer.
-
Several small doubts and in the development process were solved by similar problems in the Stack Overflow.
Very Special Thanks to:
- My mentor in Code Institute Sandeep Aggarwal who had all the patience to explain and make me understand certain concepts and peculiarities of the project content.
- All people, including family, friends, and colleagues who have tested this project on their real devices, reporting to me about any usability issues and giving improvement tips to improve the usability.
- To all of the Code Institute Slack community for the help in my issues and review to my project code.
