This is a demonstration of Argo Rollouts integrated with Argo CD in a standard OpenShift environment without a Service Mesh installed. The demo includes a pipeline that can be used to promote images using color coded tags (blue, green, yellow, etc) and the pipeline will update the image references in the development and production namespaces via Argo CD.
In development a normal Deployment is used, in Production both a bluegreen and canary rollout for the same application is deployed so that both strategies supported by Rollouts can be shown.
Your local machine must be able to run a bash script and have the following command line tools available to it:
- envsubst
- git
- kustomize
- kubectl rollouts plugin
OpenShift cluser must have:
- OpenShift GitOps 1.13+
- OpenShift Pipelines 1.11+
Note that this demo assumes it is being installed in a lab or test cluster where the user has full access to the openshift-gitops namespace. This process has been tested in RHDP using the OpenShift Workshop 4.13 catalog item.
-
Fork this repo into your own space, this is required since the pipeline will update the repo with the new image references
-
Clone the forked repo to your local file system and then switch to the directory:
cd rollouts-demo
-
Log into OpenShift with the oc CLI and from the
rollouts-demodirectory run thebootstrap.shcommand to install the app. -
Create a secret for github as follows replacing XXX with the appropriate values for your forked repository, note the password is not your password to GitHub but a Personal Access Token (classic) that you need to create in GitHub.
oc create secret generic github --type='kubernetes.io/basic-auth' --from-literal=username=XXXX --from-literal=password=XXXX --from-literal=email=XXXXX -n rollouts-demo-cicd
oc annotate secret github tekton.dev/git-0='https://github.com'  -n rollouts-demo-cicd
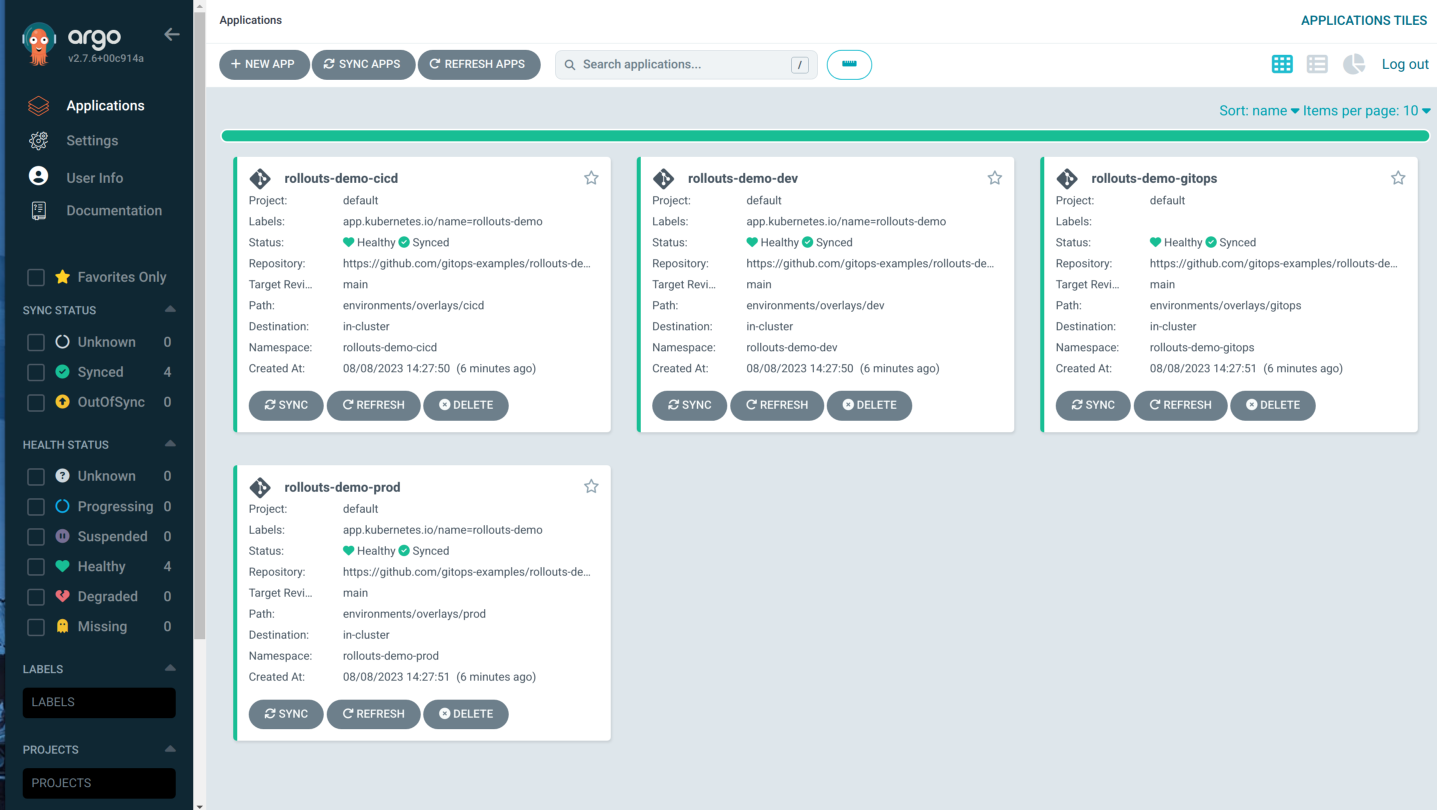
- Validate that the applications have been deployed and installed in Argo CD, the demo will install a separate Argo CD instance in the rollouts-demo-gitops namespace. To simplify the demo, note this instance is configured so that any user that can authenticate through OpenShift will be granted admin rights.
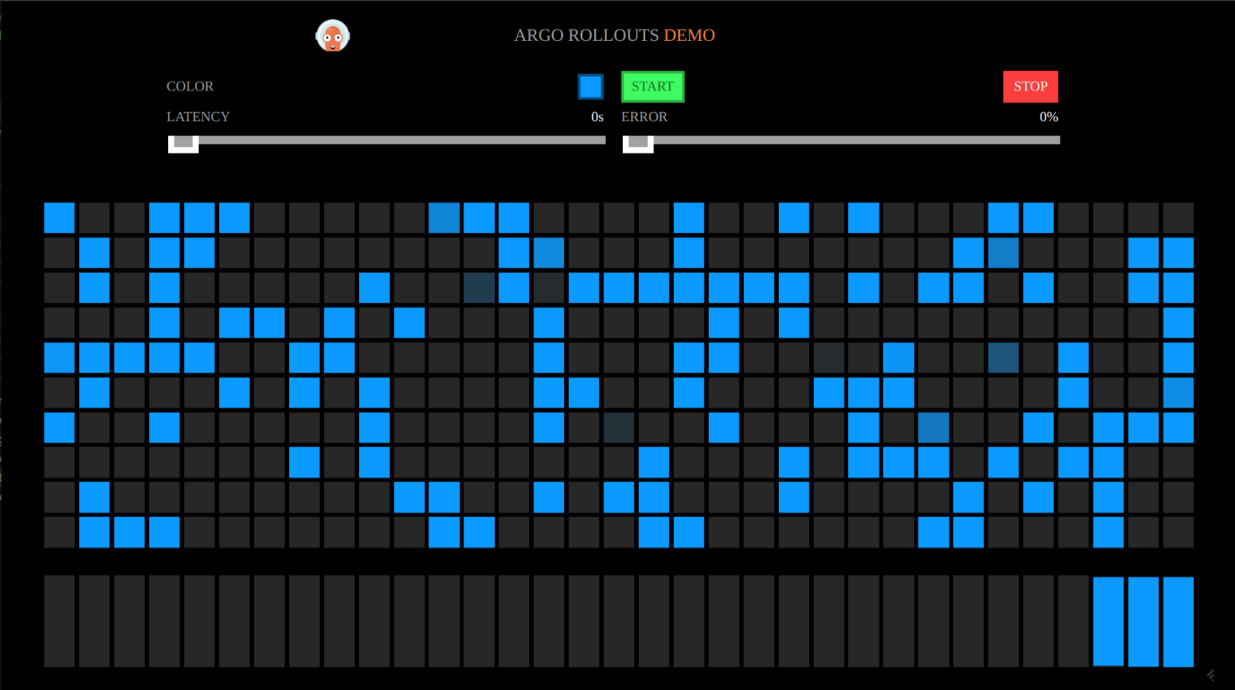
- Validate that the bluegreen and canary rollouts are running in rollouts-demo-prod and the provided routes work. The app displays a set of colored squares based on the currently deployed image, the demo initially provisions the blue image and will appear as below. As each square lights up this reflects a request made to the apps back-end and the color shown is reflective of this as we will see later.
When running the demo you will typically want to have a UI in order to follow the flow and interact with rollouts visually. You have two choices for UI at this time:
-
The local rollouts UI can be run from your laptop and access the UI in your browser at localhost:3100, the included script
rollouts-dashboard.shwill do this for you. -
There is an experimental OpenShift GitOps openshift dynamic console plugin that also provides a UI for rollouts. See more info about it and how to install it see here.
Note: If you are using RHDP for this demo and want to try the console plugin, make sure to select an instance that supports 3 control plane nodes otherwise the plugin will not rollout due to a bug in the console.
Important: The console plugin is not recommended for production instances at this time as only minimal testing as been done with it.
The demo consists of a pipeline that will promote a new image across the rollouts-demo-dev and rollouts-demo-prod namespaces. In the dev namespace we have a simple Deployment whereas in prod we have both a bluegreen and canary rollout. When promoting the image into prod both the bluegreen and canary will be updated at the same time giving you an opportunity to compare and contrast the two Rollout strategies.
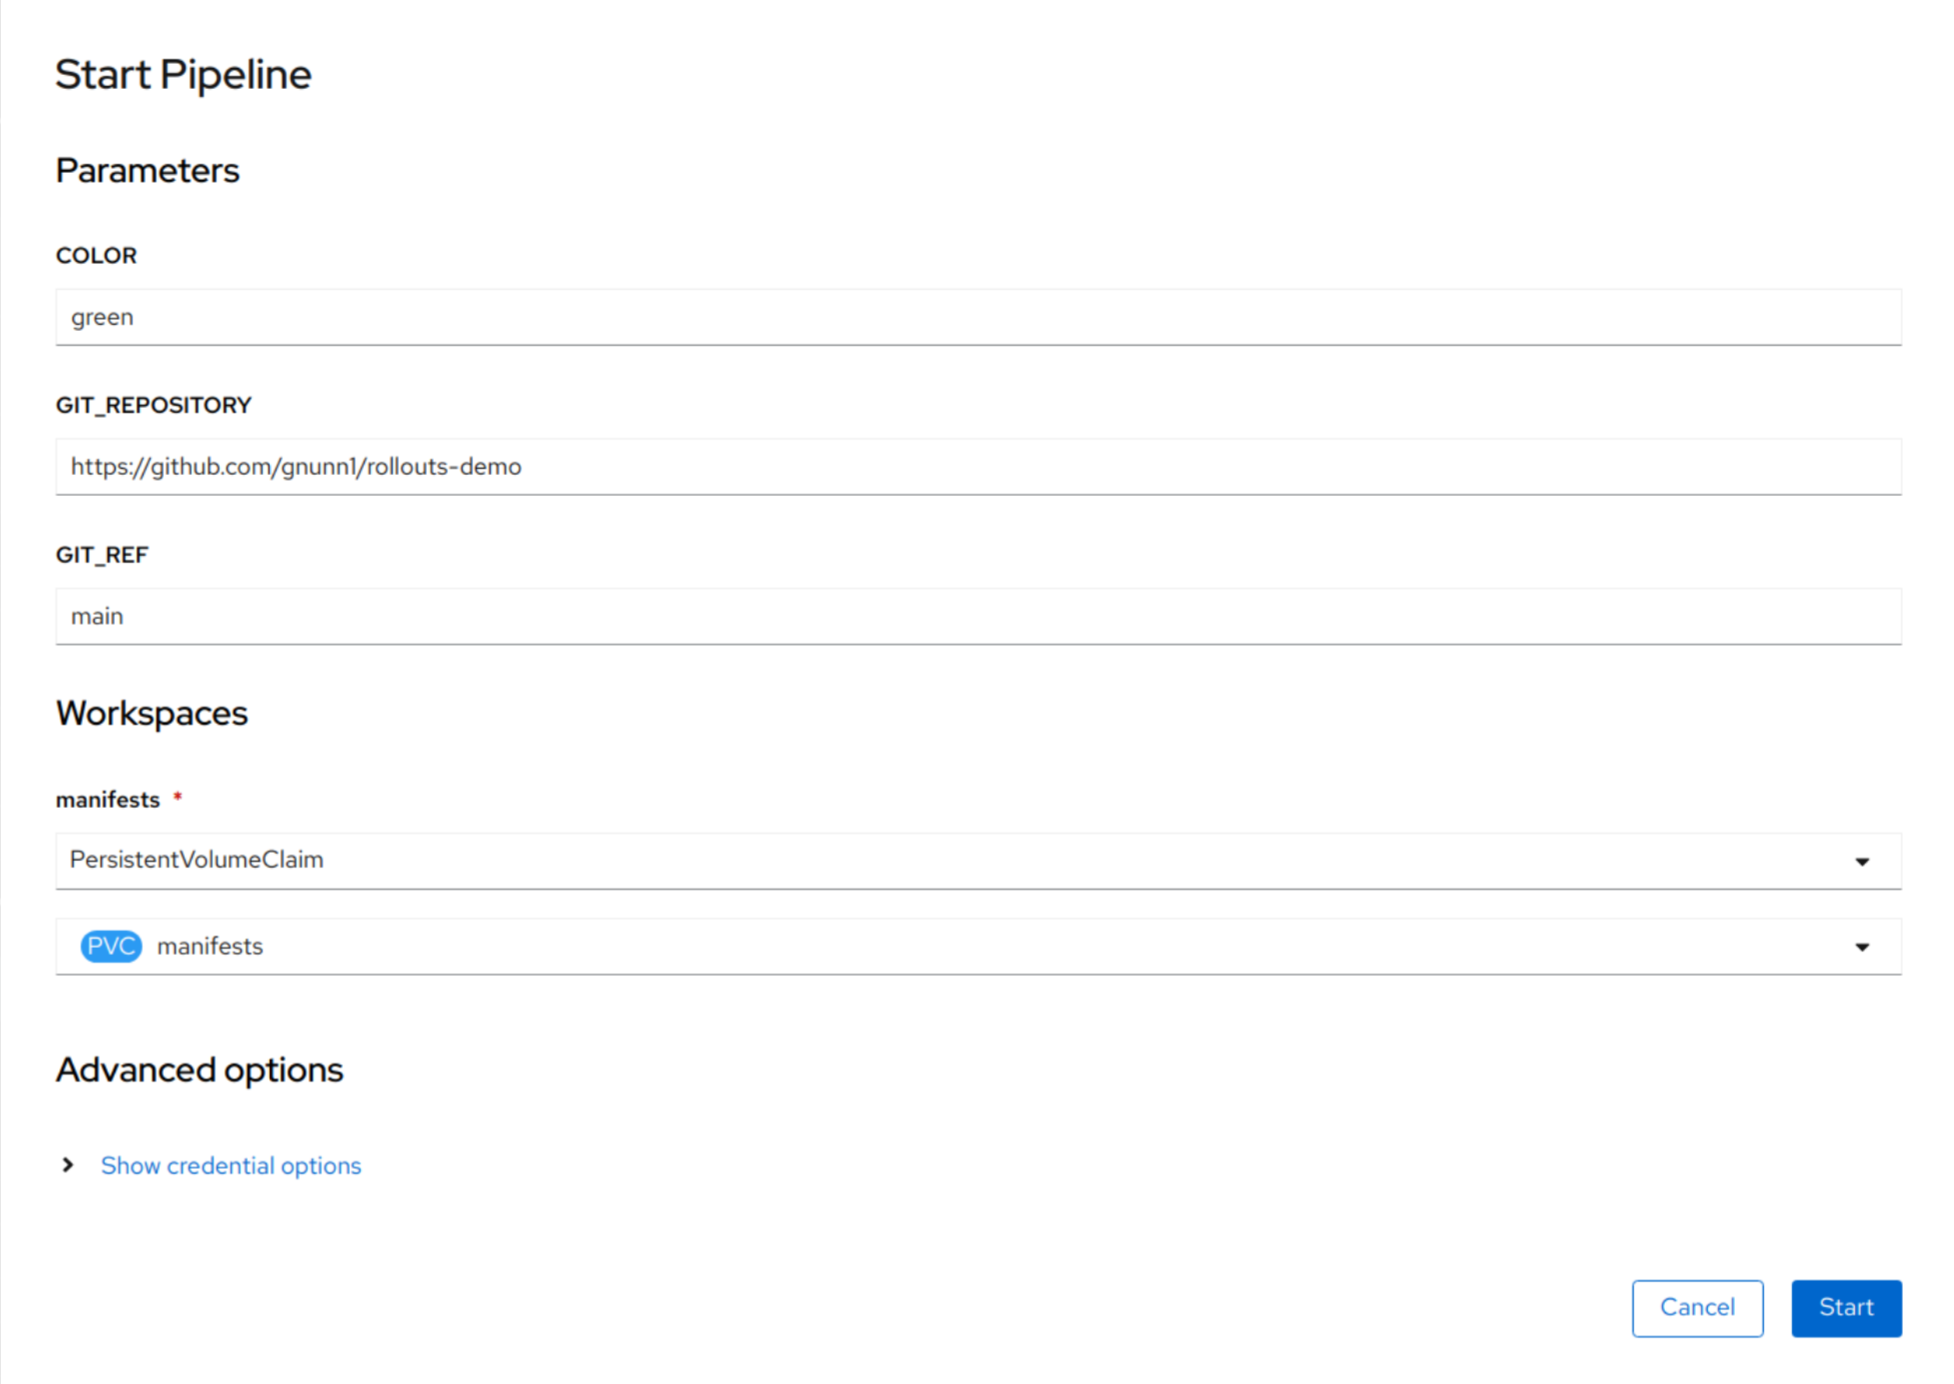
To start the demo, run the pipeline located in the rollouts-demo-cicd namespace. You need to specify the color you want to deploy, i.e. green (but others are available as well), and specify the manifests PVC for the manifests workspace. The following screenshot shows how to start the pipeline.
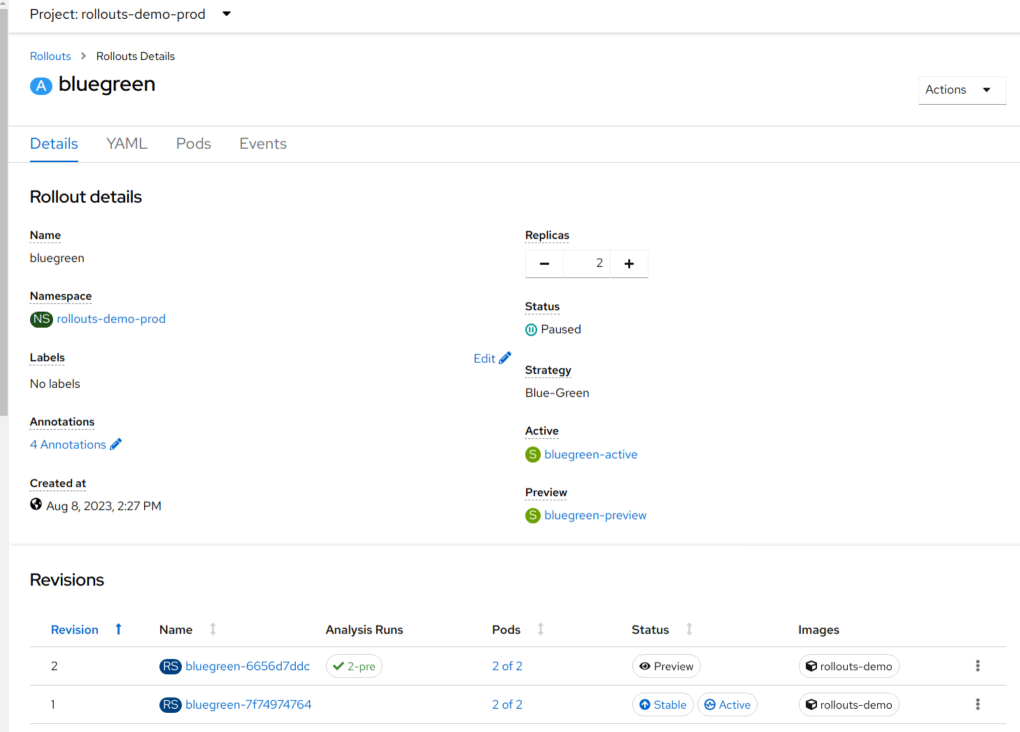
Once the pipeline has completed, check the status of your rollouts and they should either be in the Paused or Progressing state as per the screenshot below (Console plugin, rollouts UI will look different):
Both rollouts have AnalysisRuns associated with them, the AnalysisRun does the following:
-
Generates load on the application using the Apache siege application
-
Examines metrics for the route to ensure responses are returning 200 rather then 400s or 500s
It can take some time for the AnalysisRun to complete and while it is running the bluegreen rollout state may be Progressing, wait until both rollouts are Paused.
At this point you can examine each rollout, you should see that the bluegreen has one revision set to Preview and the other set to Active and Stable. There are corresponding routes for each service, confirm that Preview is displaying green squares and active is displaying blue squares.
Next if you look at the canary one, you will see that the one service is designated as Stable and the other as Canary. Similar to blue green, if you check the corresponding routes you should see that Stable is displaying a mix of blue and green depending on weight and canary is displaying green squares.
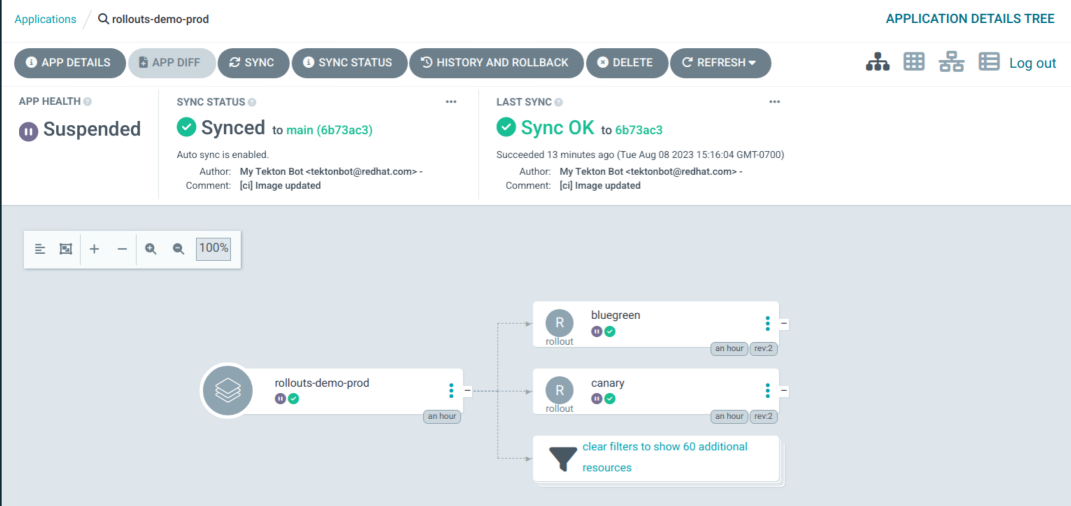
Finally check Argo CD and note that the status of the Application is suspended since the Argo rollouts are in a Paused state.
At this point you can proceed to promote both deployments and watch them go to completion, this is done by clicking the Promote button in the Argo Rollouts UI or selecting the Promote menu action in the OpenShift console plugin.
If you want to test performing a rollback, first go into Argo CD and disable automatic sync for the rollouts-demo-prod application, if you do not do this Argo CD will automatically revert the rollback back to the state in git, which is expected, but prevents the rollback.
Once the automatic sync is disabled you can then perform a rollback to the previous blue version. Note that like Deployment rollbacks are essentially a roll forward with the previous versions image.
When using the Route traffic plugin with Rollouts, note that if the routes are being managed by Argo CD you will need to configure ignoreDifferences in the Argo CD application in order for the traffic manager to change the weights dynamically. I would also recommend setting RespectIgnoreDifferences=true in syncOptions so that an accidentally sync doesn't result in Argo CD overwriting the weights made by the traffic manager.
In this demo we have it configured as follows:
apiVersion: argoproj.io/v1alpha1
kind: Application
metadata:
  labels:
    app.kubernetes.io/name: rollouts-demo
  name: rollouts-demo-prod
  namespace: rollouts-demo-gitops
spec:
  destination:
    namespace: rollouts-demo-prod
    server: https://kubernetes.default.svc
  ignoreDifferences:
  - group: route.openshift.io
    jsonPointers:
    - /status
    - /spec/to/weight
    - /spec/alternateBackends
    kind: Route
  project: default
  source:
    path: environments/overlays/prod
    repoURL: https://github.com/gitops-examples/rollouts-demo.git
    targetRevision: main
  syncPolicy:
    automated:
      selfHeal: true
    syncOptions:
    - RespectIgnoreDifferences=true
A couple of notes:
- We ignore
alternateBackendsbecause the traffic manager will remove it when the weight is set to 100 on stable - I had some issues with
statuscoming up as a diff when the route status was set tostatus: {}, some additional investigation is required.
