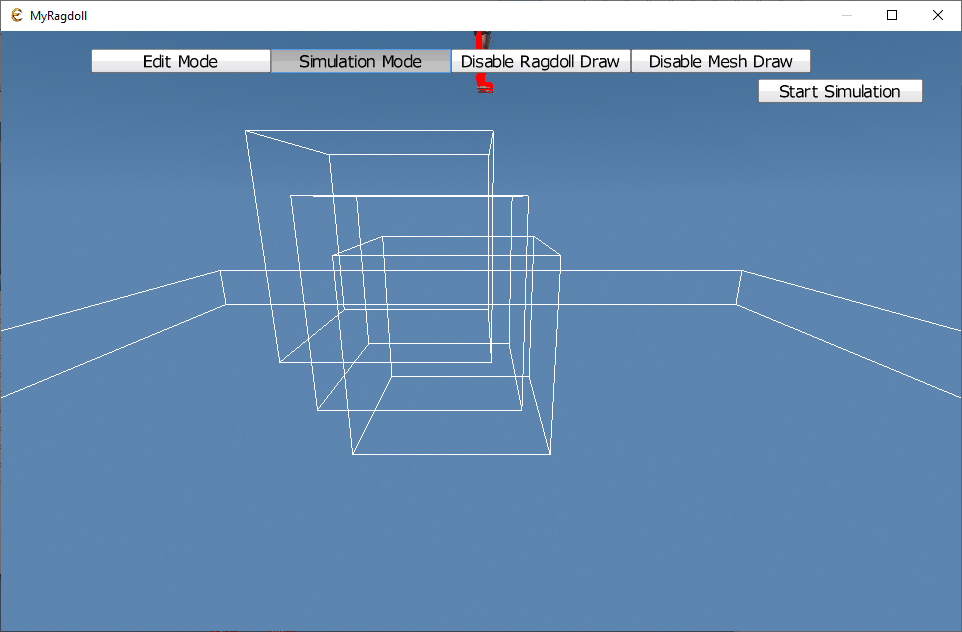
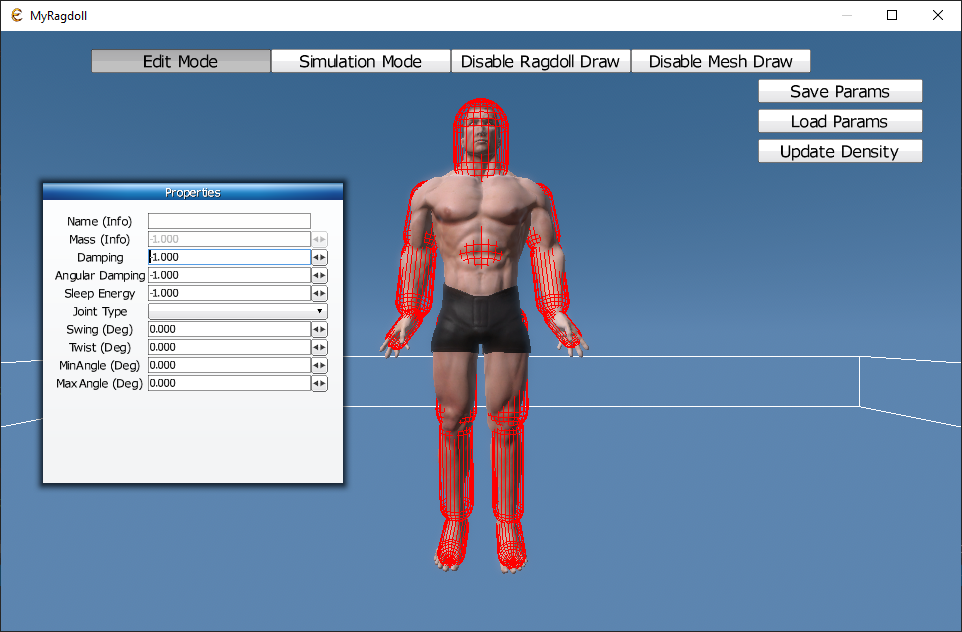
Ragdoll edytor based on build in Esenthel Engine classes Ragdoll and Chr.
- master - main branch with release version.
- development - branch with development version.
- Esenthel Engine
- Microsoft Visual Studio
- C++
- Copy ESENTHEL_ENGINE_INSTALL_PATH\Bin\Esenthel.pak to REPOSITORY_PATH\Bin
- Open Project.sln and update all paths to point to Esenthel engine installation directory.
- Open stdafx.h and update path to where Esenthel engine is installed. Change ESENTHEL_ENGINE_INSTALL_PATH to path where engine is installed.
- Open project properties. Go to Linker->Input->Additional Dependencies and change ESENTHEL_ENGINE_INSTALL_PATH to path where engine is installed (You can also open Project.vcxproj in text editor and replace ESENTHEL_ENGINE_INSTALL_PATH).
- Build, if have some include errors or linker check if previous steps are make correct.
Error (active) E1696 cannot open source file "ESENTHEL_ENGINE_INSTALL_PATH/Bin/EsenthelEngine/_/System/begin.h"
Error LNK1104 cannot open file 'ESENTHEL_ENGINE_INSTALL_PATH\Bin\EsenthelEngine64DX11.lib'
- Run MyRagdoll.exe
- Project is set for PUBLISH so it use local Engine.pak and Project.pak. If you want to change it got o Auto.cpp and change
const bool EE_PUBLISH =true; // this is set to true when compiling for publishingto
const bool EE_PUBLISH =false; // this is set to true when compiling for publishingAnd also change path to engine pak and project pak.
cchar *C   EE_ENGINE_PATH      =((WINDOWS_NEW || MOBILE || WEB) ? u"Engine.pak"  : EE_PUBLISH ? u"Bin/Engine.pak"  : u"ESENTHEL_ENGINE_INSTALL_PATH/Bin/Engine.pak");
cchar *C EE_PROJECT_PATH =((WINDOWS_NEW || MOBILE || WEB) ? u"Project.pak" : EE_PUBLISH ? u"Bin/Project.pak" : u"ESENTHEL_ENGINE_PROJECT_PATH/Game");- If you want to use custom model and have set correct project pak. You must change UID in line in Main.cpp->InitPre:
player.create(*ObjectPtr(UID(2919624831, 1261075521, 753053852, 3651670215)));Version 1.0.0.
- ESC - Exit editor
- Left CTRL - Hold to rotate camera with mouse. Hold right mouse button to move camera.
- Mouse scroll - Zoom camera in and out. (Works also with LCTRL)
- Disable Ragdoll Draw: Do not draw ragdoll and all related things.
- Disable mesh draw: Do not draw mesh.
 Start simulation to start, restart simulation.
If in simulation mode ragdoll break, go into edit mode save default parameters and load them.
 Left Shift + Left mouse button click: Select ragdoll actor and display parameters in window.
(IMPORTAND! Change actor or click on viewport to update parameters and deselect active actor!)
Pink actor: Parent to selected actor to which joint is created.
Yellow actor: Selected actor.
Black dot: Joint start pos.
Green line: Joint.
- Save params: Save ragdoll params to ragdoll_params.txt
- Load params: Load ragdoll params from ragdoll_params.txt and set it into current ragdoll. IMPORTAND! Deselect all actors to enable load button.
- If use model with skeleton like warrior disable creation of ragdoll for neck and check how it works.
- Save selected actor and joint settings when switch too simulation mode or params are saved to file.
- Two modes: simulation and edit
- Examples to use with Esenthel Engine
After saving parameters for your ragdoll you can load it and use in existing project.
For basic example we will use application from Tutorial 11 - Physics/11 - Ragdoll.
- Import text file with ragdoll parameters to your project (Just drag and drop for example to Objects folder).
- Open application 11 - Physics/11 - Ragdoll. To make it work we need some extra code that can be found in EsenthelProjectSource in repository.
- Create new code with name Helpers and copy code from EsenthelProjectSource/Helpers.h
- Create new code with name MyRagdoll and copy code from EsenthelProjectSource/MyRagdoll.h
- Create new code with name MyRagdollParams and copy code from EsenthelProjectSource/MyRagdollParams.h You should now have all needed source code and project must build. If no report bug. To use new created class we need to make some changes in Main file.
- Change line
Ragdoll ragdoll;to
MyRagdoll ragdoll;Now new class is used for ragdoll but it is created with default parameters (Should behave the same as old one!?).
- In Init() search for:
ragdoll.create(skel); // create ragdoll from skeletonand change it to
Flt densityOut; // Density saved in file or 1000 if not saved.
Mems<RagdollActorData> rad = RagdollDataHelpers::LoadRagdollData(RAGDOLL_PARAMS_FILE_UID, densityOut); // Parameters for all bones and joints
RagdollData rd(densityOut,  rad); // Object with all data to create ragdoll
ragdoll.create(skel, rd, 1.7, densityOut); // Create ragdoll from loaded data- At last change RAGDOLL_PARAMS_FILE_UID to your file UID, or if want you can load file with name from disc.
- After that the ragdoll will be created with loaded parameters.
For advanced tutorial with custom character we will use 14 - Game Basics/13 - Ragdoll.
- Import text file with ragdoll parameters to your project (Just drag and drop for example to Objects folder).
- Open application 14 - Game Basics/13 - Ragdoll. To make it work we need some extra code that can be found in EsenthelProjectSource in repository.
- Create new code with name Player and copy code from EsenthelProjectSource/Player.h
- In Player code in RagdollValidate change RAGDOLL_PARAMS_FILE_UID to your file UID, or if want you can load file with name from disc.
- Create new code with name Helpers and copy code from EsenthelProjectSource/Helpers.h
- Create new code with name MyRagdoll and copy code from EsenthelProjectSource/MyRagdoll.h
- Create new code with name MyRagdollParams and copy code from EsenthelProjectSource/MyRagdollParams.h You should now have all needed source code and project must build. If no report bug. To use new created class we need to make some changes in Main file.
- Change line
Game.ObjMap<Game.Chr> Chrs;to
Game.ObjMap<Player> Chrs;and line
Game.Chr &chr=Chrs[0];to
Player &chr=Chrs[0];- Then we need to change
if(Kb.bp(KB_Q))if(chr.ragdollBlend())if(Ragdoll.Bone *bone=chr.ragdoll.findBone("Head" ))bone.actor.addVel(Vec(0, 0, 3));
if(Kb.bp(KB_W))if(chr.ragdollBlend())if(Ragdoll.Bone *bone=chr.ragdoll.findBone("Body" ))bone.actor.addVel(Vec(0, 0, 3));
if(Kb.bp(KB_E))if(chr.ragdollBlend())if(Ragdoll.Bone *bone=chr.ragdoll.findBone("FootR"))bone.actor.addVel(Vec(0, 0, 4));
if(Kb.bp(KB_R))if(chr.ragdollBlend())if(Ragdoll.Bone *bone=chr.ragdoll.findBone("HandR"))bone.actor.addVel(Vec(0, 0, 4));
to
if(Kb.bp(KB_Q))if(chr.ragdollBlend())if(MyRagdoll.Bone *bone=chr.ragdoll.findBone("Head" ))bone.actor.addVel(Vec(0, 0, 3));
if(Kb.bp(KB_W))if(chr.ragdollBlend())if(MyRagdoll.Bone *bone=chr.ragdoll.findBone("Body" ))bone.actor.addVel(Vec(0, 0, 3));
if(Kb.bp(KB_E))if(chr.ragdollBlend())if(MyRagdoll.Bone *bone=chr.ragdoll.findBone("FootR"))bone.actor.addVel(Vec(0, 0, 4));
if(Kb.bp(KB_R))if(chr.ragdollBlend())if(MyRagdoll.Bone *bone=chr.ragdoll.findBone("HandR"))bone.actor.addVel(Vec(0, 0, 4));
so Ragdoll.Bone must be changed to MyRagdoll.Bone. After that custom player with custom ragdoll will be used.
- If in some case you will use cast to built in Game.Chr new MyRagdoll will be not used as it hides base class Ragdoll ragdoll.
- Some other methods are also not virtual so there are only hide. This can couse errors.
- This was made as alternative to editing source code but because of that it has limitation and couse errors in some cases.
- The best ide will be to find good parameters and update them in engine source code.