Detailed explanation can be found in this post
Code available at data_engineering_project_template repository.
You can run this data pipeline using GitHub codespaces. Follow the instructions below.
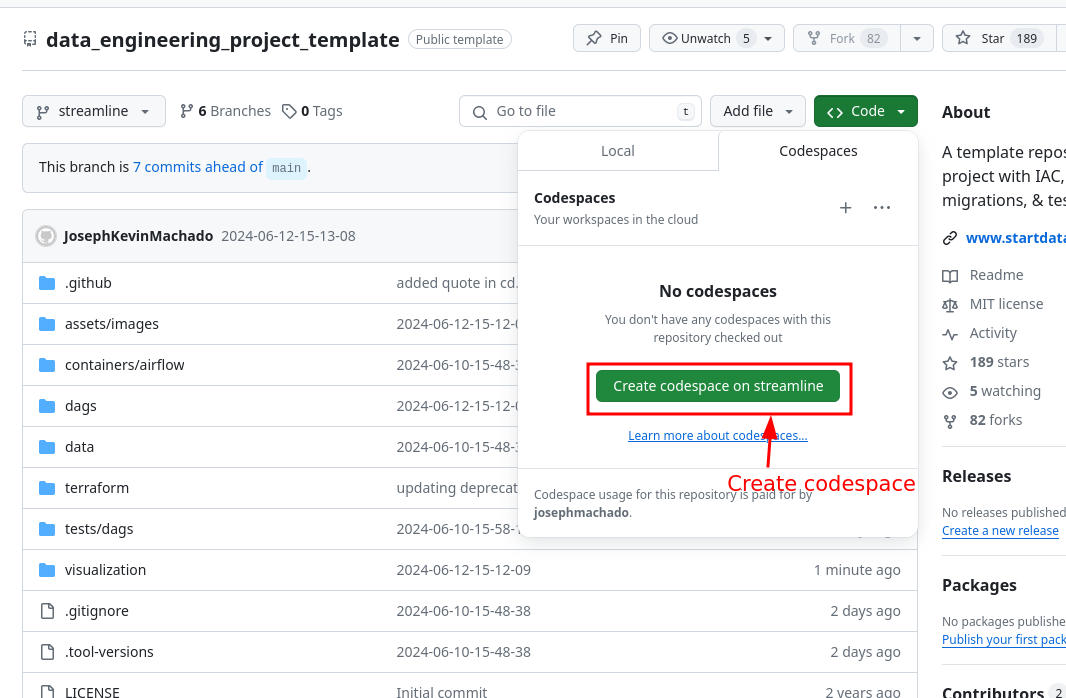
- Create codespaces by going to the data_engineering_project_template repository, cloning it(or click
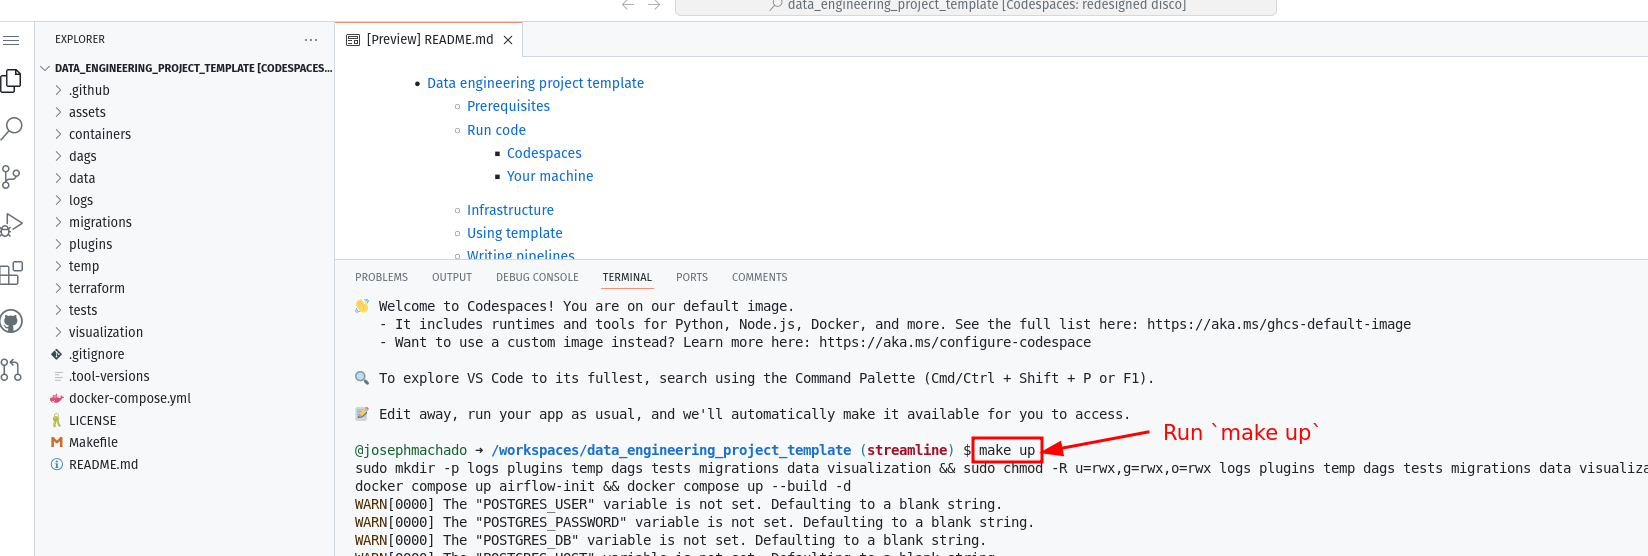
Use this templatebutton) and then clicking onCreate codespaces on mainbutton. - Wait for codespaces to start, then in the terminal type
make up. - Wait for
make upto complete, and then wait for 30s (for Airflow to start). - After 30s go to the
portstab and click on the link exposing port8080to access Airflow UI (username and password isairflow).
To run locally, you need:
- git
- Github account
- Docker with at least 4GB of RAM and Docker Compose v1.27.0 or later
Clone the repo and run the following commands to start the data pipeline:
git clone https://github.com/josephmachado/data_engineering_project_template.git
cd data_engineering_project_template
make up
sleep 30 # wait for Airflow to start
make ci # run checks and tests
Go to http:localhost:8080 to see the Airflow UI. Username and password are both airflow.
This data engineering project template, includes the following:
Airflow: To schedule and orchestrate DAGs.Postgres: To store Airflow's details (which you can see via Airflow UI) and also has a schema to represent upstream databases.DuckDB: To act as our warehouseQuarto with Plotly: To convert code inmarkdownformat to html files that can be embedded in your app or servered as is.cuallee: To run data quality checks on the data we extracted from CoinCap API.minio: To provide an S3 compatible open source storage system.
For simplicity services 1-5 of the above are installed and run in one container defined here.
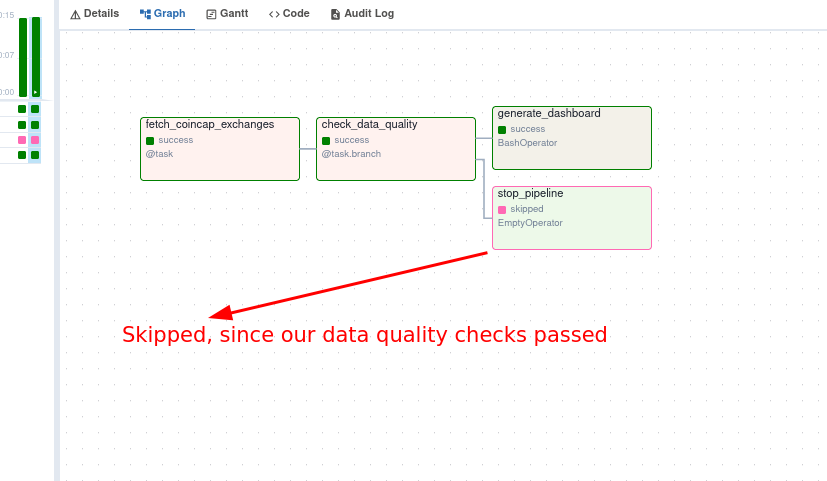
The coincap_elt DAG in the Airflow UI will look like the below image:
You can see the rendered html at ./visualizations/dashboard.html.
The file structure of our repo is as shown below:
You can use this repo as a template and create your own, click on the Use this template button.
We have a sample pipeline at coincap_elt.py that you can use as a starter to create your own DAGs. The tests are available at ./tests folder.
Once the coincap_elt DAG runs, we can see the dashboard html at ./visualization/dashboard.html and will look like  .
.
If you want to run your code on an EC2 instance, with terraform, follow the steps below.
You can create your GitHub repository based on this template by clicking on the `Use this template button in the data_engineering_project_template repository. Clone your repository and replace content in the following files
- CODEOWNERS: In this file change the user id from
@josephmachadoto your Github user id. - cd.yml: In this file change the
data_engineering_project_templatepart of theTARGETparameter to your repository name. - variable.tf: In this file change the default values for
alert_email_idandrepo_urlvariables with your email and github repository url respectively.
Run the following commands in your project directory.
# Create AWS services with Terraform
make tf-init # Only needed on your first terraform run (or if you add new providers)
make infra-up # type in yes after verifying the changes TF will make

# Wait until the EC2 instance is initialized, you can check this via your AWS UI
# See "Status Check" on the EC2 console, it should be "2/2 checks passed" before proceeding
# Wait another 5 mins, Airflow takes a while to start up

make cloud-airflow # this command will forward Airflow port from EC2 to your machine and opens it in the browser
# the user name and password are both airflow

make cloud-metabase # this command will forward Metabase port from EC2 to your machine and opens it in the browser
# use https://github.com/josephmachado/data_engineering_project_template/blob/main/env file to connect to the warehouse from metabase
For the continuous delivery to work, set up the infrastructure with terraform, & defined the following repository secrets. You can set up the repository secrets by going to Settings > Secrets > Actions > New repository secret.
SERVER_SSH_KEY: We can get this by runningterraform -chdir=./terraform output -raw private_keyin the project directory and paste the entire content in a new Action secret called SERVER_SSH_KEY.REMOTE_HOST: Get this by runningterraform -chdir=./terraform output -raw ec2_public_dnsin the project directory.REMOTE_USER: The value for this is ubuntu.
After you are done, make sure to destroy your cloud infrastructure.
make down # Stop docker containers on your computer
make infra-down # type in yes after verifying the changes TF will make


