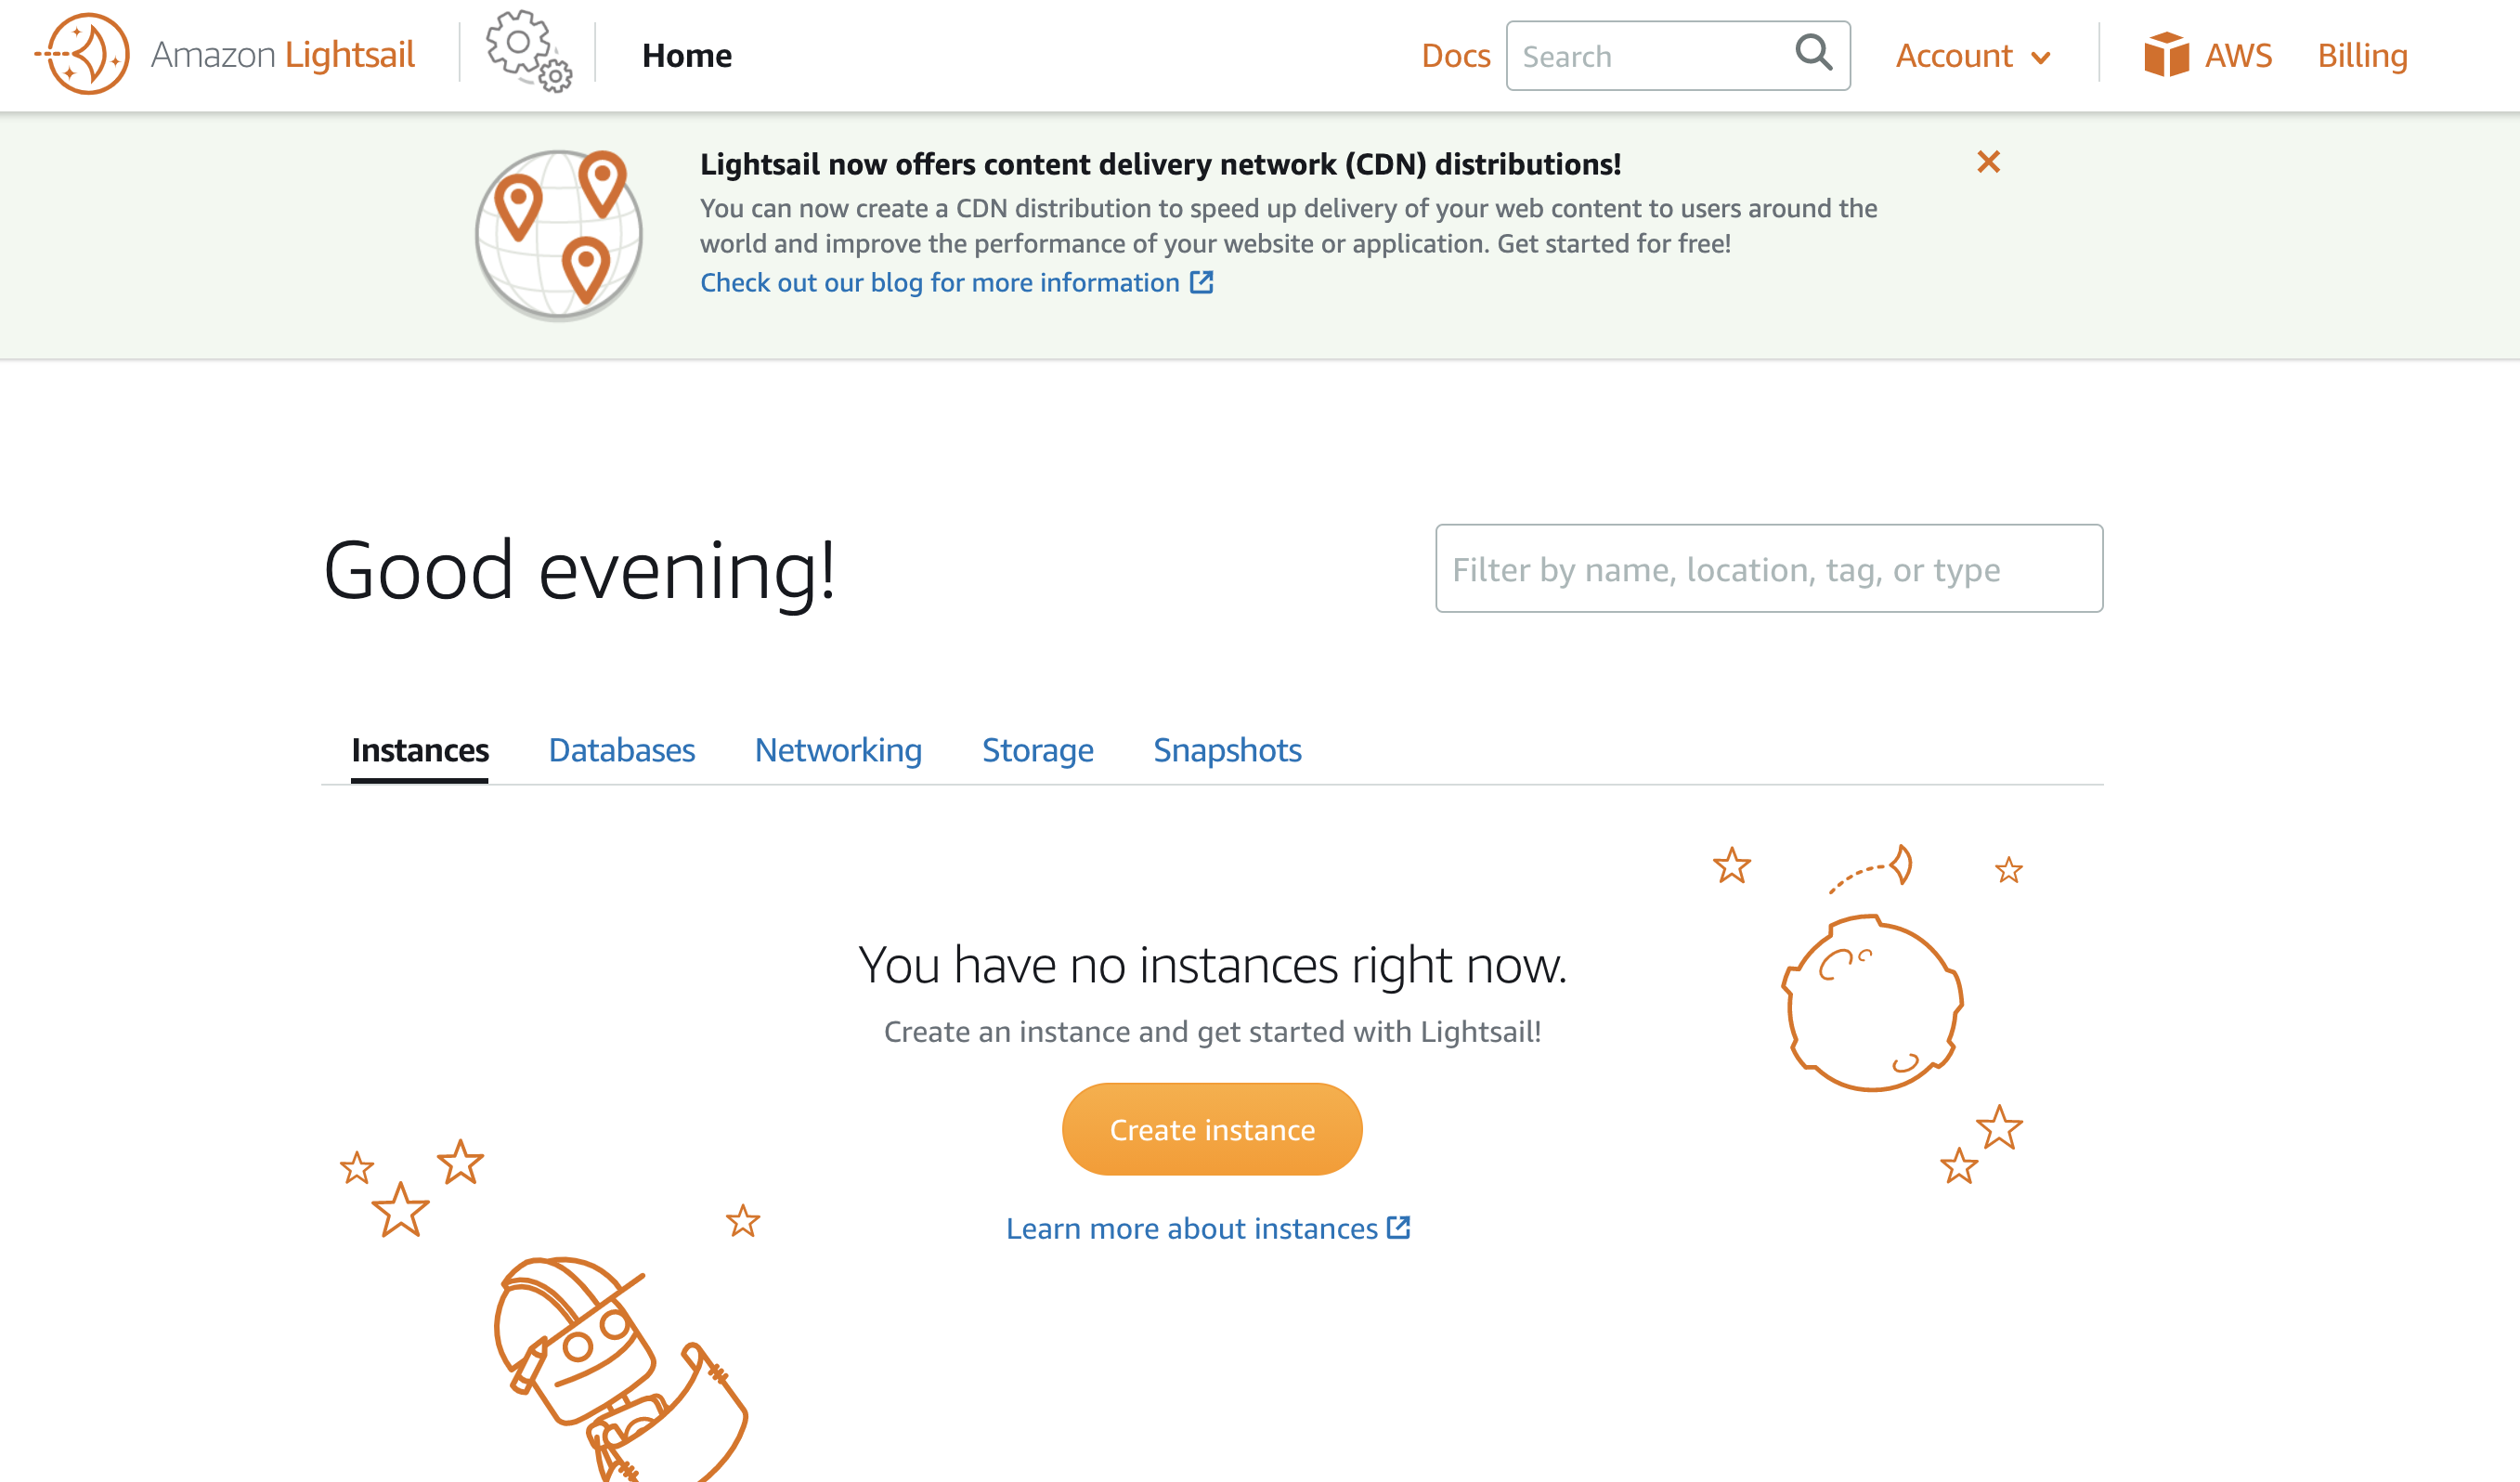
Create a Lightsail instance from the AWS dashboard
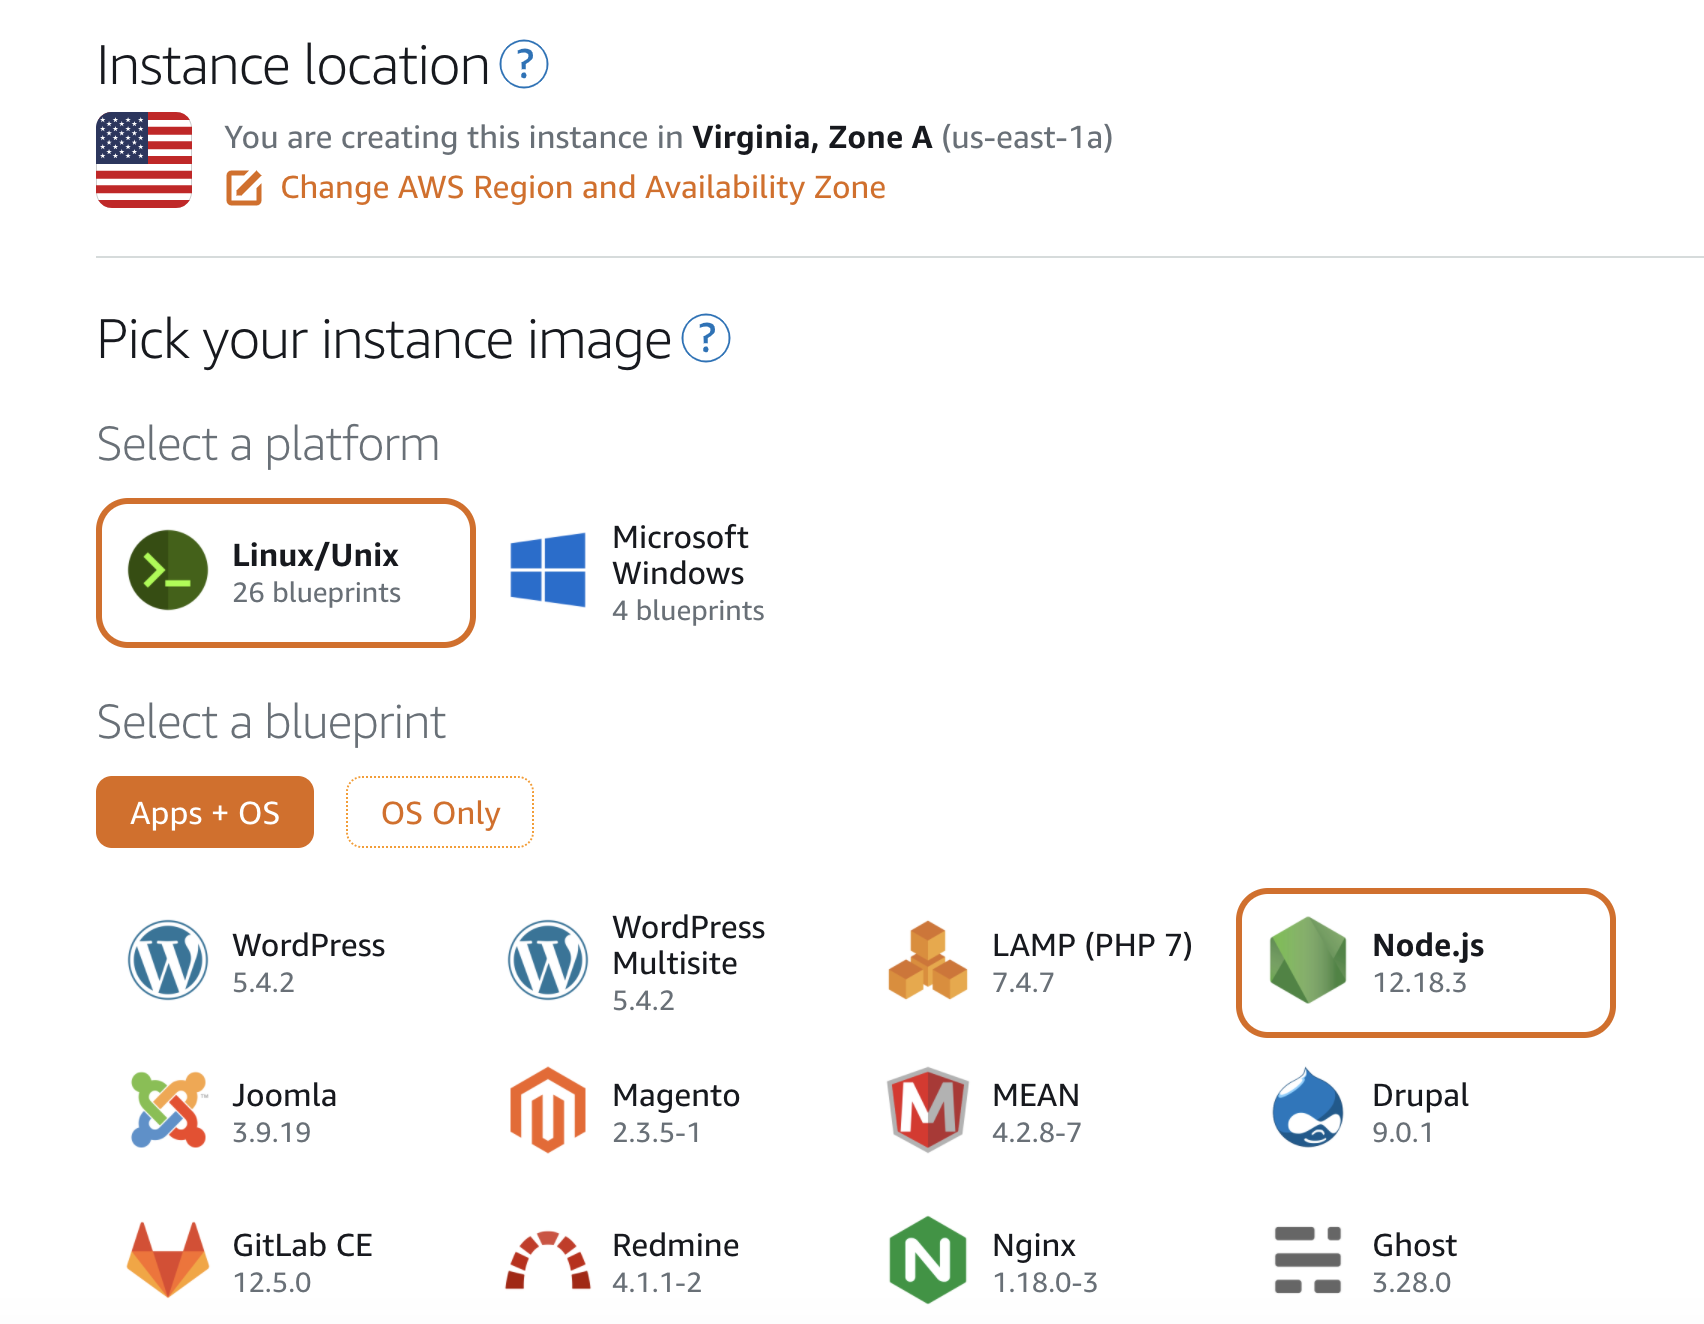
Choose your instance type
Linux & Node
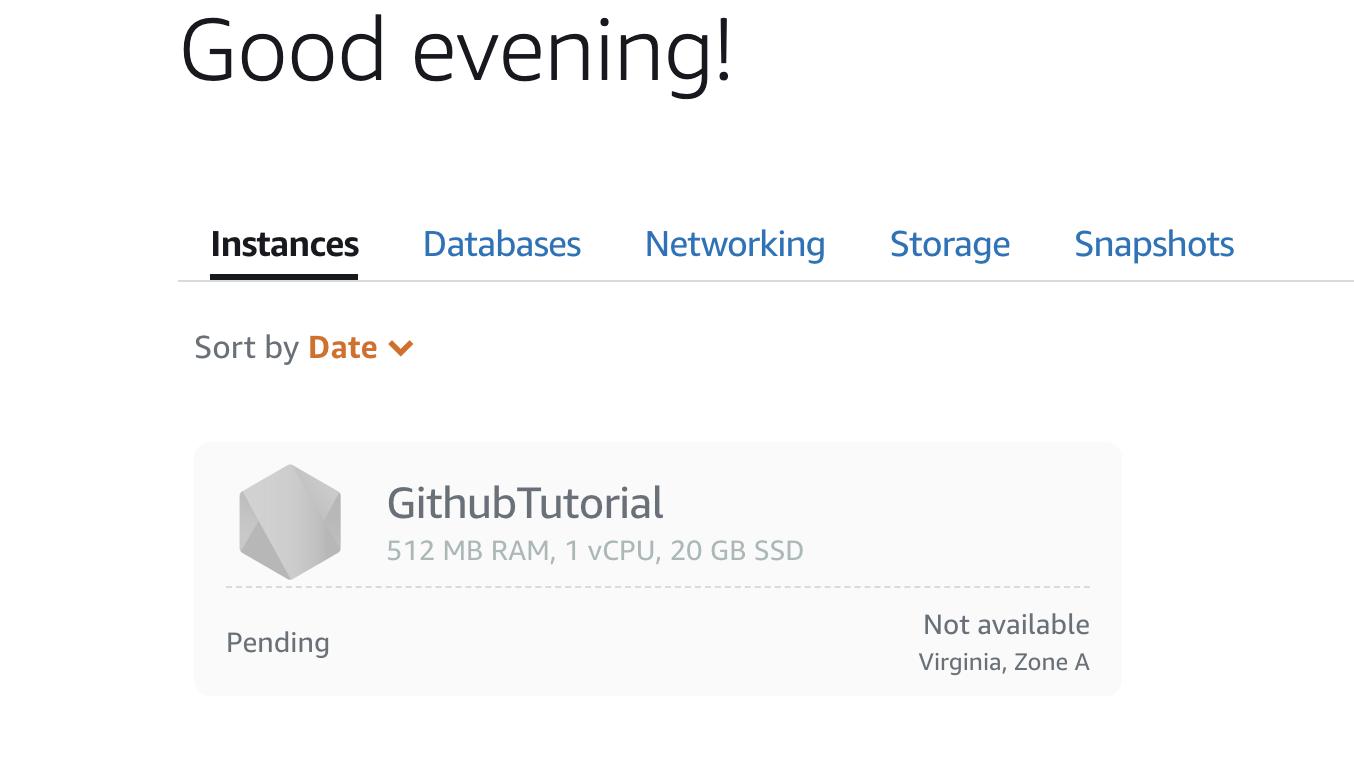
Wait for the instance to be created
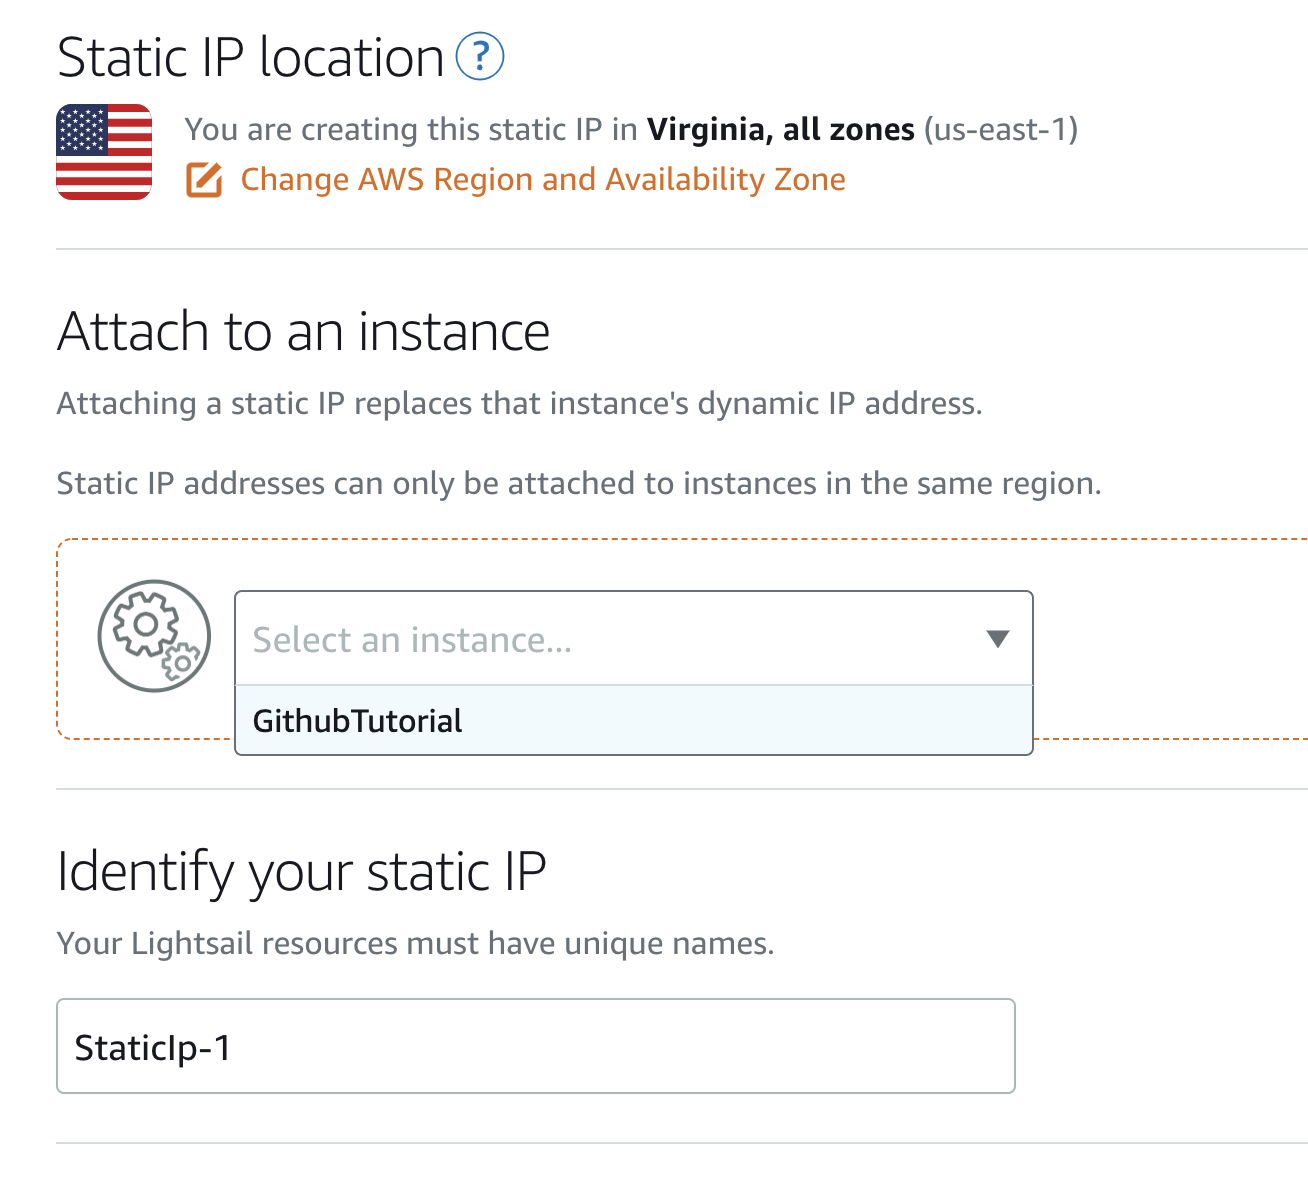
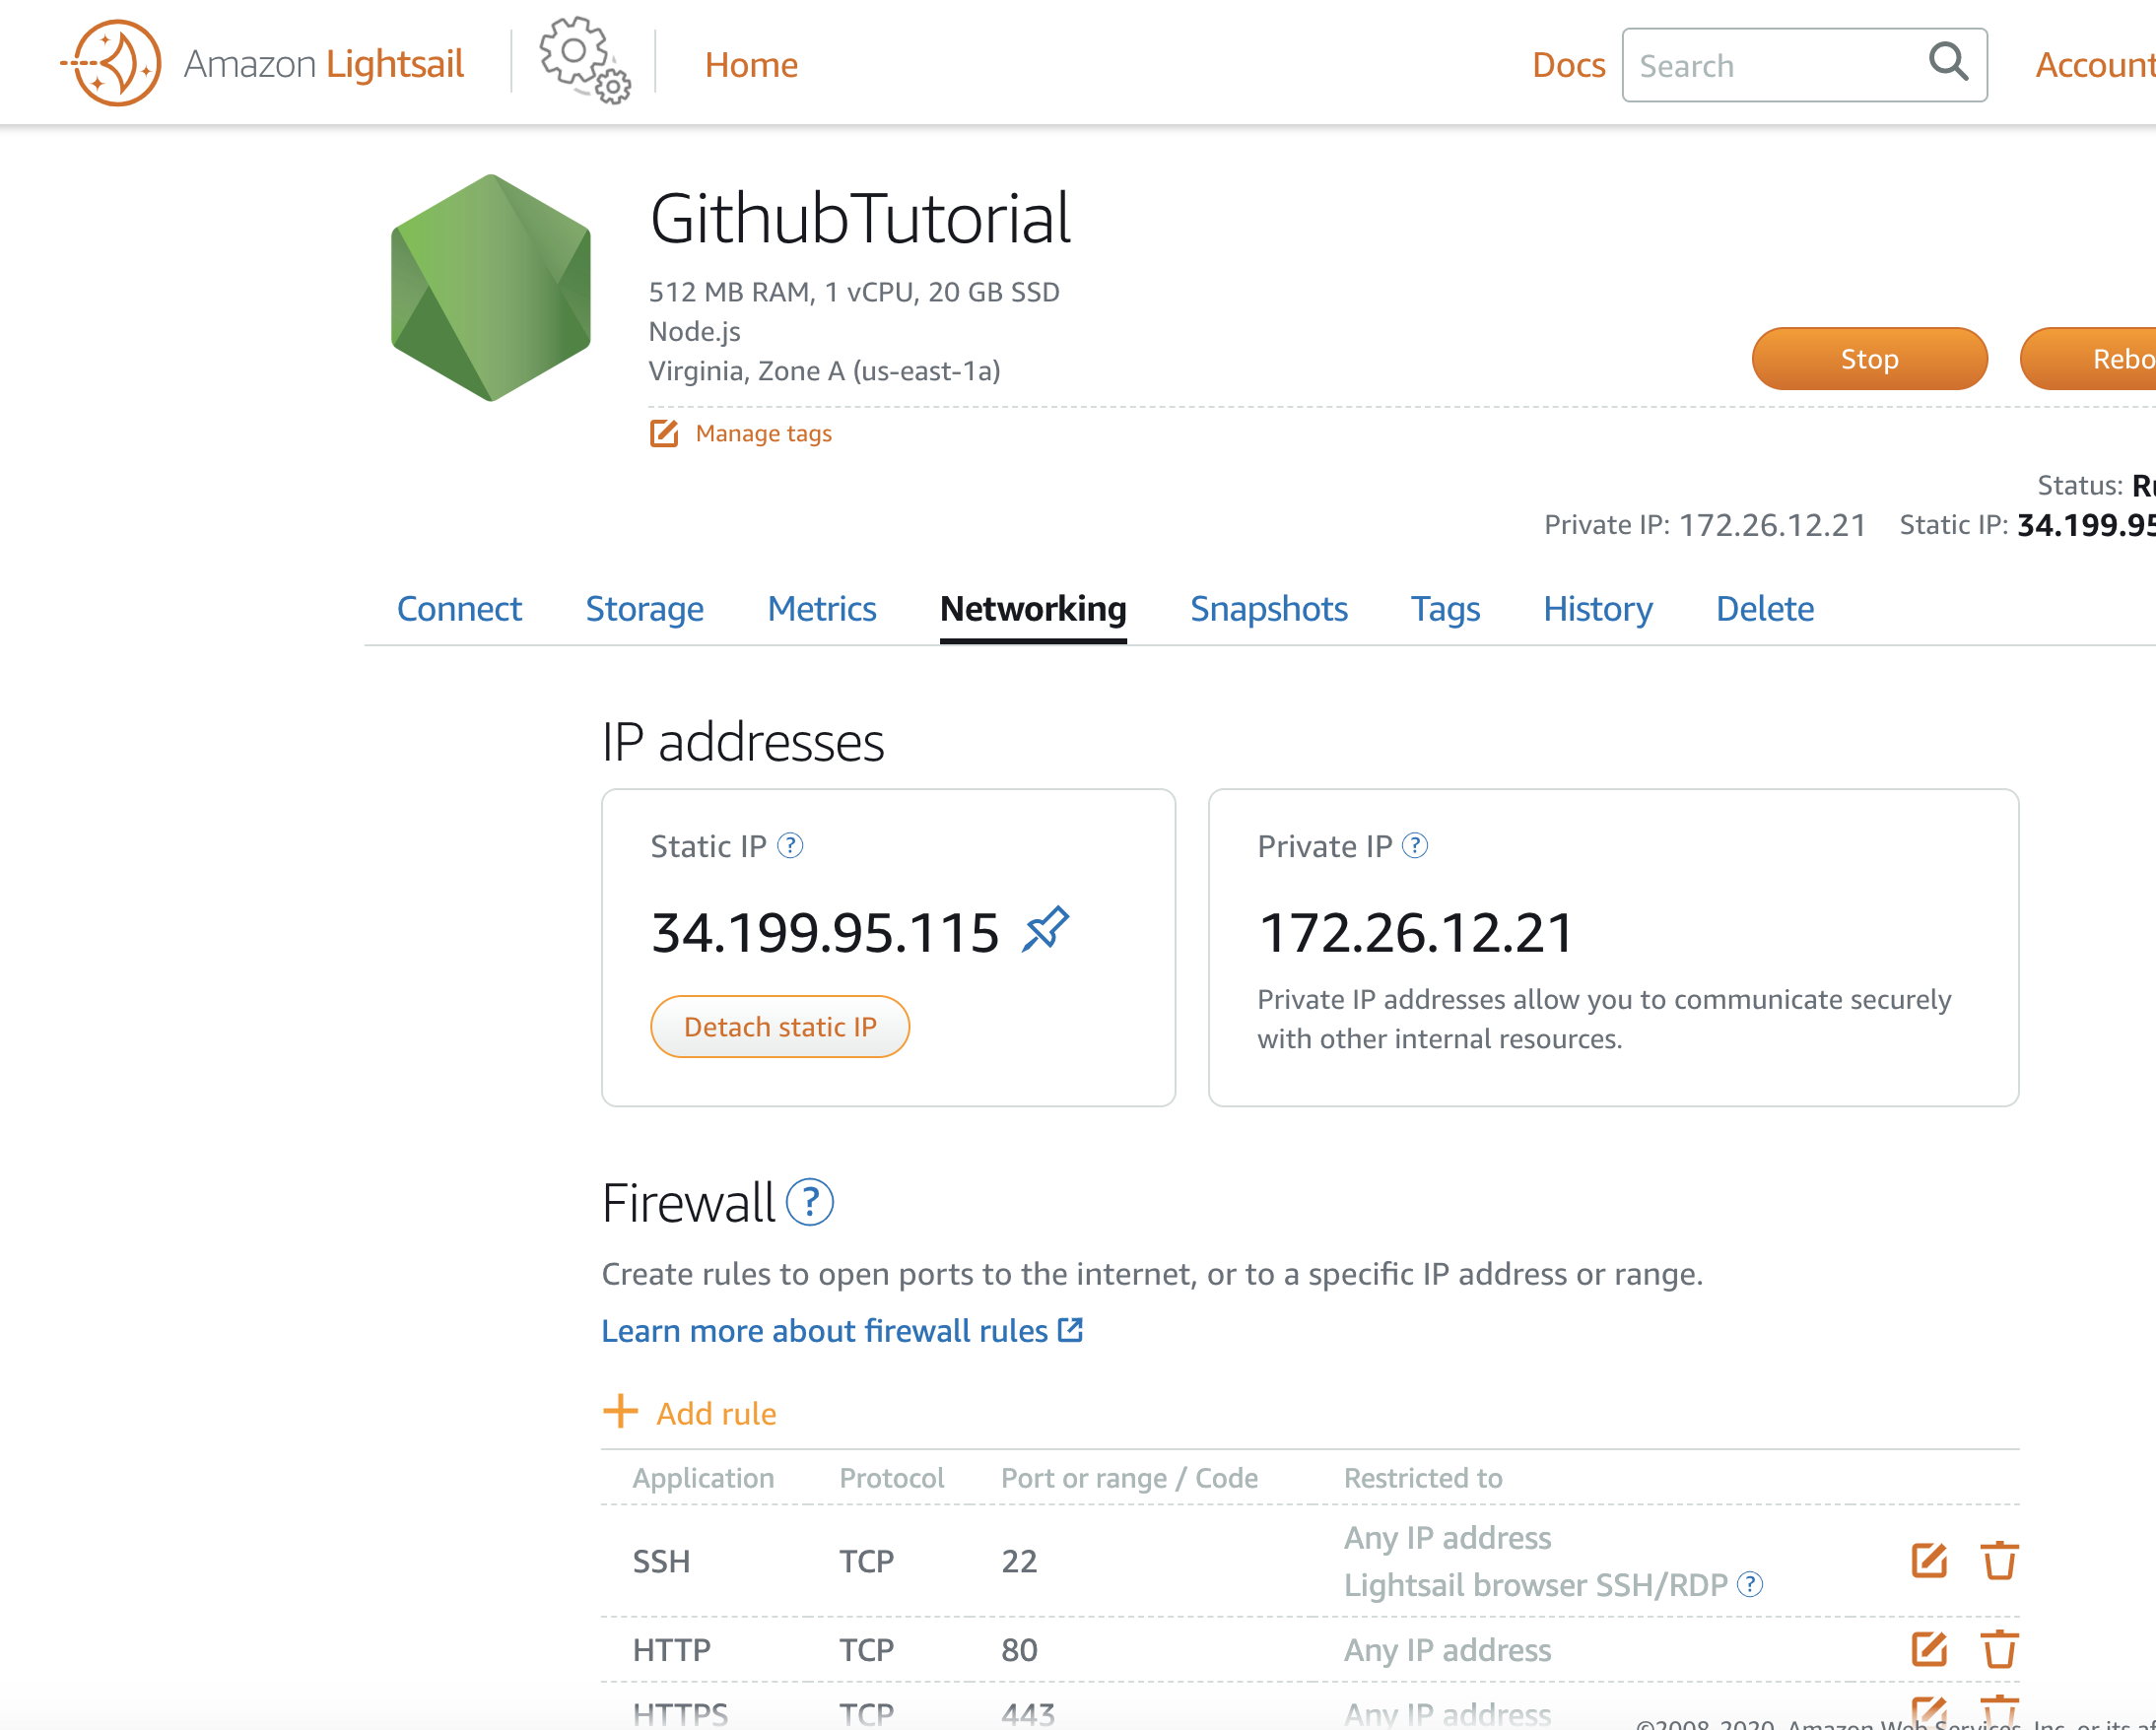
In the meantime, go to the Networking tab and click on Create static IP
Attach the static IP you just created to your instance
Go back home and click on networking so that you arrive at this tab
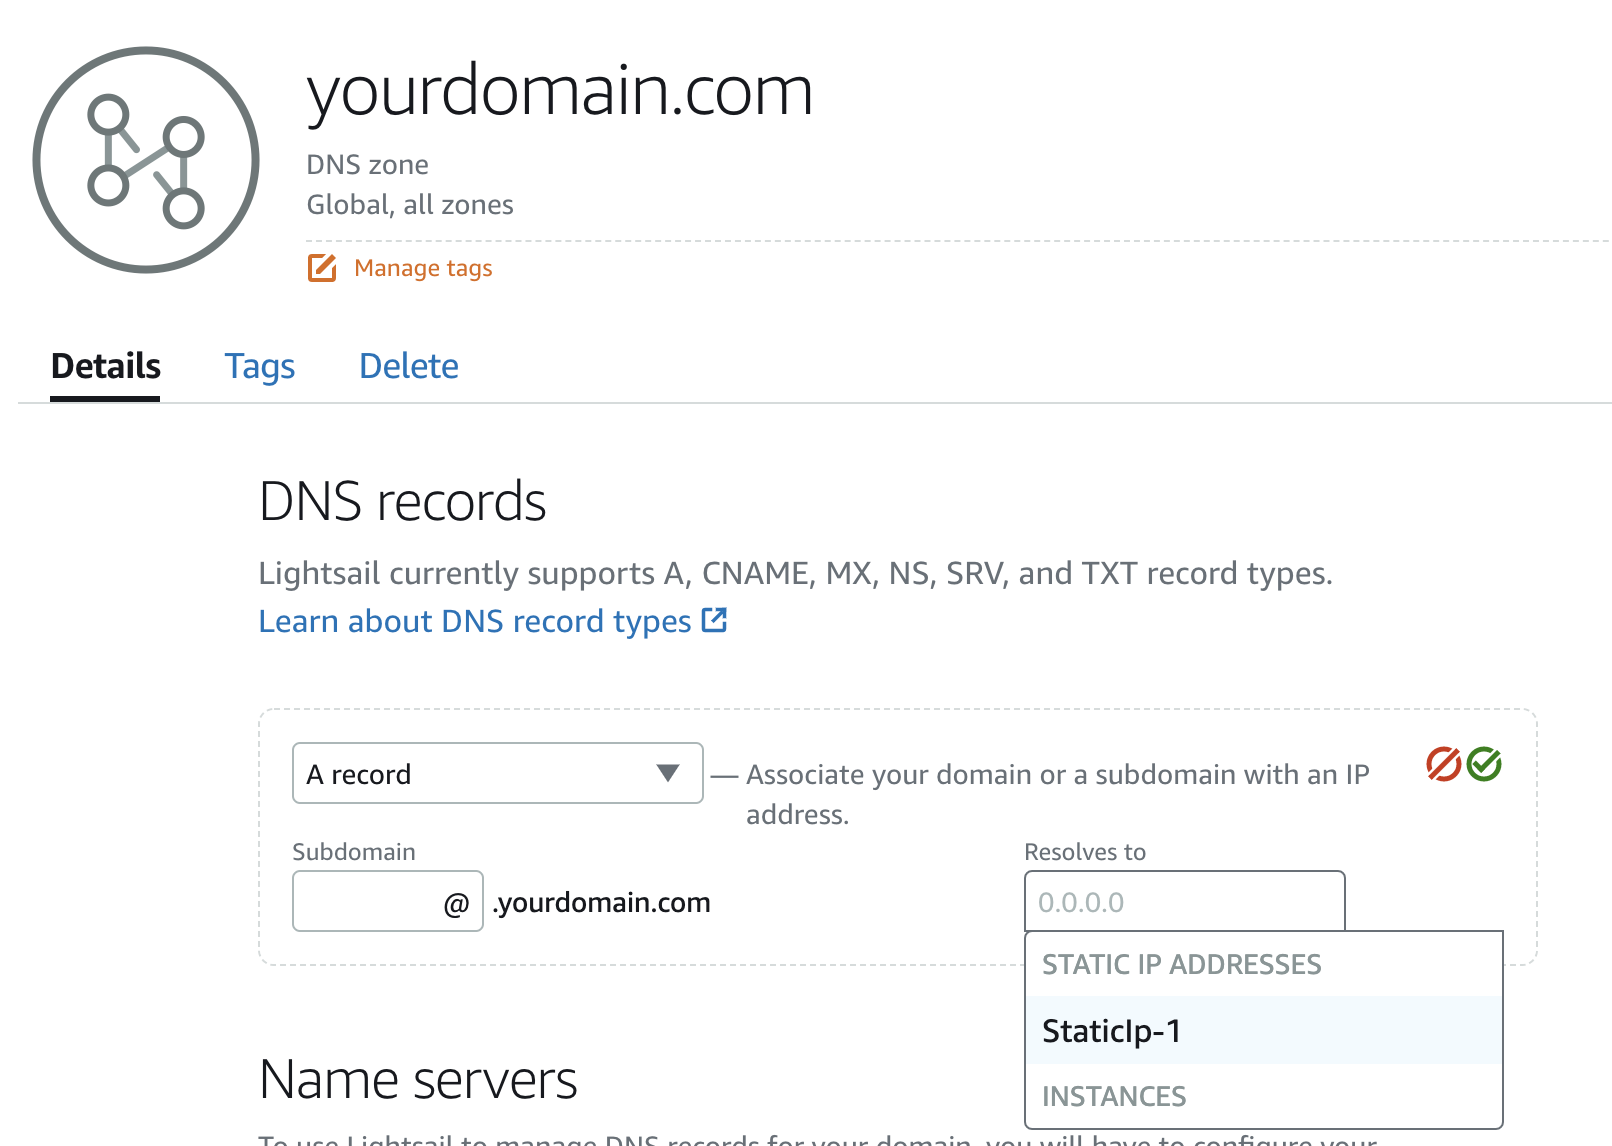
Click on Create DNS zone and enter your domain here
I personally use Google Domains to buy my domains but if you prefer to stay in the ecosystem, Amazon has their own solution called Route53
I will be using
opensourceme.appfor the rest of this tutorial as I have this one for testing
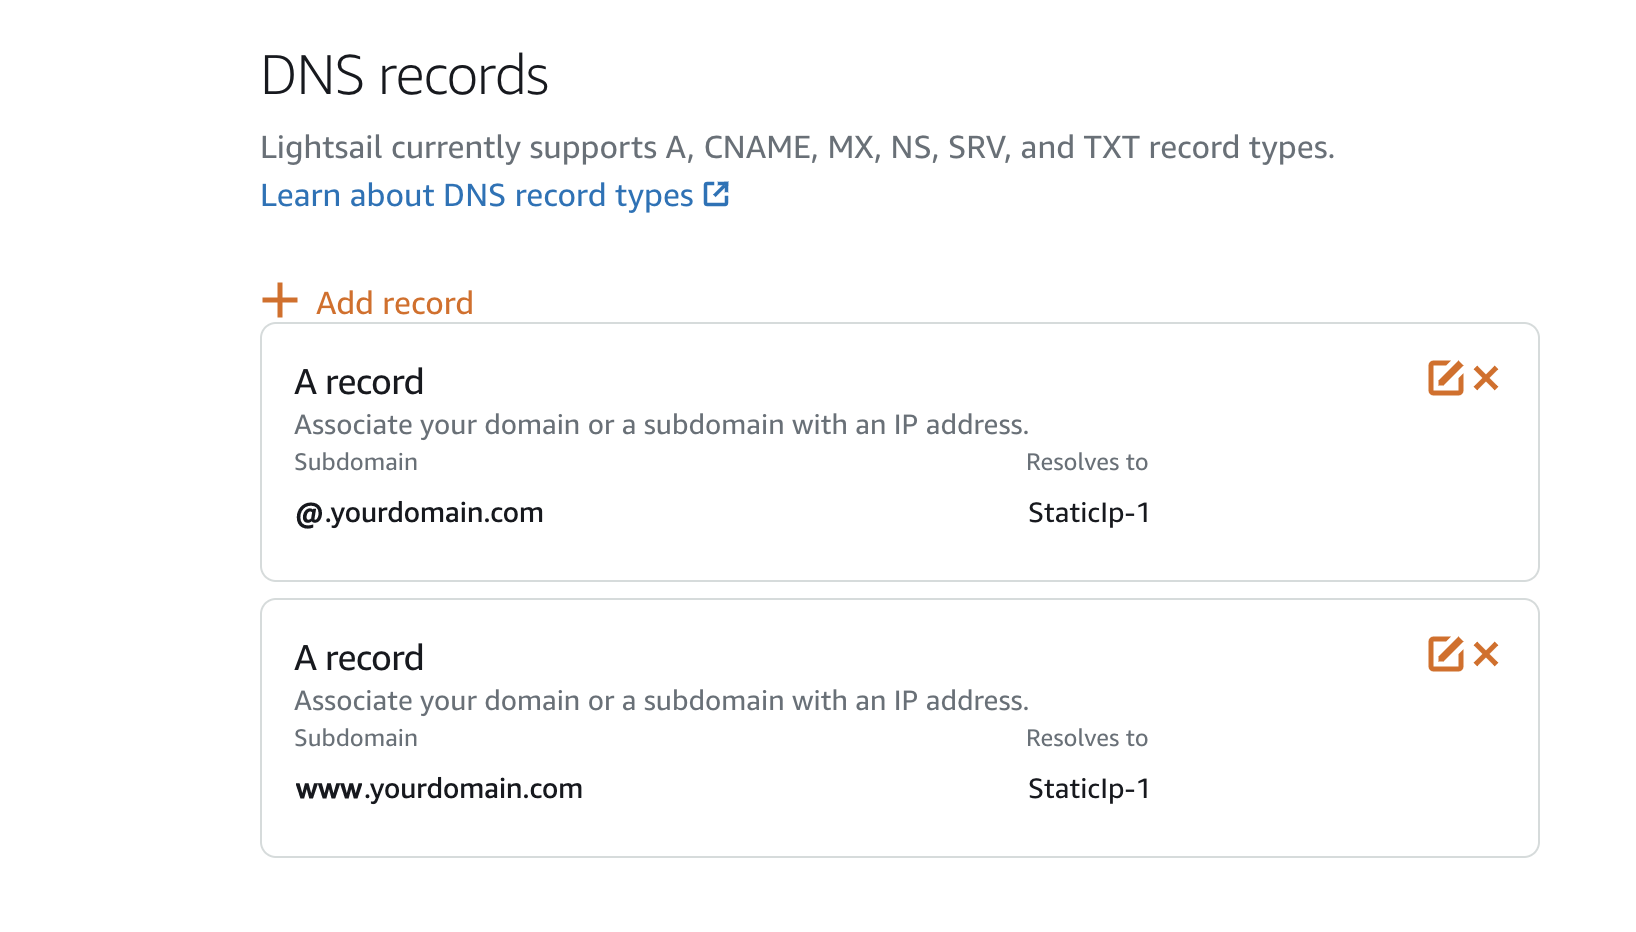
Click create and add two A records
The first one should be @ in the Subdomain and Resolves to should be the static IP address we created a few steps ago
Your second subdomain should be www in the first box and once more, select your static IP
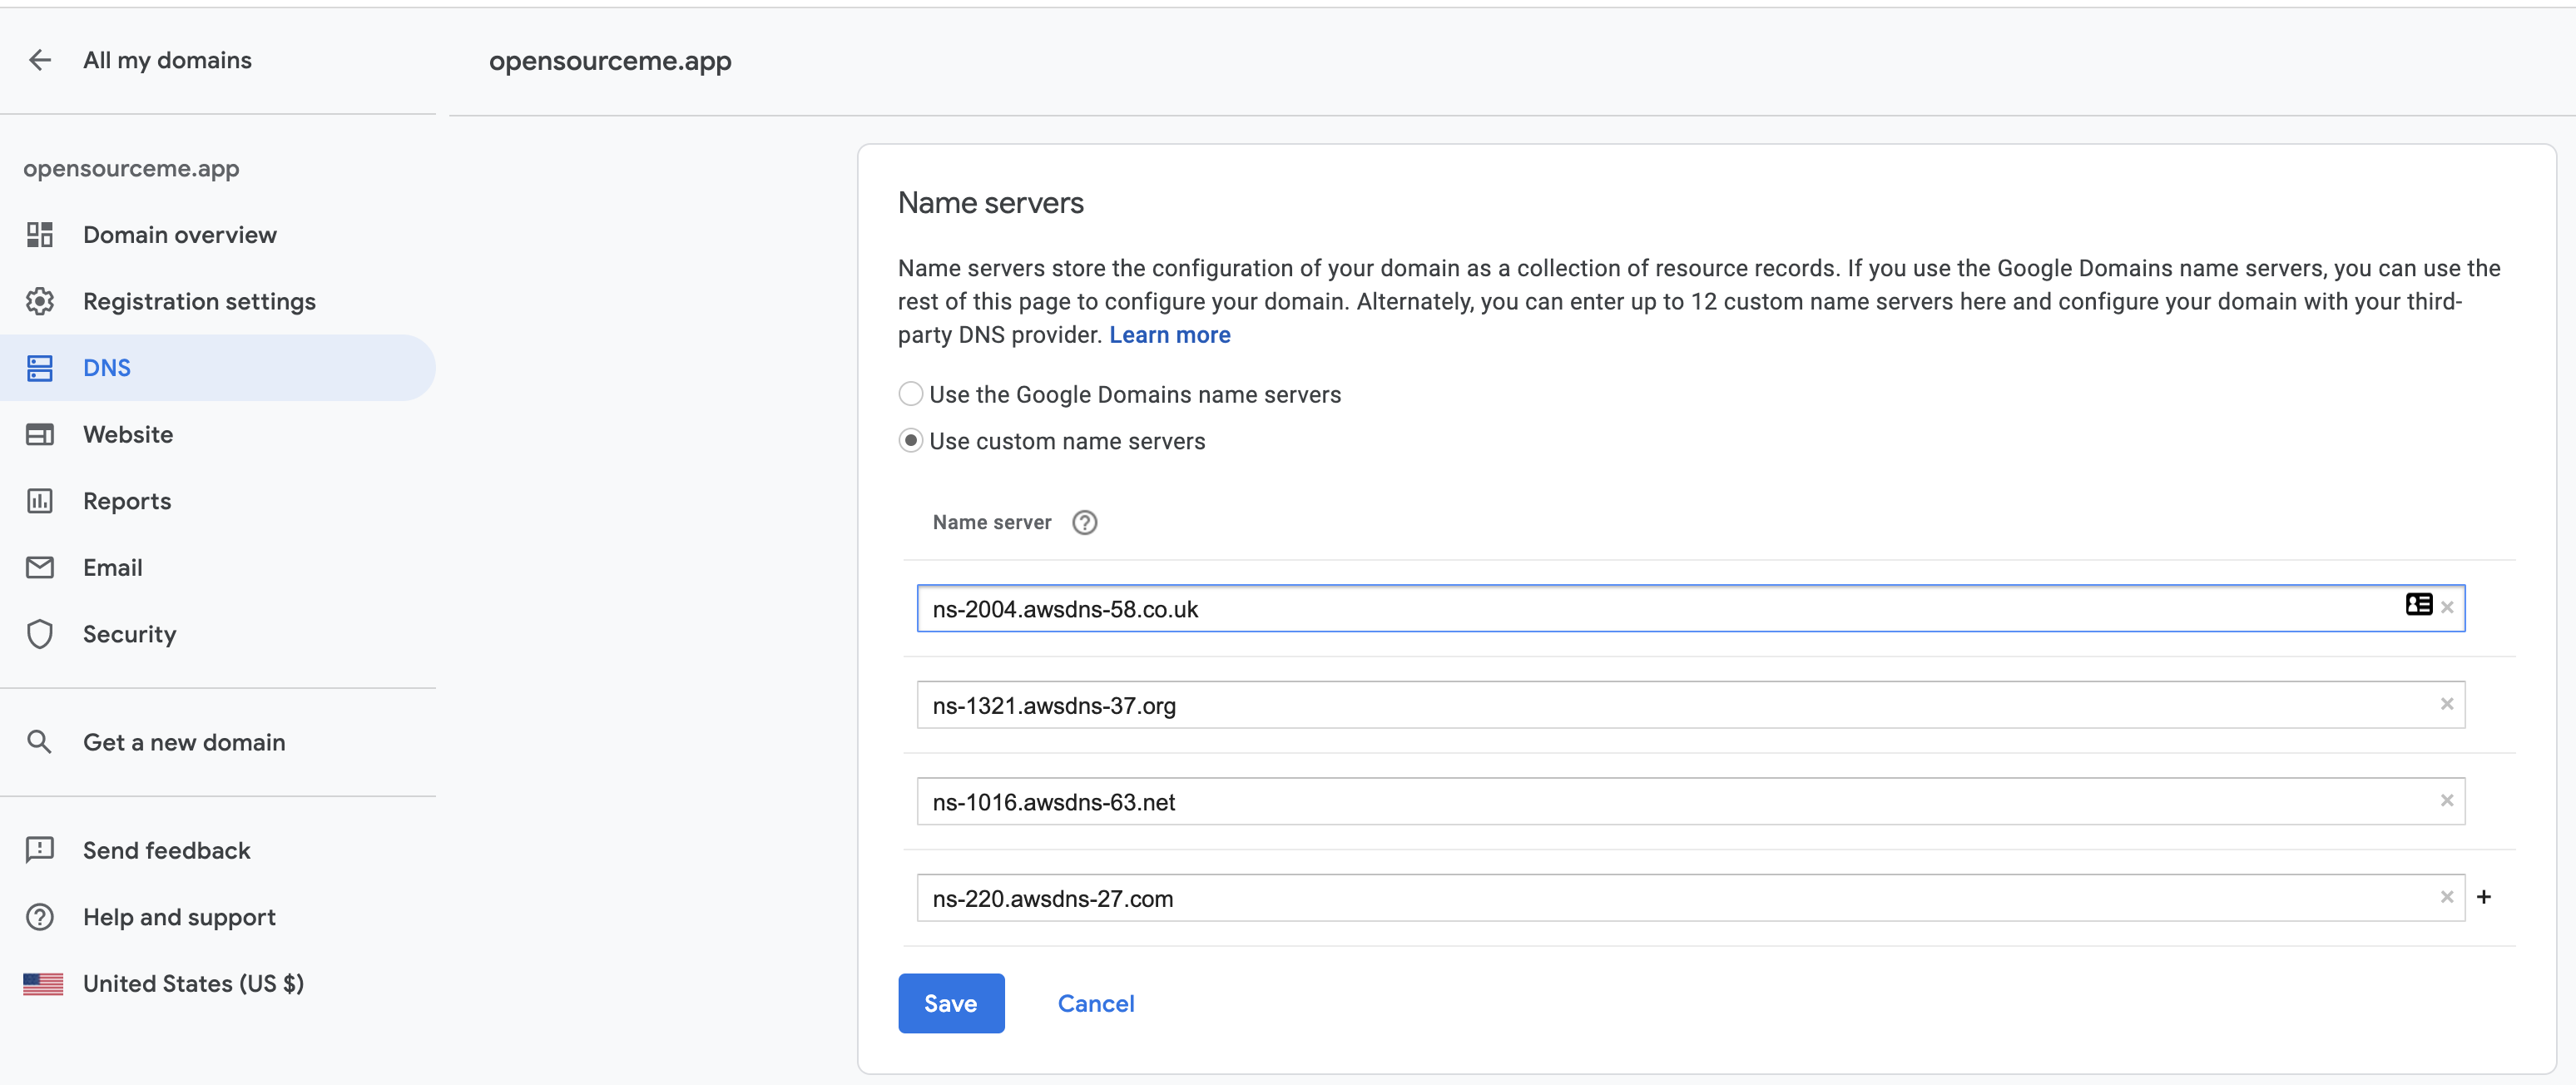
Add the name servers that Amazon provides you to your domain in your domain DNS settings. The following is for Google Domains:
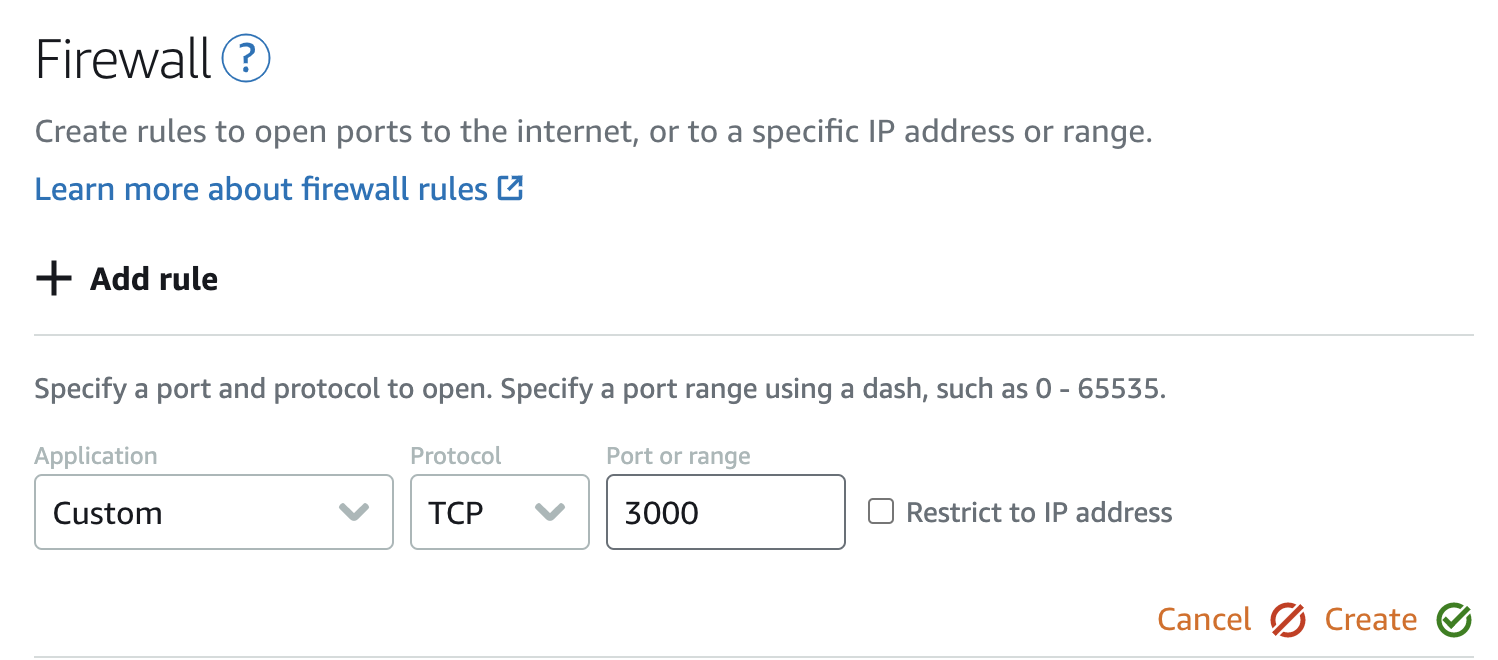
Go back to your instance networking settings and create a firewall rule so that we can do a quick connection test in a few steps
custom TCP on port 3000 - You can delete this later after your site is up
Go back to the homepage and click the terminal icon to SSH into your instance. Your instance should be up and running by now.
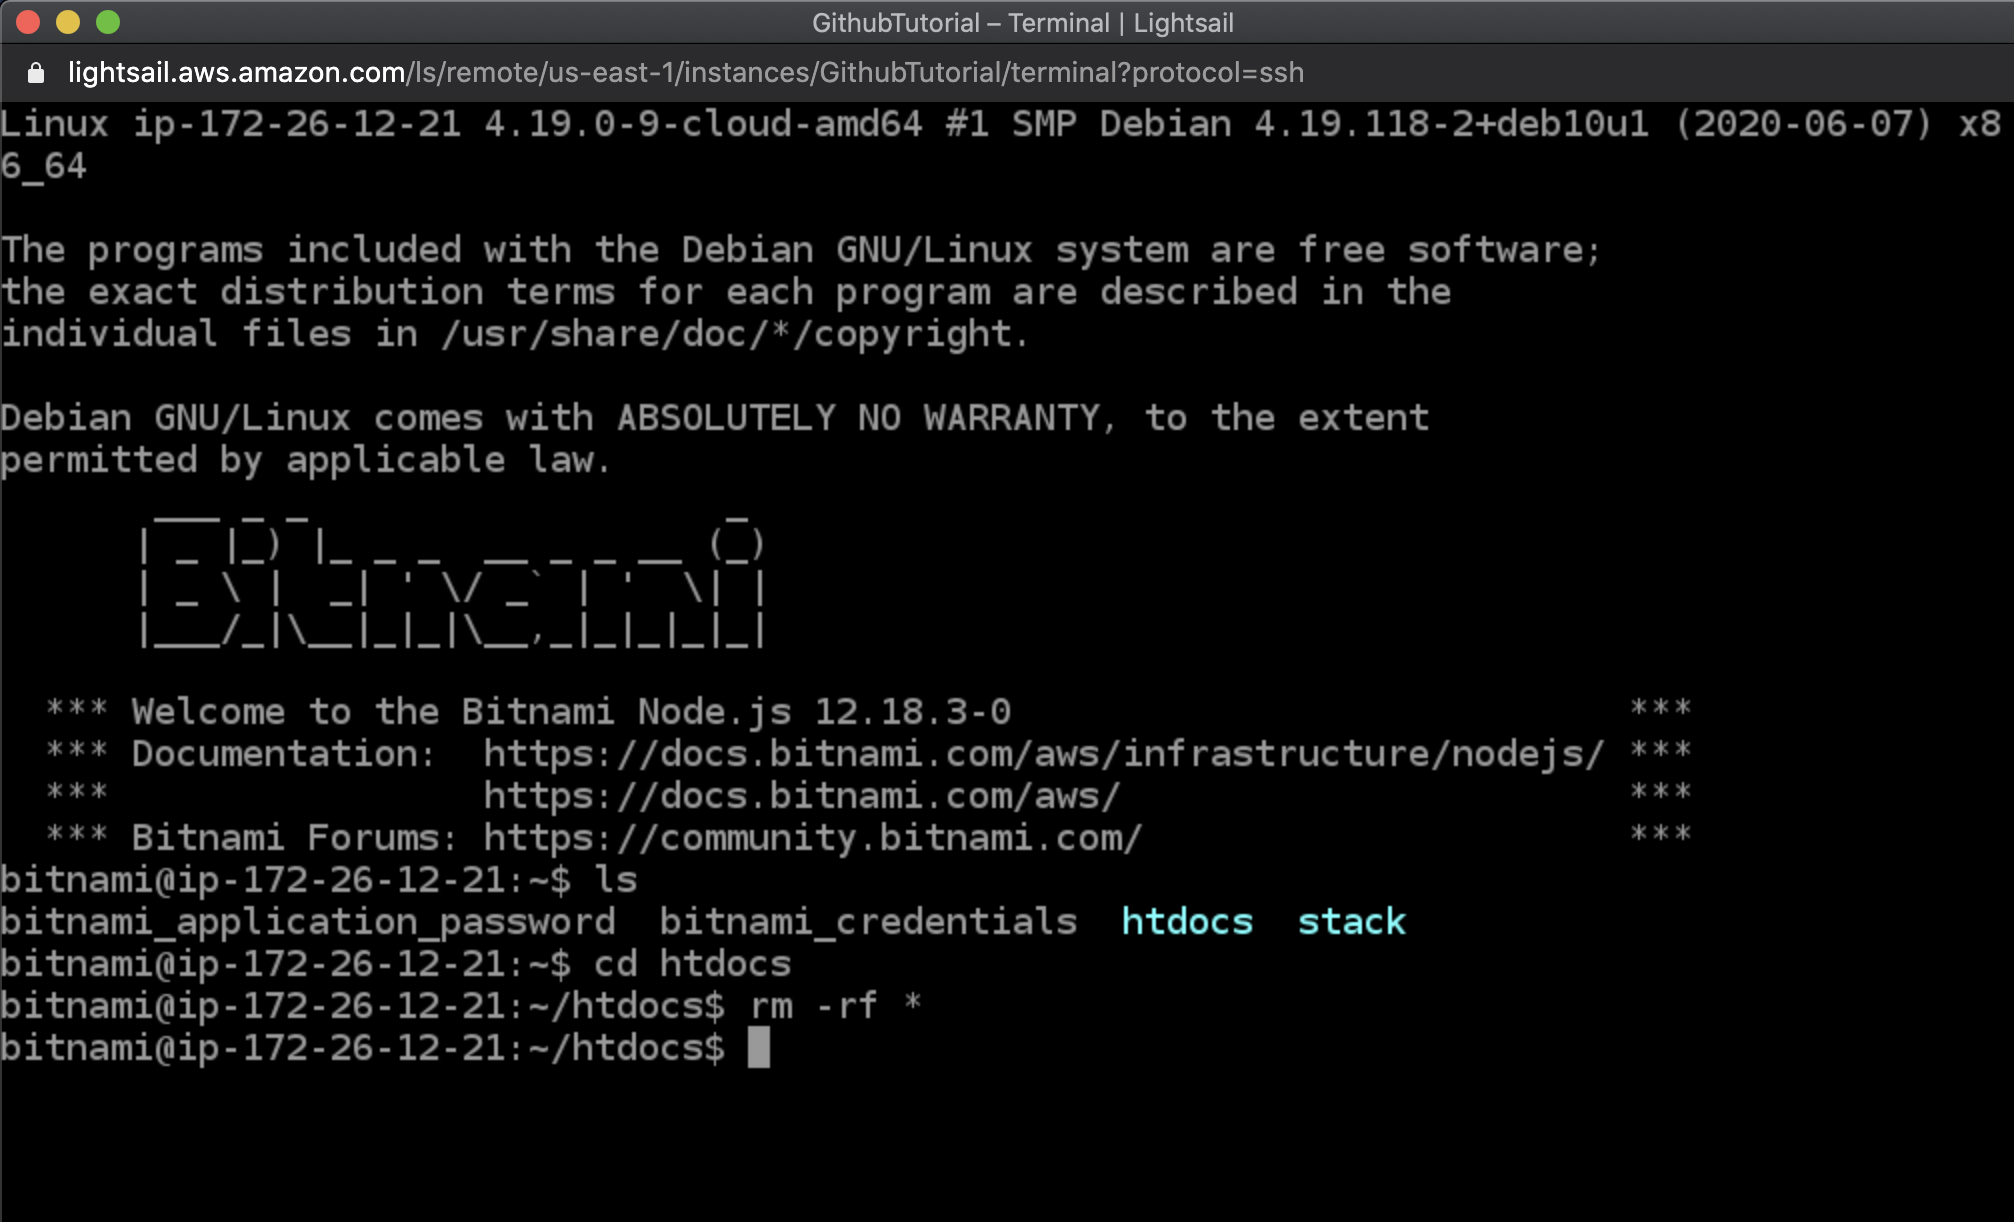
Go into htdocs
cd htdocs
Delete everything inside
rm -rf *
Clone this very repository!
git clone https://github.com/joswayski/Lightsail-Setup-Custom-Domain-SSL.git
Go into the repository folder
cd Lightsail-Setup-Custom-Domain-SSL
Install the dependencies
npm install
Run the app to test it!
node index.js
You should see: Example app listening at http://localhost:3000
If you go to your static IP from earlier and add :3000 at the end, you should be able to see something like this:
Now we have to route HTTP traffic on port 80 and all HTTPS traffic on port 443 to our server's port, 3000
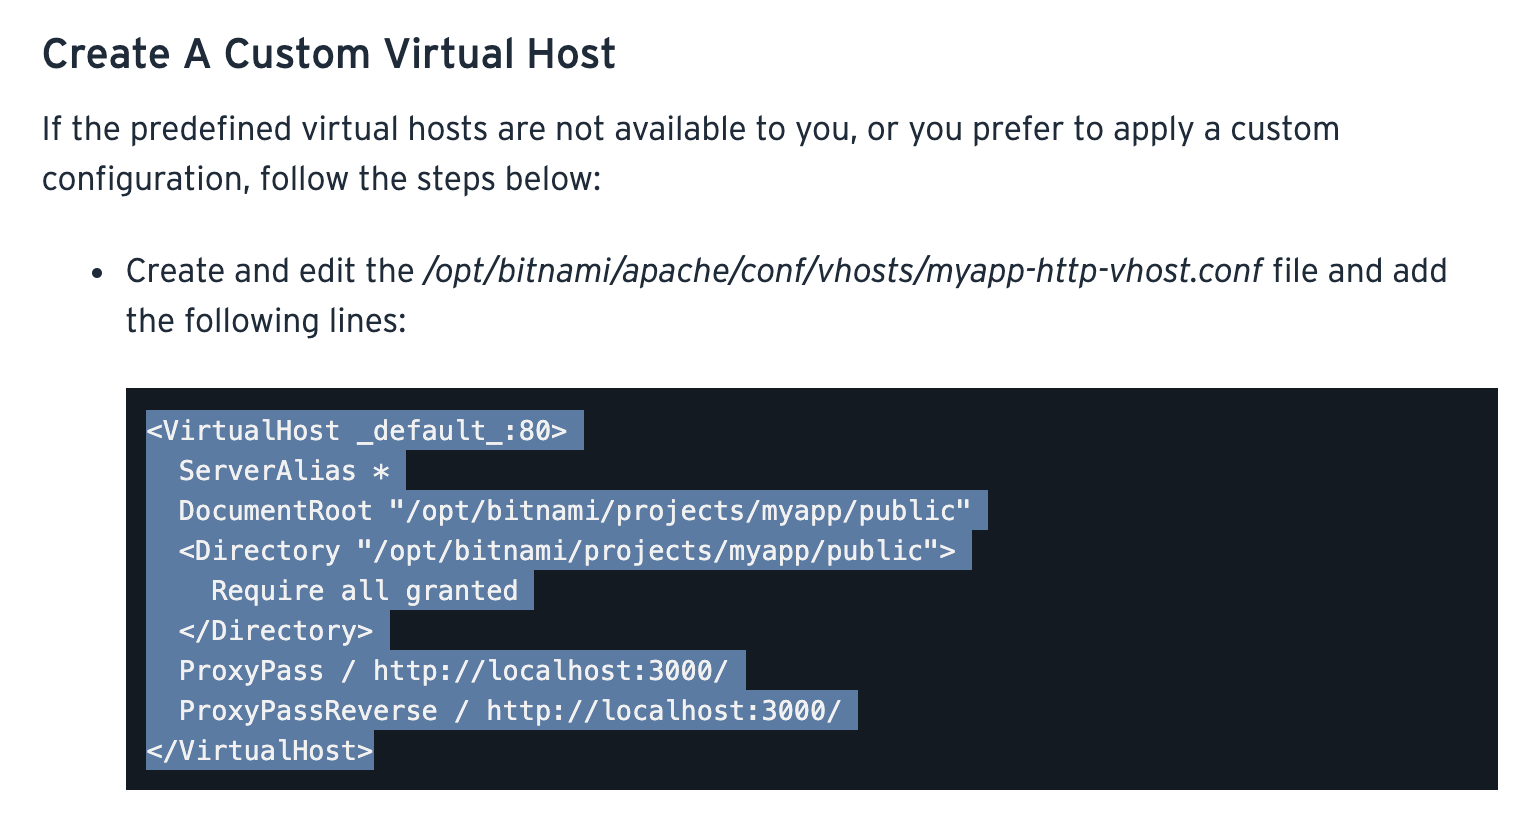
Here is the documentation from Bitnami directly, or you can follow my steps below
Stop your Node app in the SSH terminal
Control + C on Mac, I believe it is the same for Windows.
In the terminal, type in vi /opt/bitnami/apache/conf/vhosts/myapp-http-vhost.conf and press enter
Type i for INSERT mode
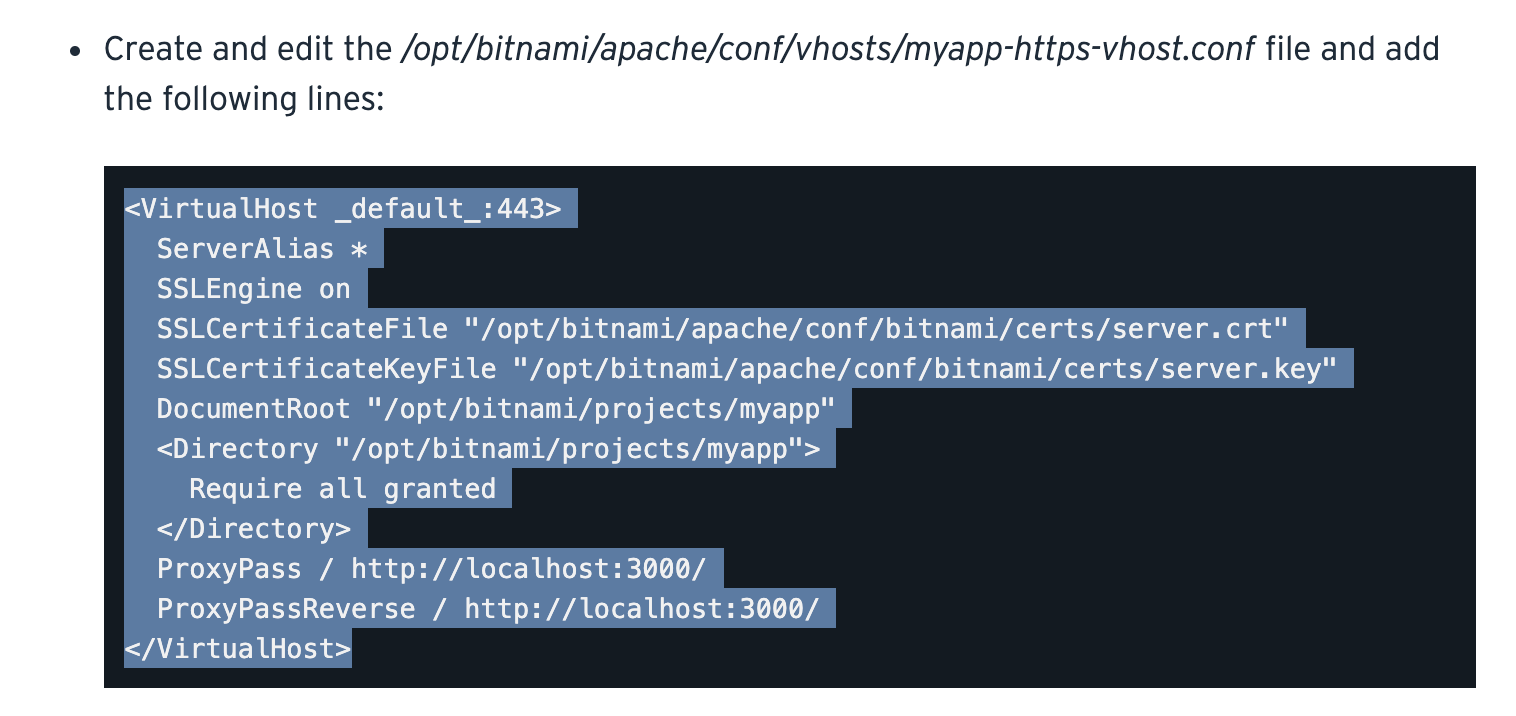
Visit this link and copy this code for port 80
NOTE: If you would like to use another port in your app, make sure that you change the
http://localhost:3000line tohttp://localhost:YOUR_PORT_NUMBERas well, in this section and the one coming up
- Replace both instances of
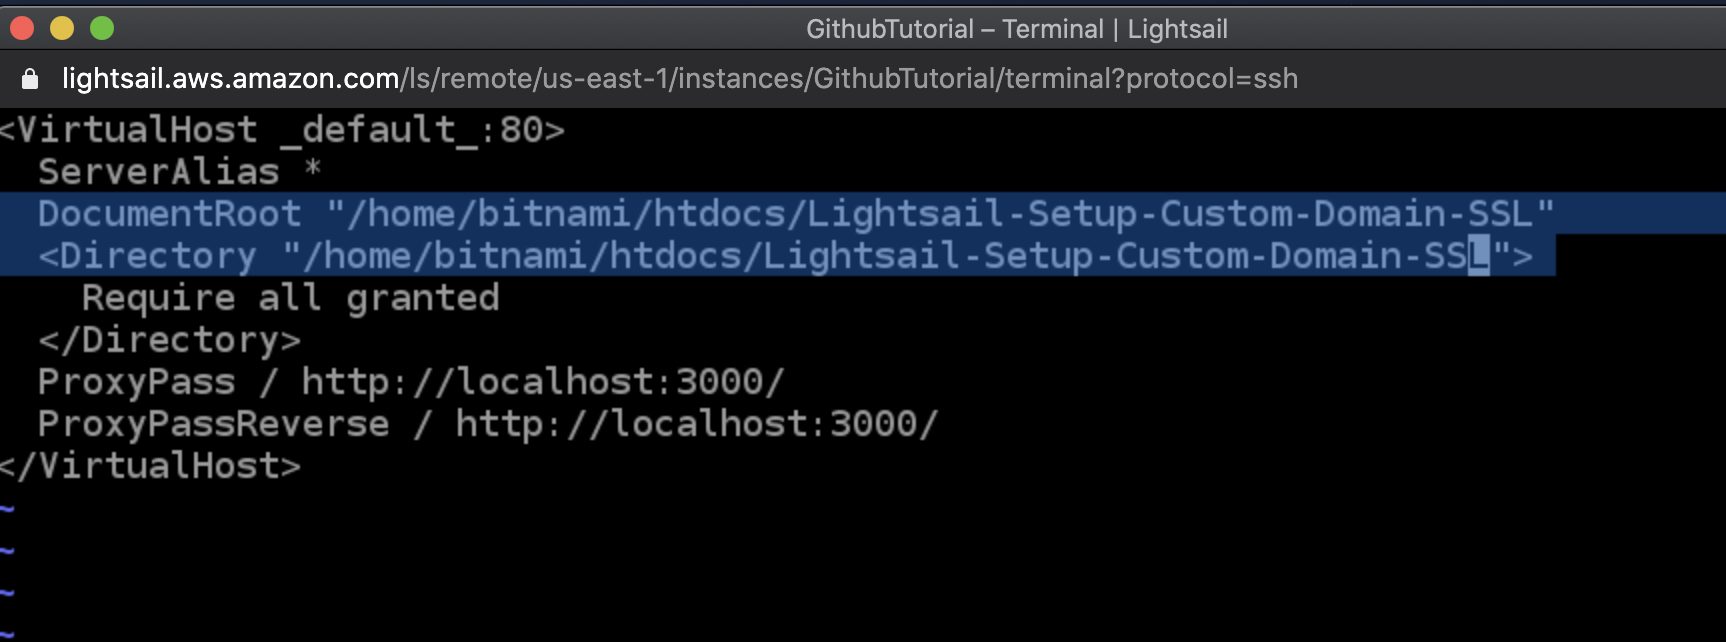
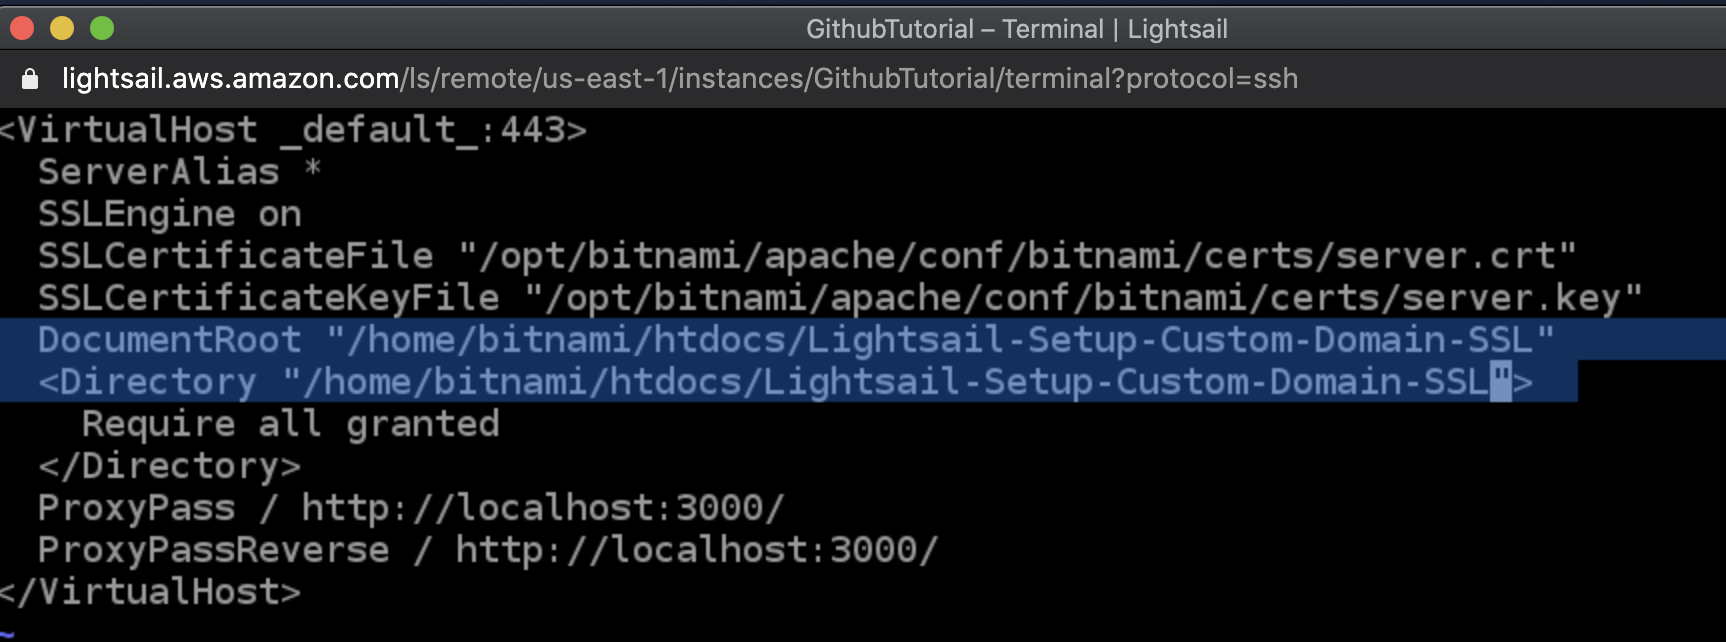
/opt/bitnami/projects/myapp/publicwith your app directory which, if you followed my tutorial, is in/home/bitnami/htdocs/Lightsail-Setup-Custom-Domain-SSL
Press your ESCAPE key
esc
And then force save
:w!
Quit the editor
:q
Now do the same thing for the other port:
vi /opt/bitnami/apache/conf/vhosts/myapp-https-vhost.conf
ENTER
i to enter INSERT mode
Copy and paste the second part for port 443
Again, be sure to replace the /opt/bitnami/projects/myapp with your app directory, or if you are following this tutorial: /home/bitnami/htdocs/Lightsail-Setup-Custom-Domain-SSL
Escape, force save, and quit the editor.
esc
:w!
:q
Restart the Apache server
sudo /opt/bitnami/ctlscript.sh restart apache
If you go back to your directory and run your app:
cd /home/bitnami/htdocs/Lightsail-Setup-Custom-Domain-SSL
node index.js
You will be able to visit your site without putitng the port number at the end!
To get your SSL certificate (fix that Not Secure in your browser), run:
sudo /opt/bitnami/bncert-tool
You will be prompted to enter this again, paste it in the terminal and run it again
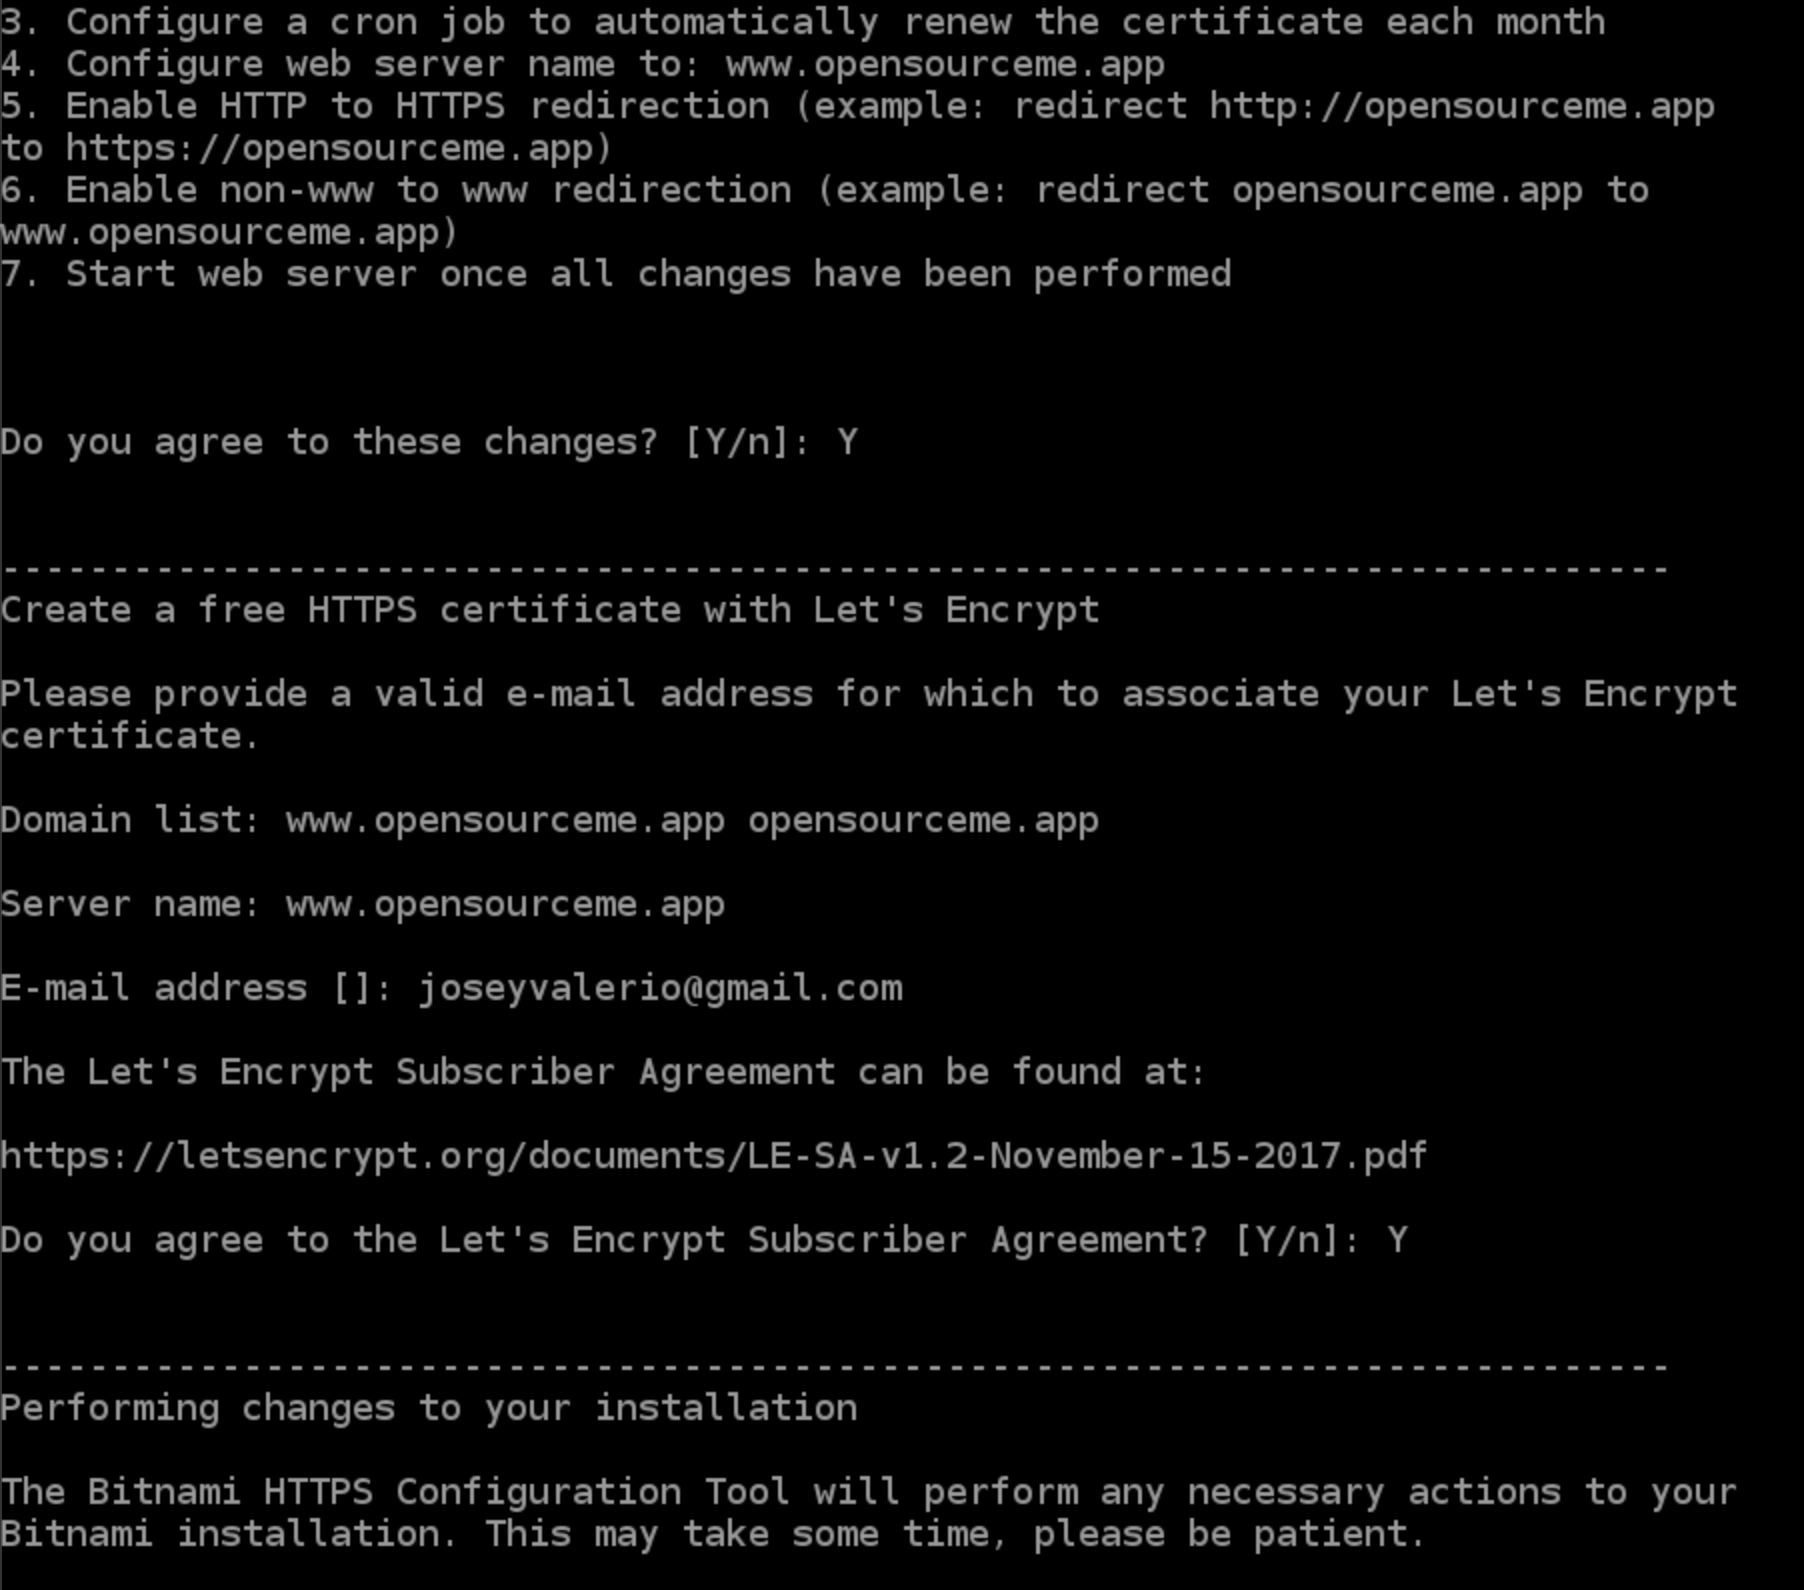
You will then be prompted to enter the domain that you chose, enter www.yourdomain.com and yourdomain.com
-
Enable HTTP to HTTPS redirection [Y/n]:
Y -
Enable non-www to www redirection [Y/n]:
Up to you, I usually say
Ybecause it looks more "professional"
- Enable www to non-www redirection [Y/n]:
N
Again, personal preference. I say
Nto this
- Do you agree to these changes? [Y/n]:
Y
Enter your email and hit Y on the following prompts. This will take a minute.
Go back to our app and run the server forever!
cd /home/bitnami/htdocs/Lightsail-Setup-Custom-Domain-SSL
forever start index.js
Your server is up and running on your custom domain with SSL! Congrats!
Feel free to delete the firewall rule on port 3000 we created earlier. Do not hesitate for any PR's or issues. Happy hosting!
