Thermostat using a Raspberry Pi Pico
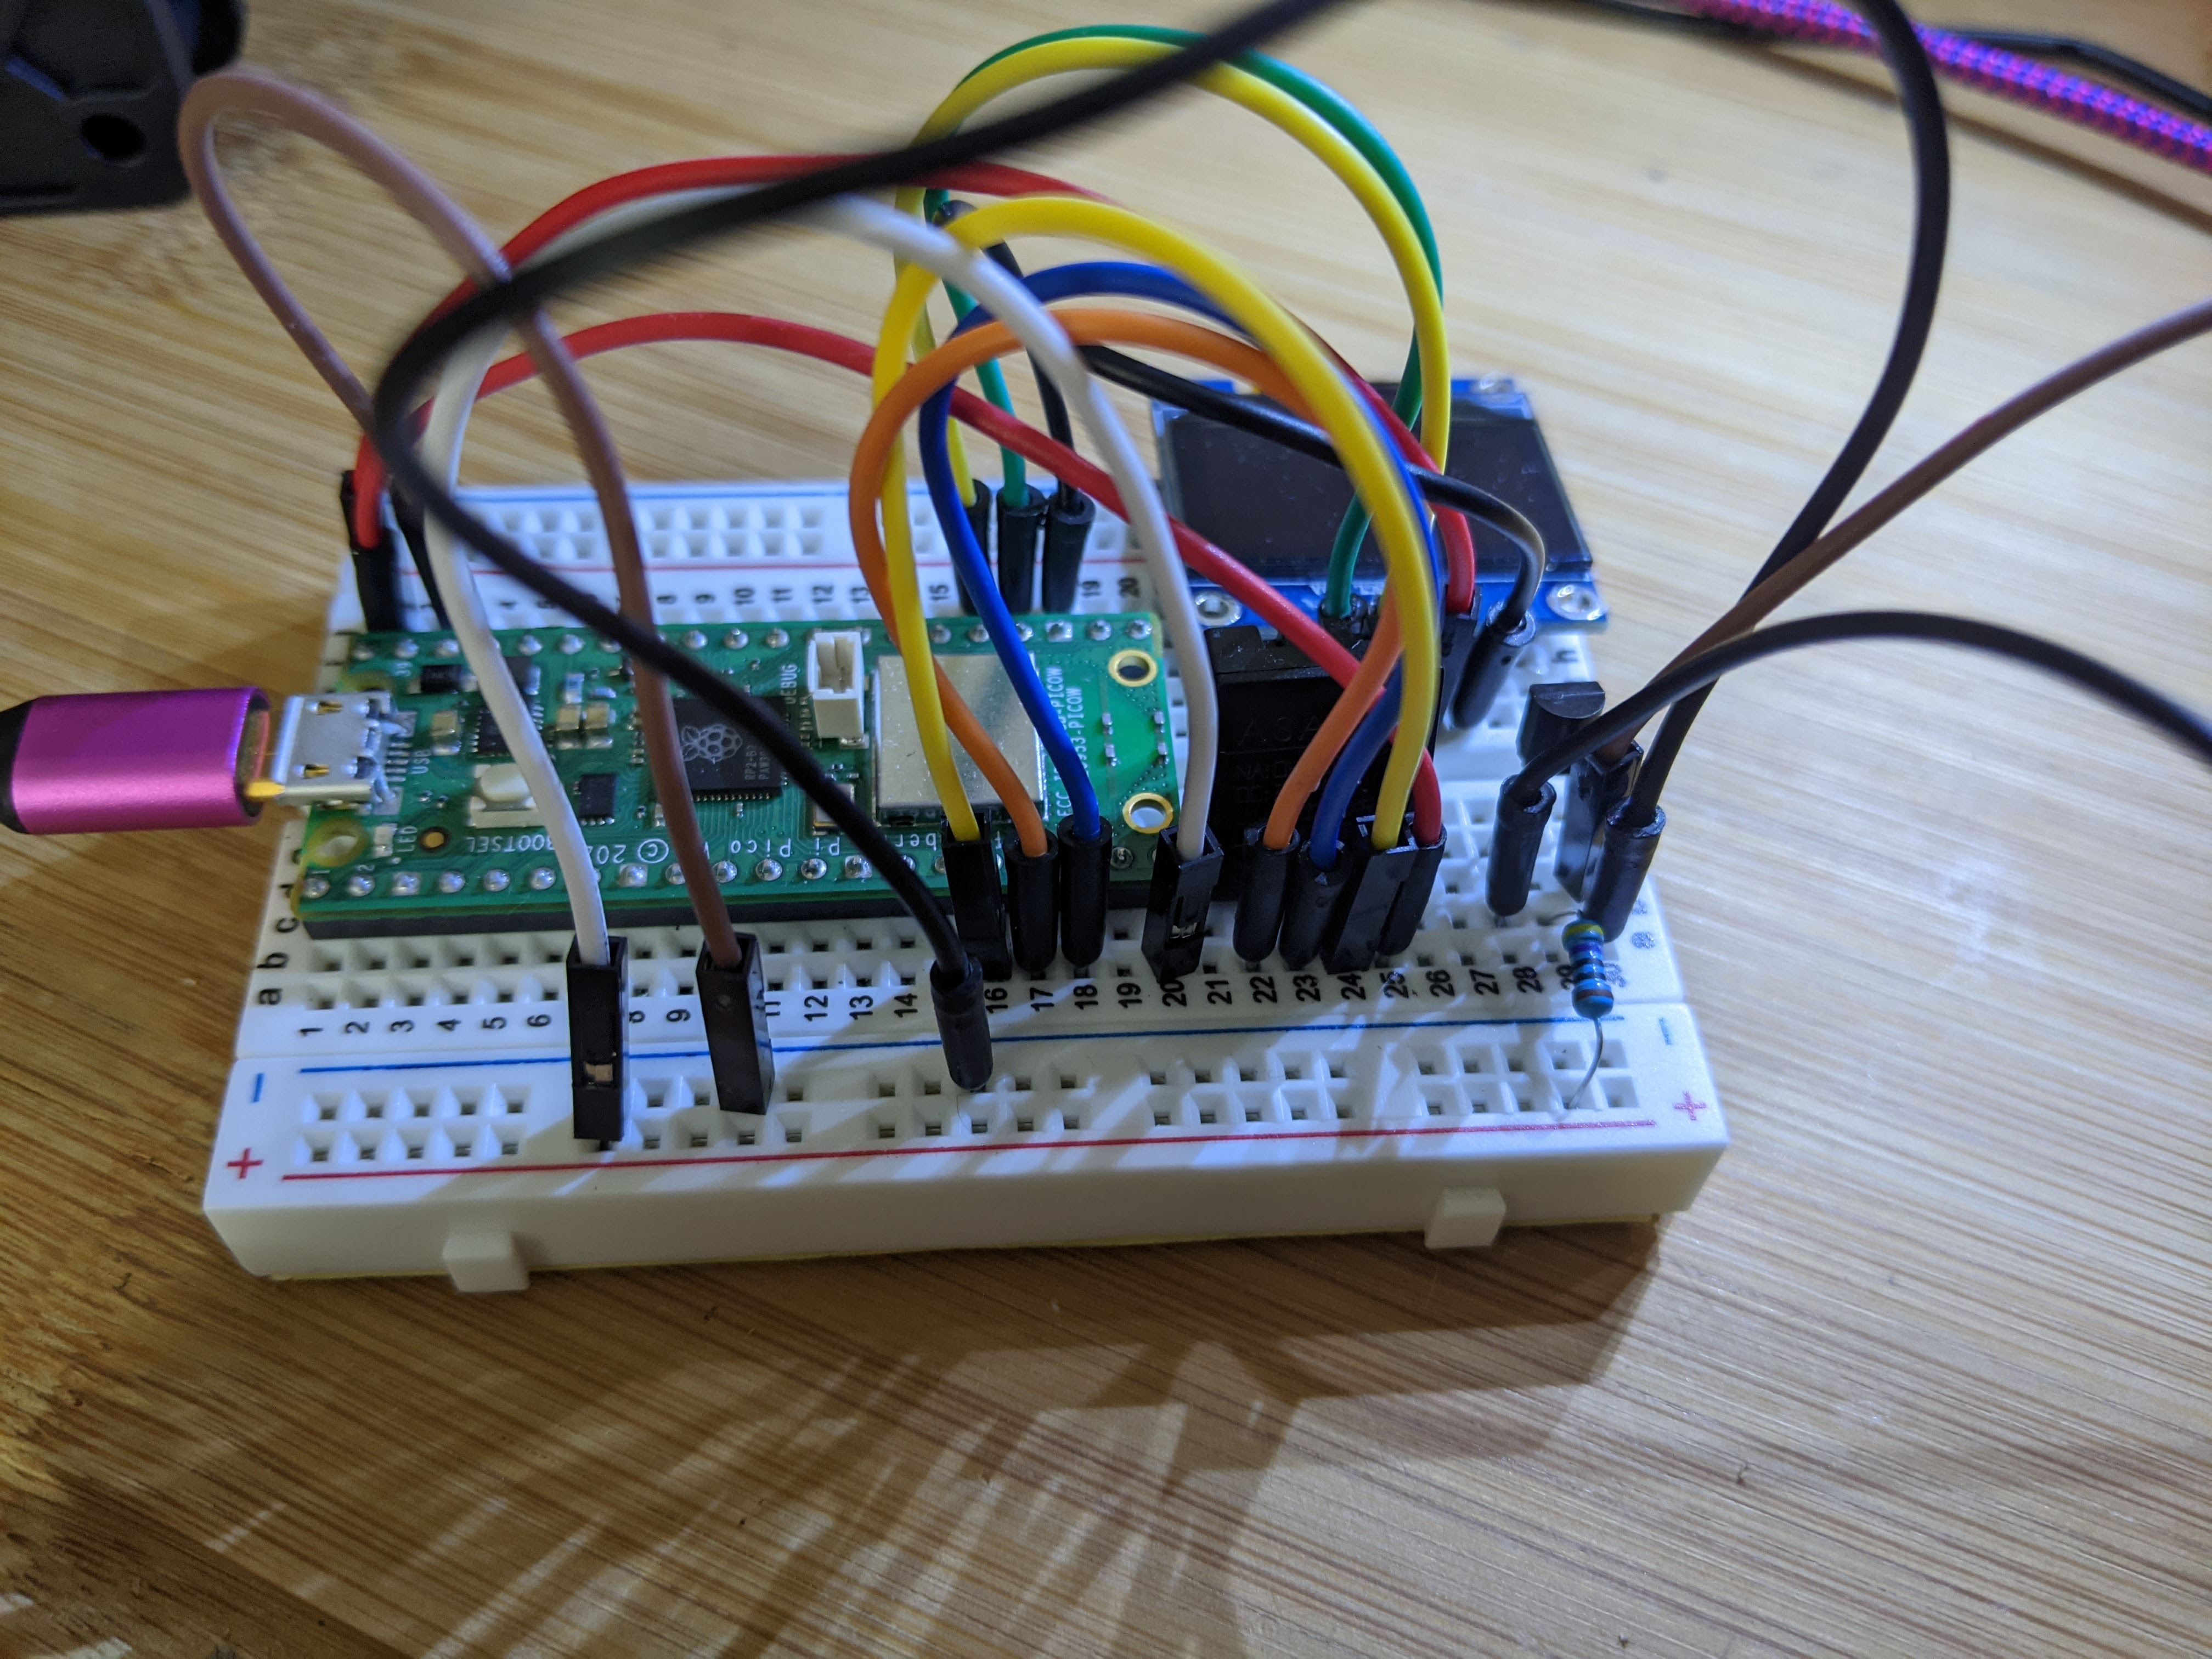
This circuit uses a 2222 npn transistor, Raspberry Pi Pico, and dht20 to control a 12V DC fan.
You define a temperature threshold to turn the fan on or off.
An OLED screen is also setup to view the temperature and output.
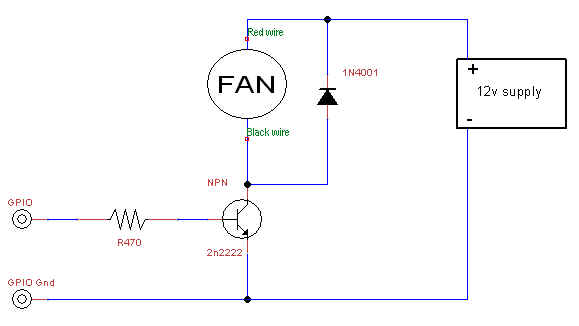
Basic premise schmatic
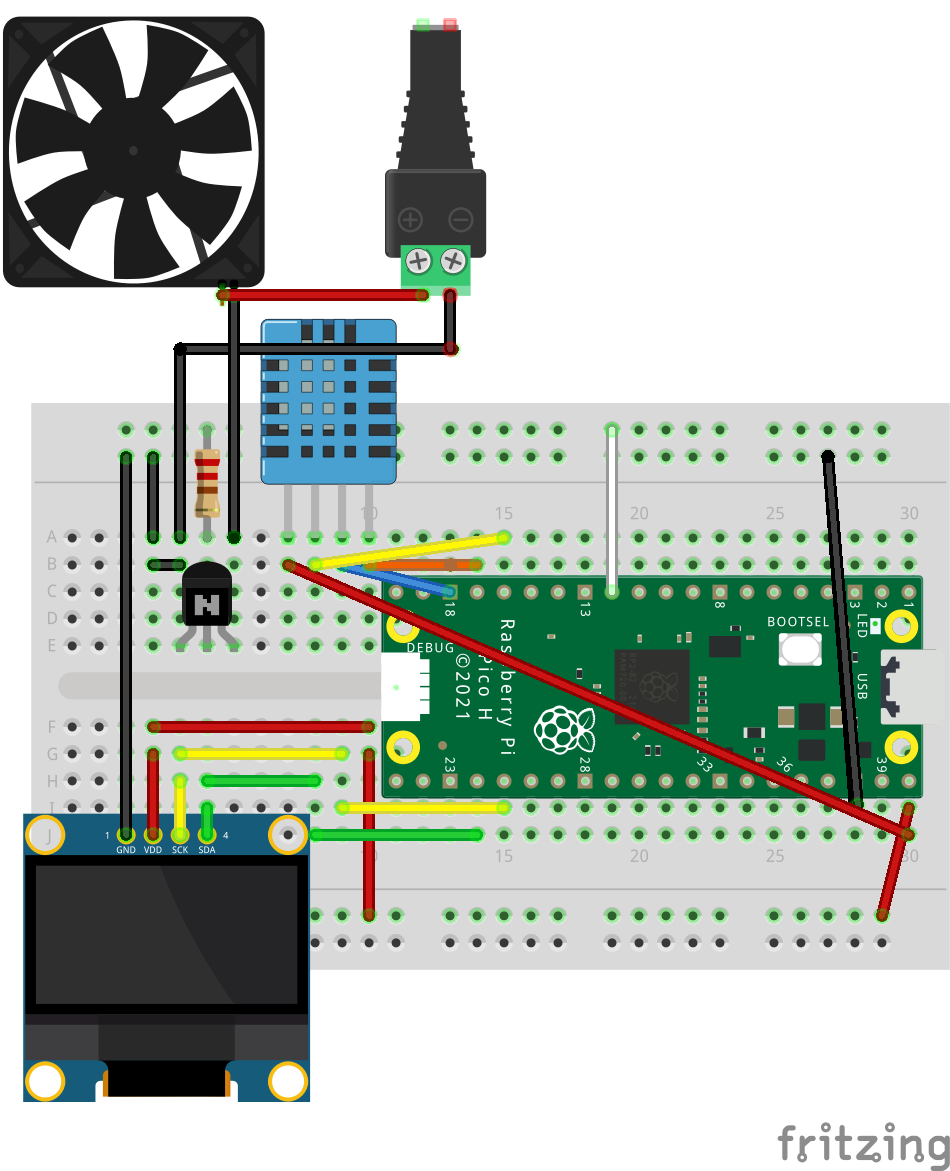
Pico Pi Pin Setup to Transistor/Circuit
| Pin | Component |
|---|---|
| Collector | DC fan Black wire |
| Base | 470 Ohm resistor |
| 470 Ohm resistor | power/+ on breadboard rail |
| Emitter | Black wire of the 12 V power |
| Emitter | ground/- on the breadboard rail (shared) |
| GPIO 15/ANY | power/+ on breadboard rail |
| ANY GND/Pin38 | power/- on breadboard rail (shared) |
| Red wire of the 12 V power supply | red wire of the DC Fan |
NOTE: I use GPIO 15 in the code, but show GPIO 9 in the Fritzing to lessen clutter
dht20 Connections
| GPIO Pin | Connection |
|---|---|
| GPIO 12 | SDA |
| GPIO 13 | SCL |
| GND | GND |
| 5V/PIN40 | VCC |
OLED Connections
| GPIO Pin | Connection |
|---|---|
| GPIO 18 | SDA |
| GPIO 19 | SCL |
| GND | GND |
| 5V/PIN40 | VCC |
Install:
- Upload this whole repo into / on the pico using a recent micropython firmware
- Edit TRIGGER_TEMP to your desired temperate trigger in basic_temp.py
- Power on the Pico with USB and turn on the 12V power supply - start at 5V and turn up to 12V as you like.
Credits |dht20 driver|ssd1306 driver|Schematic Image|
License MIT


