High dynamic range (HDR) image comparison tool for graphics people. tev allows viewing images through various tonemapping operators and inspecting the values of individual pixels. To compare images, tev can rapidly flip between them and visualize various error metrics.
tev can display true HDR on Apple extended dynamic range (EDR) and 10-bit displays.
The following file formats are supported:
- EXR (via OpenEXR)
- HDR, PNG, JPEG, BMP, GIF, PIC, PNM, PSD, TGA (via stb_image)
- PFM (compatible with Netbpm)
- QOI (via qoi. Shoutout to Tiago Chaves for adding support!)
- DDS (via DirectXTex; Windows only. Shoutout to Craig Kolb for adding support!)
- Supports BC1-BC7 compressed formats.
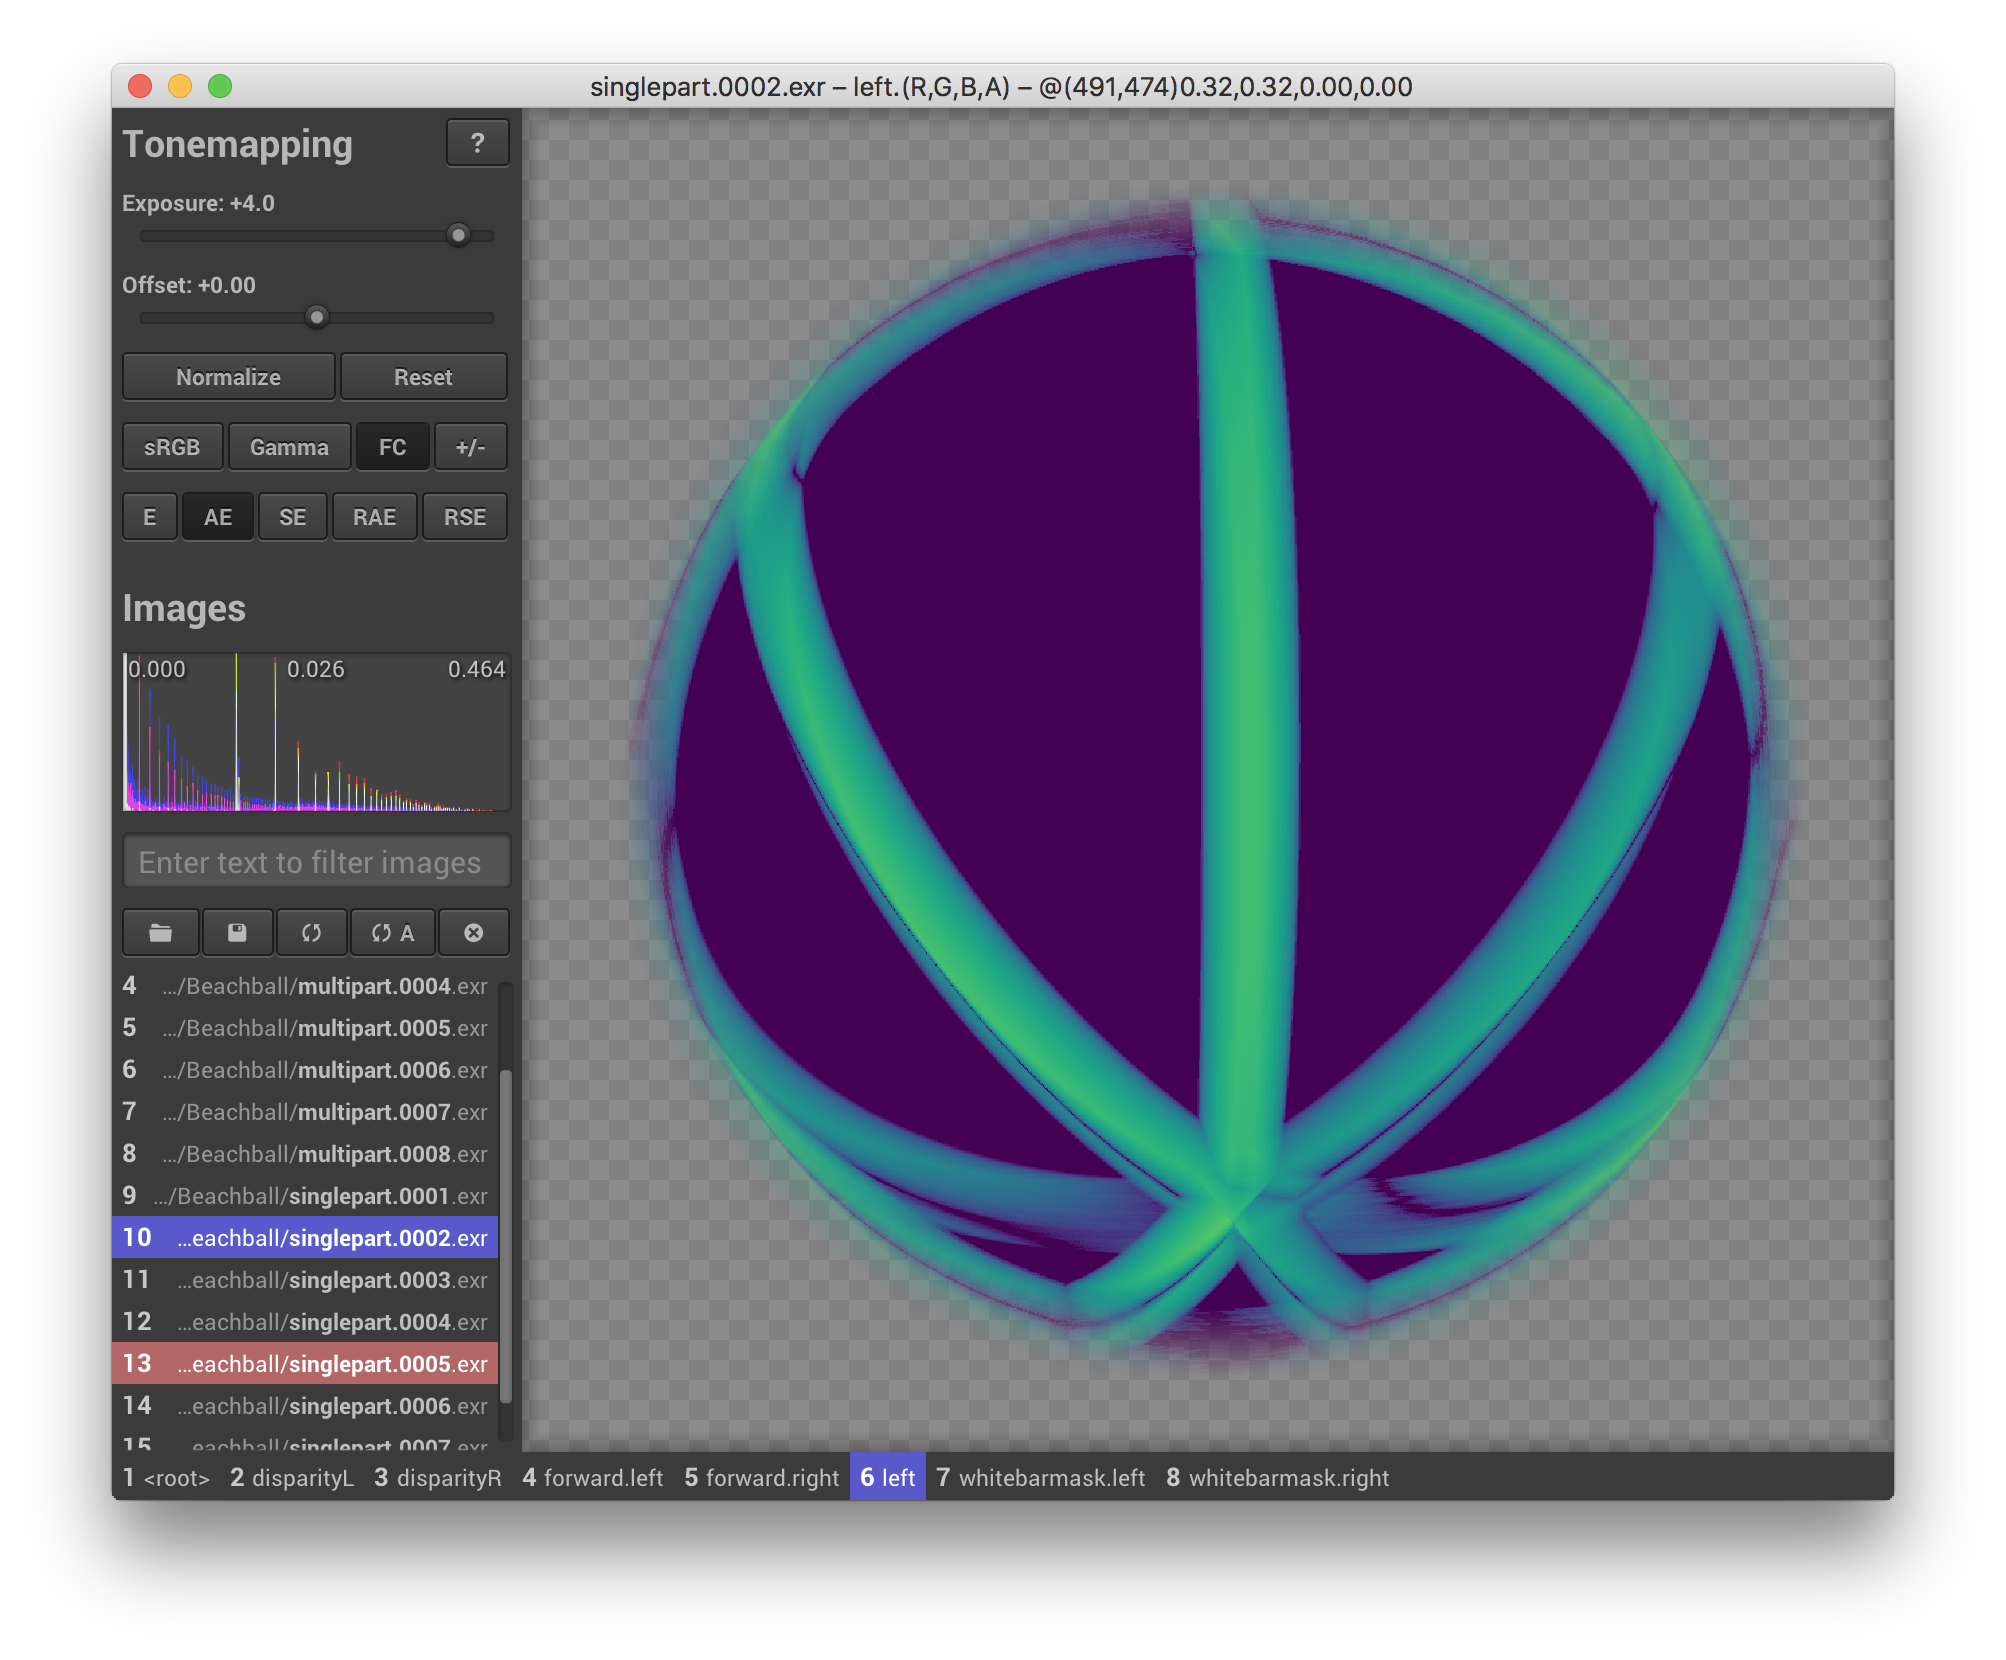 A false-color comparison of two multi-layer OpenEXR images of a beach ball. Image courtesy of openexr-images.
Download the tev executable (.exe) from the releases page.
Download the tev application (.dmg) from the releases page or install it via homebrew.
brew install --cask tevDownload the tev application (.appimage) from the releases page. See how to run AppImages.
On Arch Linux you can also install tev from the Arch User Repository.
Images can be opened via a file dialog or by dragging them into tev. They can be reloaded, closed, or filtered at any time, so don't worry about opening more images than exactly needed.
Select an image by left-clicking it, and optionally select a reference image to compare the current selection to by right-clicking. For convenience, the current selection can be moved with the Up/Down or the 1-9 keys. For a comprehensive list of keyboard shortcuts click the little "?" icon at the top (or press "h").
If the interface seems overwhelming, you can hover any controls to view an explanatory tooltip.
tev takes images as positional command-line arguments:
$ tev foo.exr bar.exrBy default, all layers and channels are loaded, but individual layers or channels can also be specified. In the following example, the depth layer of foo.exr and the r, g, and b channels of foo.exr and bar.exr are loaded.
$ tev :depth foo.exr :r,g,b foo.exr bar.exrOther command-line arguments exist (e.g. for starting tev with a pre-set exposure value). For a list of all arguments simply invoke
$ tev -htev can also be controlled remotely over the network using a simple TCP-based protocol.
The --host argument specifies the IP and port tev is listening to. By default, tev only accepts connections from localhost (127.0.0.1:14158), which is useful, for example, as frontend for a supported renderer like pbrt version 4.
The following operations exist:
| Operation | Function |
|---|---|
OpenImage |
Opens an image from a specified path on the machine tev is running on. |
CreateImage |
Creates a blank image with a specified name, size, and set of channels. If an image with the specified name already exists, it is overwritten. |
UpdateImage |
Updates the pixels in a rectangular region. |
CloseImage |
Closes a specified image. |
ReloadImage |
Reloads an image from a specified path on the machine tev is running on. |
VectorGraphics |
Draws vector graphics over a specified image. |
tev's network protocol is already implemented in the following languages:
If using these implementations is not an option, it's easy to write your own one. Each packet has the simple form
[uint32_t total_length_in_bytes][byte operation_type][byte[] operation_specific_payload]
where integers are encoded in little endian.
There are helper functions in Ipc.cpp (IpcPacket::set*) that show exactly how each packet has to be assembled. These functions do not rely on external dependencies, so it is recommended to copy and paste them into your project for interfacing with tev.
All that is required for building tev is a C++20-compatible compiler. Begin by cloning this repository and all its submodules using the following command:
$ git clone --recursive https://github.com/Tom94/tevtev uses CMake as its build system. The following sections detail how it should be used on various operating systems.
On macOS and most Linux distributions CMake can be obtained via a package manager (Homebrew on macOS, apt on Ubuntu/Debian, etc.). Most Linux distributions additionally require xorg, gl, and zlib development packages and zenity. On Ubuntu/Debian simply call
$ apt-get install cmake xorg-dev libglu1-mesa-dev zlib1g-dev zenityOnce all dependencies are installed, create a new directory to contain build artifacts, enter it, and then invoke CMake with the root tev folder as argument as shown in the following example:
$ mkdir build
$ cd build
$ cmake ..
Afterwards, tev can be built and installed via
$ make -j
$ make install
On Linux you can package a portable AppImage with
$ make packageOn Windows, install CMake, open the included GUI application, and point it to the root directory of tev. CMake will then generate Visual Studio project files for compiling tev. Make sure you select at least Visual Studio 2019 or higher!
tev is available under the BSD 3-clause license, which you can find in the LICENSE.md file. TL;DR you can do almost whatever you want as long as you include the original copyright and license notice in any copy of the software and the source code.