This simple application will run a static HTML page which can request YouTube data about a configured set of channels.
This repo also includes tutorial steps to provide people, even very basic beginners learning web development for the first time, with a specific goal and iterative steps to get there.
I regularly track a set of channels and look to see how subscription rates are growing/slowing to see how what our channel is doing compares against relevant comparison points. This dashboard allows a user to track that data themselves without visiting YouTube channels directly.
I wanted to learn how to use the YouTube API, but also re-learn some basic web development and JavaScript that I haven't touched in a while. As I went along iteratively building out the dashboard, I attempted to capture logical steps which could help somebody trying to learn. This provides a solid use case with a clear end-goal that pushes you iteratively through a learning process by adding extra technology slowly.
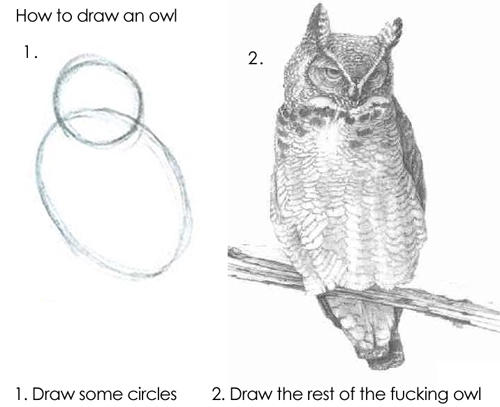
A lot of tutorials are very much like the classic 'Owl' tutorial meme and miss a lot of the middle steps. Here, I'd like to show you the steps that get you to the rest of the Owl!
The initial lessons are intended for people new to web development. These early stages use basic HTML and markup. Later lessons use more advanced technology for intermediate developers looking to see how to try different concepts out.
🚧[UNDER CONSTRUCTION]🚧
- Lesson 1 - Retrieving YouTube subscription count for a channel
- Lesson 2 - Building a table of channels dynamically using JavaScript
- Lesson 3 - Building a table with a sorted list in JavaScript
- Lesson 4 - Using JavaScript Array functions to handle multiple results from the YouTube API
- Lesson 5 - Integrating Airtable as a database for your JavaScript app
- Lesson 6 - Creating Classes in JavaScript
- Lesson 7 - Converting Classes to Modules
- Lesson 8 - Converting JavaScript to TypeScript
- Lesson 9 - Converting to Azure Functions
- Lesson 10 - Using Azure Functions Secrets 🚧 UNDER CONSTRUCTION🚧
In the HTML file, you will see a working static HTML file that will let you see the current subscription counts of two channels. To get it running:
- Configure your local 'hosts' file to have an entry you will use to load this project (e.g. '127.0.0.1 youtube.local')
- Create a web application definition on your web server (such as IIS) that binds to this local hostname (e.g.
youtube.local). - Bind the web application to the folder where you are hosting the code (e.g.
%mypath%\Lesson9-AzureFunctionswhere%mypath%is your local file system folder where the Lesson9 folder is) - Deploy the Azure Function to your Azure subscription (see further down for how to do this)
- Configure CORS on the Azure subscription to accept your local hostname (e.g.
youtube.local) - Once your Azure Functions are available, get the host name and configure youtubeDashboard.ts to have your host name instead of the one in the repo.
const ENV_AZURE_FUNCTIONS_HOST = "https://jcy-dashboard-capturesubscribers.azurewebsites.net"; - Open the HTML web page in your browser using the local hostname (e.g.
http://youtube.local/AzureFunctions.html). - On load of the page, the table will be built out. You can add breakpoints to see the code in action.
Note that there is no additional styling or extra markup. The HTML file is made to be as simple as possible for learning purposes.
If you are new to Azure functions, like I was, I highly recommend the Azure Functions tutorial which goes through the deployment process.
Steps summary
- Open the repo in Visual Code
- Sign in to Azure: You should have an Azure icon on the left where you can select to Sign in.
- Create a function app in Azure: See these steps in the tutorial for the instructions on how to do this. The basics summary is: Click the + to create a new resource, select a subscription, region, runtime, and give it a name.
- Go to the Workspace area in your Azure tab to see your local functions
- Select the local project
- Press the 'cloud' icon which is for deploying to the Azure cloud
- Choose the function (in this case
CaptureSubscribers)
