Lost Pixel is an open source visual regression testing tool. Run visual regression tests on your Storybook and Ladle stories and on your application pages.
Lost Pixel consists of two products:
- lost-pixel (open BETA) - the core engine driving the visual regression test runs. It could be used standalone and the main use-cases are outlined in the documentation
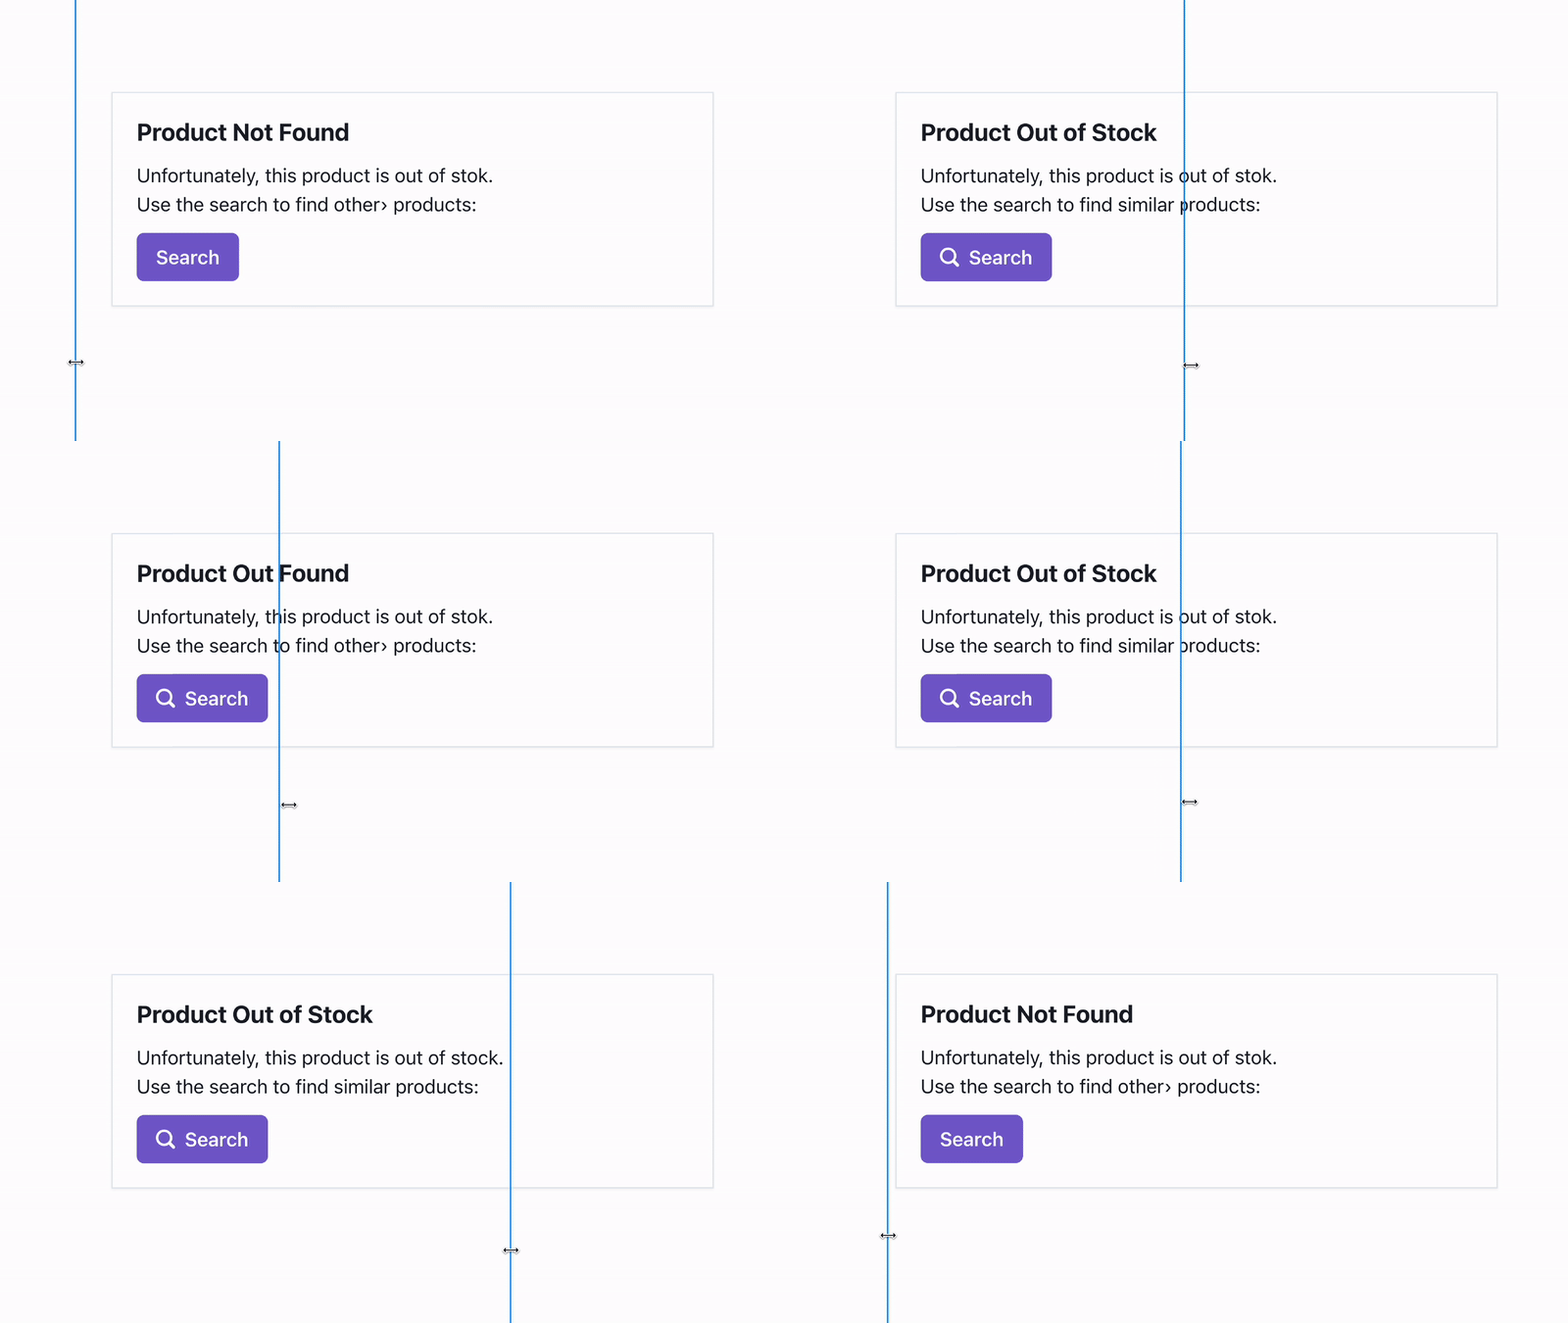
| What machine sees 🤖 | What human sees 👀 |
|---|---|
 |
 |
- lost-pixel-platform (closed BETA) - the UI and CI helpers that allow you to use lost-pixel's managed version. This includes specified regression UI, collaboration with team members and easy approval/rejection process for the snapshots. Configure it just once and enjoy hassle free visual regression tests integrated into your GitHub actions pipeline.
Storybook 🖼
Assuming you are using basic example of Storybook. This setup will run visual regression tests against all the storybook stories on every push.
You can find more examples in the examples repository. You can learn more about Lost Pixel workflow and get more useful recipes in documentation.
Add lostpixel.config.ts at the root of the project:
import { CustomProjectConfig } from 'lost-pixel';

export const config: CustomProjectConfig = {
  storybookShots: {
    storybookUrl: './storybook-static',
  },
  generateOnly: true,
  failOnDifference: true,
};
Add GitHub action .github/workflows/lost-pixel-run.yml
on: [push]

jobs:
  build:
    runs-on: ubuntu-latest

    steps:
      - name: Checkout
        uses: actions/checkout@v2

      - name: Setup Node
        uses: actions/setup-node@v2
        with:
          node-version: 16.x
          cache: 'npm'

      - name: Install dependencies
        run: npm ci

      - name: Build Storybook
        run: npm run build-storybook

      - name: Lost Pixel
        uses: lost-pixel/lost-pixel@2.15.0
Ladle example 🥄
Assuming you are using basic example of Ladle. This setup will run visual regression tests against all the ladle stories on every push.
You can find more examples in the examples repository. You can learn more about Lost Pixel workflow and get more useful recipes in documentation.
Add lostpixel.config.ts at the root of the project:
import { CustomProjectConfig } from "lost-pixel";

export const config: CustomProjectConfig = {
  ladleShots: {
    ladleUrl: "http://172.17.0.1:61000",
  },
  generateOnly: true,
  failOnDifference: true
};
Update package.json with following scripts:
 "scripts": {
    "serve": "npx serve build -p 61000",
    "build": "ladle build"
  },
Add GitHub action .github/workflows/lost-pixel-run.yml
on: [push]

jobs:
  build:
    runs-on: ubuntu-latest

    steps:
      - name: Checkout
        uses: actions/checkout@v2

      - name: Setup Node
        uses: actions/setup-node@v2
        with:
          node-version: 16.x
          cache: "npm"

      - name: Install dependencies
        run: npm install

      - name: Build ladle
        run: npm run build

      - name: Serve ladle
        run: npm run serve &

      - name: Lost Pixel
        uses: lost-pixel/lost-pixel@v2.15.0
Pages example(next.js) ⚛️
Assuming you are using basic example of Next.js. This setup will run visual regression tests against selected pages on every push.
You can find more examples in the examples repository. You can learn more about Lost Pixel workflow and get more useful recipes in documentation.
Add lostpixel.config.ts at the root of the project:
import { CustomProjectConfig } from 'lost-pixel';

export const config: CustomProjectConfig = {
  pageShots: {
    pages: [
      { path: '/app', name: 'app' },
    ],
    pageUrl: 'http://localhost:3000',
  },
  generateOnly: true,
  failOnDifference: true,
};
Add GitHub action .github/workflows/lost-pixel-run.yml
on: [push]

jobs:
  build:
    runs-on: ubuntu-latest

    steps:
      - name: Checkout
        uses: actions/checkout@v2

      - name: Setup Node
        uses: actions/setup-node@v2
        with:
          node-version: 16.x
          cache: "npm"

      - name: Install dependencies
        run: npm ci

      - name: Build Next app
        run: npm run build

      - name: Run Next app
        run: npm run start &

      - name: Lost Pixel
uses: lost-pixel/lost-pixel@v2.15.0You can ask questions and initiate discussions about Lost Pixel.
If you see an error message or run into an issue, help us with creating a bug report!
If Lost Pixel at the moment doesn't support some mode or does not have a feature we would appreciate your thoughts!
Lost Pixel is open source in it's heart and welcomes any external contribution. You can refer to CONTRIBUTING.md to get going with the project locally in couple of minutes.


