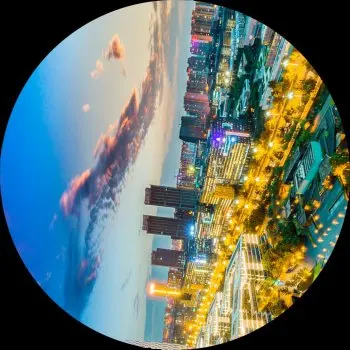
拖动滑块旋转图片,完整人机验证。仿百度旋转验证码,拷贝百度验证码html部分。其本身存在严重bug,需要超大图库才能防止破解,人工智能破解图像旋转角度。
单张图片或许能计算出旋转角度。(图像识别技术本人不会……)
PHP 实现无损 裁剪缩放 旋转图片,350*350 黑色背景图片。
https://github.com/scupte/xuanzhaunyanz


领券加社区 http://www.chayouh.com/
后续思路 https://www.kailigw.com/post/13862.html 数据库查汉明距找角度
使用 精易Web浏览器支持库即可
获取背景图(验证图片)。使用图像识别技术获取旋转角度,在利用精易Web*浏览器完成滑动验证。 还有其他方法不再叙述。…………
https://github.com/scupte/xuanzhaunyanz/blob/master/python/xuanzhuan360.py
https://github.com/scupte/xuanzhaunyanz/blob/master/python/yz.py

https://bbs.125.la/forum.php?mod=viewthread&tid=14469311&extra=
https://scupte.github.io/xuanzhaunyanz/demo/index.html
Yzt.php 文件和 2.ttf 放在extend/Yzt 目录下。
<?php
namespace app\api\controller;
use think\Controller;
use Yzt\Yzt;
class Yzpic extends Controller
{
    public function index()
    {
        $Yzt = new \Yzt\Yzt('https://api.uomg.com/api/rand.img1', true, true, rand(20, 270));
       // $info = $Yzt->move('static/upload/');
        //return $info;
        //die();
        header("Content-type: image/png;text/html; charset=utf-8");
        $tot = rand(20, 300);
        imagepng($Yzt->changeCircularImg());
        die();

    }
}
#方便机器识别,给图片添加文字
$Yzt = new \Yzt\Yzt('https://api.uomg.com/api/rand.img1', true, true, rand(20, 270));##python cv2 识别粗略代码
#!/usr/bin/env python
# -*- coding: utf-8 -*-
import cv2
import numpy as np
from PIL import Image
fengmian = './pic.png'
img = cv2.imread('pic.jpg')
img3 = cv2.imread(fengmian)
img4 = cv2.cvtColor(img3, cv2.COLOR_BGR2RGB)  # cv2默认为bgr顺序
h, w, _ = img3.shape  # 返回height,width,以及通道数,不用所以省略掉

jihe = []
for i in range(350):
    for o in range(350):
        r, g, b = img4[i][o]
        if(r == 88 and g == 170 and b == 104):
            jihe.append([i+1, o+1])
            b = 0
            g = 0
            r = 0
        else:
            b = 255
            g = 255
            r = 255
        img[i, o] = [b, g, r]
cv2.imwrite('9_1.png', img)
cv2.namedWindow("image")  # 创建窗口并显示的是图像类型
cv2.imshow("image", img)
cv2.waitKey(0)
cv2.destroyAllWindows()  # 释放窗口
###第二步 2.py
# -*- coding: utf-8 -*-
import cv2
import numpy as np

imagepath = '9_1.png'
img = cv2.imread(imagepath)
gray = cv2.cvtColor ( img , cv2.COLOR_BGR2GRAY )
ret, binary = cv2.threshold(gray,127,255,cv2.THRESH_BINARY)

contours, hierarchy = cv2.findContours(binary,cv2.RETR_TREE,cv2.CHAIN_APPROX_SIMPLE)
#cv2.drawContours(img,contours,-1,(0,0,255),1)
for cnt in contours:

    # 最小外界矩形的宽度和高度
    width, height = cv2.minAreaRect(cnt)[1]

    if width* height > 100:
        # 最小的外接矩形
        rect = cv2.minAreaRect(cnt)
        box = cv2.boxPoints(rect)  # 获取最小外接矩形的4个顶点

        box = np.int0(box)
        print box

        if 0 not in box.ravel():

            #绘制最小外界矩形
            for i in range(4):
                cv2.line(img, tuple(box[i]), tuple(box[(i+1)%4]), 0)  # 5
            theta = cv2.minAreaRect(cnt)[2]
            if abs(theta) <= 45:
                print('图片的旋转角度为%s.'%theta)


            #     angle = theta
print theta
cv2.imshow("img", img)
cv2.waitKey(0)