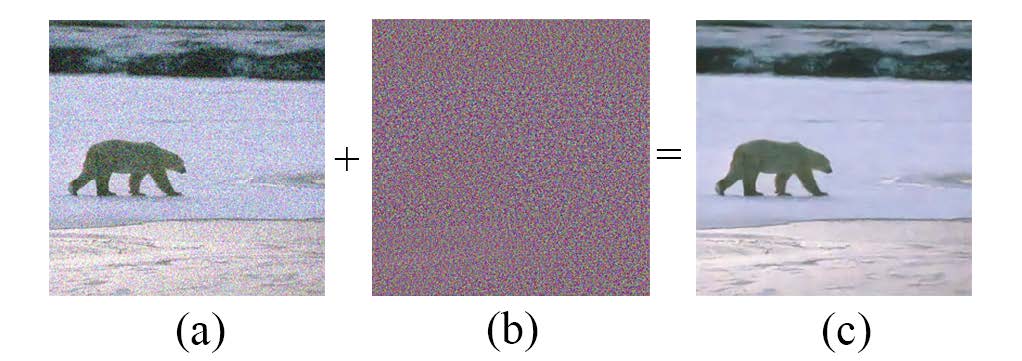
中文 This is my undergraduate design for my Degree of Bachelor Research on Image Denoising Method Based on Generative Adversarial Network
This design is based on this article | github
And was inspired by this github
tensorflow2.0 GAN code was inspired github
other denoising way github
The generation network is divided into three parts:
- conv layer : extracting image/noise features
- residual block: using short cut to accelerate model training, to solve vanishing gradient problem
- deconv layer: Up-sampling get the learning noise
According to the main idea of WGAN, change the last sigmoid layer to dense layer convert into solving Regression Issues
- Add Self-attention-like multiply pathway in generate network
- Improved LOSS function of the generative network
- Increased stability of model training with Wasserstein-GAN
- python == 3.8.10
- tensorflow == 2.3.0
- opencv == 4.0.1
- scikit-image == 0.18.1
- numpy == 1.20.2
- pandas == 1.2.5
(optional but recommend)
- cuda == 10.1
- cudnn == 7.6.5
- wget == 3.2
# use conda to solve python environment
conda create -n wgan python=3.8
conda activate wgan
conda install cudatoolkit=10.1 cudnn=7.6.5 tensorflow==2.3.0 numpy opencv scikit-imagegit https://github.com/juju-w/Image-Denoise-using-Wasserstein-GAN.git
cd Image-Denoise-using-Wasserstein-GAN# to get help
python image_operation.py -h
# first generate your own dataset with image_operation.py automatically
python image_operation.py \
--dataset_build \
--input_dir <INPUT_FOLDER> \
--out_dir <OUT_FOLDER>
# or build by yourself manually
python image_operation.py \
--add_noise --noise_levels 15 \
--resize --size 256 \
--input_dir INPUT_FOLDER \
--out_dir <OUT_FOLDER>"""
TRAIN CONFIG
"""
D_LEARNING_RATE = 0.0001 # Discriminater learning rate
G_LEARNING_RATE = 0.0001 # Generater learning rate
BATCH_SIZE = 64 # batch size
PATCH_NUM = 128 # patch per image
PATCH_SHAPE = [BATCH_SIZE, 64, 64, 3] # pathc size
BATCH_SHAPE = [BATCH_SIZE, 256, 256, 3] # bathc size
N_EPOCHS = 20 # epoch num
SAVE_DIS_WEIGHT = False # IF SAVE DISCIMINATER WEIGHT
# LOSS weight factor
ADVERSARIAL_LOSS_FACTOR = 1.0
PIXEL_LOSS_FACTOR = 0.001
STYLE_LOSS_FACTOR = 0
SP_LOSS_FACTOR = 0.5
SMOOTH_LOSS_FACTOR = 0
SSIM_FACTOR = - 20.0
PSNR_FACTOR = - 2.0
D_LOSS_FACTOR = 1.0
# PATH
TRAIN_CLEAN_PATH = 'data/output/1_train/clean/'
TRAIN_NOISE_PATH = 'data/output/1_train/noise15/'
VAL_CLEAN_PATH = 'data/output/2_val/clean/'
VAL_NOISE_PATH = 'data/output/2_val/noise15/'
TEST_CLEAN_PATH = 'data/output/3_test/clean/'
TEST_NOISE_PATH = 'data/output/3_test/noise15/'
CHECKPOINT_PATH = 'checkpoint/noise15/'
"""
TEST CONFIG
"""
GEN_IMG_PATH = 'output/WGAN/fake_noise15' #faking img save path
GEN_CSV = True # genrate index csv file after test # train
python train.py
# test
python test.pyfind csv file in GEN_IMG_PATH.csv default in output/WGAN/fake_noise15.csv
If you use this WGAN image denoise way in your research, please consider use the following BibTeX entry.
@misc{juju-w2021WGAN,
  author = {juju-w},
  title = {Image-Denoise-using-Wasserstein-GAN},
  year = {2021},
  howpublished = {\url{https://github.com/juju-w/Image-Denoise-using-Wasserstein-GAN}}
}


