A Reference Architecture and Demo for Wordpress on Azure - at cloud native scale.
Update January 2023 - First Party Offering
There is now an Azure Marketplace solution for Wordpress managed by the App Service team at Microsoft, which also has options for integrating blob storage and CDN delivery. See this quickstart documentation for details.
Cloud Native applications separate state from their application, which means your media files should not be on what the app thinks is a file system. That means there is no uploads folder. Instead we will use "Storage as a Service" with Azure Blob Storage.
Using the Microsoft Azure Storage for WordPress plugin, we can implement this architecture with minimal effort. No code require, just plugin installation and configuration.
Out of the box, Wordpress puts uploaded files into wp-content/uploads, on the file system, which fine for testing and small webistes. However, file systems do not scale infinitely. You can mount additional storage, for example file shares and with path mappings to avoid architecture and software changes.
-
Performance
However this only hides the underlying problem - file share performance issues, most commonly IO and latency. Increasing disk size and swapping spinning disks for SSD does not scale infinitely. -
Site Backups
When your media files sit on the file system, how do you plan on backing up something that massive? You need to separate your wordpress code, your customizations, e.g. themes, which can be version controlled. Backups can also become bloated, affecting your Recovery Time Objective (RTO) in event of failure.
There is no file system. Instead the application interfaces with an API over HTTP, with the many advantages, including:
-
Infinite Scale
HTTP is cloud scale and web applications have tried and true patterns for handling large scale workloads. For example, if you want to upload a multi Gigabyte video, with HTTP APIs, you can split the data into smaller chunks using multiple HTTP calls that let's you recover from failure, pause uploads and more. Can your file system do that? -
Focus on your app, not infrastructure
Like any managed service, Blob Storage does one thing and does it well. Why worry about backups, when you can get redundency out of the box?
and much more!
Before we start, let's be clear that this reference architecture uses Official Wordpress Docker Image in a container for convenience. You can also use the App Service PHP runtime. For this demo, we want to focus on architecure, not managing PHP files.
So our Dockerfile is short and simple:
FROM wordpress:5.5

# PHP Configuration, e.g. max upload size, etc.
COPY ./uploads.ini /usr/local/etc/php/conf.d/uploads.ini

# Pre-install Azure Storage Plugin
COPY ./wp-plugins/windows-azure-storage /var/www/html/wp-content/plugins/windows-azure-storage
Per official documentation on Docker Hub, we can customize the docker image like so:
- Themes go in a subdirectory in
/var/www/html/wp-content/themes/ - Plugins go in a subdirectory in
/var/www/html/wp-content/plugins/
For purpose of this demo, you will create the infrastructure locally from your machine.
You need an Azure Subscription with at least Contributor role in order to create the Azure resources.
If you do not have an active session, login and select your subscriptoin
az login
az account set --subscription <SUBSCRIPTION_ID>
Demo is already preconfigured. Note that the Infrastructure as Code will add a random string into your resource names, for example n26it in the example output below. This is necessary because certain Azure Resource Names, e.g. storage accounts and contianer registries need to be globally unique.
Run:
terraform init
terraform plan
terraform apply
It may take several minutes to create all the infrastructure. Once it's done, you will see an output similar to this:
app_service = {
  "hostname" = "wordpress-n26it-app.azurewebsites.net"
  "name" = "wordpress-n26it-app"
  "site_config" = {
    "always_on" = true
    "app_command_line" = ""
    "cors" = [
      {
        "allowed_origins" = []
        "support_credentials" = false
      },
    ]
    "ftps_state" = "Disabled"
    "linux_fx_version" = "DOCKER|onazureio/wordpress:5.5"
    "min_tls_version" = "1.2"
    "scm_type" = "None"
  }
}
resource_group = {
  "id" = "/subscriptions/<SUBSCRIPTION_ID>/resourceGroups/wordpress-n26it-rg"
  "location" = "northeurope"
  "name" = "wordpress-n26it-rg"
}
resource_group_id = /subscriptions/<SUBSCRIPTION_ID>/resourceGroups/wordpress-n26it-rg
uploads_cdn_enpoint = https://wordpress-n26it.azureedge.net
uploads_storage_account = {
  "location" = "northeurope"
  "name" = "wordpressn26ituploads"
}
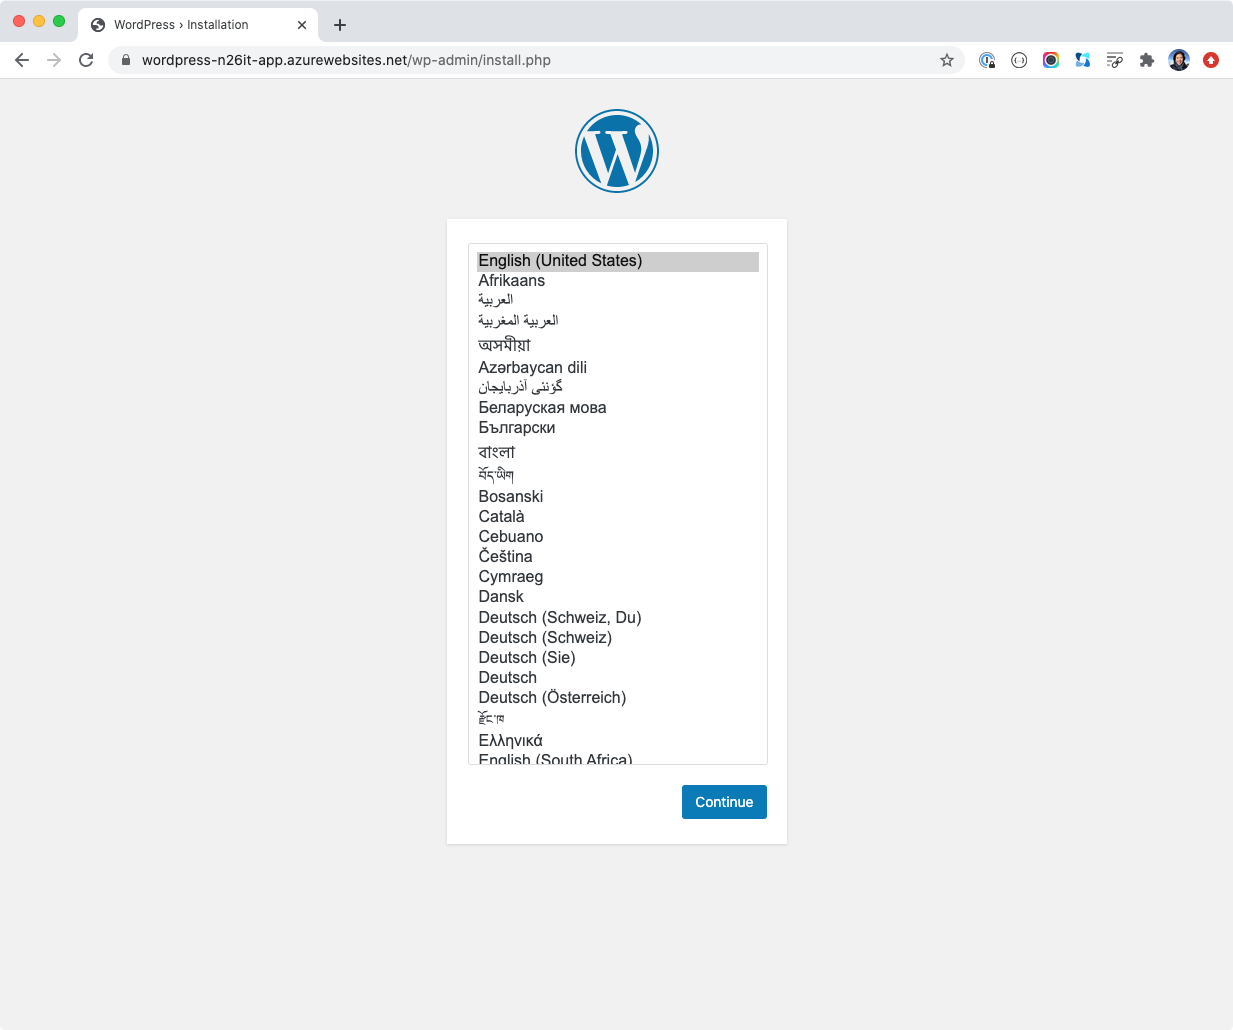
- Open your wordpress URL, e.g.
http://wordpress-n26it-app.azurewebsites.net"immediately in your browser for security reasons.
 .
. - Select your language
- Create the administrator account, configure website title, etc.
- Confirm
- Finally Login with the credentials you just created in step 3
The Microsoft Azure Storage for WordPress plugin is pre-installed, but you must activate it.
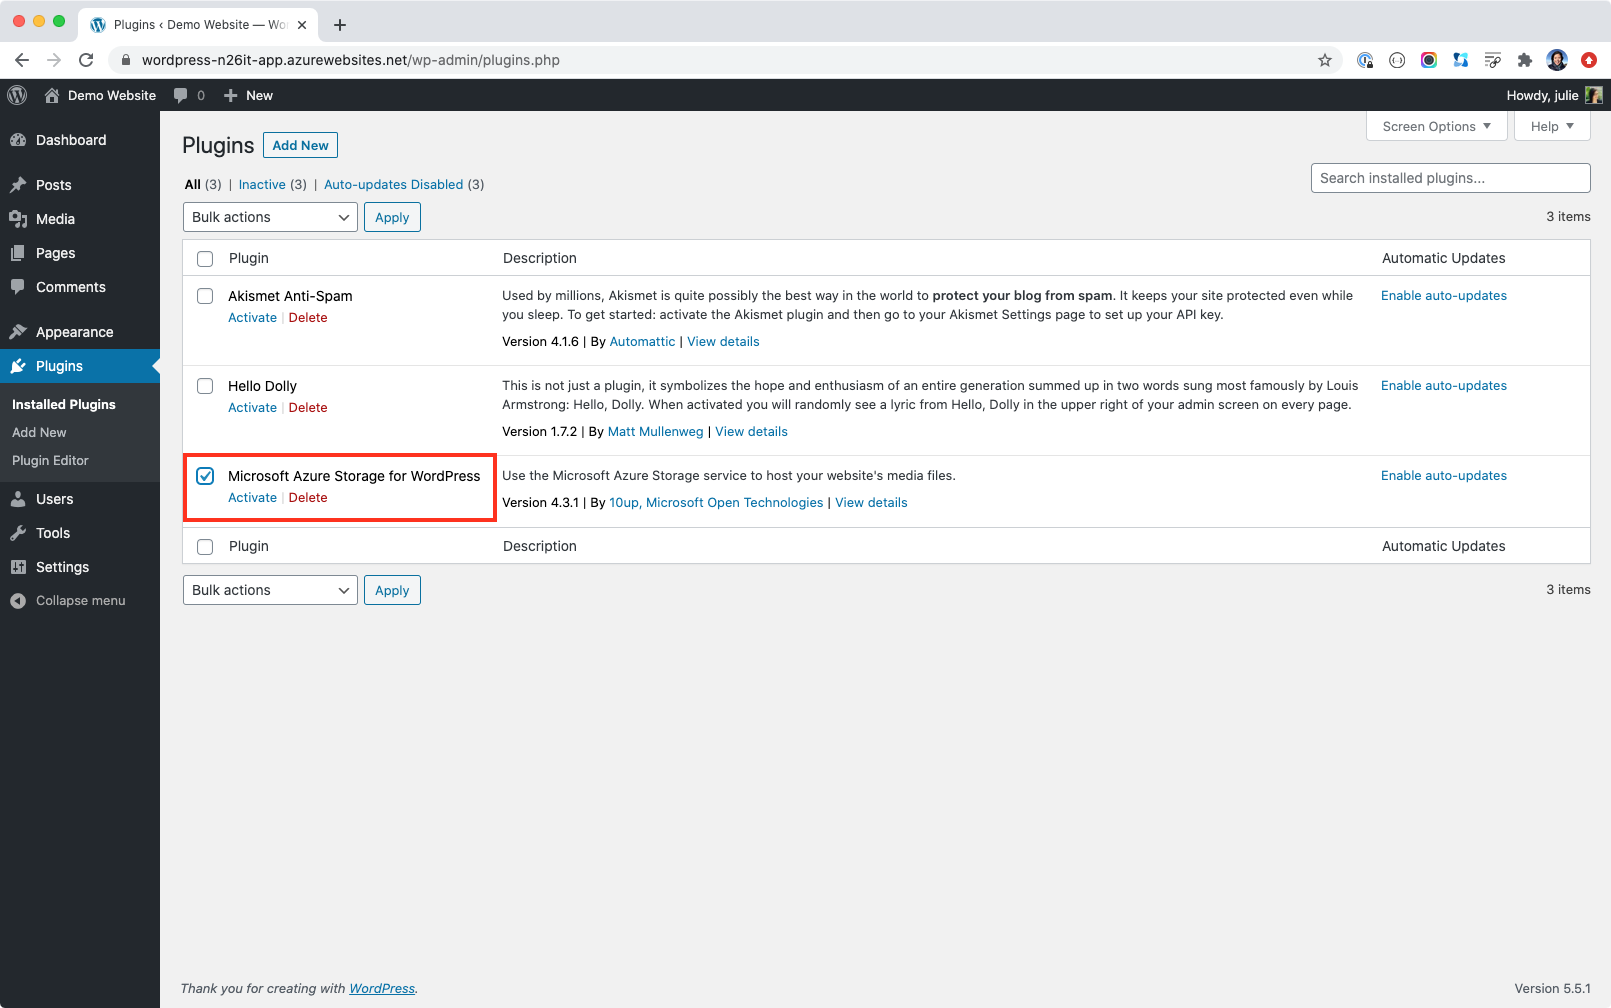
- Activate the Plugin
Go to "Plugins" > "Installed Plugins", check the box and click the "Activate" link

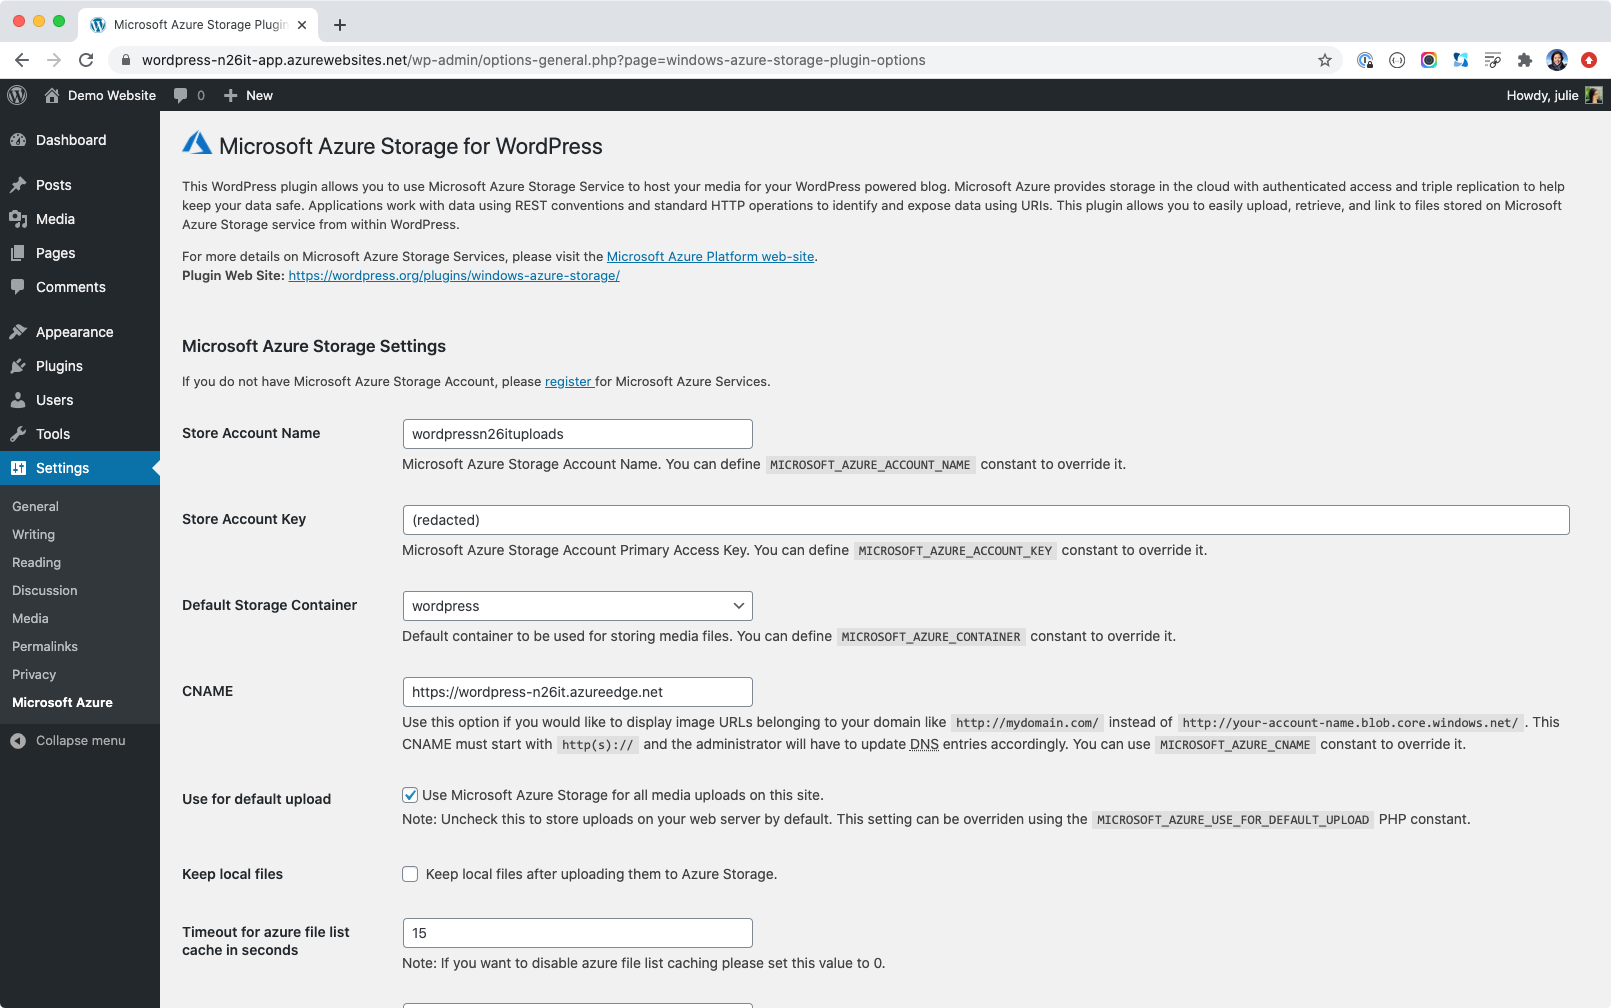
- Configure the Plugin
Go to "Settings" > "Microsoft Azure"

Configure the following
| Property | Example |
|---|---|
| Storage Account Name | wordpressn26itstatic |
| Storage Account Access Key | redacted |
| Blob Storage Continer Name | wordpress |
| CDN for Azure Storage Account | https://wordpress-n26it.azureedge.net |
| "Use for default upload" | click the checkbox |
Scroll down and click the "Save Changes" button.
To test the setup, upload an image to your blog post and examine the URL. It should look something like this:
https://wordpress-n26it.azureedge.net/wordpress/2020/09/my-image-1024x730.png
And notice that wordpress even generated a thumbnail of size 1024x730 for me.