This repository contains code and instructions on how to integrate Hugging Face Transformers with Snowflake using External Functions. Below you can find an architectural overview of the solution.
- Running Snowflake Warehose. Get started here
- Database with data, e.g. tweet_data
TODO: Add API Gateway policy
We are going to use AWS CDK to deploy your Hugging Face Transformers to Amazon SageMaker and create the AWS API Gateway to connect to Snowflake and our SageMaker endpoint.
Install the cdk required dependencies. Make your you have the cdk installed.
pip3 install -r aws-infrastructure/requirements.txtChange directory int to aws-infrastructure/
cd aws-infrastructure/Bootstrap your application in the cloud.
cdk bootstrap \
   -c model="distilbert-base-uncased-finetuned-sst-2-english" \
   -c task="text-classification"
Deploy your Hugging Face Transformer model to Amazon SageMaker
cdk deploy \
   -c model="distilbert-base-uncased-finetuned-sst-2-english" \
   -c task="text-classification"
Test your endpoint with curl:
curl --request POST \
  --url {HuggingfaceSagemakerEndpoint.hfapigwEndpointE75D67B4} \
  --header 'Content-Type: application/json' \
  --data '{"data":
	"inputs": "Hugging Face, the winner of VentureBeat’s Innovation in Natural Language Process/Understanding Award for 2021, is looking to level the playing field. The team, launched by Clément Delangue and Julien Chaumond in 2016, was recognized for its work in democratizing NLP, the global market value for which is expected to hit $35.1 billion by 2026. This week, Google’s former head of Ethical AI Margaret Mitchell joined the team."
}}'
You should see the following response: [{"label":"POSITIVE","score":0.9970797896385193}]
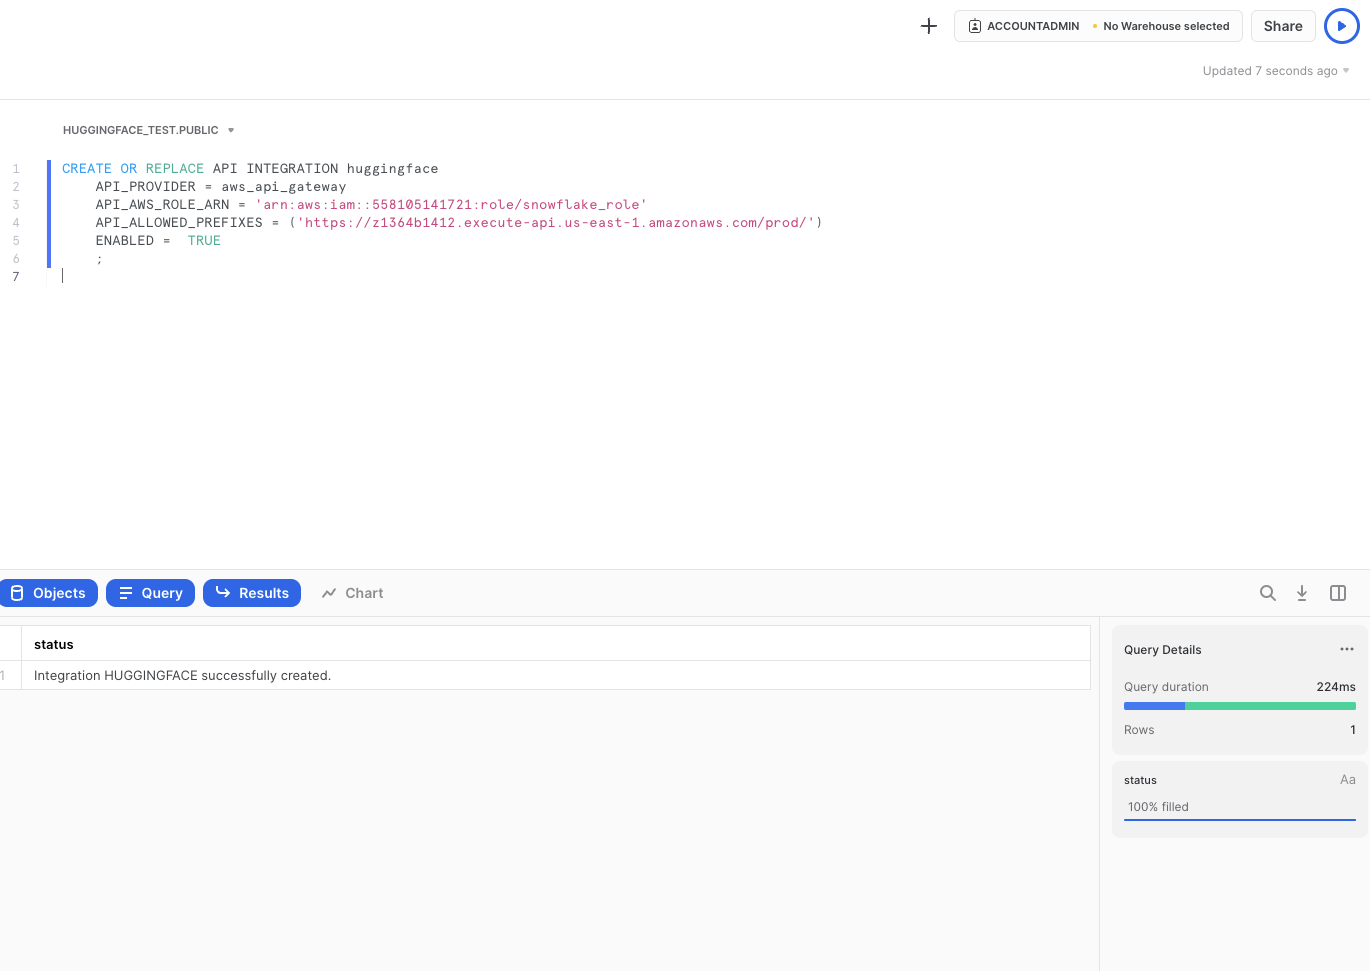
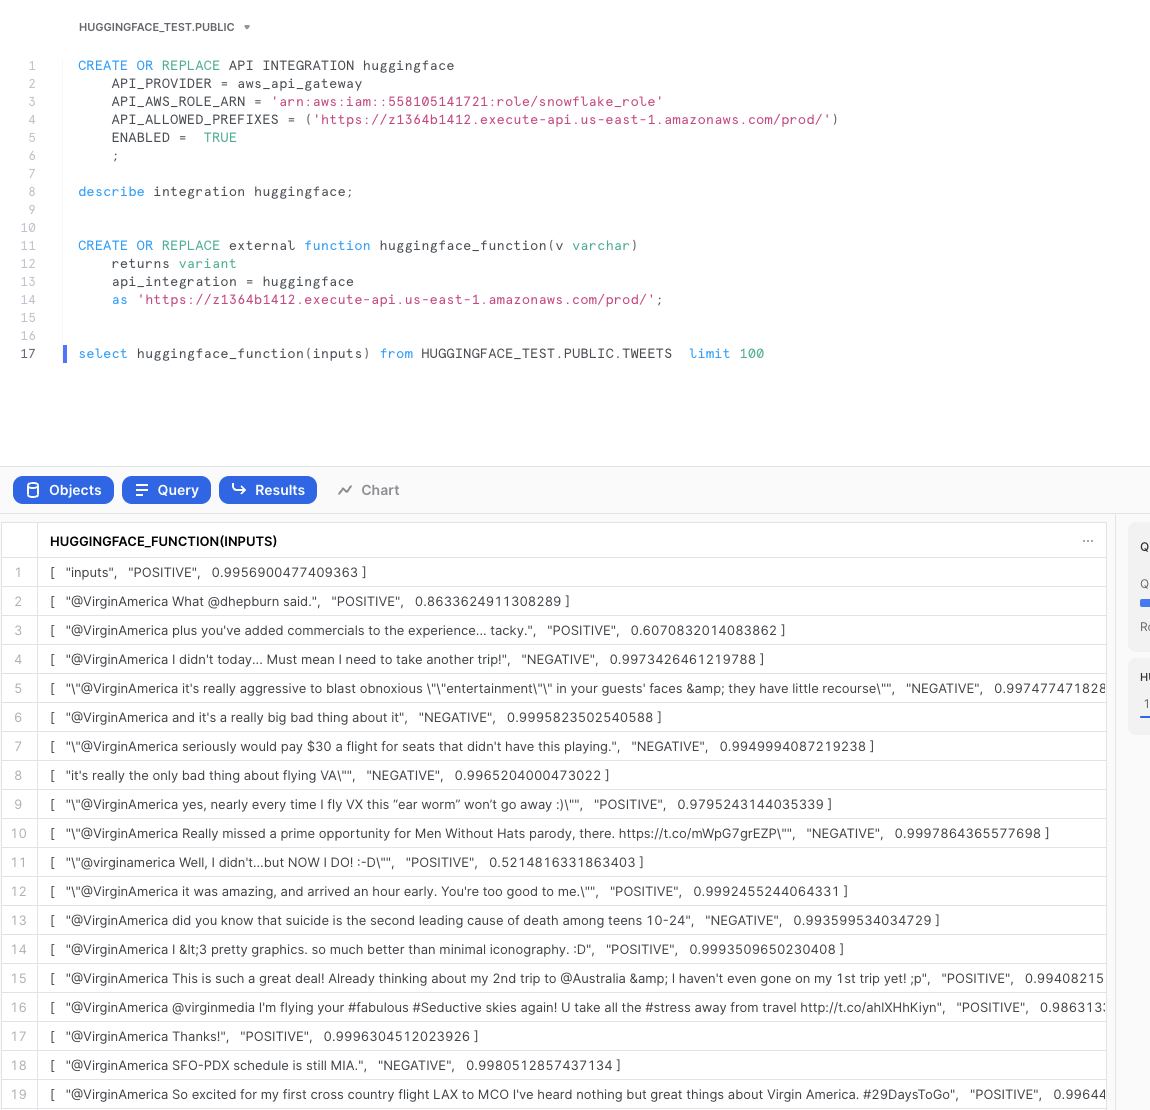
Open a new Worksheet in the Snowflake Web Console and create a new API Integration. Therefore we need our API Gateway endpoint and the snowflake_role arn. Change the Values in the snippet below and then execute.
CREATE OR REPLACE API INTEGRATION huggingface
    API_PROVIDER = aws_api_gateway
    API_AWS_ROLE_ARN = 'arn:aws:iam::{YOUR-ACCOUNT-ID}:role/snowflake_role'
    API_ALLOWED_PREFIXES = ('{HuggingfaceSagemakerEndpoint.hfapigwEndpointE75D67B4}')
    ENABLED =  TRUE
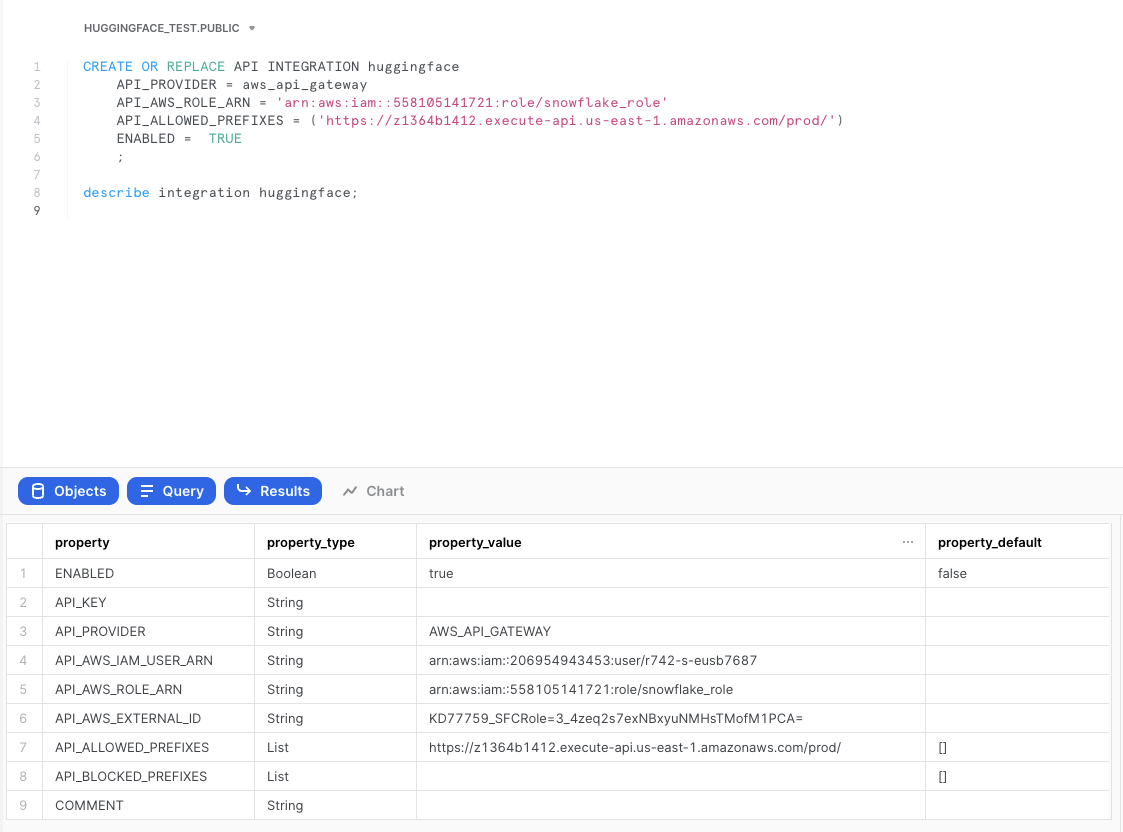
;Before we can create and use our external function we need to authorize Snowflake to assume our snowflake_role to access our API Gateway. To do this we need to extracte the API_AWS_IAM_USER_ARN and API_AWS_EXTERNAL_ID from out Snowflake API integration.
Therefore we need to run the following snippet in our snowflake web console:
describe integration huggingface;Then copy the API_AWS_IAM_USER_ARN and API_AWS_EXTERNAL_ID.
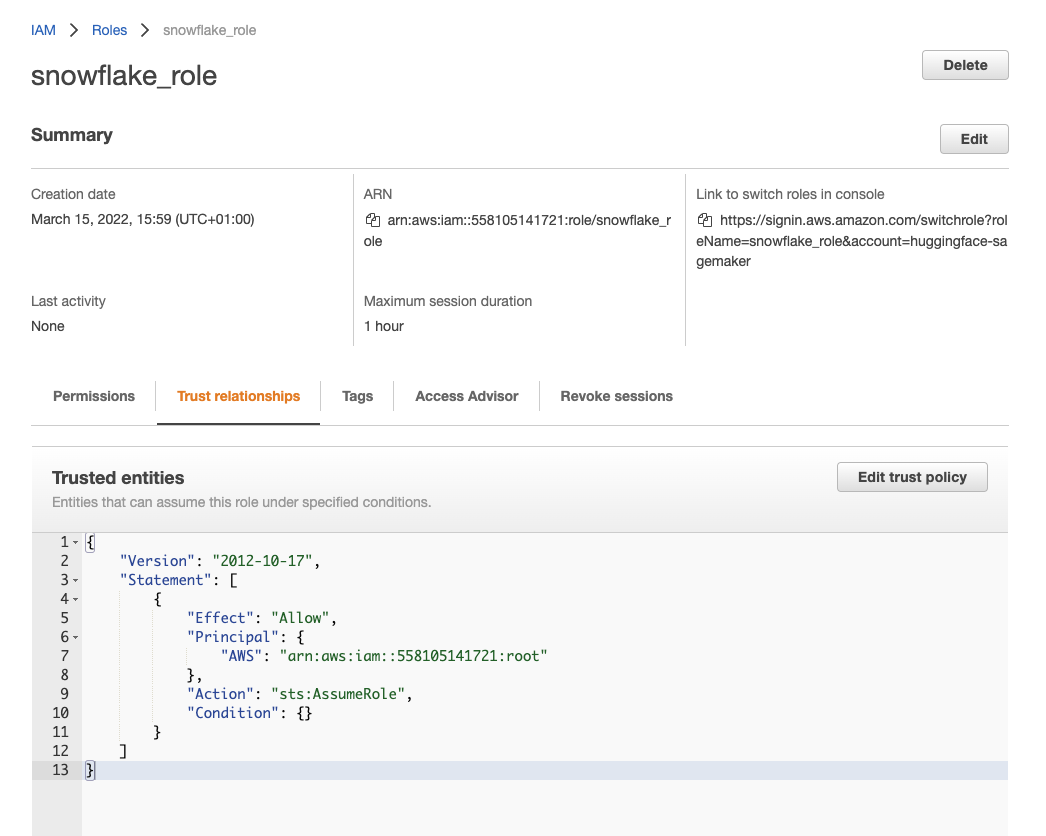
To authorize snowflake we need to manually adjust the trust relationship for our snowflake_role. Go to the AWS Management Console IAM Service. Search for the snoflake_role and click on the Edit trust policy button on the "Trust Relationships" tab.
Replace API_AWS_IAM_USER_ARN and API_AWS_EXTERNAL_ID from the snippet below with your values and click "update policy".
{
	"Version": "2012-10-17",
	"Statement": [
		{
			"Effect": "Allow",
			"Principal": {
				"AWS": "{API_AWS_IAM_USER_ARN}"
			},
			"Action": "sts:AssumeRole",
			"Condition": {"StringEquals": {"sts:ExternalId": "{API_AWS_EXTERNAL_ID}"}}
		}
	]
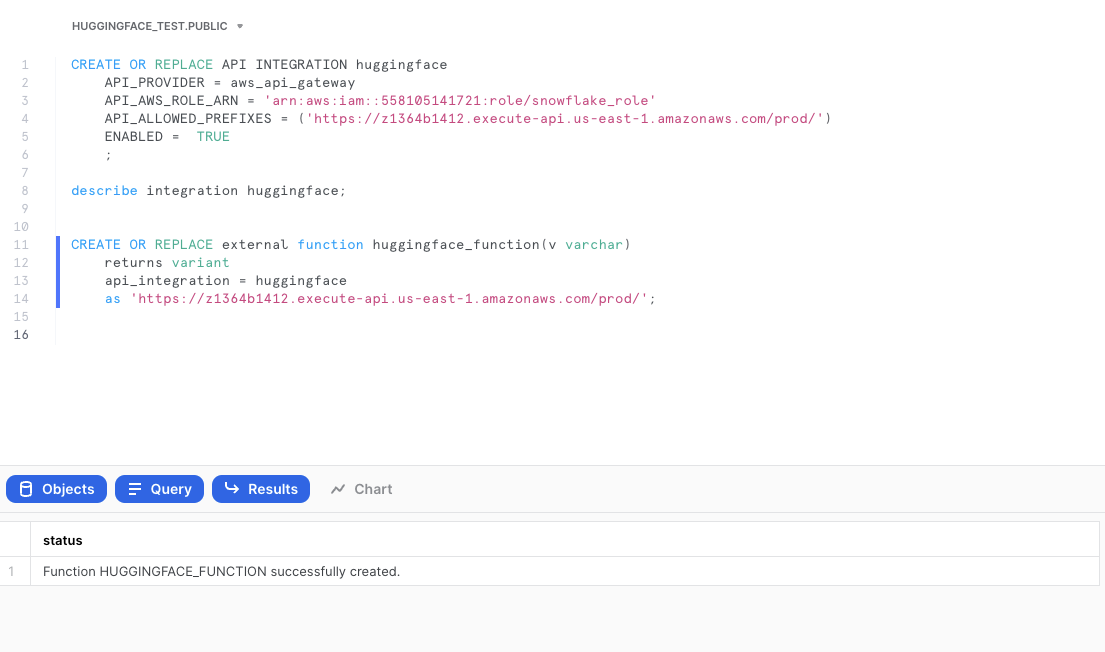
}After we have enabled the trust relationship between Snowflake and our snowflake_role we can create our external function. Replace the {HuggingfaceSagemakerEndpoint.hfapigwEndpointE75D67B4} value with your API Gateway endpoint and then execute the following snippet in Snowflake.
CREATE OR REPLACE external function huggingface_function(v varchar)
    returns variant
    api_integration = huggingface
as '{HuggingfaceSagemakerEndpoint.hfapigwEndpointE75D67B4}';Now we can use our external function to run our model on our data. Replace HUGGINGFACE_TEST.PUBLIC.TWEETS and inputs with your database and column.
select huggingface_function(inputs) from HUGGINGFACE_TEST.PUBLIC.TWEETS limit 100the result look the similar to this

