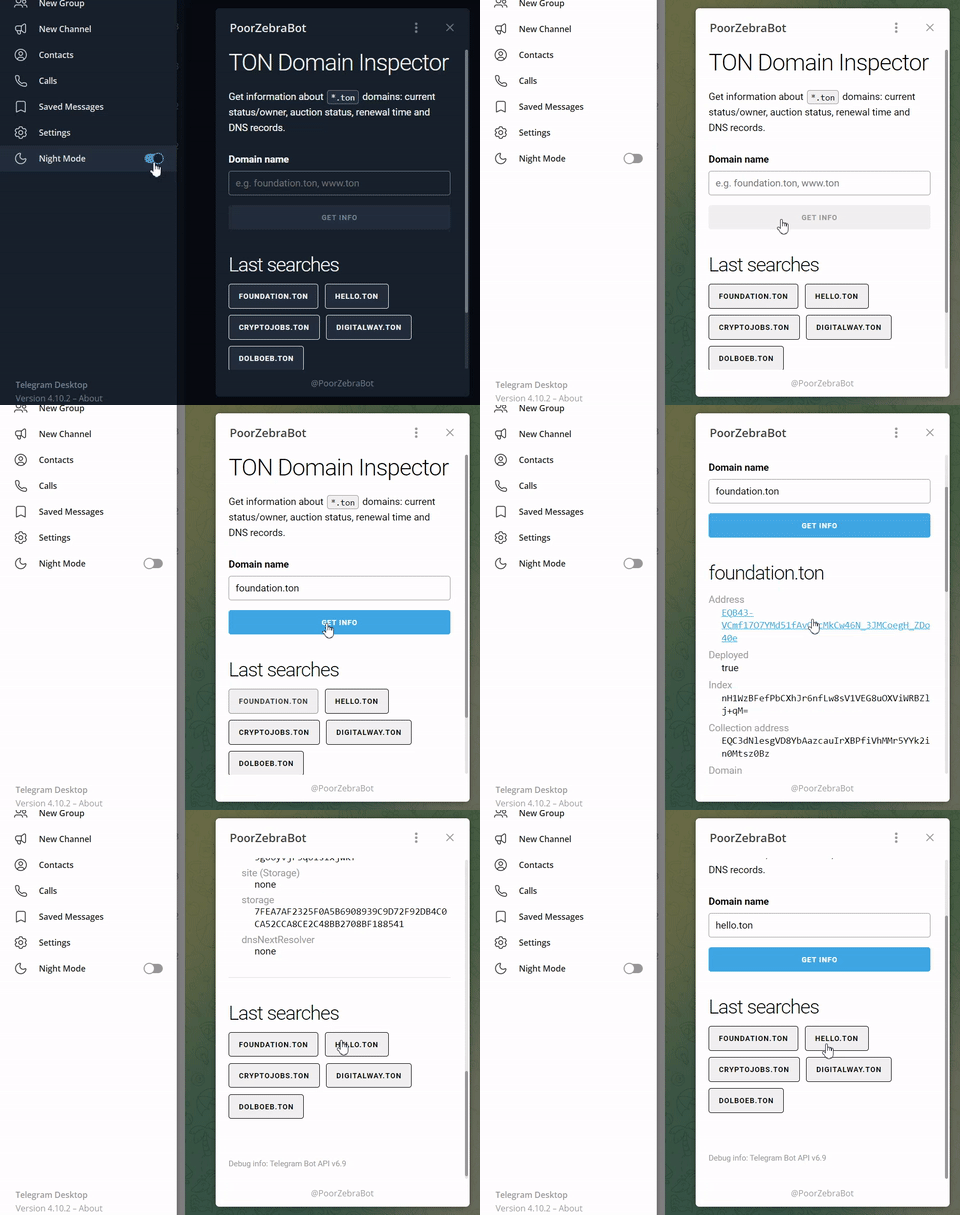
Mini App created for Telegram Mini App Contest in October 2023.
Demo link: https://t.me/PoorZebraBot/tmac2023 (not guaranteed to work beyond November 2023).
- /docs - published output static files for MiniApp, which are handled by GitHub Pages and used as app source in BotFather (so, no separate hosting needed).
- /server - server-side part, written in C# (.NET 6.0), that provides data for Mini App. You'll need to publish running app via Ngrok or use publish to hosting provider (Windows or Linux).
- /webapp - Mini App (client), written using Svelte Kit to minimize runtime app size.
- Mini App provides input field where user should type TON Domain name he wants to get info about (domain may be entered with or without
.tonsuffix). - Submitted domain name is sent to server app, which connects to TON Blockchain, extracts information about requested name and returns JSON in response.
- Client app displays domain name info in structured way.
- Last 5 checked domain names are stored in Telegram Cloud Storage (new in v6.9) so user can access them from any device after reopening app.
- Also, Telegram theme colors are used (via CSS variables), so Mini App changes own look on-the-fly.
Please consult commit history to get step-by-step guide how to create Mini App from scratch (empty project, static pages, scripting) using Svelte Kit.
For server-side app, you may use any language and SDK, check docs.ton.org.
- Install .NET SDK 6.0 or later (Windows, Linux, macOS compatible)
- Obtain latest TON Blockchain binaries (tonlibjson.*) and drop them into your source code /server folder (consult TonLib.NET readme for details).
- Run
dotnet runfrom console (in /server folder) - Open http://localhost:5000/search?domain=foundation.ton in your browser.
First request will wait for about 1 minute and may even fail, because tonlib need some time to sync with TON Blockchain (you'll see progress in console logs), but this is not a problem, just refresh (F5) your page to retry. Once synced, response with JSON data will arrive in less than a second. - Use Ngrok to publish your port 5000 to internet:
ngrok http 5000
Now you have url likehttps://0893-95-24-75-242.ngrok-free.appand your server-side app is accessible from internet.
- Install npm if needed :)
- Navigate to /webapp and run
npm installfrom there - Edit
.envfile and change hostname to your one from ngrok, so your file should look like:
PUBLIC_SERVER="https://0893-95-24-75-242.ngrok-free.app/search"
(don't remove/searchat end of address!) - Run
npm run devto run app on your computer - Again, use Ngrok to publish your port 5173 to internet (
ngrok http 5173).
Ngrok may say that your account is limited to only 1 session and you need to perform some actions to be able to run multiple sessions - follow its instructions or just pass to next step (to publish to CDN). - Publish app to some CDN (static file hosting):
- Run
npm run buildto update files in./../docsfolder - Upload this file to static hosting of your choice (this repo uses GitHub Pages, don't forget
CNAMEand.nojekyllfiles if you want to use GH Pages too!).
- Run
- Finally, you should have some public address (like https://tondomaininspectorbot.just-dmitry.ru/) which opens your index page.
Go to https://t.me/BotFather and create new Mini App (it will also ask you to create new Bot if you don't have any).
- Fill name, title, description and other fields with value of your choice;
- Use address from step 7 (URL of your mini app), e.g. https://tondomaininspectorbot.just-dmitry.ru/, when BotFather ask for WebApp URL.
- Finally, BotFather will provide you with your app address like
https://t.me/<yourbotname>/<yourbappname>
If you made everything correctly, then you should be able to open your Mini App.
