Taking part in the Student Zone at Microsoft Build is about so much more than just learning about tools and resources -- it's also about joining a community of other developers and collaborating to produce something amazing!
To give you the opportunity to show you were there, we've made this stellar MakeCode and JavaScript community project and invite you to make your mark on our Student Zone universe!
This inspired the session Make your mark: contribute to a community project using MakeCode and JavaScript at Microsoft Build with Chloe Condon and Morgan Bell!
There are many ways to collaborate with this project! You can check out the constellations we've made, create your own, add them to the universe, and even help make this web application project better!
Before you get started, check out the 12 constellations that we made here.
You will find all of the actual MakeCode projects so you can see the code and what it results into!
Then, head over to the Universe and see what they look like all together!
To get started creating your own MakeCode constealltions, just follow these steps:
- Head over to the MakeCode on micro:bit coding page
- Create a new project
- Use the LED code blocks to turn LEDs on
- Click the share button at the top of your project page
- Publish the project
- Copy the Share URL
Right now, this project will only allow you to add starts to YOUR universe (so if your friends add stars on their computer, you won't see them). Don't worry, we plan on changing that! If you're interested in helping us make this more dynamic and collaborative, check out the section Contribute to this Project.
To see the stars you made in MakeCode in the Universe in YOUR browser, just follow these steps:
- Open the universe by clicking here
- Paste the Share URL you copied from your MakeCode project into the text box
- Click the "Add Stars" button
- See your constellation be added!
When trying to think of a way for all of us to show we're a part of this incredible learning community, I wanted to find a way where learners of all skill levels and ages could participate. So, I decided to mix together MakeCode and Web Dev to create a "universe" webpage that pulled in MakeCode projects.
MakeCode is an incredible, free, browser-based learning portal for anyone to get started learning to code with a block-based language, JavaScript, or Python. MakeCode brings learners on a journey through writing code for Minecraft, LEGO Mindstorms, the Circuit Playground Express, The Arcade, the Cue, the Chibi Chip, and the micro:bit.
This project will be using the micro:bit MakeCode integration because it offers up the simplest way to show off "stars". The micro:bit is a simple square device with 25 LEDs on a 5x5 grid, 2 buttons, 3 pins plus 1 ground and 1 3v. The best part? you do not have to have the physical device in order to try it out! There is a simulator right on the MakeCode coding page!
And that simulator is exactly what we're using to create our universe!
To make this easy, MakeCode and micro:bit have an incredible embeddable simulator!
When you create a project, you can share that project publicly and embed the code, the editor, or the simulator into a simple webpage!
How to embed:
- Create a micro:bit MakeCode project
- Click the Share button
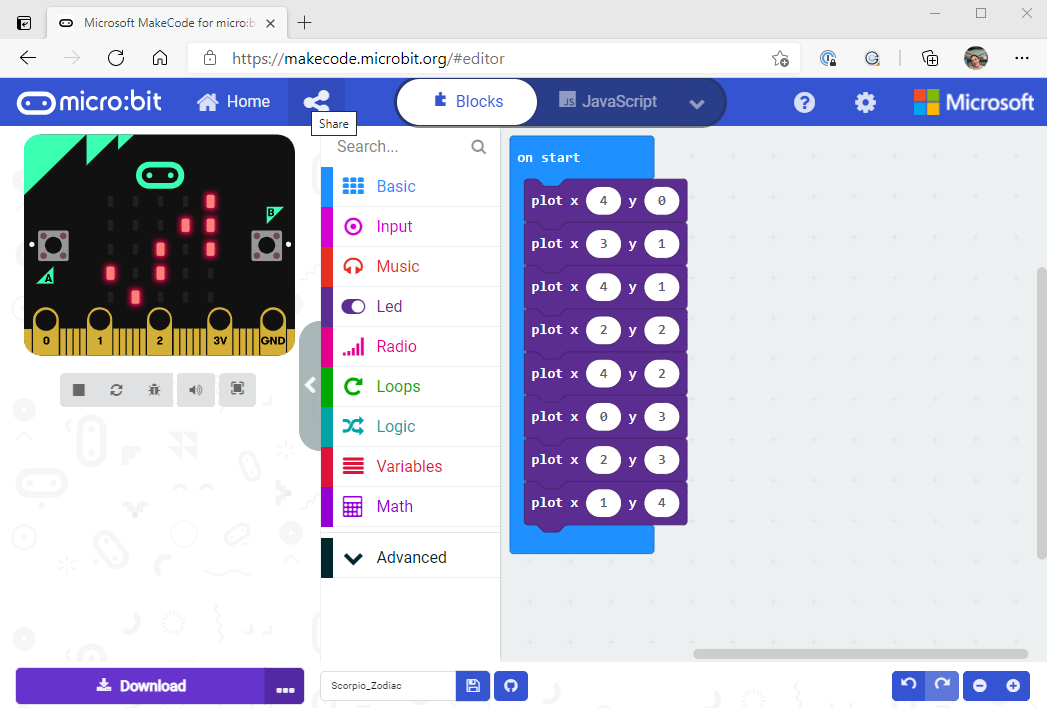
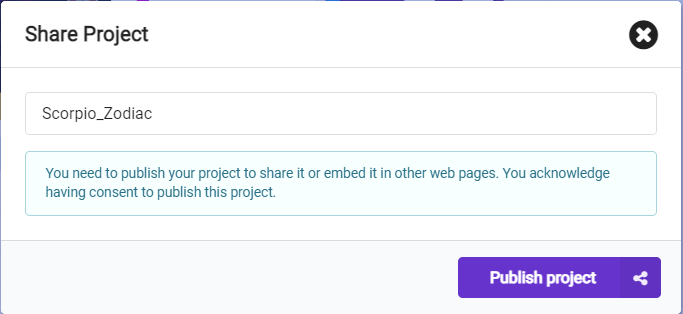
- Click the Publish button
- Click the embed expansion
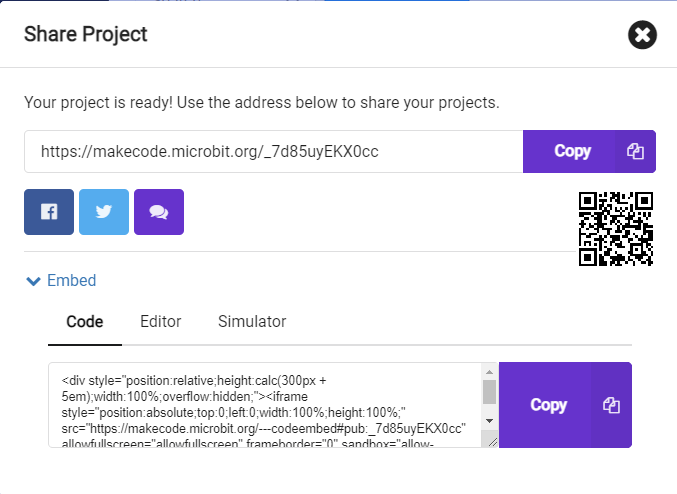
- Copy the HTML code to embed: a. The Code b. The Editor c. The Simulator
For example, I made a simple Scorpio Zodiac, here are all the ways I can share it:
You can click on this link and see my project! You can even start with this and edit my code and re-share as your project, buidling on each other's projects is one of the best parts of this collaborative coding journey!
https://makecode.microbit.org/_7d85uyEKX0cc
The embed code for the actual code looks like this:
<div style="position:relative;height:calc(300px + 5em);width:100%;overflow:hidden;">
  <iframe style="position:absolute;top:0;left:0;width:100%;height:100%;" src="https://makecode.microbit.org/---codeembed#pub:_7d85uyEKX0cc" allowfullscreen="allowfullscreen" frameborder="0" sandbox="allow-scripts allow-same-origin">
  </iframe>
</div>
And in a simple webpage it would look like this: https://guthals.com/MakeYourMark/embedCodeExample
The embed code for the editor looks like this:
<div style="position:relative;height:0;padding-bottom:70%;overflow:hidden;">
  <iframe style="position:absolute;top:0;left:0;width:100%;height:100%;" src="https://makecode.microbit.org/#pub:_7d85uyEKX0cc" frameborder="0" sandbox="allow-popups allow-forms allow-scripts allow-same-origin">
  </iframe>
</div>
And in a simple webpage it would look like this: https://guthals.com/MakeYourMark/embedEditorExample
The embed code for the actual code looks like this:
<div style="position:relative;height:0;padding-bottom:81.97%;overflow:hidden;">
  <iframe style="position:absolute;top:0;left:0;width:100%;height:100%;" src="https://makecode.microbit.org/---run?id=_7d85uyEKX0cc" allowfullscreen="allowfullscreen" sandbox="allow-popups allow-forms allow-scripts allow-same-origin" frameborder="0">
  </iframe>
</div>
And in a simple webpage it would look like this: https://guthals.com/MakeYourMark/embedSimulatorExample
To tie that all together, I made a simple webpage in this GitHub repo to show all 12 constellations that I made.
Here are the 12 constellation MakeCode projects:
Feel free to check them out and start with those if you want!
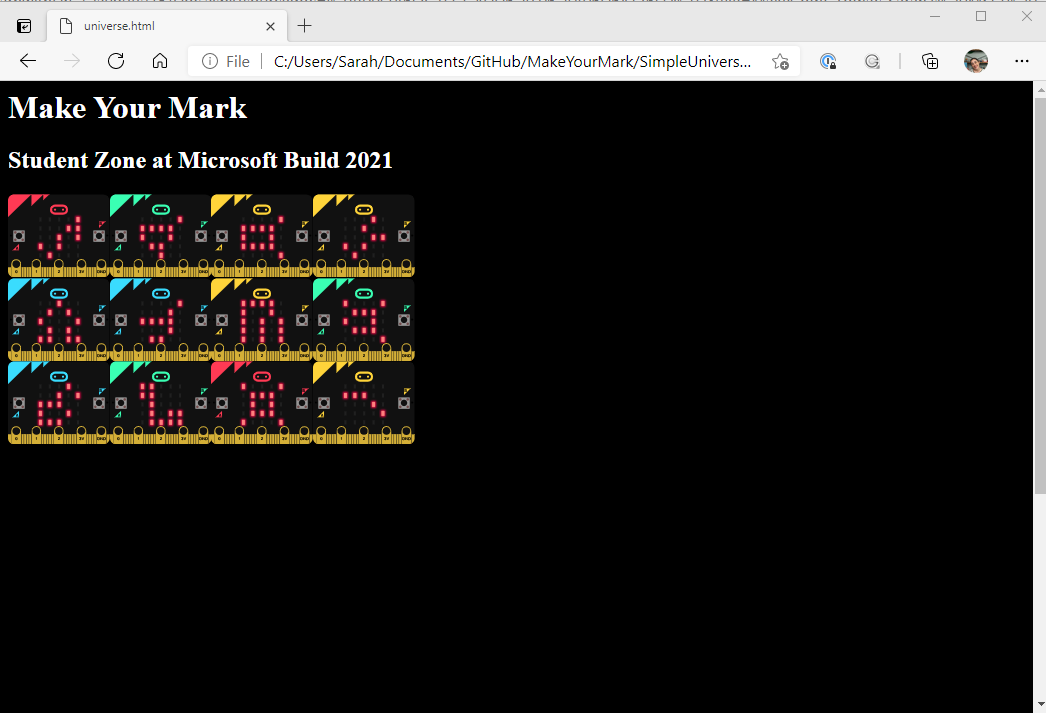
The first simple webpage I made you can find in the SimpleUniverse folder. If you clone this repo and open the HTML page in your browser, you will be able to see something like this:
And that's where we start! The next step is to make this a little more interactive so others can add their "constellations" via micro:bit/MakeCode simulators and maybe even add in some gamification (voting by clicking maybe?).
This project is a little...static...hard coded...and local. But that's where you come in!
We're looking for people to contribute to this project! You can do that in many ways:
- Read through the Code of Conduct: Make sure you understand the Code of Conduct for participating in this community.
- Open an issue: Have an idea to improve this project, but not quite sure how to implement it?
- Explore issues: Check out the issues that are already open! Maybe there is someone stuck on how to fix something, or someone has an idea that you can fix! Either way, it's always a good idea to look through issues before opening new ones (to make sure someone didn't already open one) and before trying to contribute (since contributing in the direction the maintainer is heading is more likely to get your pull requests merged!)
- Explore the Code: Before contributing code, it's always a good idea to explore the code! This repository is using an amazing extension for Visual Studio Code called CodeTour. More information about how to explore the code is in the next section; Use CodeTour to Explore the Code.
- Open a Pull Request: Did you see any issues (or maybe you opened them yourself) that you want to try to integrate into the project? Suggest your changes by opening a pull request (also called PR). Don't forget to update the CodeTour steps!
The CodeTour extension for Visual Studio Code is a great way to get acquainted with a project, and we've used it here to help you get started!
First, make sure you have a few things installed:
- Visual Studio Code is a free coding editor that is available on all platforms. Make sure you've installed it and/or updated it.
- CodeTour extension this will enable you to get a guided your through the code
Then, get started with your tour of the code:
- Fork the MakeYourMark repository on GitHub
- Clone it to your local computer
- Open it in Visual Studio Code and In the File Explore, find the
Getting-Startedtour and click the play button to start the tour: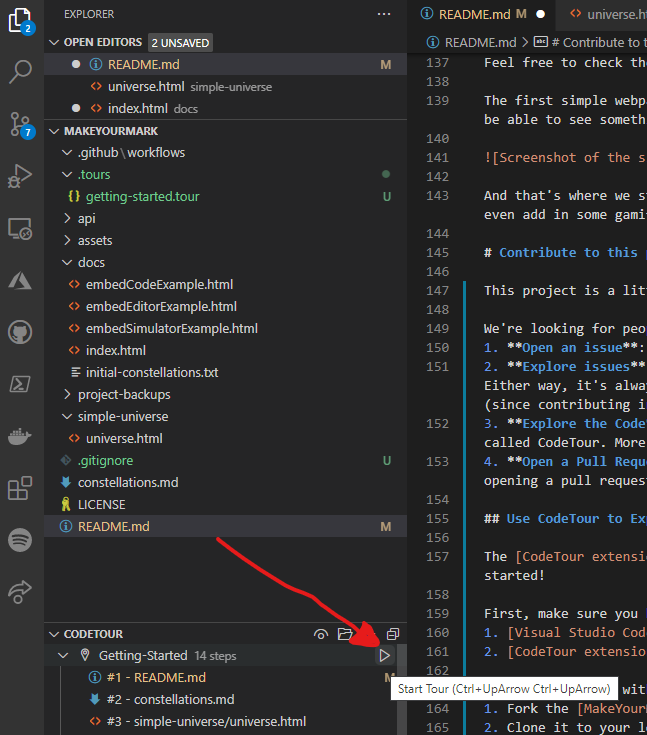
Happy Coding!
