This is a short tutorial on getting an SSH client running on Windows to work with a Tessel 2.
Before continuing please read through this tutorial and have -
- A Tessel 2 - The following must be completed before starting this tutorial :
- You should already have connected your Tessel 2 to your PC and have completed the initialization steps as described in the Tessel 2 documentation.
- Completed the "blinky" exercise and and have it working.
- An SSH client of your choice successfully installed. I prefer Bitvise, it's full featured and offers a free licensing option.
- Located the key files that were created when you ran the
t2 provisioncommand. They are typically located inC:\Users\USERNAME\.tesselwhereUSERNAMEis your current Windows login. For example, if you logged into Windows using "JustAWinUser" then you will find the files inC:\Users\JustAWinUser\.tessel.- If you've got more than one Tessel 2 you can copy each Tessel's files to an alternative location. Then when you return to working on a specific Tessl you can copy those files back to
C:\Users\USERNAME\.tessel. Those files are -id_rsaid_rsa.pubpreferences.json- I believe this file is over-written when running an application on the Tessel 2.
- If you've got more than one Tessel 2 you can copy each Tessel's files to an alternative location. Then when you return to working on a specific Tessl you can copy those files back to
I decided to give PuTTY a try, and unfortunately I could not get it working. There might be a way but I'm not aware of it. It appears to me that -
- The Tessel 2 does contain the private and public SSH keys. The private key seems to be part of the OpenWRT installation on the Tessel 2. And there is an
authorized_keysfile and it seems that thet2 provisioncommand causes the creation of that file. - PuTTY expects to generate its own public key and then store that on the "server". I'm not sure if that's compatible with the Tessel 2 way of doing thing. I didn't want to risk it and end up spending more time on getting SSH working than I had available to me.
In addition PuTTY is definitely not intuitive. When I first started using Bitvise a few years ago it was straight forward and not overly complicated. Applying the keys required some reading of help files, and poking around in the GUI but I understood it quickly.
I've used PuTTY in the past for serial and telnet and it worked very well. And I will probably continue using it for just those things.
By this point your Tessel 2 is powered on, initialized, and have confirmed that it's running correctly.
Next we'll need the IP address of your Tessel 2. This can be done with this command -
t2 wifi
Which should print the following -
INFO Looking for your Tessel...
INFO Connected to Tessel-xxxxxxxxxxxx.
INFO Connected to "YOURSSID"
INFO IP Address: 192.168.0.26
INFO Signal Strength: (70/70)
INFO Bitrate: 48mbps
Make note of the IP Address and the "Connected to Tessel-xxxxxxxxxxxx" information, you will need both in the following steps. For now copy both pieces of information and paste them into a text file that you can use later.
Your new text file should contain -
192.168.0.26
Tessel-xxxxxxxxxxxx
NOTE: Your actual IP address and Tessel-xxxxxxxxxxxx name may differ from what is shown above. The xxxxxxxxxxxx portion will be the MAC address of your Tessel 2. And can be used to identify the specific board you're connected to. You might want to physically label your Tessel 2, especially if you have more than one.
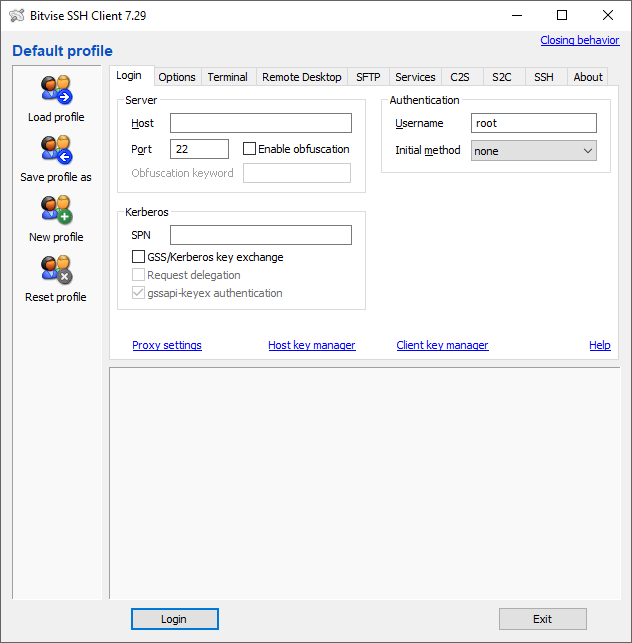
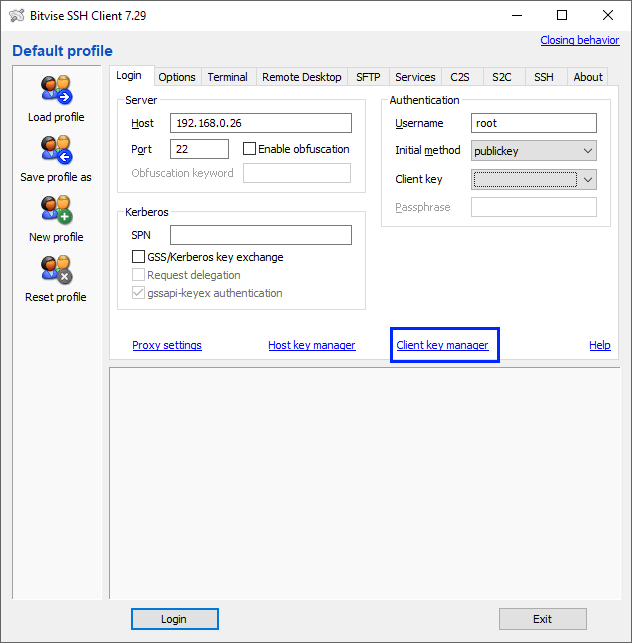
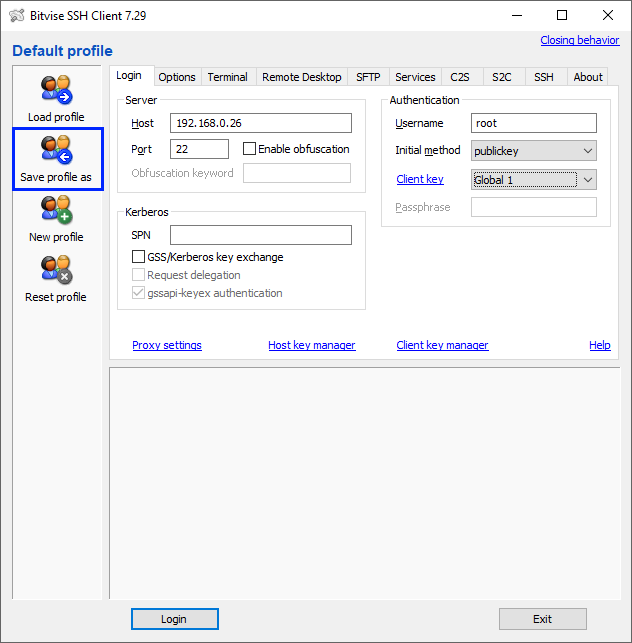
1) Run your SSH client (we're using Bitvise) and you should see this -
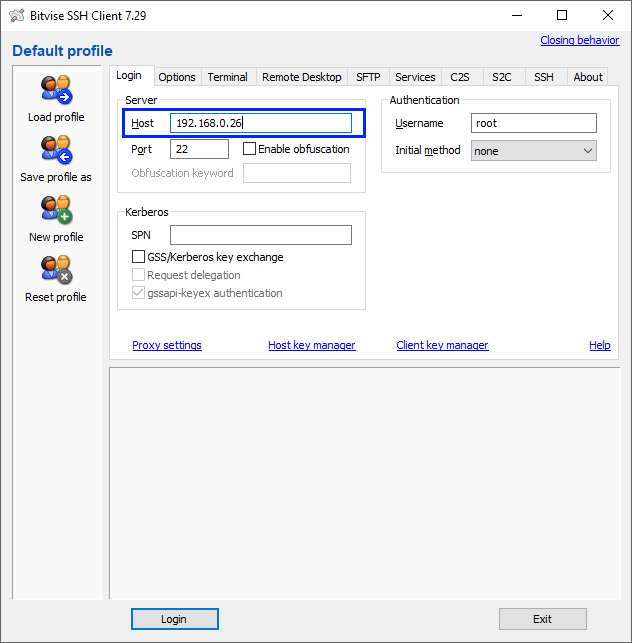
2) Enter the IP address of your Tessel 2 -
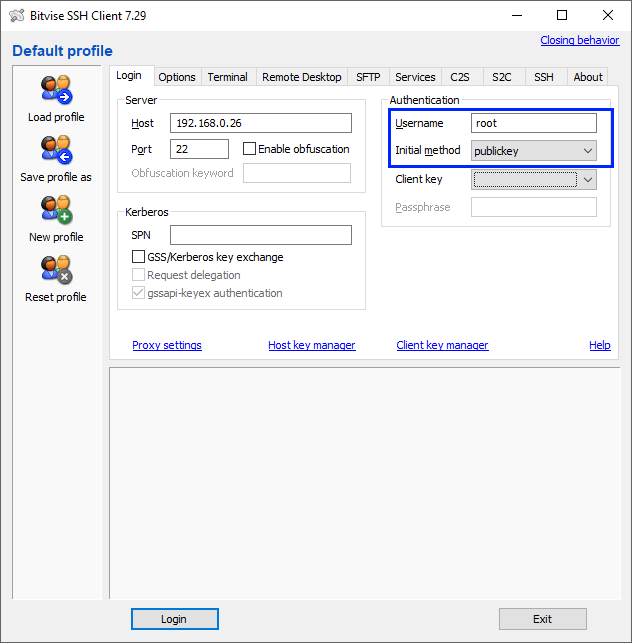
3) Change the Authentication settings to where Username is root and the Initial method is publickey.
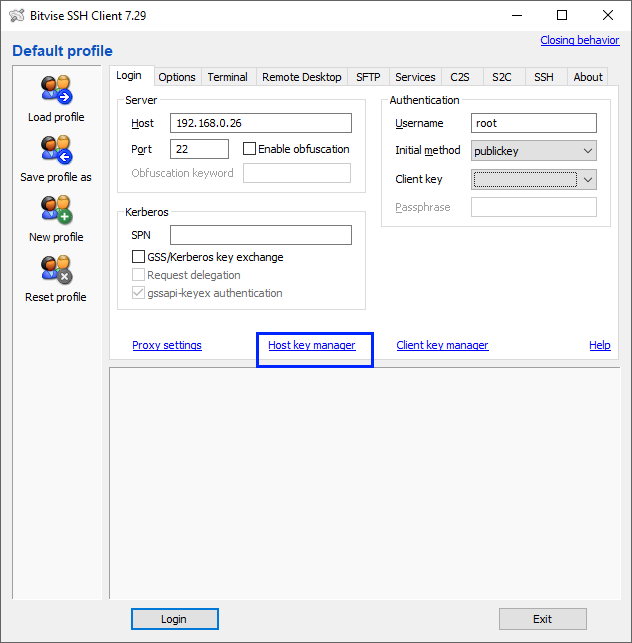
4) Click on Host key manager
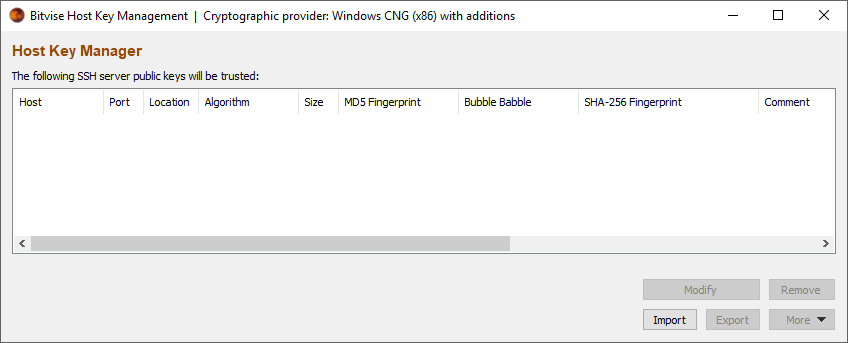
You will see the following dialog box (this assumes this is your very first use of Bitvise) -
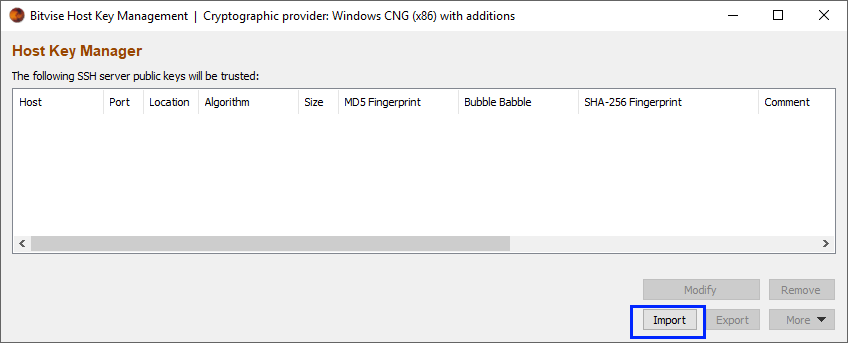
5) Click on the Import button -
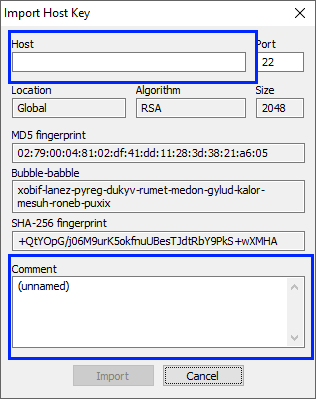
Navigate to C:\Users\USERNAME\.tessel where USERNAME is your current Windows login and select id_rsa.pub and click Open. Then -
- Fill in the Host with Tessel's IP address, this was seen when you ran the
t2 wificommand. - Then in the Comments field add
Tessel-xxxxxxxxxxxx, this was also seen when you ran thet2 wificommand.
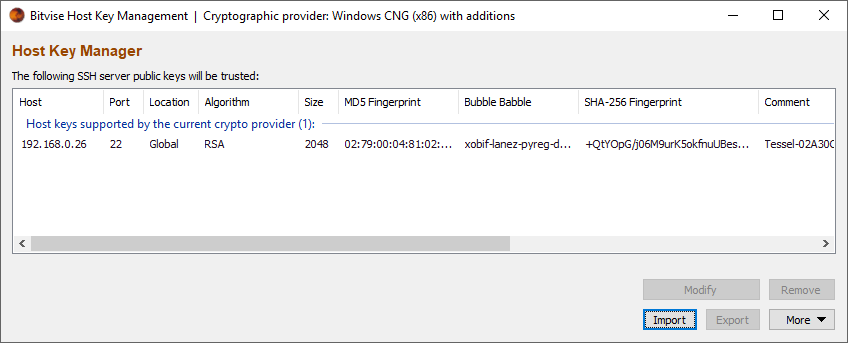
Click the Import button after both fields have been filled in. You should see the imported key listed in the Host Key Manager -
Close the dialog box.
6) You should have returned to the main Bitvise window. Click on Client key manager -
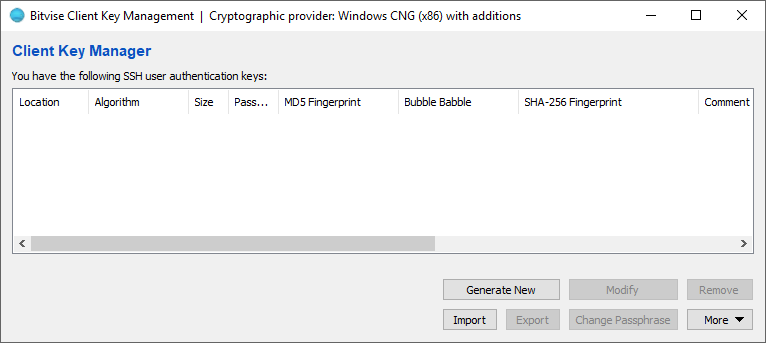
You will see the following dialog box (this assumes this is your very first use of Bitvise) -
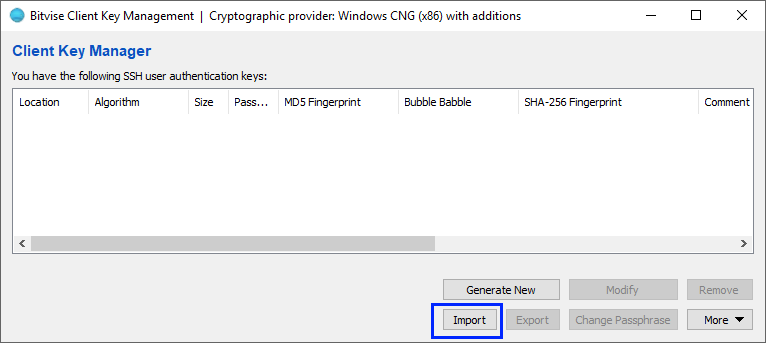
7) Click on the Import button -
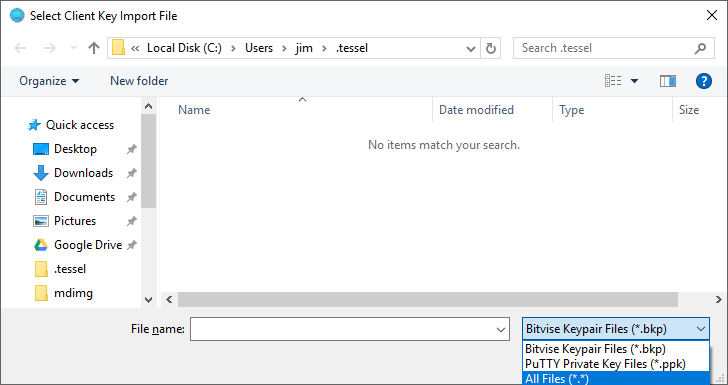
Navigate to C:\Users\USERNAME\.tessel where USERNAME is your current Windows login and change the file filter to All Files (*.*).
The file id_rsa should be visible, select it and click Open.
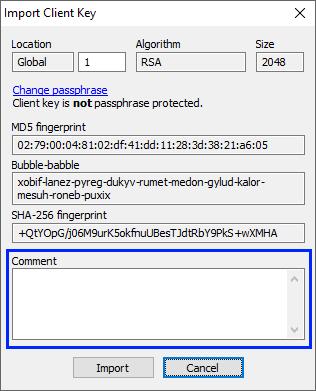
8) Then in the resulting dialog box fill in the Comments field with Tessel-xxxxxxxxxxxx, this was seen when you ran the t2 wifi command.
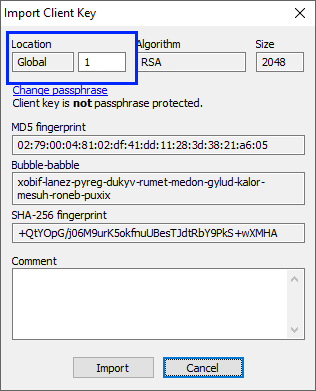
Make note of the values in the Location fields. You will need to remember this for a subsequent step.
Be aware that your values may differ from the example.
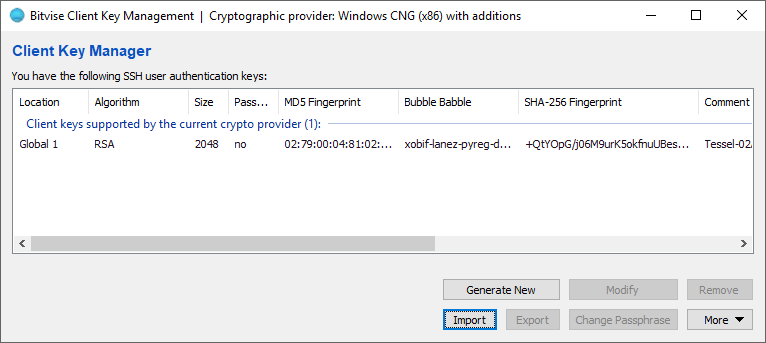
Then click the Import button and you should see -
Close the dialog box.
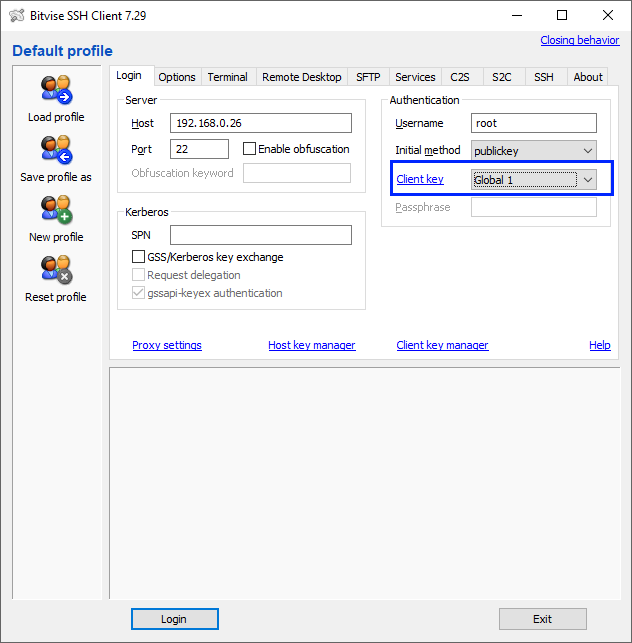
9) You should now be back at the main Bitvise window. Now change the Client key to the location you made note of earlier.
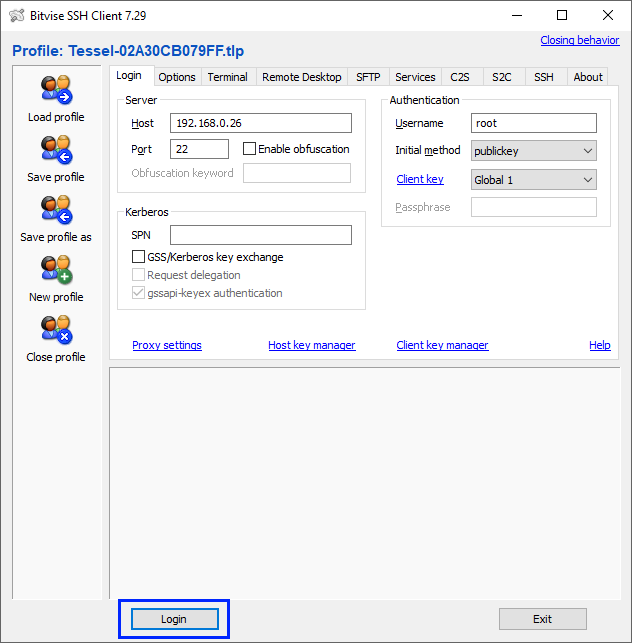
10) Save the profile in a convienient location and name it using the Tessel-xxxxxxxxxxxx string that was obtained with the t2 wifi command.
11) Click the Login button
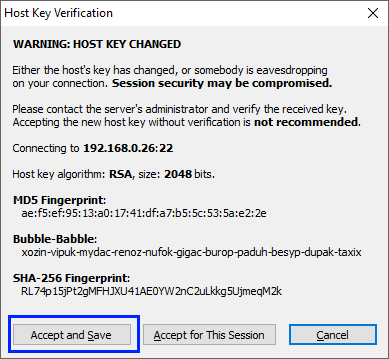
Since this is the first login to your Tessel 2 you may see this dialog, you can safely click Accept and Save -
NOTE: On the first attempt to log in you might get an error. Try again and the second attempt should be successful.
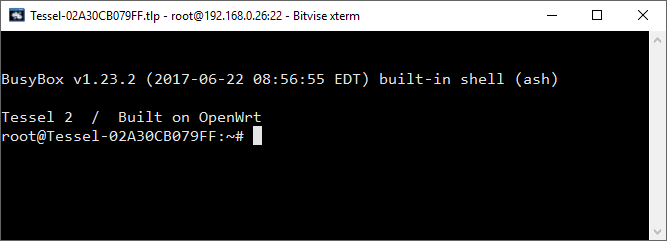
When you are logged in you should see a new terminal window -
Here are some additional things to note in regarding the Tessel 2 and SSH.
Each time you run the t2 provision command you will overwrite any previous key files that were located in C:\Users\USERNAME\.tessel. If you want to preserve them I recommend that you copy them to a safe and identifiable location prior to any subseqent provision commands.
If you're not familiar with Linux then be very careful when you're poking around in the terminal.
I'm running Windows 10 64bit with NodeJS 6.10.2.
- t2-cli: 0.1.8
- t2-firmware: 0.1.0
- Node.js: 6.10.3
My favorite development tools that I used were -
- Notepad++ : https://notepad-plus-plus.org/ General editing.
- Markdown Edit : http://markdownedit.com/ Used for editing this README file.
- PaintDOTNet - https://www.getpaint.net/ Used in creating the images for this document.
- Bitvise SSH Client - https://www.bitvise.com
- Gitkraken : https://www.gitkraken.com/
© 2017 James Motyl
