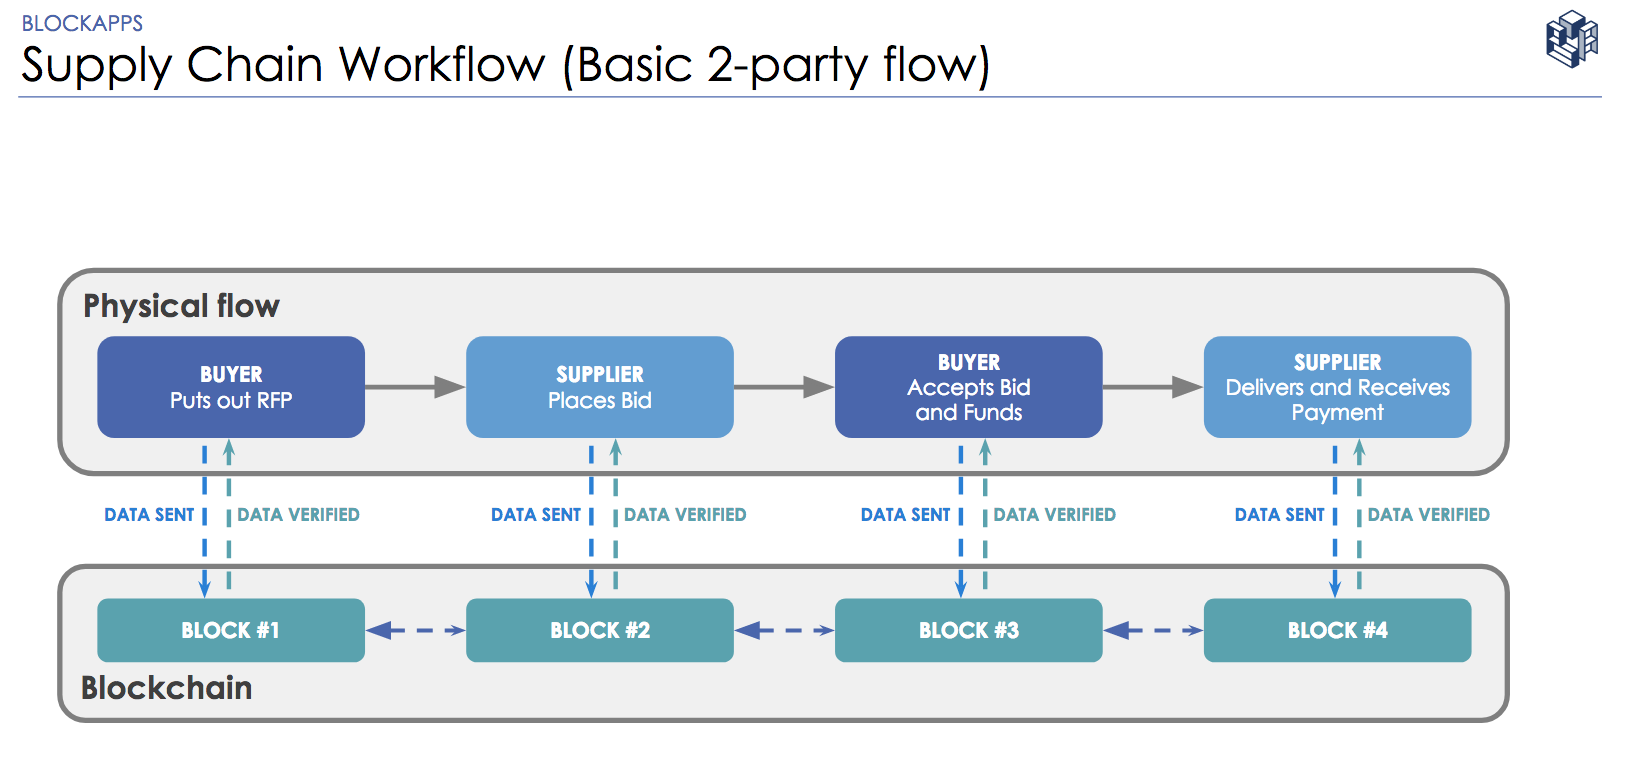
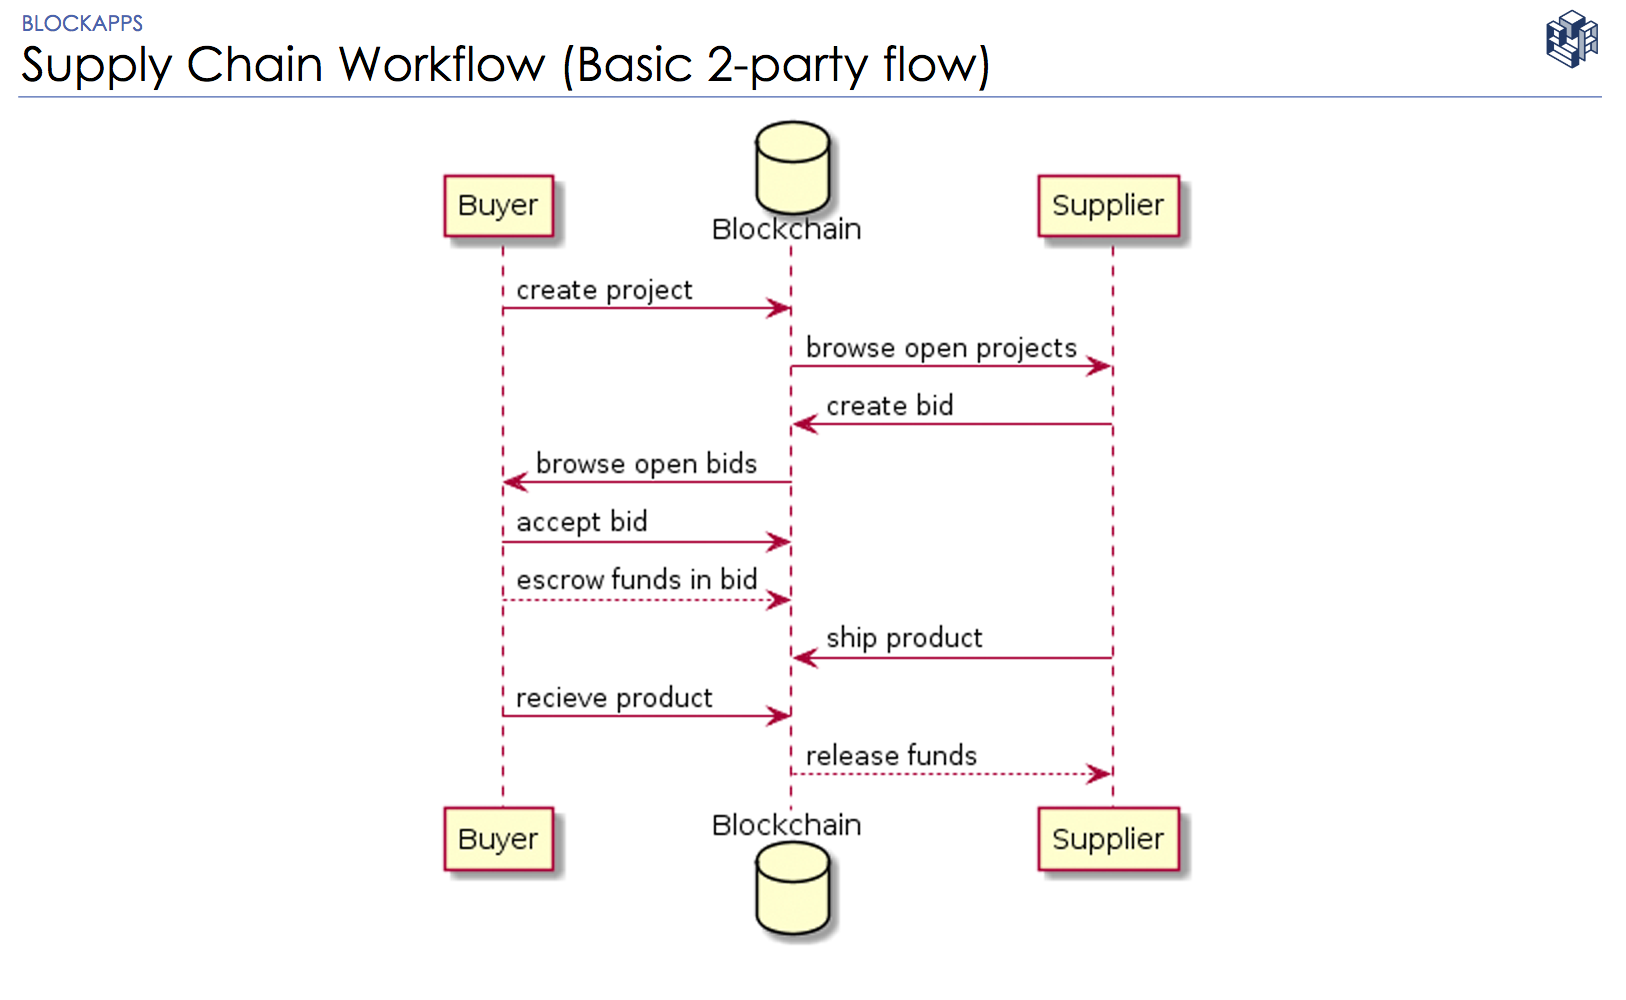
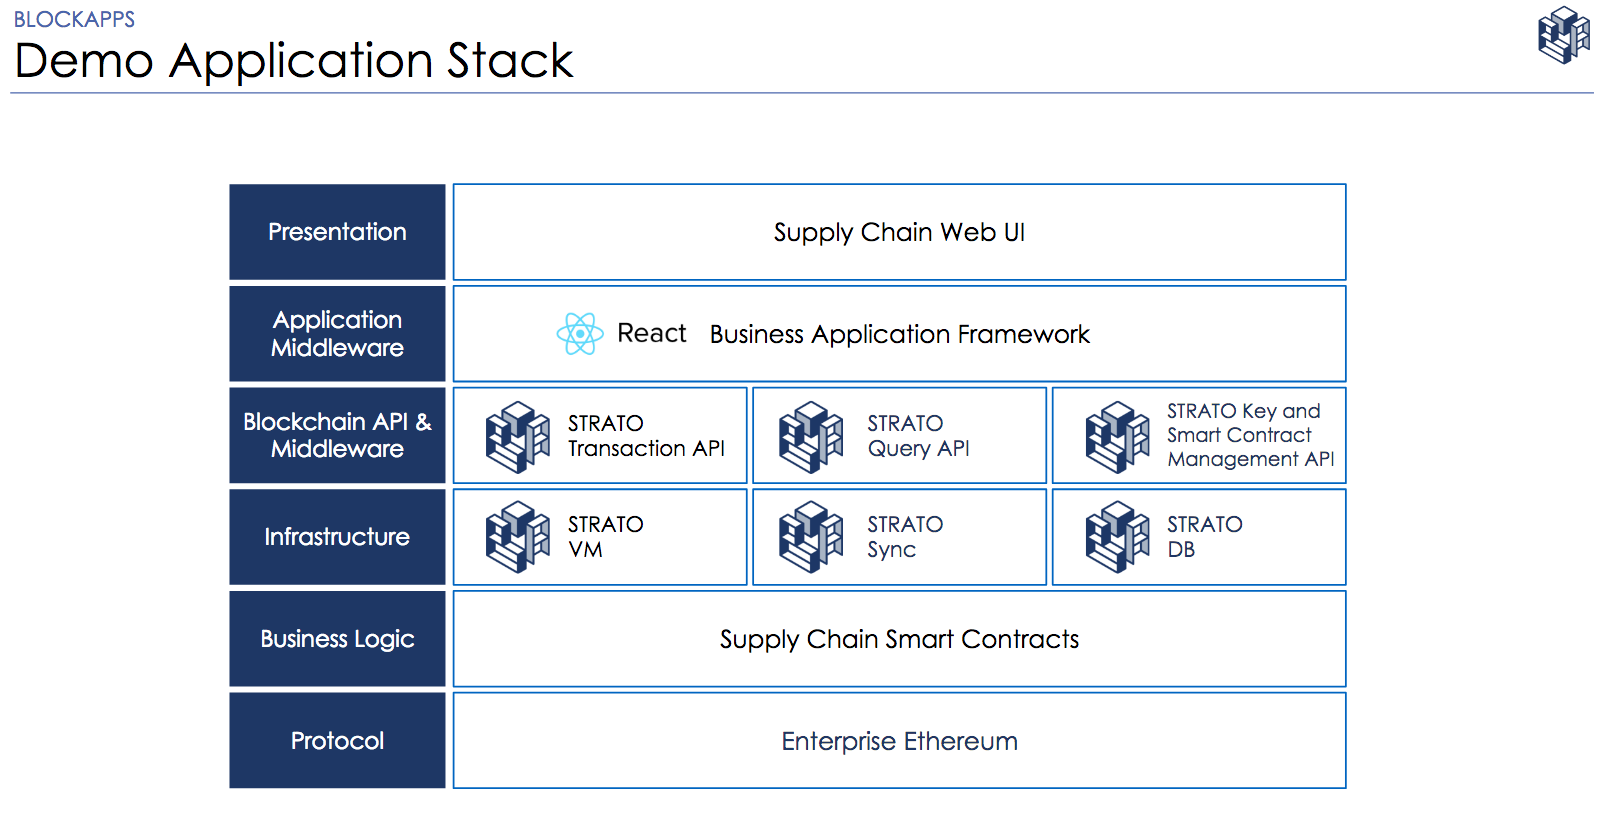
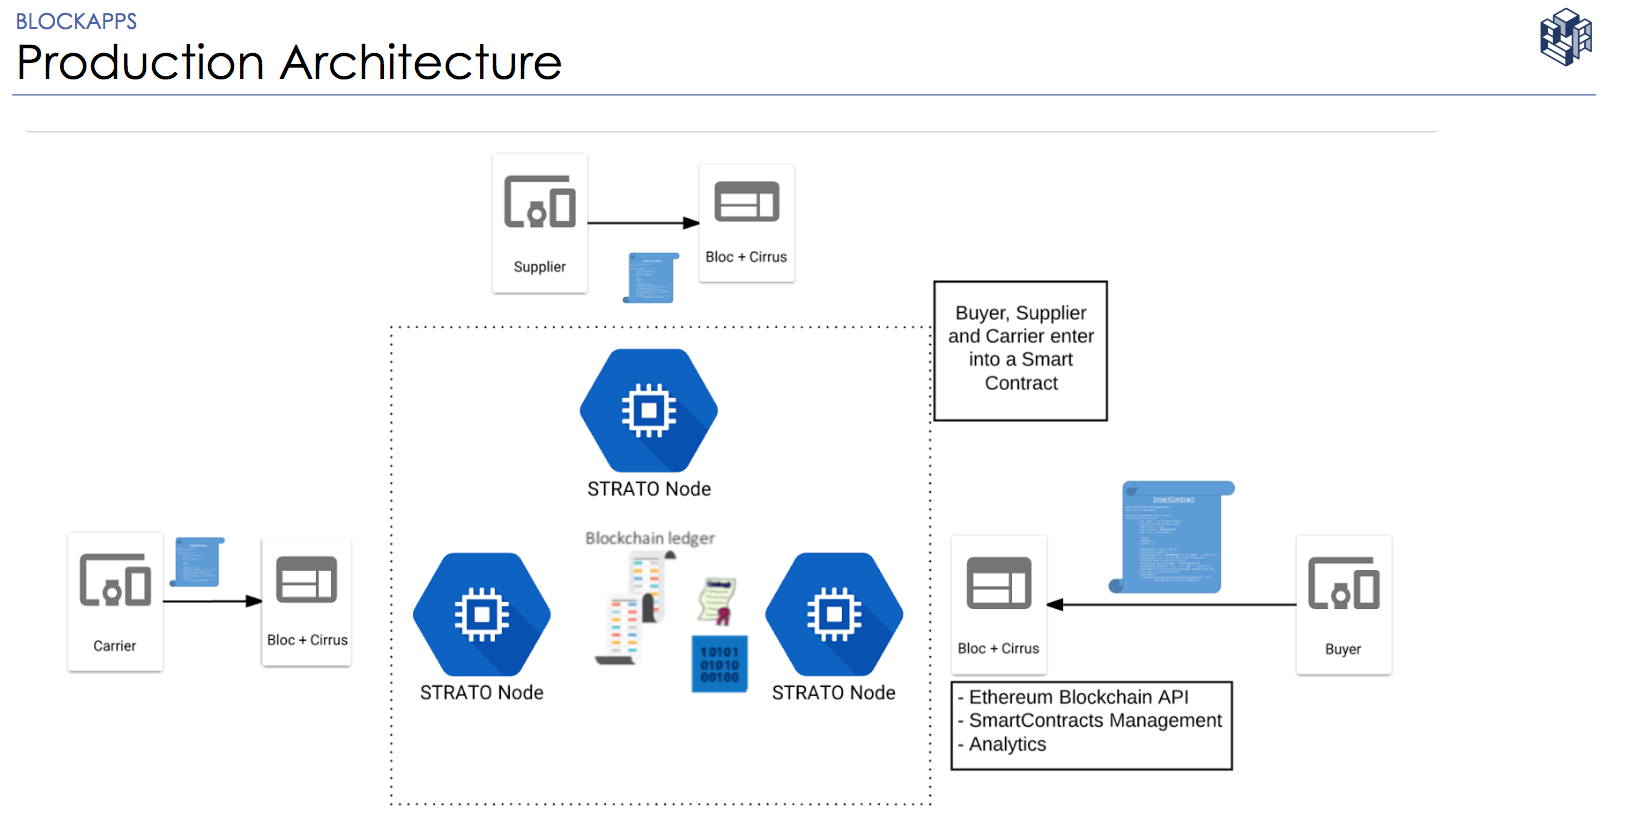
This demo app uses STRATO blockchain platform and Smart Contracts to demonstrate a solution for a basic 2-party Supply Chain Workflow.
Node v7.2 or more recent.
This application requires a BlockApps STRATO node. Follow the instruction in the STRATO getting started guide to install a local instance.
Please make sure that ports 80, 3030, and 3031 are publicly accessible. If you are using AWS or Azure, you may need to allow traffic on these ports by changing the firewall settings.
Once you have a functional STRATO node, you can clone this project and deploy it to the STRATO instance using the instructions below.
Install the dependencies
npm i
Install the UI dependencies
cd ui
npm i
If you are deploying using STRATO on localhost (Linux and Mac users only):
Run the following from the project root:
npm run deploy
Windows users should run
set "SERVER=localhost" & npm run deploy-windows
From the project root (Linux, Mac and Windows):
npm run start
If you are deploying using STRATO on localhost (Linux and Mac users only):
cd ui
npm run start
On Windows:
cd ui
set "REACT_APP_API_URL=http://localhost:3031" & set "PORT=3030" & npm run start-windows
Create a config file under ./server/config with the naming convention <server-name>.config.yaml. You are free to chose the server-name.
Copy the content of localhost.config.yaml to a new file <server-name>.config.yaml, located at ./server/config. ou are free to chose the server-name.
Configfure <server-name>.config.yaml as follows:
apiDebug: true
password: '1234'
timeout: 600000
libPath: ./server/lib
contractsPath: ./contracts/
dataFilename: ./server/dapp/dapp.presets.yaml
deployFilename: ./server/config/<server-name>.deploy.yaml

# WARNING - extra strict syntax
# DO NOT change the nodes order
# node 0 is the default url for all single node api calls
nodes:
  - id: 0
    explorerUrl: 'http://<your-ip-or-dns>:9000'
    stratoUrl: 'http://<your-ip-or-dns>/strato-api'
    blocUrl: 'http://<your-ip-or-dns>/bloc/v2.2'
    searchUrl: 'http://<your-ip-or-dns>/cirrus'
Replace with the name of your config file (excluding config.yaml) and <your-ip-or-dns> with the IP or the DNS name of your remote server and then run the following from the project root:
SERVER=<server-name> npm run deploy
On Windows:
set "SERVER=<local-ip>" & npm run deploy-windows
Here can be 127.0.0.1 or the local network ip.
From the project root (Linux, Mac and Windows):
npm run start
cd ui
API_URL="http://<your-ip-or-dns>:3031" npm run start
On Windows:
cd ui
set "REACT_APP_API_URL=http://<your-ip-or-dns>:3031" & set "PORT=3030" & npm run start-windows
where <your-ip-or-dns> is the IP or DNS name of the remote machine. Eg:
set "REACT_APP_API_URL=http://some.remote.cloudapp.provider.com:3031" & set "PORT=3030" & npm run start-windows
npm run test
On Windows:
set "SERVER=<server-name>" & npm run test-windows
Open the app in the browser.
By default, application is running at http://localhost:3030/
The app comes pre loaded with four different users: Buyer1, Buyer2, Supplier1, Supplier2. All these users have the same password: 1234.
Note: After the buyer accepts the bid, 20 dollars from the buyer's account is taken and held by the smart contract but is still not disbursed until the product is accepted


