This code pattern is part of the Bee Travels project that focuses on deploying a Python currency exchange application to OpenShift 4 using UBI
-
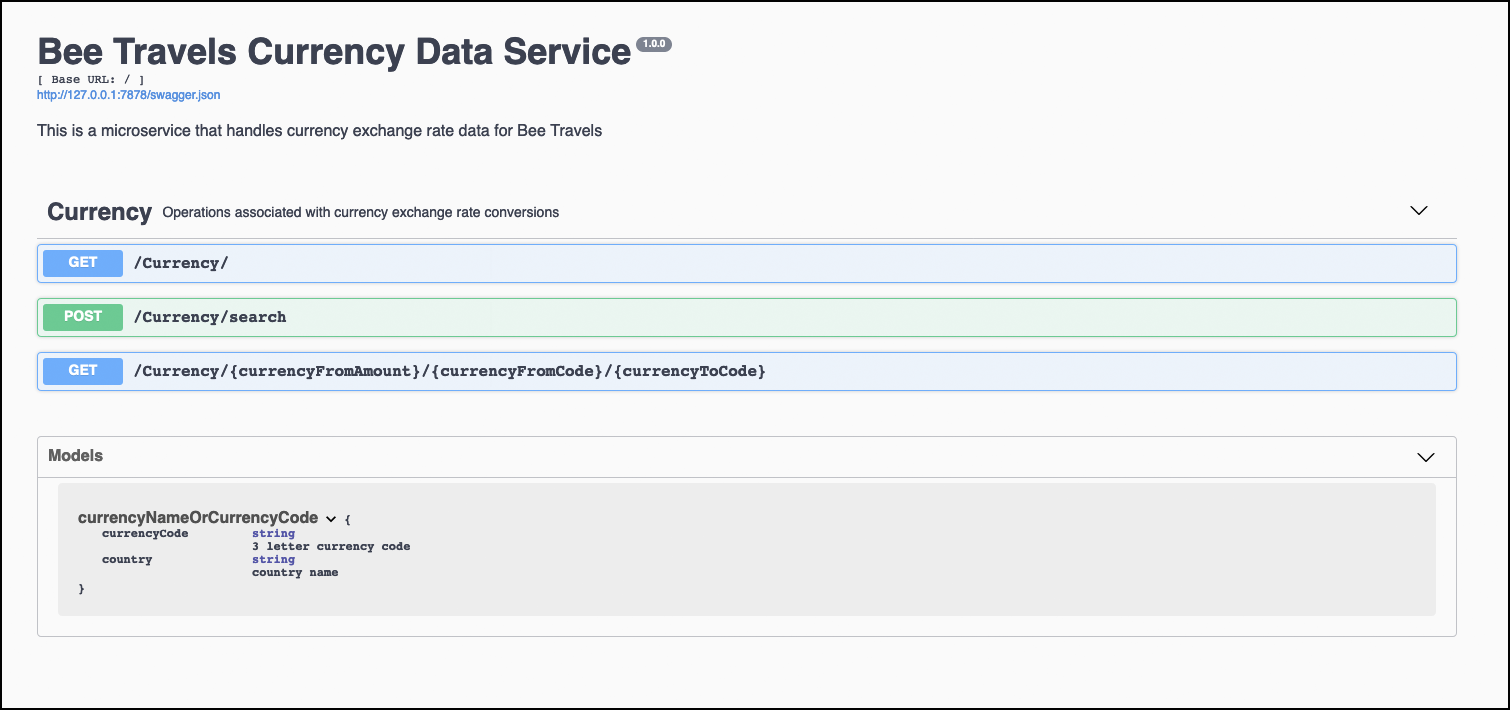
Design and create a Python microservice with a REST interface that has a swagger test harness where you can manually inspect, discover, and run the various API endpoints.
-
Build a docker image of this microservice using the UBI
-
Deploy and run this microservice on OpenShift version 4
This is the flow of the currency conversion microservice.
Figure 1: Architecture flow
- Client API Consumer calls the microservice over the internet (http(s) request).
- Flask process acts as a
web serverand accepts the REST request (e.g. GET /convertCurrency/ZAR/USD/600.66). - Code routing in Flask passes the request to a service module which in turn calls the External European Currency Exchange API (http://api.exchangeratesapi.io).
- An exchange rate for ZAR is retrieved and stored. The value of 600.66 South African Rands (ZAR) is converted to US Dollars(USD).
- Flask then sends a response to the calling consumer with the dollar amount (in this case, $40.59 ).
- IBM Cloud RedHat OpenShift version 4: Red Hat® OpenShift® on IBM Cloud™ is a fully managed OpenShift service that leverages the enterprise scale and security of the IBM Cloud.
- Swagger: A framework of API developer tools for the OpenAPI Specification that enables development across the entire API lifecycle.
-
Container Orchestration is the process of automating the deployment, scaling and management of containerized applications.
-
Microservices are an application architectural style in which an application is composed of many discrete, network-connected components called microservices. They are collections of fine-grained, loosely coupled services intercommunicating via a lightweight protocol to provide building blocks in modern application composition in the cloud.
-
Python is a programming language that lets you work quickly and integrate systems more effectively.
-
Flask is a microframework written in Python. It is classified as a microframework because it does not require particular tools or libraries.
You need to have the following installed to complete the steps in this code pattern:
- Docker
- IBM Cloud Account
- IBM RedHat OpenShift 4.3 Cluster
- OpenShift CLI tool oc
Follow these steps to set up and run this code pattern locally and on the cloud. The steps are described in detail below.
Clone the currencyexchange GitHub repository locally.
In a terminal, run the following:
git clone https://github.com/IBM/python-ubi-openshift.git

cd python-ubi-openshiftWe showcase this method, by using the UBI.
At the core of containers there is a lighter weight Linux operating system. Most of us may have used Ubuntu or Alpine as the base Operating system.
Red Hat now offers us a good alternative base image, that is essentially the core of Red Hat Enterprise Linux. Much like CentOS and Red Hat Enteprise linux derive it's core elements from the OpenSource Fedora project.
This Linux alternative from Red Hat is called the Red Hat Universal Base Image (UBI).
The UBI comes in a few flavors:
- You can choose one of the three base images (
ubi,ubi-minimalandubi-init) - Or language-specific runtime images (e.g.
node.js,python, etc.)
UBI allows one to use associated packages provided by YUM repositories which satisfy common application dependencies, like httpd (apache web server) etc.
Take a look at our Dockerfile and notice the FROM directive is using the UBI version 8 (core of Red Hat 8) base image.
FROM registry.access.redhat.com/ubi8/ubiNow let's build this docker image with the UBI.
-
Make sure you are at the root directory of this application.
-
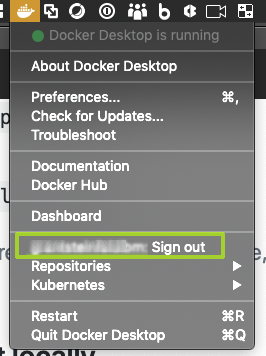
Note your docker-hub username
How to find your docker hub credentials
To download Docker Desktop you must create a Docker Hub account.
To find the username, you can click on at your Docker Desktop icon (Mac) toolbar
- Build the docker image by running:
export DOCKERHUB_USERNAME=<your-dockerhub-username>
docker build -t $DOCKERHUB_USERNAME/currencyexchange-py:v0.0.1 .SETX DOCKERHUB_USERNAME "your-dockerhub-username"
docker build -t $DOCKERHUB_USERNAME/currencyexchange-py:v0.0.1 .Expected output details
Here is a truncated snippet of the successful output you should see:
Sending build context to Docker daemon  69.63MB
Step 1/10 : FROM registry.access.redhat.com/ubi8/ubi
 ---> fd73e6738a95

 ...

Collecting flask (from -r requirements.txt (line 13))
  Downloading https://files.pythonhosted.org/packages/9b/93/628509b8d5dc749656a9641f4caf13540e2cdec85276964ff8f43bbb1d3b/Flask-1.1.1-py2.py3-none-any.whl (94kB)

 ...

Successfully built 3b5631170697
Successfully tagged <DOCKERHUB_USERNAME>/currencyexchange-py:v0.0.1
Notes:
-
The docker build process, pulled the RedHat 8 Universal Base Image from the redhat registry.
-
The base image is the generic image, i.e. ubi8/ubi. We could have use the Python 3 language specic flavor of the image but opted for this version for 2 reasons:
-
to show off the yum install features
-
to show how a finer controlled version of the language could have been used, like in our case the latest version (at the time of writing) of Python version 3.8 (note to check docker file version to be sure!)
Great! So, now lets run the image locally!
docker run -p 7878:7878 $DOCKERHUB_USERNAME/currencyexchange-py:v0.0.1At your command line run: docker ps and you should now confirm that the docker container for the currencyexchange microservice is up and running.
Explore the microservice from your browser at http://127.0.0.1:7878 for documentation about this API's endpoints and a
try-it-outtest harness to actually run the API calls.
- To allow changes to the this microservice, create a repo on Docker Cloud where you can push the newly modified container.
# build your docker image
export DOCKERHUB_USERNAME=<your-dockerhub-username>

docker build -t $DOCKERHUB_USERNAME/currencyexchange-py:v0.0.1 .

docker login

# push image to docker hub
docker push $DOCKERHUB_USERNAME/currencyexchange-py:v0.0.1
What a successful push to docker hub should look like
The push refers to repository [docker.io/claraxxxxxx/currencyexchange-py]
693f7ba0eeed: Pushed
225cfc6f0260: Pushed
2ddc888e45c8: Pushed
1aac3cbf59e3: Pushed
85f69e555a1b: Pushed
1295eae54c9d: Pushed
v0.0.1: digest: sha256:2aa41155a8bd44bb25tytytyt990ed4d5f455968ef88697463456f249a35654841d size: 1574- Provision an IBM RedHat OpenShift 4 Service and follow the set of instructions for creating a Container and Cluster.
You can deploy to OpenShift by either the Web Console browser applicaton, or by using the command line terminal.
We are going to use the oc command line tool in this code pattern. Please check that you have v4.1.0 or later installed.
Install or verify the oc tool
Run the command below#aserctain what version of the oc cli you have installed
oc version
#You should have v4.1 or later installed.
v4.1.0
If you don't already have this installed, please follow instructions to do so here: [`oc` CLI documentation](https://cloud.ibm.com/docs/openshift?topic=openshift-openshift-cli#cli_oc)
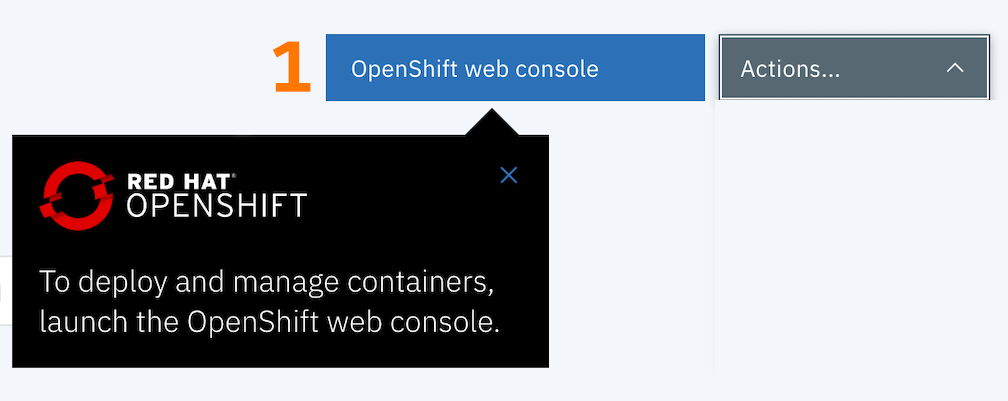
Launch the Web Console by clicking on the blue and white button ( annotated with a number(1) above )
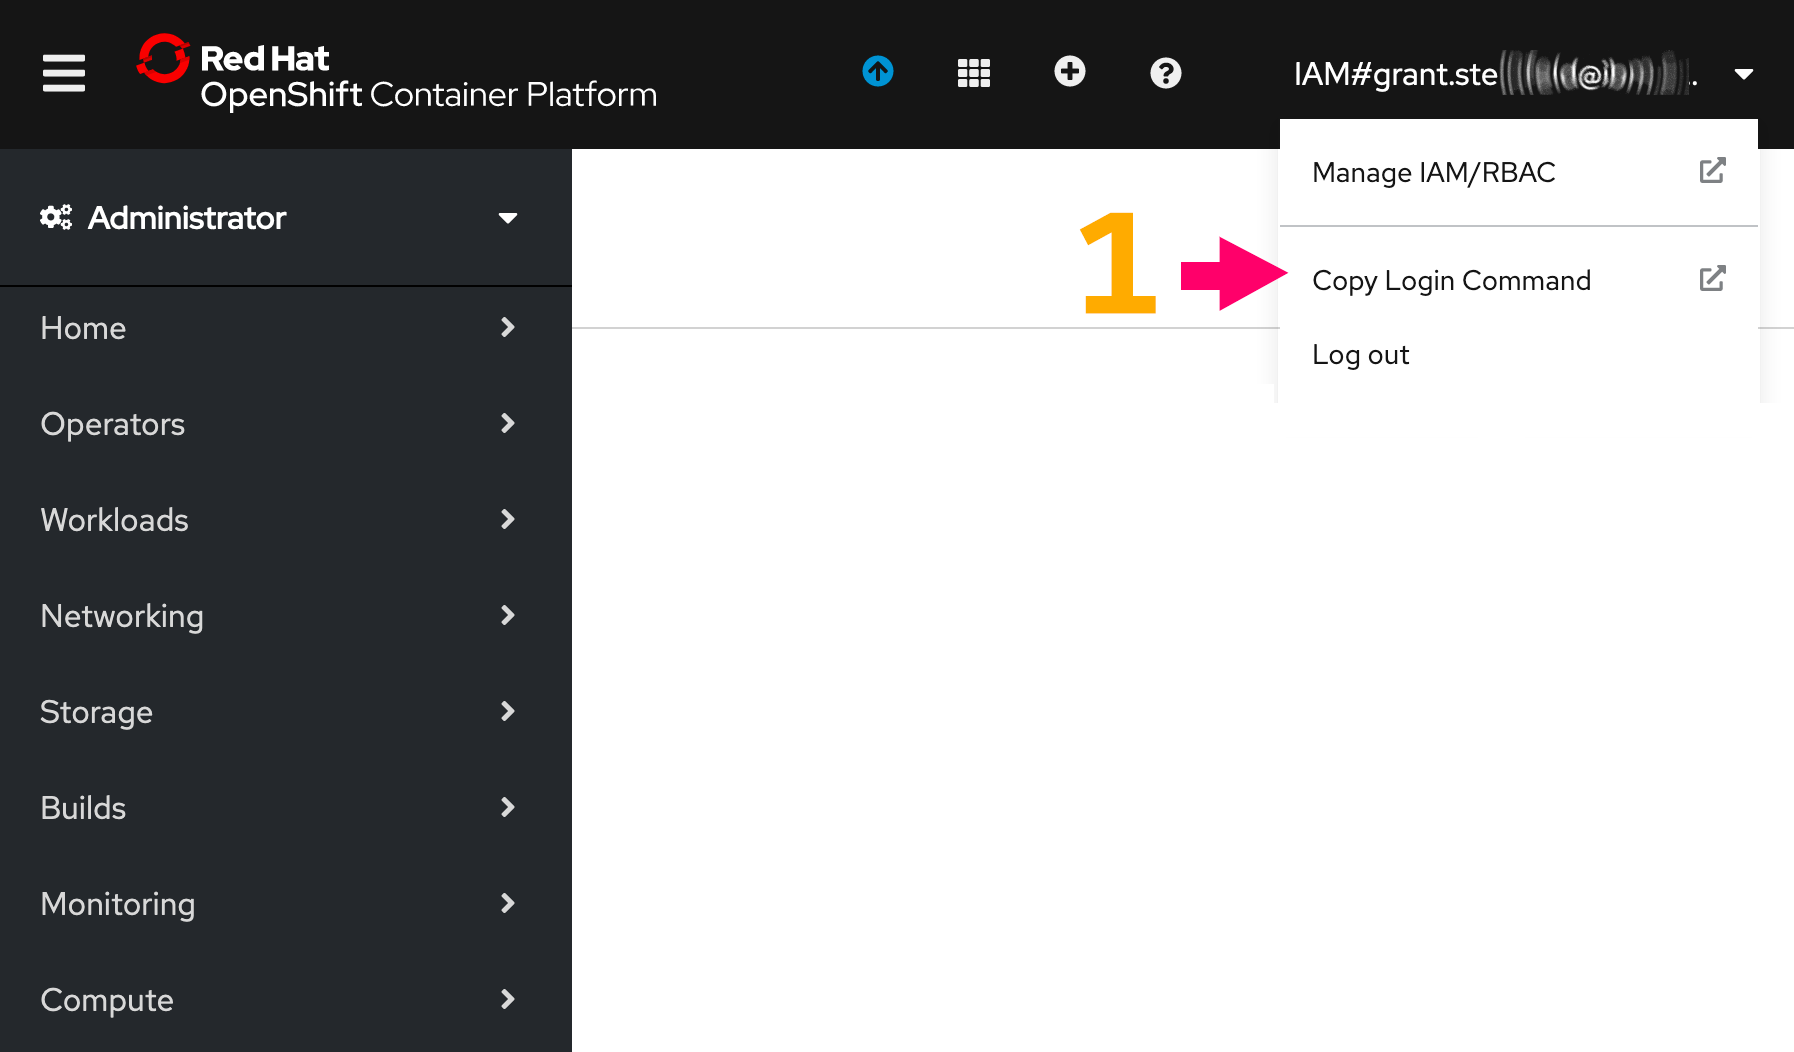
Once in the OpenShift Web Console screen, click on your username and choose
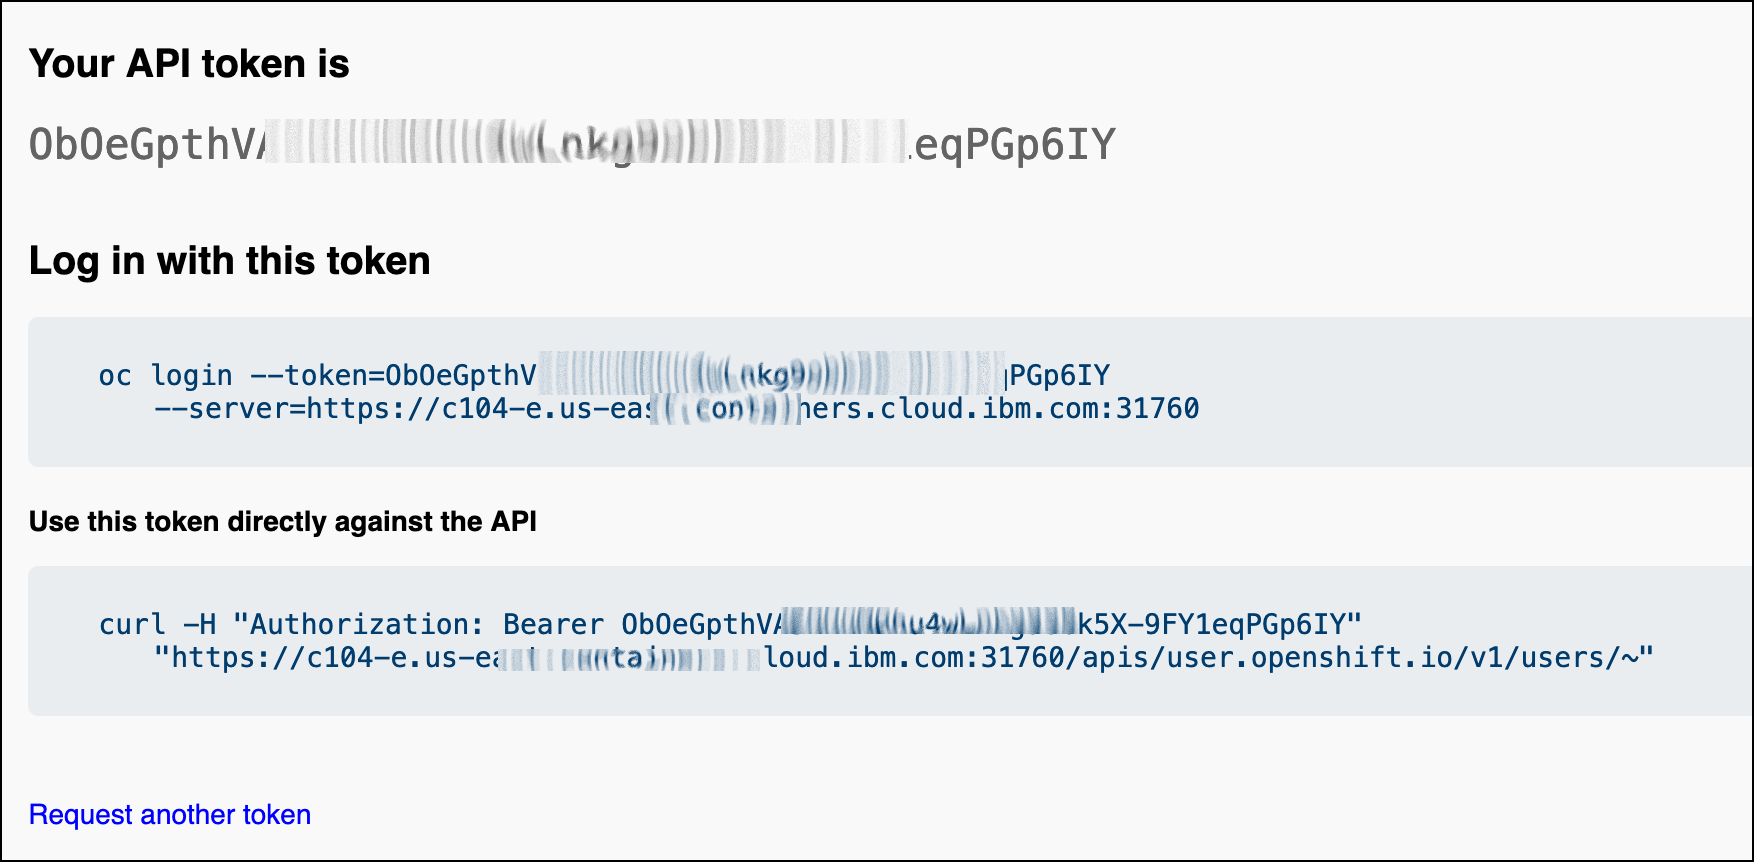
Click on the Copy login command dropdown option under your username
By clicking on display token hyperlink will reveal your oc login token and command.
use oc login ... to login to your cluster, for example
oc login --token=X8bjO-ROAhGUx8S9pvg6767574ysuG9SSgSI6hyg --server=https://c108-e.us-northwest.containers.cloud.ibm.com:31007create a new project
oc new-project currencyexchange-pyyou should be able to confirm this by typing:
oc projectand see
next add a new application
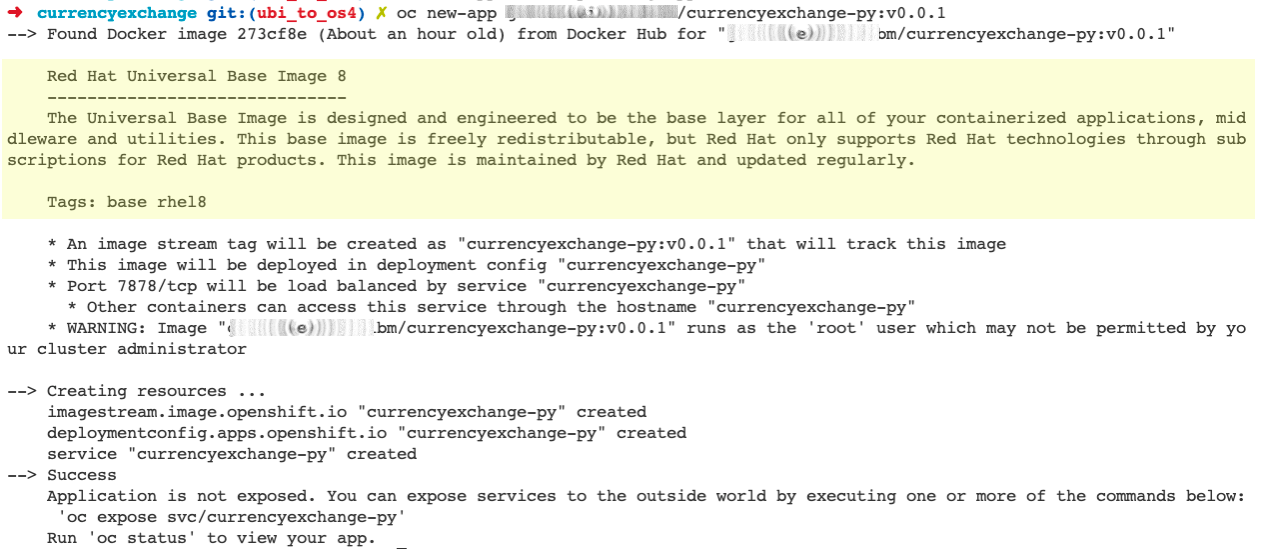
oc new-app $DOCKERHUB_USERNAME/currencyexchange-py:v0.0.1Great! Now you should see
Note the yellow highlight section confirms that the RedHat UBI is the base image in your docker deployment.
Almost there! You will need to expose the microservice to the outside world by executing
oc expose svc/currencyexchange-py

#expected output
> route.route.openshift.io/currencyexchange-py exposed

#get the external URL to access the microservice
oc status
You should see oc status commands output similar to this
Now the route is exposed externally and will be visible via the public internet.
You can now access the currency exchange microservice running inside your OpenShift cluster by navigating to URL, ( see the figure above, where the URL is highlighted in purple).
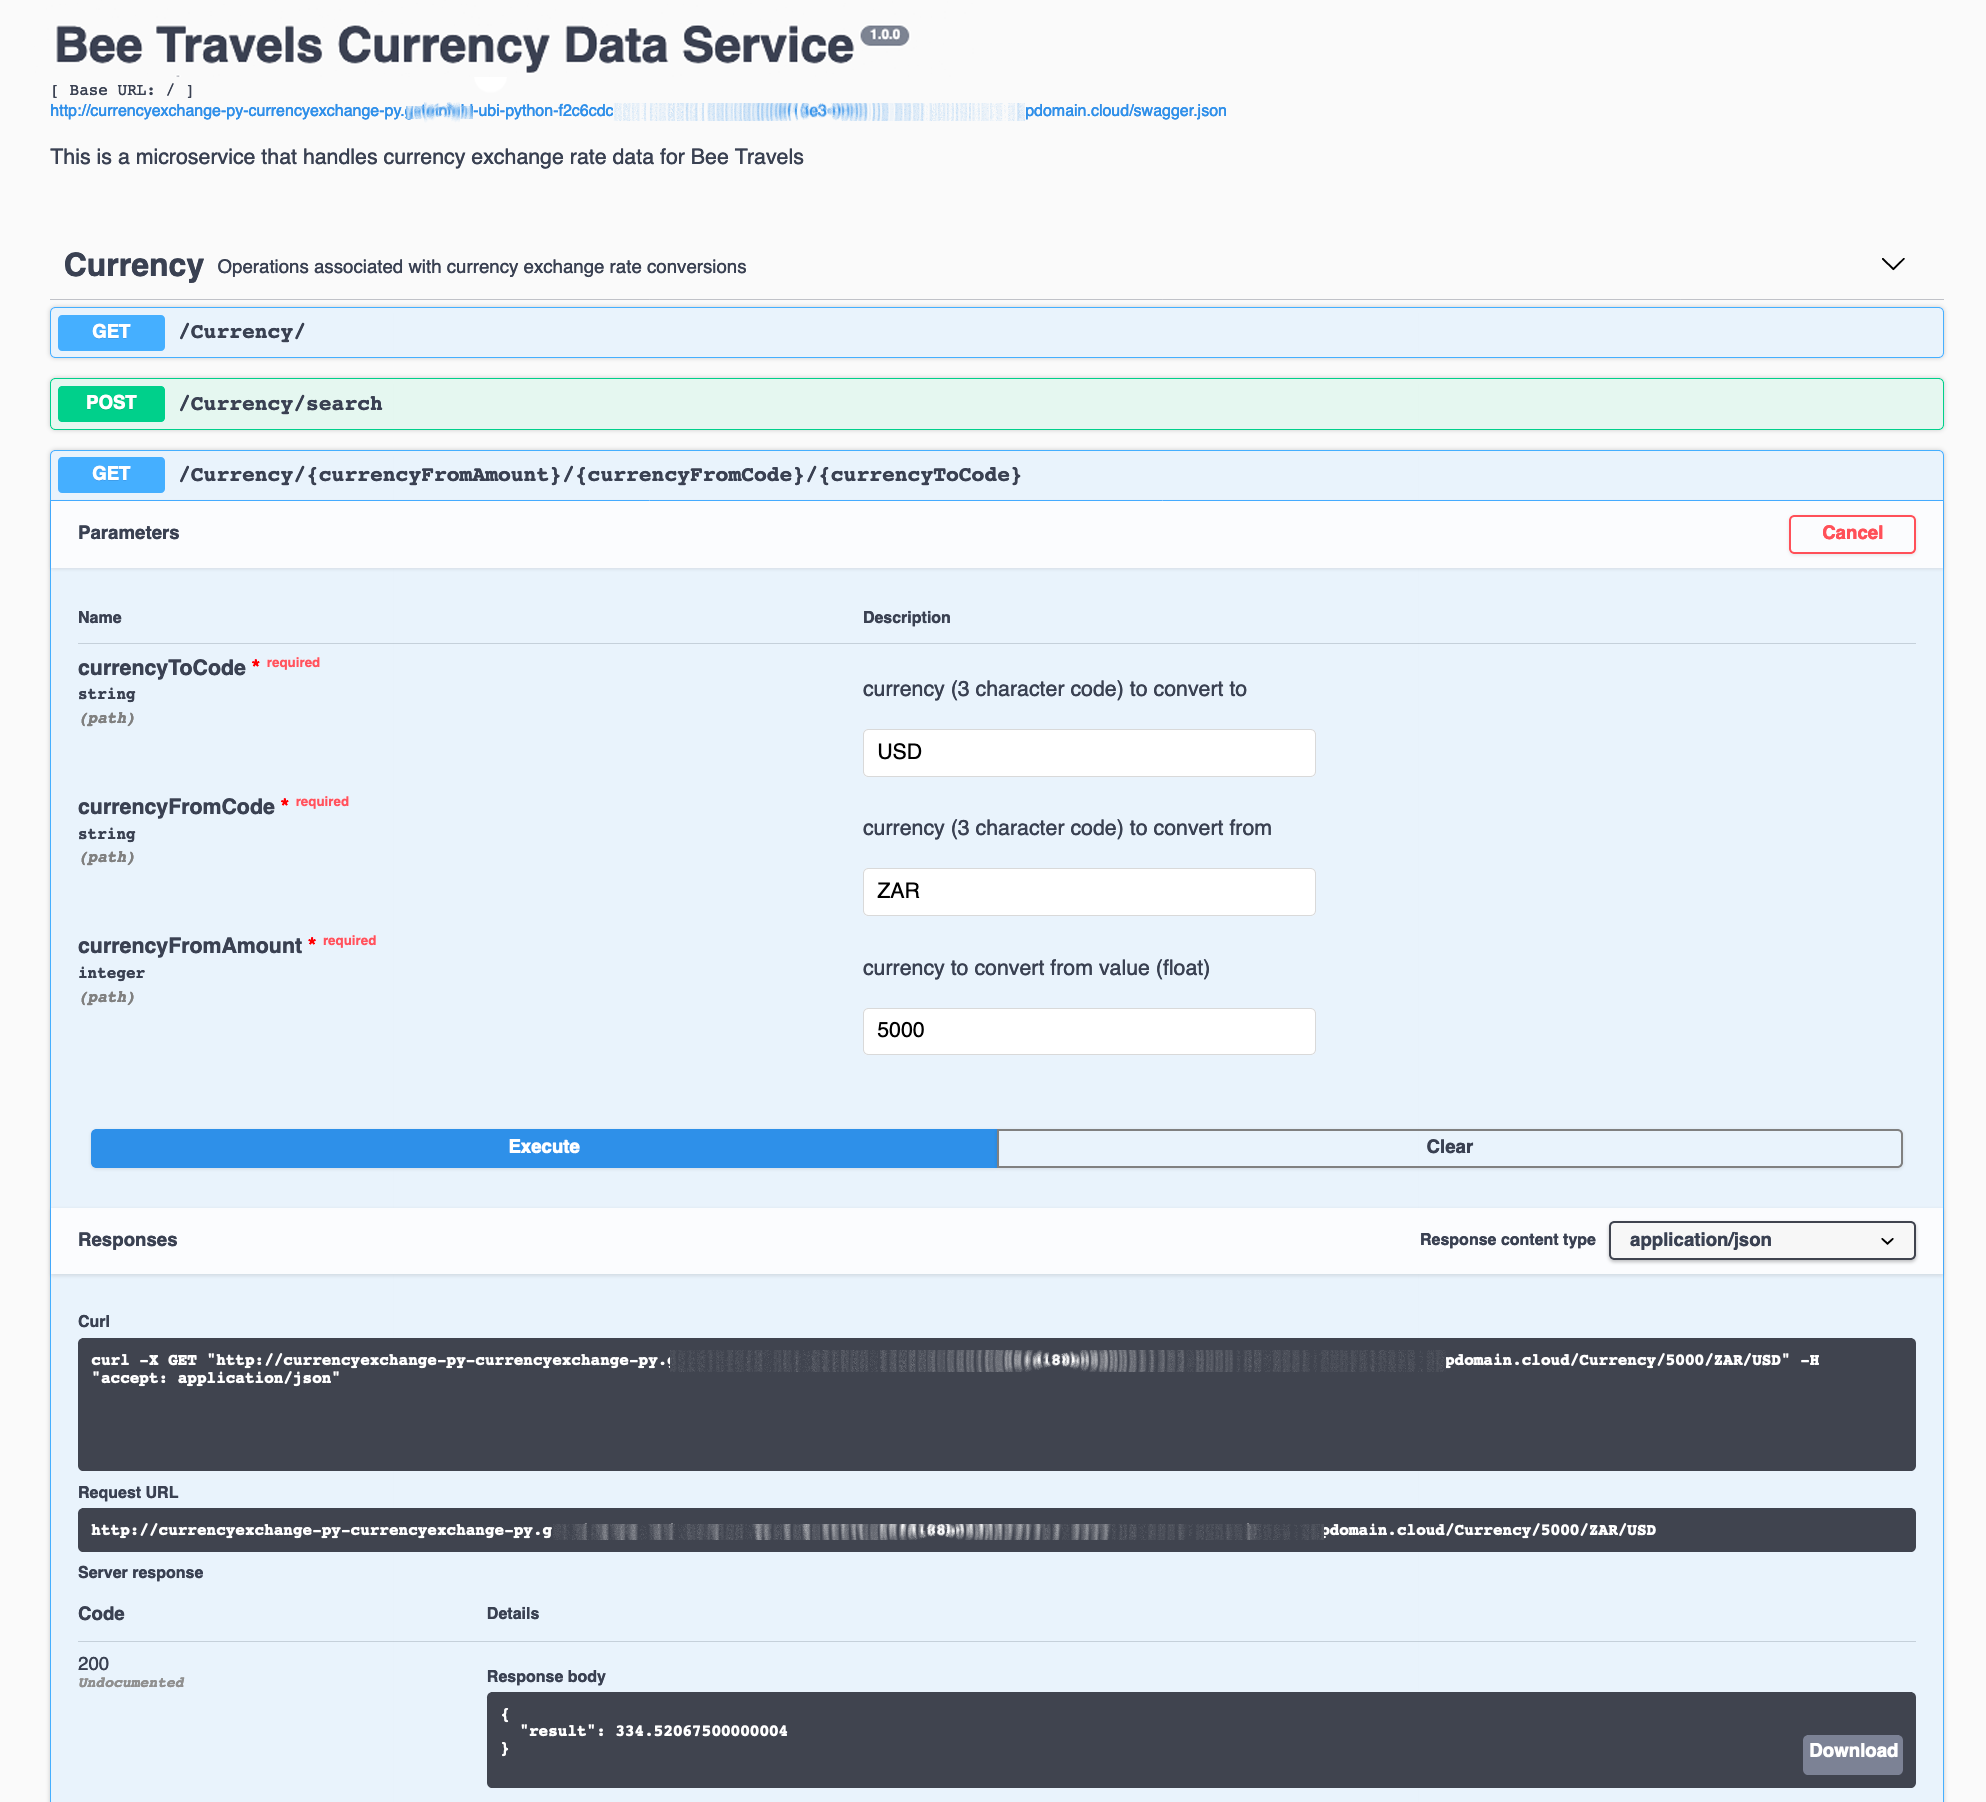
You should now see the Flask generated swagger RESTful API as an interactive test harness in a web page, where you can explore and manually test the Currency Conversion microservice:
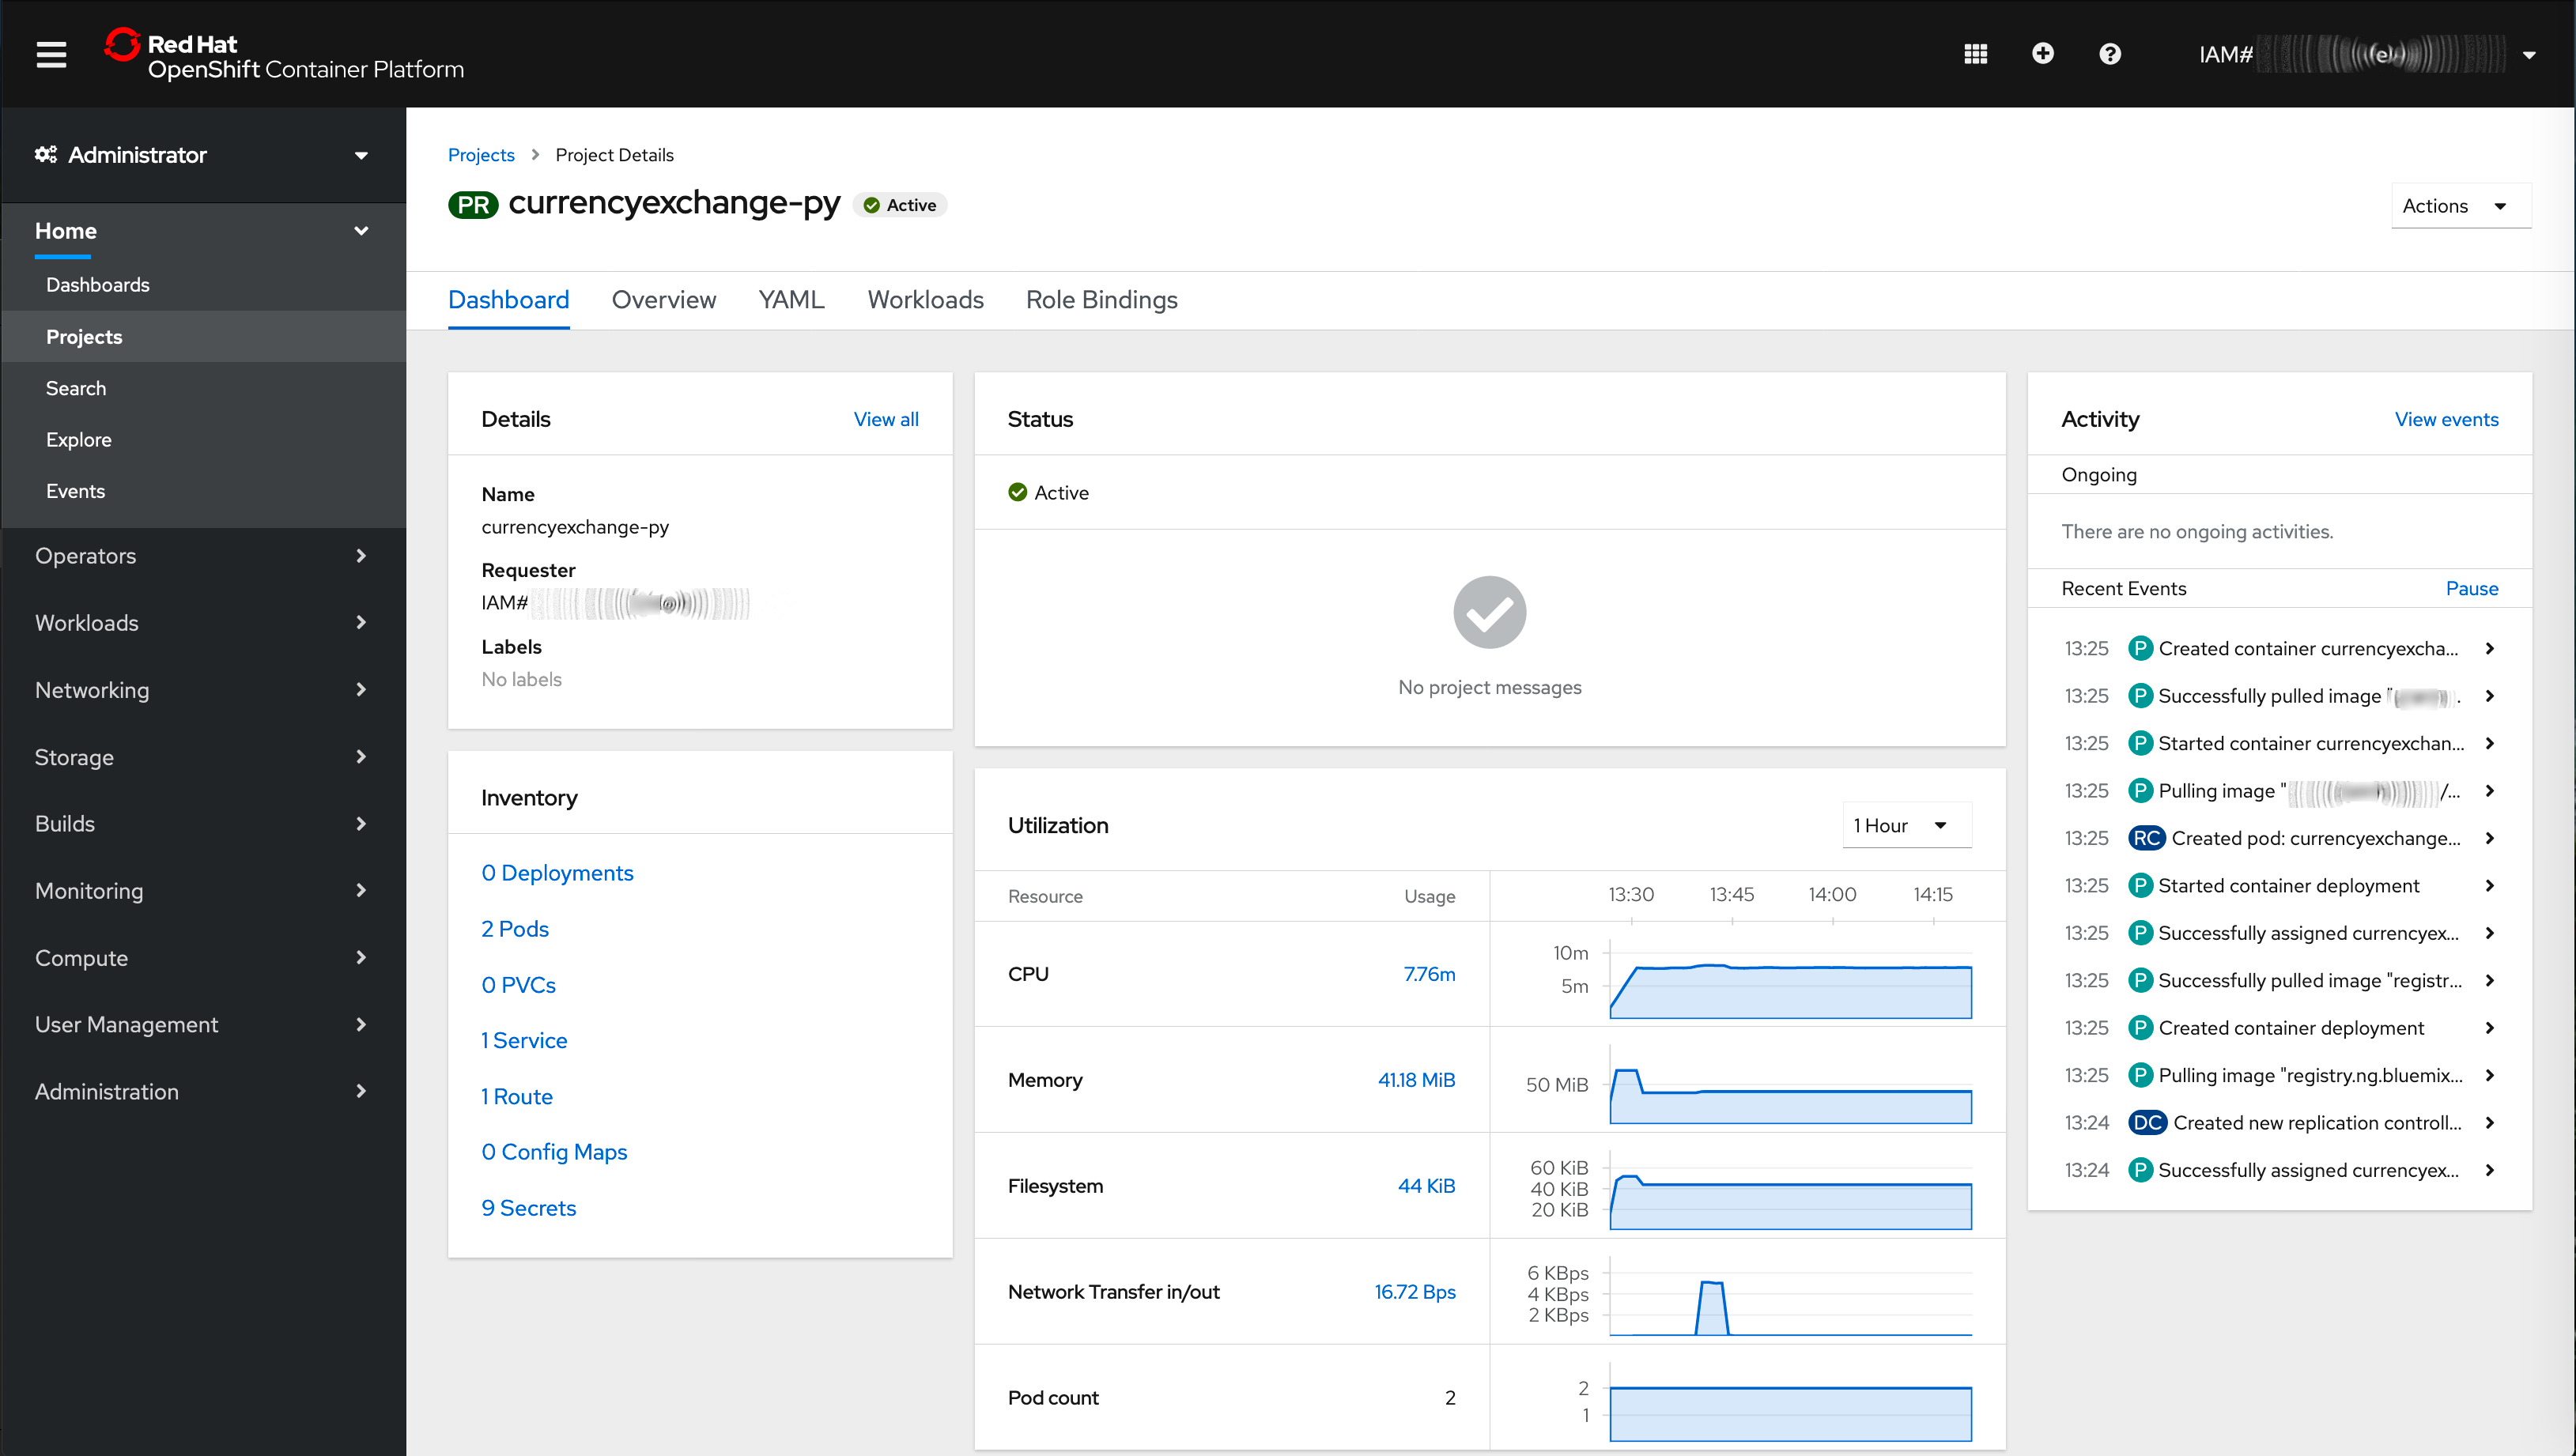
You can examine the health of your microsevice with the OpenShift Web Console Dashboard
Here you can monitor your currency exchange microservice cluster. See and adust the number of pods, the more pods the more resiliant and responsize your microservice will behave under load. You can also see the Bandwidth, Memory, CPU and disk utilization.
You have now successfully created a Python Flask microservice container image, using the UBI, and optionally deployed it to a Red Hat OpenShift 4 cluster on the IBM Cloud.
Introducing the Red Hat Universal Base Image - RedHat blog by Scott McCarty
Python RESTful APIs using flask-restplus
This code pattern is licensed under the Apache License, Version 2. Separate third-party code objects invoked within this code pattern are licensed by their respective providers pursuant to their own separate licenses. Contributions are subject to the Developer Certificate of Origin, Version 1.1 and the Apache License, Version 2.

