live-glsl is a very simple and lightweight tool for coding shaders. It has the ability to dynamically reload your shader, which means that any changes you make to the code will be automatically applied without needing to restart the application. Additionally, it provides on-screen error reporting, making it easy to quickly identify and fix any issues in your code. The shader inputs can also be annoted to generate GUI elements from a simple syntax, allowing you to experiment with different value tweaks and see the results in real time.
To manually compile live-glsl, you will need to have CMake installed on your system, which you can download from the CMake website. Once CMake is installed, you can compile live-gls with the following commands:
> cmake . -Bbuild && cmake --build build
> build/live-glsl --input fragment_shader_to_watchThere are multiple examples available in the shaders folder that you can easily run to see the tool in action. To execute an example, navigate to the main directory, build the tool from sources, and then run the command ./build/live-glsl --input shaders/atmosphere.frag in your terminal. This will run the specified example file and allow you to start coding.
live-glsl provides a set of convenient built-in uniforms that can be directly accessed from the shader.
time: afloatvalue for the amount of time that has passed since the start of the application, measured in seconds. This can be useful for creating time-dependent effects or animations within your shaders.resolution: avec2value for the screen resolution in pixels. This can be used to ensure that your shaders are properly scaled and displayed on different screen sizes.mouse: avec3value that provides information about the current state of the mouse. The first two components of this vector represent the x and y coordinates of the mouse on the screen, measured in pixels. The third component of the vector stores the state of the mouse click, with a value of1indicating that the mouse button is currently pressed, and0indicating that it is not.pixel_ratio: afloatvalue that provides the pixel ratio of the current device. This can be useful for ensuring that your shaders are properly scaled and displayed on high-resolution screens.
live-glsl enables users to easily control some features with shaders annotations. There are annotations to control texture inputs, render passes and uniform GUI elements.
You can use the @path(path) syntax to load textures in a shader file. The "path" refers to the location of the texture file relative to the shader file. When you load a texture with this syntax, it will be connected to the uniform variable on the following line in the shader file. Additionally, a new uniform variable will automatically be created that represents the texture's resolution. This new uniform variable will be named by adding "_resolution" to the original texture sampler uniform variable's name. For example:
@path(heightmap.png)
uniform sampler2D heightmap;

uniform vec2 heightmap_resolution;Render passes are a feature that allow you to define an input, output, width, and height for separate shaders. They are defined using the syntax @pass(output, [input, width, height]). For example, @pass(render_pass_0, 512, 512) would create a render pass with an output named render_pass_0 that has a size of 512 by 512 pixels:
@pass(render_pass_0, 512, 512)

void main() {
  ...
}

@pass_end

@pass(main, render_pass_0)

void main() {
  ...
}

@pass_end
It's important to note that the order of render passes isn't automatically resolved, so they will be executed in the order they appear in the code. Additionally, the output of a render pass will be displayed to the default framebuffer unless there are no render passes defined or the render pass output is named main.

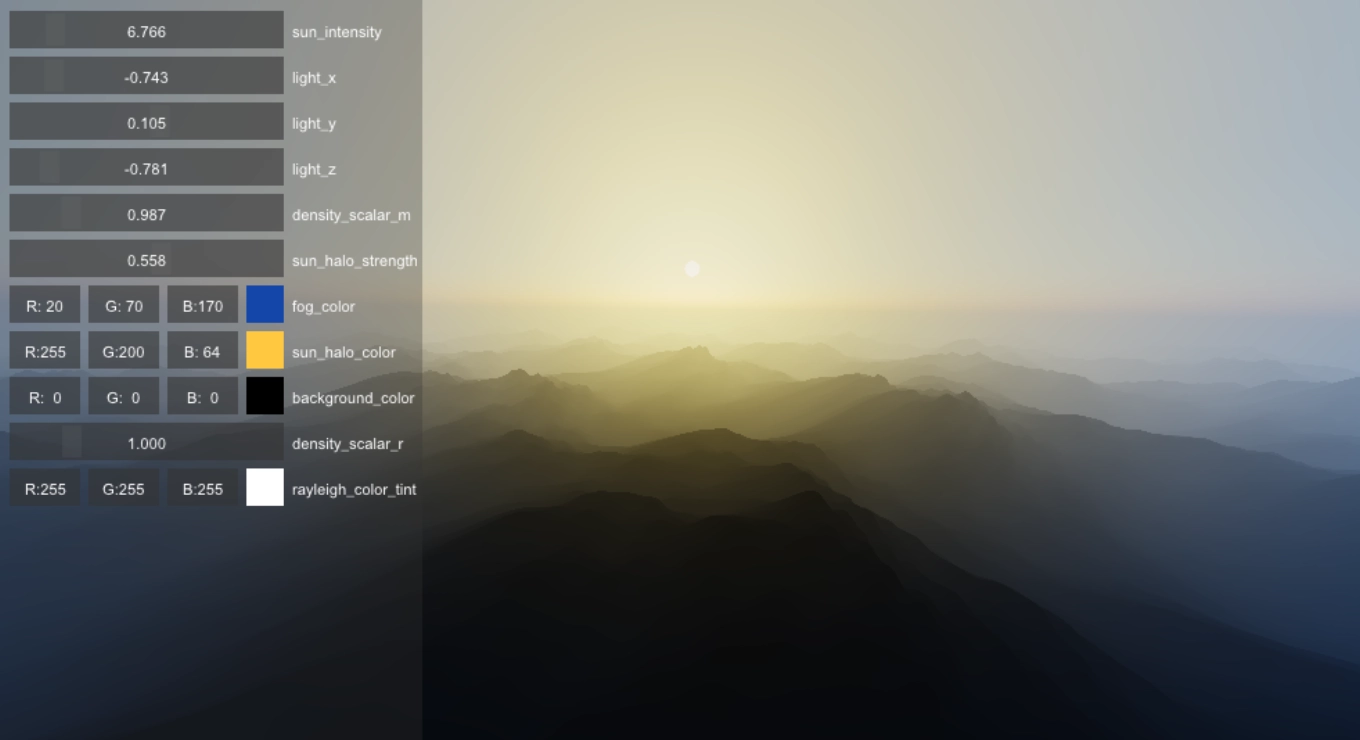
GUI elements are defined annotations that should be placed directly before the uniform statement that they are associated with in the shader code. These elements include: slider1, slider2, slider3, slider4, , color3, color4. Sliders can be used to adjust a uniform value with a visual slider and color pickers allow to select a color value for a uniform input. GUI elements should be preceded by an @ and immediately followed by their parameters in parenthesis.
Slider types follow the syntax slider(min_value, max_value). For example:
@slider1(-1.0, 1.0)
uniform float uniform_name;
Color types do not need any parameter.
live-glsl also has the ability to include separate shader files in your code, this can help to keep your shader code organized and modular, making it easier to avoid duplication. This can be done by using the #include directive, which allows you to reference another shader file and insert its contents into the current file.
For example, suppose you have a file named lighting.glsl that contains a set of lighting functions that you would like to use in your main shader code. You could include this file in your code using the following line:
#include "lighting.glsl"When the shader is compiled, the contents of the lighting.glsl file will be inserted into the current shader code, allowing you to use the lighting functions in your code.
live-gls creates an OpenGL 3.2 and uses version 1.50 of the OpenGL Shading Language (GLSL).