This repo provides a quick-start template for creating a RESTful web application using the Flask microframework for Python 3.8+.
Features:
- Flask 1.1.x.
- SQLAlchemy database models
- Marshmallow for object marshalling
- JSON Web Token (JWT) authentication
- Pytest unit-tests
This is a "pure RESTful" application, it exposes only RESTful APIs and does not generate any HTML, perfect for pairing with a single-page-application (SPA) web front-end or mobile app.
See RESTful Flask application quick-start for more info.
You will need Python 3.8 or later. Use the appropriate installation method for your system to install Python and make sure it is in your path.
Clone or download the repo into a working directory. cd into this directory.
Now create a Python virtual environment for this project with:
python -m venv .virtualenv
Now activate the virtual environment. on macOS, Linux and Unix systems, use:
source .virtualenv/bin/activate
On Windows:
.virtualenv\Scripts\activate.bat
Now run:
pip install -e .[dev,doc]
This will install the packages the project depends on along with some additional packages for development. doc is optional - it installs Sphinx for documenting your project.
To make sure everything is installed and working correctly, run:
pytest
This will produce a lot of output, but toward the end, you should see something like:
======================================================= test session starts ========================================================
platform darwin -- Python 3.5.2, pytest-3.0.3, py-1.4.31, pluggy-0.4.0
rootdir: /Users/kmilligan/workspace/flask-quickstart, inifile:
collected 11 items

tests/test_auth.py ......
tests/test_contacts.py .....

==================================================== 11 passed in 2.90 seconds =====================================================
To start the web server, run
export FLASK_APP=sample
flask run
set FLASK_APP=sample
flask run
$env:FLASK_APP = "sample"
flask run
The API will available at http://localhost:5000.
Note that because this app does not generate HTML itself, requesting this URL with a web browser directly will just return a JSON error message. Use a RESTful client application to authenticate and make requests.
You can test your RESTful APIs with PostMan or another HTTP request tool.
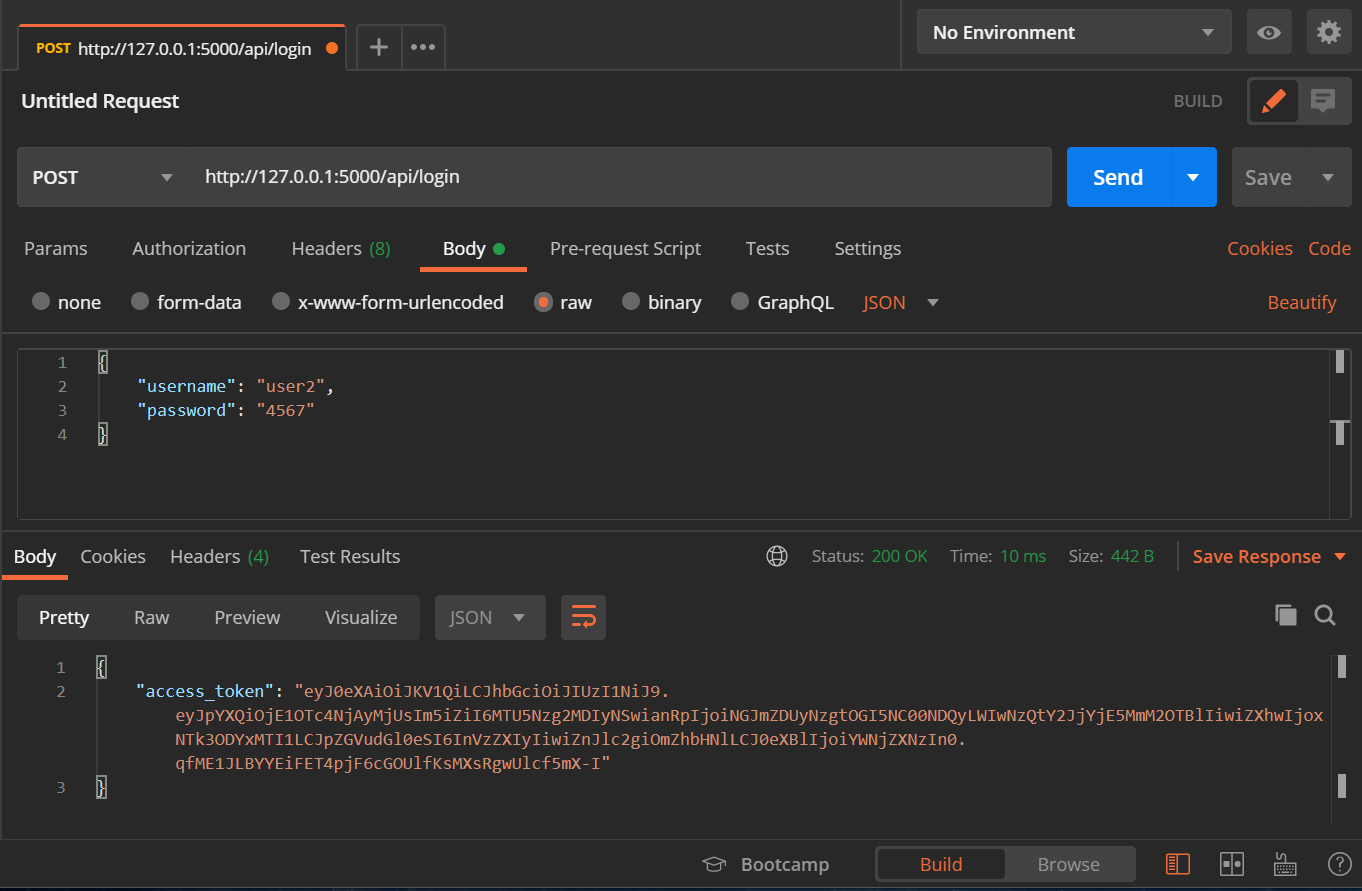
Send a POST request to http://127.0.0.1:5000/api/login with the username/password to login and get an access token:
Copy the access token to the clipboard - you will need it for subsequent requests.
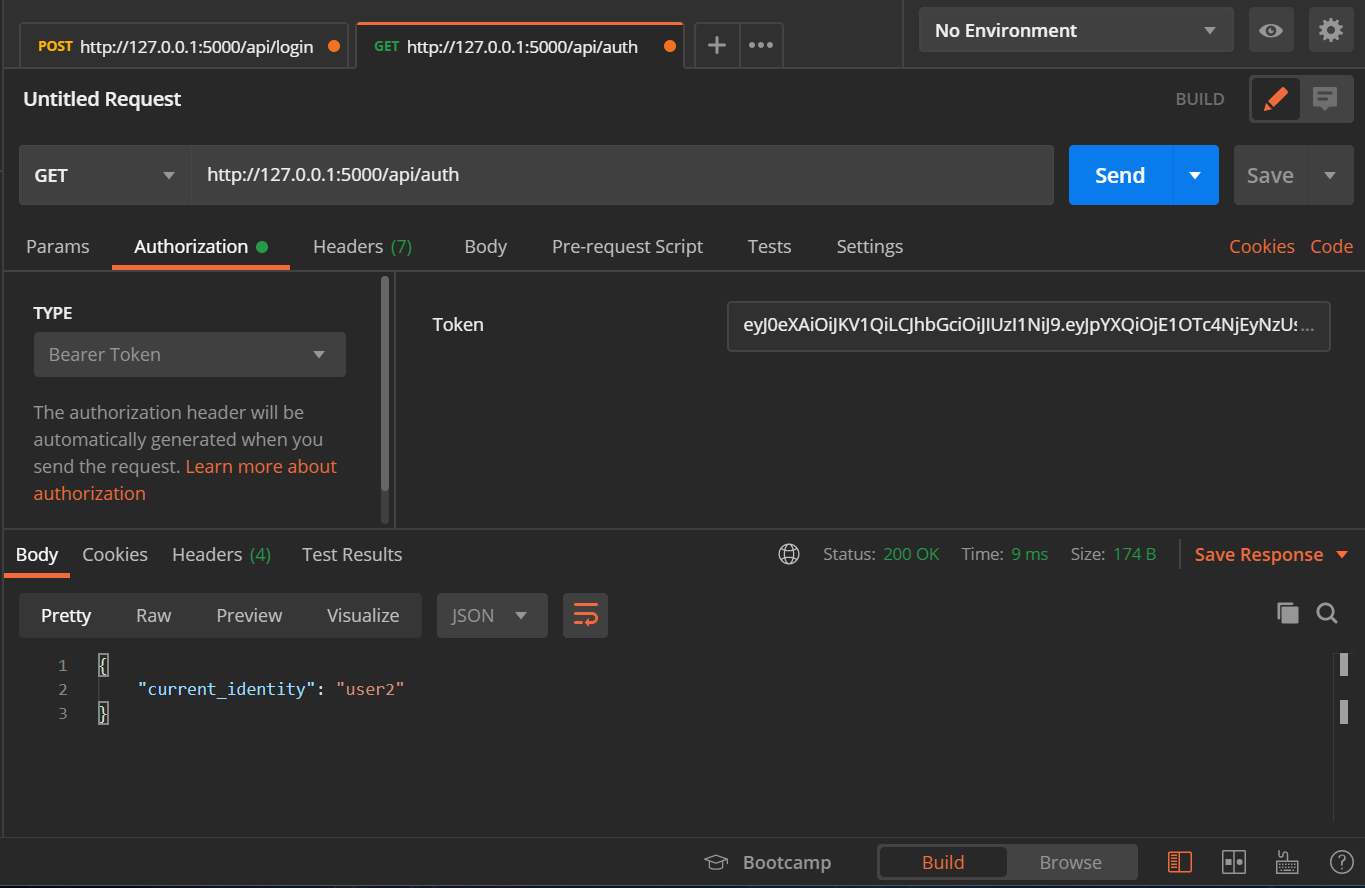
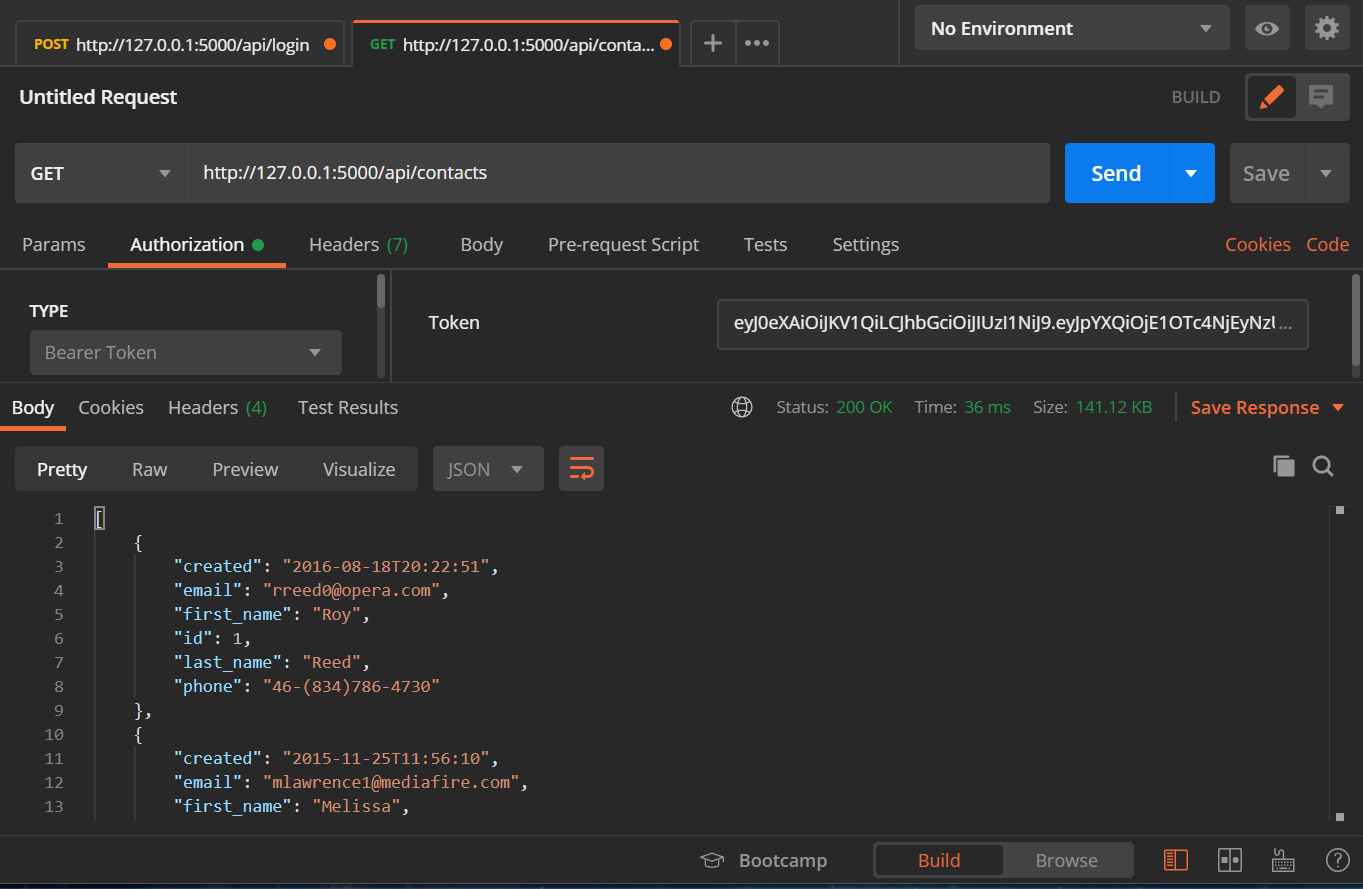
Create a new GET request to http://127.0.0.1:5000/api/auth and set the "Authorization" type to "Bearer Token". Paste the access token into the Token field and send the request:


