[Description]
|--- .vscode
|--- src
|    |--- Hng.Application
|    |--- Hng.Application.Test
|    |--- Hng.Domain
|    |--- Hng.Infrastructure
|    |--- Hng.web
|         |--- Controllers
|         |--- Program.cs
|         |--- .dockerignore
|         |--- Dockerfile
|         |--- appsettings.json
|         |--- appsettings.Development.json
|--- .gitignore
|--- Hng.Csharp.Web.sln
Ensure you have your computer setup correctly for development by installing the following
- .Net 8 with C# 12.0
- Visual studio 2019 or higher with ASP.Net web installation pack or
- Visual studio code with .Net and C# dev extensions installed
- Install .Net maui development pack for future uses
If you don't have git on your machine, install it.
Fork this repository by clicking on the fork button on the top of this page. This will create a copy of this repository in your account.
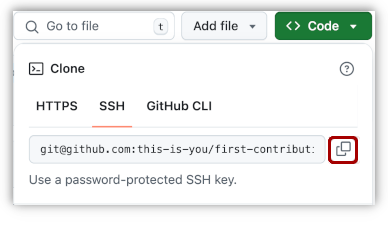
Now clone the forked repository to your machine. Go to your GitHub account, open the forked repository, click on the code button and then click the copy to clipboard icon.
Open a terminal and run the following git command:
git clone "url you just copied"where "url you just copied" (without the quotation marks) is the url to this repository (your fork of this project). See the previous steps to obtain the url.
For example:
git clone git@github.com:this-is-you/hng_project.gitwhere this-is-you is your GitHub username. Here you're copying the contents of the first-contributions repository on GitHub to your computer.
Change to the repository directory on your computer (if you are not already there):
cd hng_projectNow create a branch using the git switch command:
git switch -c your-new-branch-nameFor example:
git switch -c add-alonzo-churchMake your changes to the codebase. Ensure your code follows the project's coding standards and guidelines.
Run the existing tests to ensure your changes do not break anything. If you added new functionality, write corresponding tests and run them.
Now open Contributors.md file in a text editor, add your name to it. Don't add it at the beginning or end of the file. Put it anywhere in between. Now, save the file.
If you go to the project directory and execute the command git status, you'll see there are changes.
Add those changes to the branch you just created using the git add command:
Push your changes using the command git push:
git push -u origin your-branch-namereplacing your-branch-name with the name of the branch you created earlier.
If you get any errors while pushing, click here:
-
remote: Support for password authentication was removed on August 13, 2021. Please use a personal access token instead.
remote: Please see https://github.blog/2020-12-15-token-authentication-requirements-for-git-operations/ for more information.
fatal: Authentication failed for 'https://github.com//first-contributions.git/'
Go to GitHub's tutorial on generating and configuring an SSH key to your account.
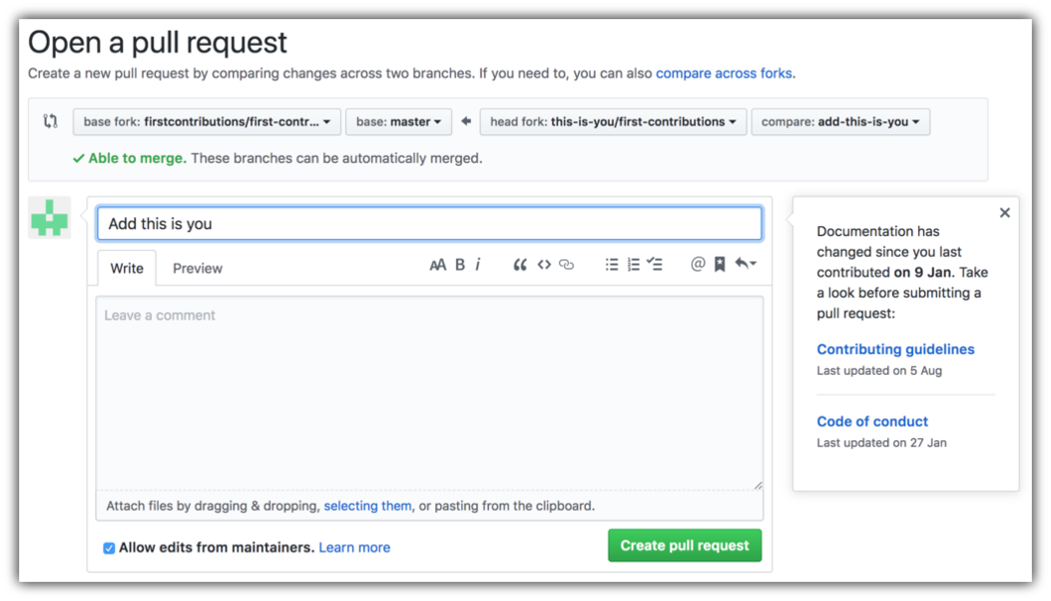
If you go to your repository on GitHub, you'll see a Compare & pull request button. Click on that button.
Now submit the pull request.
Soon your changes will be merged into the staging branch of this project. You will get a notification email once the changes have been merged.
First, clone the repository to your local machine using Git.
git clone https://github.com/your-username/[app-name].git
cd [app-name]Opening the solution in Visual studio should automatically restore all your dependencies, you can ensure this by right clicking on the solution explorer and clicking Restore dependencies.
If you are using Vscode with the required installations mentioned above, navigate to the project directory and install the required dependencies.
dotnet restorePress F5 on your keyboard to run the application in debug mode for both Visual studio and Vscode (You may need to open a .cs file to trigger this).
Alternatively you can cd into src/Hng.Web project and run the command
dotnet runDepending on the IDE/code editor, you should be greeted with the Swagger documentation page else navigate to /swagger to view the documentation
Update your appsettings.development file with details of your postgress connection
"DefaultConnectionString": "Server=server-here; Port=5432; Database=UserDb;User Id=postgres;Password=yourpasswordhere"


