Download "RASPBIAN JESSIE LITE" https://www.raspberrypi.org/downloads/raspbian/
Create your new hard disk for DashboardPI
Insert the microSD to your computer via USB adapter and create the disk image using the
ddcommandLocate your inserted microSD card via the
df -hcommand, unmount it and create the disk image with the disk copyddcommand$
df -h/dev/sdb1 7.4G 32K 7.4G 1% /media/XXX/1234-5678$
umount /dev/sdb1Caution: be sure the command is completely accurate, you can damage other disks with this command
if=location of RASPBIAN JESSIE LITE image file of=location of your microSD card
$
sudo dd bs=4M if=/path/to/raspbian-jessie-lite.img of=/dev/sdb(note: in this case, it's /dev/sdb, /dev/sdb1 was an existing factory partition on the microSD)
Setting up your RaspberriPi
Insert your new microSD card to the raspberrypi and power it on with a monitor connected to the HDMI port
Login
user: pi pass: raspberry
Change your account password for security
sudo passwd pi
Enable RaspberriPi Advanced Options
sudo raspi-config
Choose:
1 Expand File System
9 Advanced Options
A2 Hostnamechange it to "DashboardPI"
A4 SSHEnable SSH Server
A7 I2CEnable i2c interface
Enable the English/US Keyboard
sudo nano /etc/default/keyboard
Change the following line:
XKBLAYOUT="us"
Reboot PI for Keyboard layout changes / file system resizing to take effect
$
sudo shutdown -r now
Auto-Connect to your WiFi
sudo nano /etc/wpa_supplicant/wpa_supplicant.conf
Add the following lines to have your raspberrypi automatically connect to your home WiFi (if your wireless network is named "linksys" for example, in the following example)
network={
   ssid="linksys"
   psk="WIRELESS PASSWORD HERE"
}
Reboot PI to connect to WiFi network
$
sudo shutdown -r nowNow that your PI is finally on the local network, you can login remotely to it via SSH. But first you need to get the IP address it currently has.
$
ifconfigLook for "inet addr: 192.168.XXX.XXX" in the following command's output for your PI's IP Address
Go to another machine and login to your raspberrypi via ssh
$
ssh pi@192.168.XXX.XXX
Start Installing required packages
$
sudo apt-get update$
sudo apt-get upgrade$
sudo apt-get install vim git python-smbus i2c-tools python-imaging python-smbus build-essential python-dev rpi.gpio python3 python3-pip
**Update local timezone settings
$
sudo dpkg-reconfigure tzdata
select your timezone using the interface
Setup the simple directory l command [optional]
vi ~/.bashrcadd the following line:
alias l='ls -lh'
source ~/.bashrc
Fix VIM default syntax highlighting [optional]
sudo vi /etc/vim/vimrcuncomment the following line:
syntax on
Install i2c Backpack Python Drivers
$
git clone https://github.com/adafruit/Adafruit_Python_LED_Backpack
$
cd Adafruit_Python_LED_Backpack/
$
sudo python setup.py install
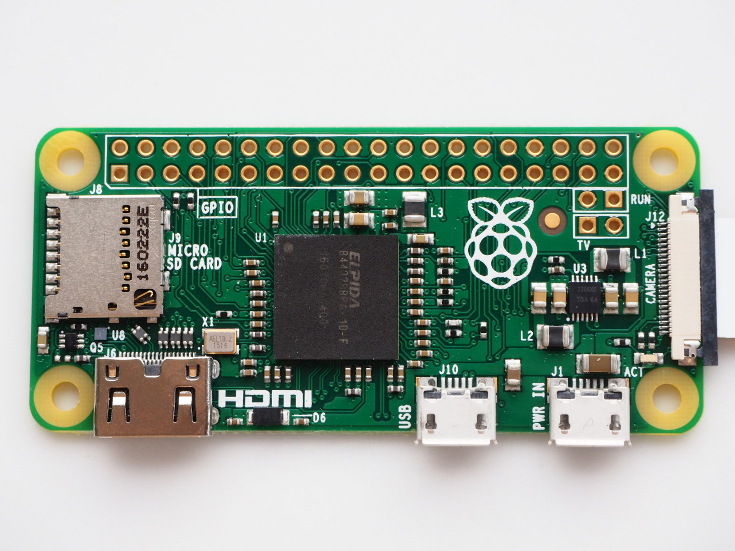
Raspberry PI or Pi Zero
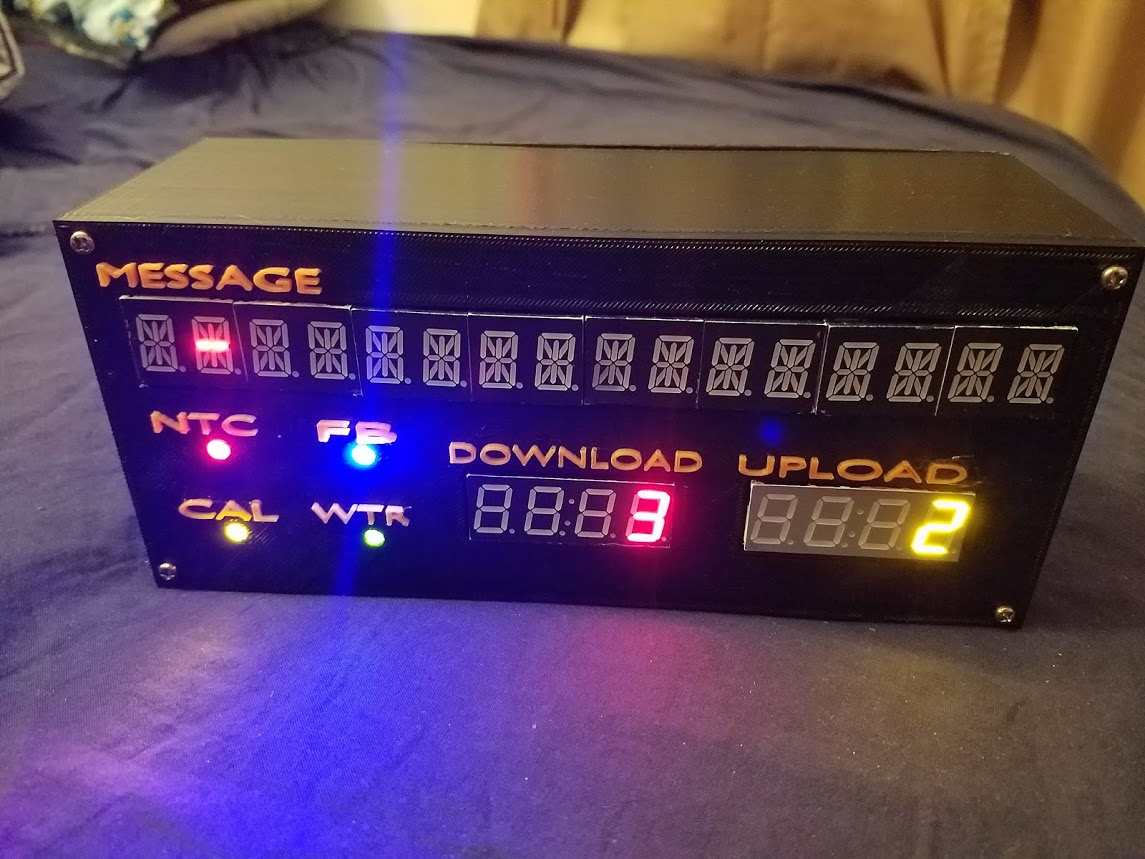
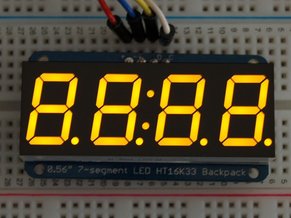
0.56" 4-Digit 7-Segment Display w/I2C Backpack (x2)
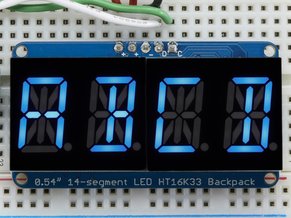
Quad Alphanumeric Display - 0.54" Digits w/ I2C Backpack (x4)
LED Lights (x4)
Using the following 3 STL files in the /construction/3D Print/ folder, print out the cover, box and back of the case to assemble.
Dashboard-cover.stl Dashboard-box.stl Dashboard-back.stl
NOTE: All the I2C backpacks must be soldered on the back of each of the displays, the backpacks come with the display and must all be soldered on first.
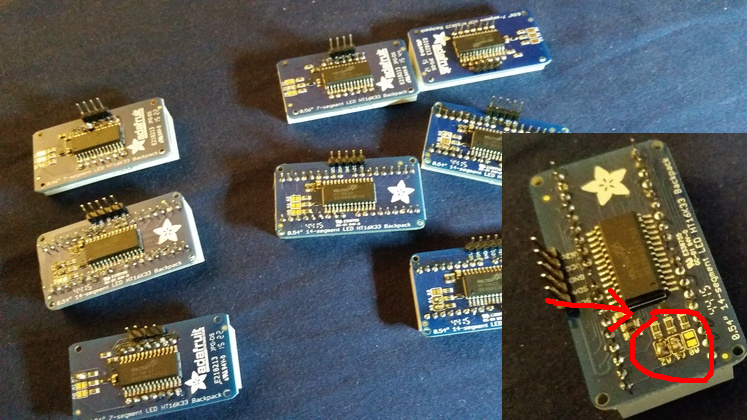
For each of the I2C backpack displays you must solder the jumpers on the back in the all the possible combinations to have your RaspberriPI I2C interface to recognize each display with a unique address.
Leave the first display with no jumper soldered, the 2nd with the farthest right soldered, the 3rd with only the middle soldered and so on... Eventually you'll have to solder jumpers in all the combinations of 2 at a time connected and the final display with all 3 jumpers soldered to be connected.
There's a total of 3 pins so you should have a total combination of 8 unique combinations.
Using a hot glue gun, mount the displays in the holes and glue them in place. The LED lights may hold by friction from the 3D printed design, else use hot glue to hold them in place as well.
NOTE: I have written down on the back of the box cover the HEX addresses x70 - x77 that each display has based on the soldering jumpers (see section #2)
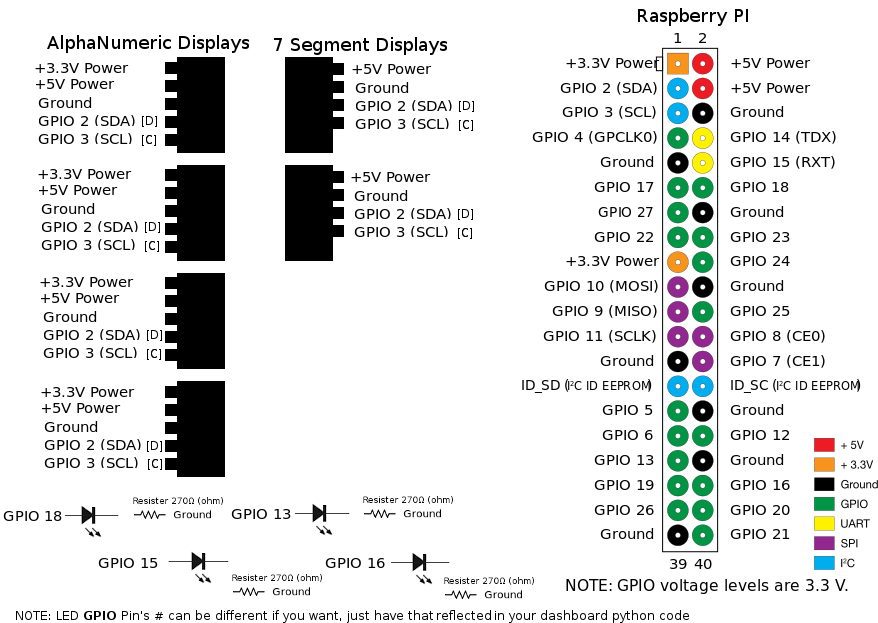
Each of the 14 segment alpha numeric displays needs to have a connection to the RaspberryPI GND, 5V and 3V pins. The 7 segment display only needs connectivity to the GND and 5V pins.
I've used standard jumper wires to connect to all the pins on the display / RaspberryPI pins and grouped the common connections (all the GND wires, 5V wires) with a wirenut.
Each LED light needs to have a 270 ohm resister solder to the ground (short) pin and connect each positive LED pin to the corresponding GPIO pins on the PI, I've used GPIO pins 18, 13, 15 and 16.
For each display in the dashboard ALL of the D and C pins need to be connected to the SCL and SDA pins on the PI.
Screw the front cover and back panel to the main box
You're now ready to run the Dashboard!
This project includes a small PHP server that you can host on almost any low cost linux webhost. From this project copy the files from the "server/" folder and place them on your PHP webhost and remember the domain name.
For our example it will be installed on a hypothetical host with the public domain name of: www.mydashboard.com
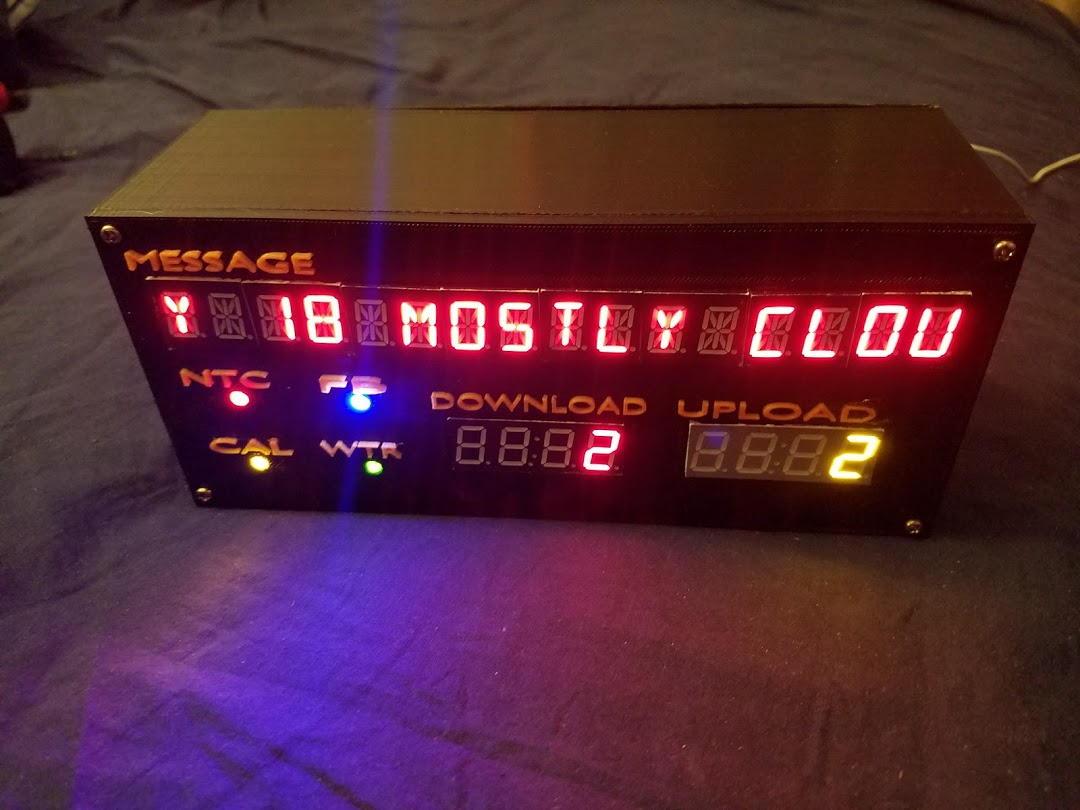
The server/README.md file contains all the details about how to get/set message values, measurement values and flag values to the PHP server. These values will then be listened for on the Retrodashboard to display to you as output via the alphanumeric / numeric and led lights turning on and off.
Start up your RaspberryPi and make sure the I2C bus recognizes all your connected 7/14 segment displays. [each display is given a unique address described above by how you solder each display's jumpers in different combinations]
If you have all 8 displays with jumpers soldered in all 8 combinations, you should have the following output for the i2cdetect command:
sudo i2cdetect -y 1
0 1 2 3 4 5 6 7 8 9 a b c d e f
00: -- -- -- -- -- -- -- -- -- -- -- -- --
10: -- -- -- -- -- -- -- -- -- -- -- -- -- -- -- --
20: -- -- -- -- -- -- -- -- -- -- -- -- -- -- -- --
30: -- -- -- -- -- -- -- -- -- -- -- -- -- -- -- --
40: -- -- -- -- -- -- -- -- -- -- -- -- -- -- -- --
50: -- -- -- -- -- -- -- -- -- -- -- -- -- -- -- --
60: -- -- -- -- -- -- -- -- -- -- -- -- -- -- -- --
70: 70 71 72 73 74 75 76 77
(in this case all the displays numbered 0 to 7 are being recognized on the PI as I2C available devices)
**Install all 3 python driver scripts from this project (in the dashboard/ folder) to your home directory of the RaspberryPI. ** So your PI has the following home directory files:
cd ~
ls -lh
-rwxrwxr-x 1 pi pi 2.8K May 21 01:56 alphanum.py
-rwxrwxr-x 1 pi pi 2.2K May 21 01:54 dashboard.py
-rwxrwxr-x 1 pi pi 1.4K May 21 02:36 indicators.py
Edit each python scripts variable to reference your running PHP data server (see Step 7)
dashboardServer = 'CHANGE TO YOUR SERVER.com'
alphanum.py
Change the python code to reflect the HEX addresses each display is assigned based on the solder jumpers (see section #2)
display1 = AlphaNum4.AlphaNum4(address=0x77, busnum=1)
display2 = AlphaNum4.AlphaNum4(address=0x76, busnum=1)
display3 = AlphaNum4.AlphaNum4(address=0x75, busnum=1)
display4 = AlphaNum4.AlphaNum4(address=0x73, busnum=1)
dashboard.py
Change the python code to reflect the HEX addresses each display is assigned based on the solder jumpers (see section #2)
blueDisplay = SevenSegment.SevenSegment(address=0x70, busnum=1)
yellowDisplay = SevenSegment.SevenSegment(address=0x71, busnum=1)
greenDisplay = SevenSegment.SevenSegment(address=0x72, busnum=1)
redDisplay = SevenSegment.SevenSegment(address=0x74, busnum=1)
indicators.py
*Change the python code to reflect the GPIO pin numbers each LED is assigned based on your exact wiring (I've used GPIO pins: 13,15,16,18)
GPIO.setup(18, GPIO.OUT)
GPIO.output(18,GPIO.LOW)
GPIO.setup(13, GPIO.OUT)
GPIO.output(13,GPIO.LOW)
GPIO.setup(15, GPIO.OUT)
GPIO.output(15,GPIO.LOW)
GPIO.setup(16, GPIO.OUT)
GPIO.output(16,GPIO.LOW)
Now that your 3 scripts are pointing to your own data server you're now ready to run the dashboard to display your output.
Run the following commands to start your Dashboard displays.
$ nohup python indicators.py > indicators.out &
$ nohup python dashboard.py > dashboard.out &
$ nohup python alphanum.py > alphanum.out &
This will allow you to logout of your PI and have the python drivers remain running as a background process, if they do fail for any reason, the error message will be found in the [.out] from the commands above.
Run Displays at system startup
Place the following entries in the Dashboard crontab to have it run the scripts on system start/reboot. Note: logging to [.out] files has been supressed in this case to /dev/null if you have any errors occuring.
$ crontab -e
@reboot nohup python /home/pi/indicators.py >/dev/null 2>&1
@reboot nohup python /home/pi/dashboard.py >/dev/null 2>&1
@reboot nohup python /home/pi/alphanum.py >/dev/null 2>&1
The 'plugins/' folder contains plugins to get started populating the central server with information that the dashboard will display as output.
network-monitor.py
This plugin will persist to the central data hub local network information such as your current upload and download speed in KBPS.
Software Requirements:
ifstat is required
sudo apt-get install ifstat
Configure and run the script:
dashboardServer = 'CHANGE TO YOUR SERVER.com'
$ nohup python network-monitor.py > network-monitor.out &
server-monitor.py
This plugin will persist to the central data hub local CPU usage and temperature statistics.
Software Requirements:
psensor-server is required
sudo apt-get install psensor-server
Configure the script:
dashboardServer = 'CHANGE TO YOUR SERVER.com'
Run pensor server on port 17510, then run the server monitor script:
$ nohup psensor-server -p 17510 > /dev/null 2>&1
$ nohup python server-monitor.py > server-monitor.out &
DashboardPhone/
This is a fully functional Android App that runs on your phone as a service and will persist to the central data hub notifications and indicator flags (coming soon).
Configure the App You need to update the settings.java file with your local settings
	// host with the PHP server script installed for the RetroDashboard
	public static String remoteDashboardHost = "CHANGE TO YOUR SERVER.com";

	// create a list of notifications (by title) your phone always produces but don't need to broadcast
	public static String[] ignoredNotifications = new String[] { "Privacy Guard active", "Change keyboard" };
Build the App
Using an Android IDE, import the project locally and build it to an APK file. Install the APK on your phone locally and it should start working for you.
PushBullet/
Using the pushbullet app for your phone, signup to recieve an API key to have a simple python script be able to capture and push data hub notifications and indicator flags
Install Python 3.5 for asyncio functionality
sudo apt-get update
sudo apt-get install build-essential tk-dev
sudo apt-get install libncurses5-dev libncursesw5-dev libreadline6-dev
sudo apt-get install libdb5.3-dev libgdbm-dev libsqlite3-dev libssl-dev
sudo apt-get install libbz2-dev libexpat1-dev liblzma-dev zlib1g-dev
If one of the packages cannot be found, try a newer version number (e.g. libdb5.4-dev instead of libdb5.3-dev).
wget https://www.python.org/ftp/python/3.5.2/Python-3.5.2.tgz
tar zxvf Python-3.5.2.tgz
cd Python-3.5.2
./configure --prefix=/usr/local/opt/python-3.5.2
make
sudo make install
sudo ln -s /usr/local/opt/python-3.5.2/bin/pydoc3.5 /usr/bin/pydoc3.5
sudo ln -s /usr/local/opt/python-3.5.2/bin/python3.5 /usr/bin/python3.5
sudo ln -s /usr/local/opt/python-3.5.2/bin/python3.5m /usr/bin/python3.5m
sudo ln -s /usr/local/opt/python-3.5.2/bin/pyvenv-3.5 /usr/bin/pyvenv-3.5
sudo ln -s /usr/local/opt/python-3.5.2/bin/pip3.5 /usr/bin/pip3.5
cd ~
echo 'alias python35="/usr/local/opt/python-3.5.2/bin/python3.5"' >> .bashrc
echo 'alias idle35="/usr/local/opt/python-3.5.2/bin/python3.5"' >> .bashrc
Install the python3 dependancies
sudo apt-get install python3-setuptools
sudo apt-get install python3-pip
pip3 install asyncpushbullet
Optional way Download the python repository directly to obtain the python dependancies without the use of pip installing it
git clone https://github.com/rharder/asyncpushbullet
cd asyncpushbullet && sudo /usr/local/opt/python-3.5.2/bin/python3.5 setup.py install
Copy the PushBullet/ folder of the dashboard plugins/ from this project to the dashboard pi.
Visit the pushbullet settings page in your account to generate an API key to use https://www.pushbullet.com/#settings
Configure your pushbullet-listener.py script to have the correct API and dashboard central host
# your API Key from PushBullet.com
API_KEY = "o.XXXYYYZZZ111222333444555666"

# dashboard central server host
dashboardServer = 'MY-SERVER-HERE.com'
Add the script to start at dashboard boot and restart your dashboard pi
$ crontab -e
@reboot nohup /usr/local/opt/python-3.5.2/bin/python3.5 /home/pi/PushBullet/pushbullet-listener.py >/dev/null 2>&1
Optional Date and Time Output - instead of having internet upload/download speed use the following script to show the date and time instead
In the Crontab Change:
@reboot nohup python /home/pi/dashboard.py >/dev/null 2>&1
to:
@reboot nohup python /home/pi/date-time.py >/dev/null 2>&1
