Open-Source Network Video Recorder (NVR), with Object Detection
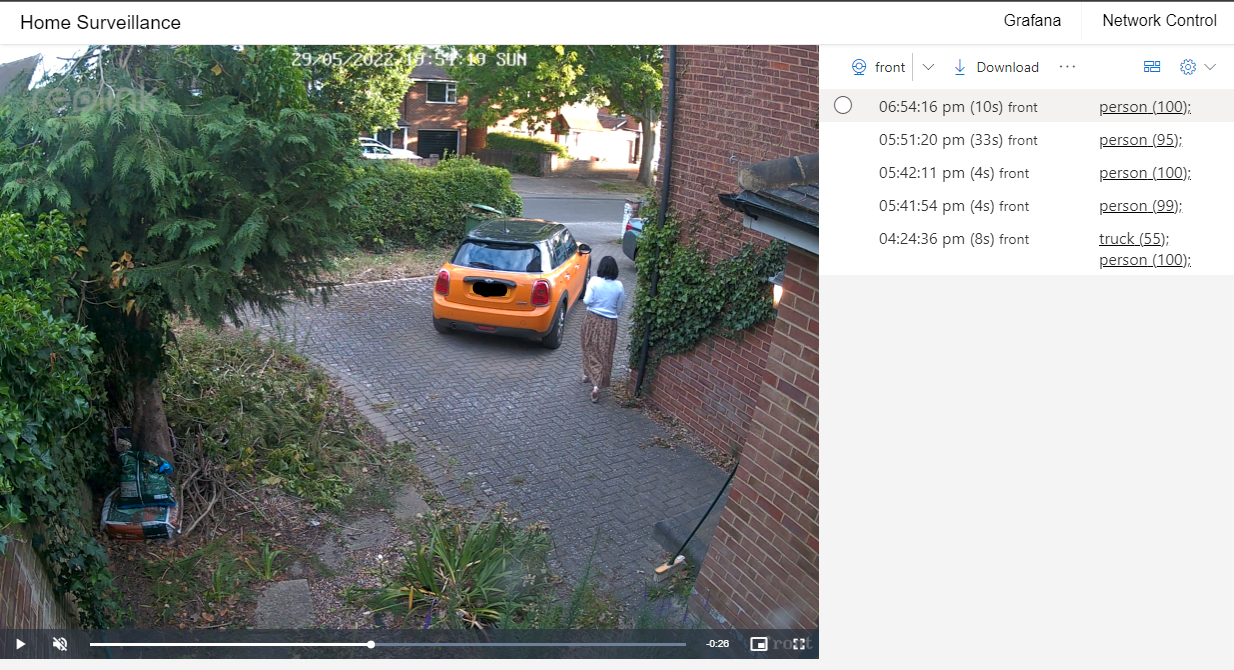
Web application to monitor your IP Security Camera network, continuously record camera feeds to your computers harddrive, and monitor motion events through a web app. Features include:
✔️ No expensive hardware required, use your old computers & harddrives
✔️ Supports one or multiple cameras, with single, filtered, motion list
✔️ No cloud account required, self-contained
✔️ Enhance your Cameras motion detection with Object Detection tagging/filtering
✔️ Continuously monitors hardrives, deleting the oldest video segments when almost full
NOTE: This repo was developed with Reolink POE cameras, that provided a RTMP endpoint, and a API for motion detection. But can be develoed/extended for other IP cameras
Object Detection
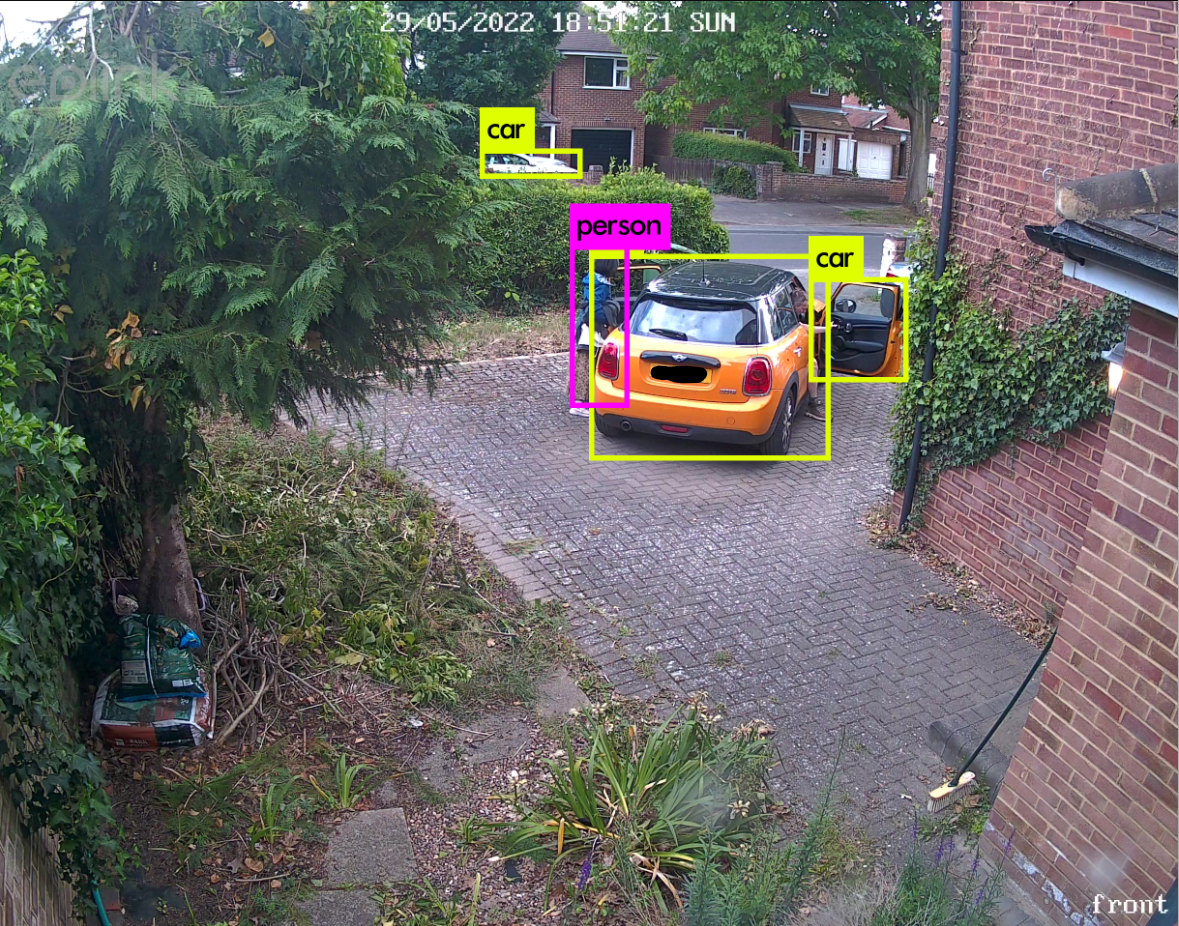
In addition, if your cameras motion sensor triggers a detection, the app will take a still of the detection, and run a Object Detection process, to tag the still with the objects in the picture. You can then use these tags to filter and review your motion events. This is very useful to avoid false positives, like the sun going behind a cloud, or a rain shower.
Settings
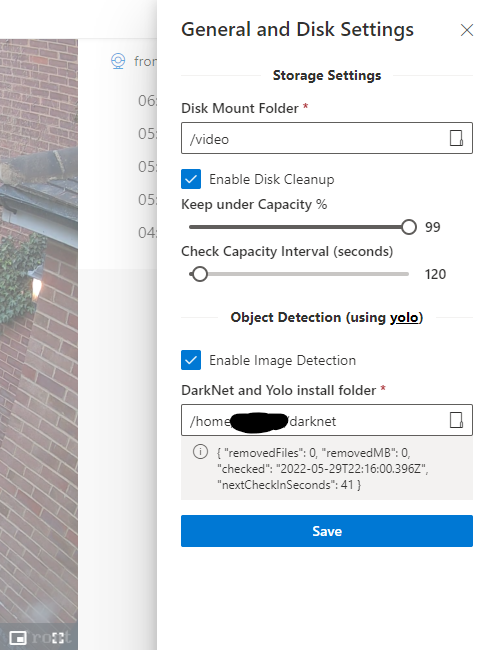
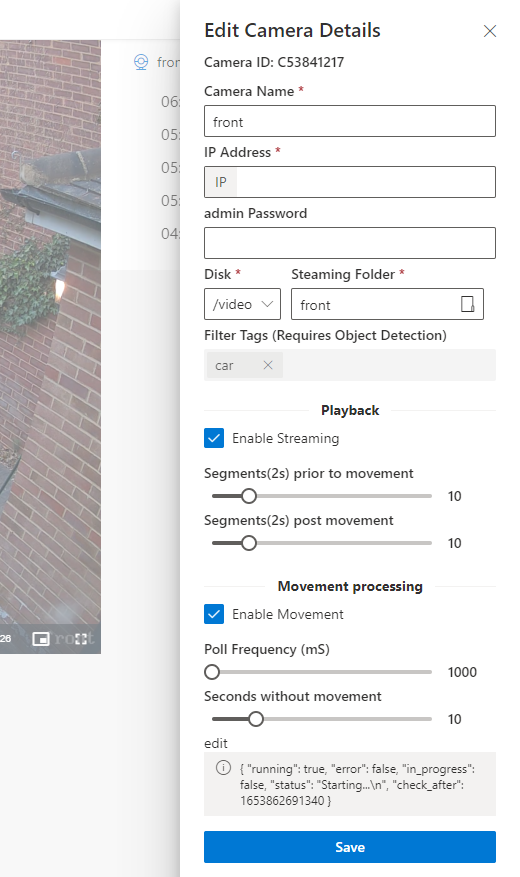
Using the settings menu, you first select the disk you will be using to stream real-time video from the cameras, and if you want to use the auto-deletion featre to prevent the disk from filling up, then if you want to use the object detection feature. Then you can add your cameras
Install / Setup / Run
The benifit of this app, its, its open-source, and it can be installed on any comodity h/w running linux (a free o/s operating system), techincal savvy users should be able to get this working.
Build & Run Web App
Ensure you have nodejs (recommended version >= 16 LTS) and ffmpeg (latest version) installed.
Clone this repo onto a Linux machine, then build the app by running these commands:
# install dependencies
npm i

# build typescript server
npx tsc

# build fromend
npm run-script build
To manually run the server
node ./lib/index.js
Then open a browser and navigate to http://<hostname>:8080. You are free to use a proxy like nginx and add TLS/DNS, authenitcation, then expose your app to the internet so you can monitor your home when away
Darknet Real-time object detection
To enable the Object Detection feature, you will need to install the following darknet/yolo project, information here: https://pjreddie.com/darknet/yolo/. Then, go into the settings panel, enable object detection, and set the installation folder.
The install folder must include the following files
.
├── darknet (the executable)
└── cfg (directory)
     ├── yolov3.cfg
     └── yolov3.weights
To run the server each time the machine starts
Create a executable web.sh file containing the following (the paths need to be absolute):
#!/bin/bash
WEBPATH="/home/<user>/open-source-nvr/build" DBPATH="/home/<user>/open-source-nvr/mydb" node /home/<user>/open-source-nvr/lib/index.js
Now, create a open-source-nvr.service file for Linux Systemd service managers, to ensure your website starts when the machine starts & will be kept running
[Unit]
Description=open-source-nvr
Wants=network-online.target
After=network-online.target

[Service]
User=<user>
Group=<user>
Type=simple
ExecStart=/home/<user>/open-source-nvr/web.sh

[Install]
WantedBy=multi-user.target
Copy the open-source-nvr.service file to /etc/systemd/system , and replacing the <user>
Enable & run the service
sudo systemctl enable  open-source-nvr.service
sudo systemctl start  open-source-nvr.service
Additional Systemd commands
list services
systemctl --type=service
list logs
sudo journalctl -u open-source-nvr.service -f
sudo journalctl -u open-source-nvr.service -n 100 --no-pager
Example to create Logic Volume for the local files
To create a logical volume from a volume group storage pool, use the lvcreate command. Specify the size of the logical volume with the -L option, specify a name with the -n option, and pass in the volume group to allocate the space from.
sudo lvcreate -L 40G -n video-files ubuntu-vg
format:
sudo mkfs -t ext4 /dev/mapper/ubuntu--vg-video--files
mount:
mkdir /video
sudo mount /dev/mapper/ubuntu--vg-video--files  /video
ensure its always mounted:
sudo vi /etc/fstab
/dev/mapper/ubuntu--vg-video--files /video ext4 defaults 0 0
Video Format Info
The video encapsulation format used by all Reolink cameras is MP4. So the video's format we download via Reolink Client or Reolink app is MP4. But when using USB disk to backup videos directly from Reolink NVR, you could choose either H.264 or MP4 video files. - the compression type is H264
The player
HTTP Live Streaming (HLS) is a widely used protocol developed by Apple that will serve your stream better to a multitude of devices. HLS will take your stream, break it into chunks, and serve it via a specialized playlist


