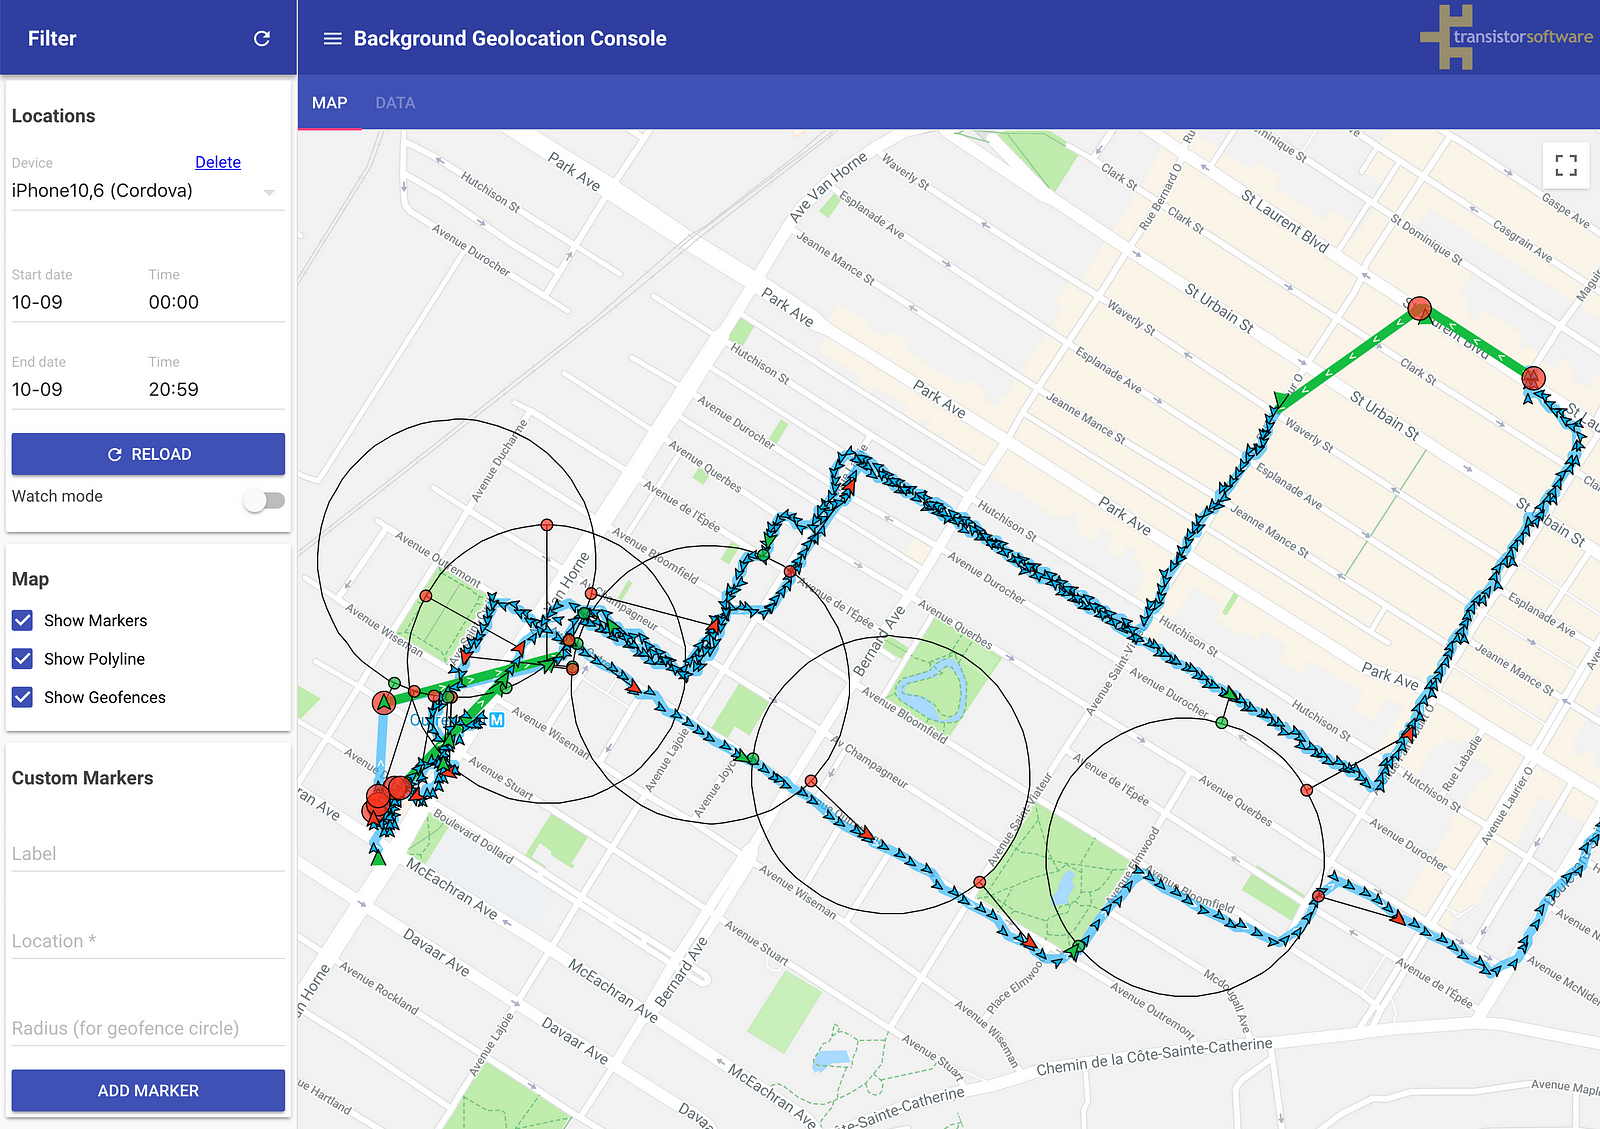
A simple Node server & web app with SQLite database for field-testing & analysis of the Background Geolocation plugin.
You may read the news about this application in our article on Medium.
You must have npm installed on your computer. From the root project directory run these commands from the command line:
npm installnpm run serverIf you are in an environment that supports opening a web browser, a browser window will automatically launch the front-end web app at the end of the server startup procedure.
The Background Geolocation Sample App is perfect for use with this web-application. To configure the app, determine your IP address and pick a unique console username, then simply edit Settings->url and set it to http://<your.ip.ad.dress>:9000/locations/<your-console-username>.
You may also want to configure Settings->autoSync to false while out field-testing as well, so that the app doesn't try syncing each recorded location to a possibly unreachable server running on your localhost. Once you return after a test and you're back on your office Wifi, click the [Sync] button on the Settings screen to upload the cached locations to the Background Geolocation Console server.
As you integrate the background-geolocation plugin with your app, you may find it useful to post locations to the test console to verify your integration.
If you want to post to the tracking console in your own app, it’s very easy: The plugin contains a helper method #transistorTrackerParams to compose a params config suitable for consumption by the server. It's up to you to provide the device plugin instance (Cordova: cordova-plugin-device, React Native: react-native-device-info, Flutter
//
// Configure the BackgroundGeolocation plugin to post to this console
// after modifying the #url / #params below, visit in your browser:
// http://<your.ip.ad.dress>:9000
//

let username = 'your-custom-username';
BackgroundGeolocation.ready({
  url: 'http://<your-ip-address>:9000/locations',
  params: BackgroundGeolocation.transistorTrackerParams(device) // <-- device plugin instance.
}, (state) => {
  BackgroundGeolocation.start();
});Map deviceParams = await Config.deviceParams;
BackgroundGeolocation.ready(Config(
url: 'http://<your.ip.address>:9000/locations',
params: deviceParams
));You can deploy easily the app on Heroku by pushing the code to your heroku git repository.
Before this, you will need to create 2 environment variables (either in the heroku dashboard, or by executing heroku config:set <VARIABLE_NAME>=<VARIABLE_VALUE>) :
NPM_CONFIG_PRODUCTION = false: It will tell heroku to installdevDependencies(and not onlydependencies), required to build browserify'sbundle.min.jsfileGOOGLE_MAPS_API_KEY = <PUT YOUR KEY HERE>: A Google Maps API v3 allowed for your heroku domain (see https://console.developers.google.com)- Optionally,
DB_CONNECTION_URL = postgres://<username>:<password>@<hostname>:<port>/<dbname>if you want to persist locations into a postgresql db (instead of a sqlite db which will be deleted after every heroku shutdown)
And to reference heroku/nodejs buildpack (either in the heroku dashboard, or by executing heroku buildpacks:add --index 1 heroku/nodejs)