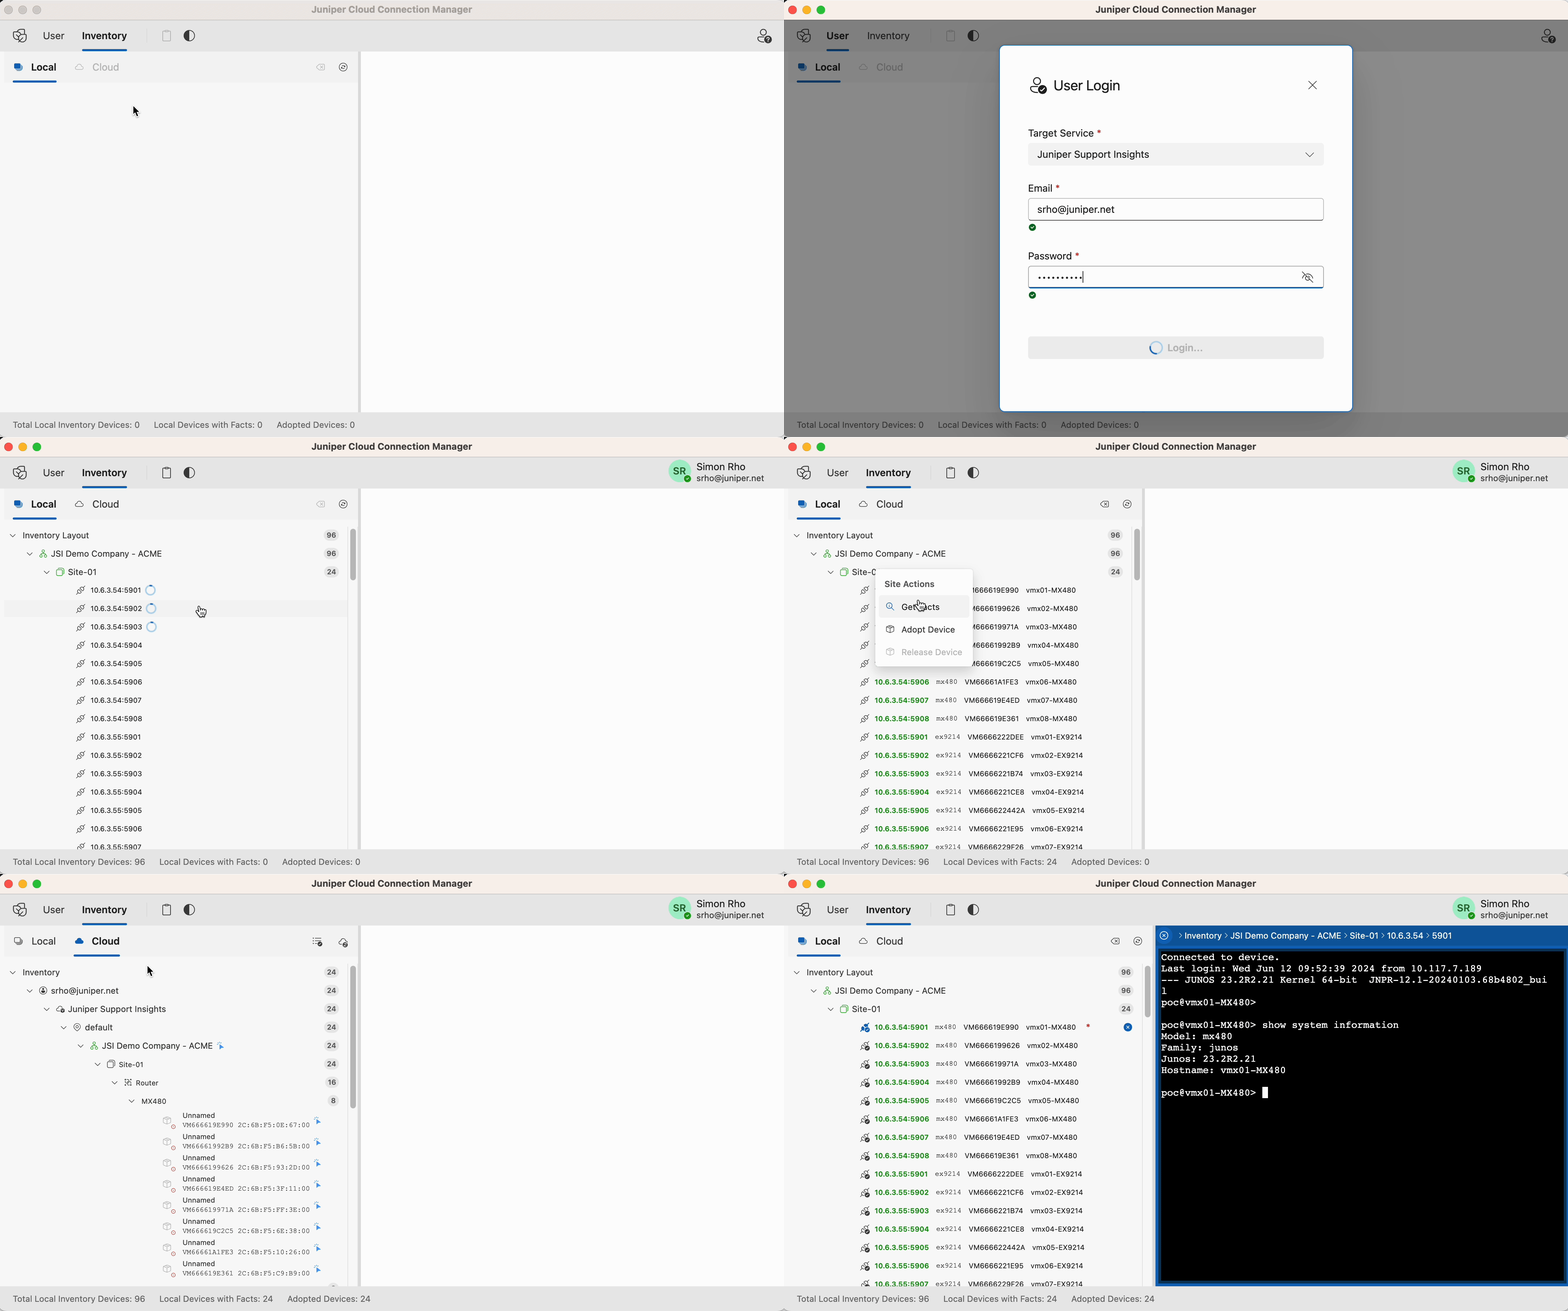
Juniper Cloud Connection Manager (JCCM) is a standalone application designed to automate the adoption of multiple Juniper network devices to various Juniper cloud services such as JSI, MIST, and Routing Assurance. JCCM streamlines network management, ensuring seamless integration and efficient control of your devices.
- Automated Device Adoption: Simplifies the process of adopting Juniper network devices to Juniper cloud services.
- User Login and Authentication: Secure user login process to ensure authorized access.
- Import Inventory: Import and manage your network device inventory with ease.
- Get Facts: Retrieve detailed information about your network devices, including hardware model, hostname, serial number, status, and more.
- Adopt Devices: Seamlessly adopt devices to desired cloud services with a few clicks.
- Release Devices: Easily release devices from cloud services when needed, ensuring flexible management.
- Integrated SSH Terminal: Optionally open an SSH terminal within the same window for direct device management.
- User-Friendly Interface: Intuitive UI designed to enhance user experience and simplify network cloud attachment tasks.
- Multi-Platform Support: Available for both Intel-based and ARM-based macOS systems and Intel-based Windows systems.
- Social Login Support: Google Social SSO Login is currently in the tech preview stage.
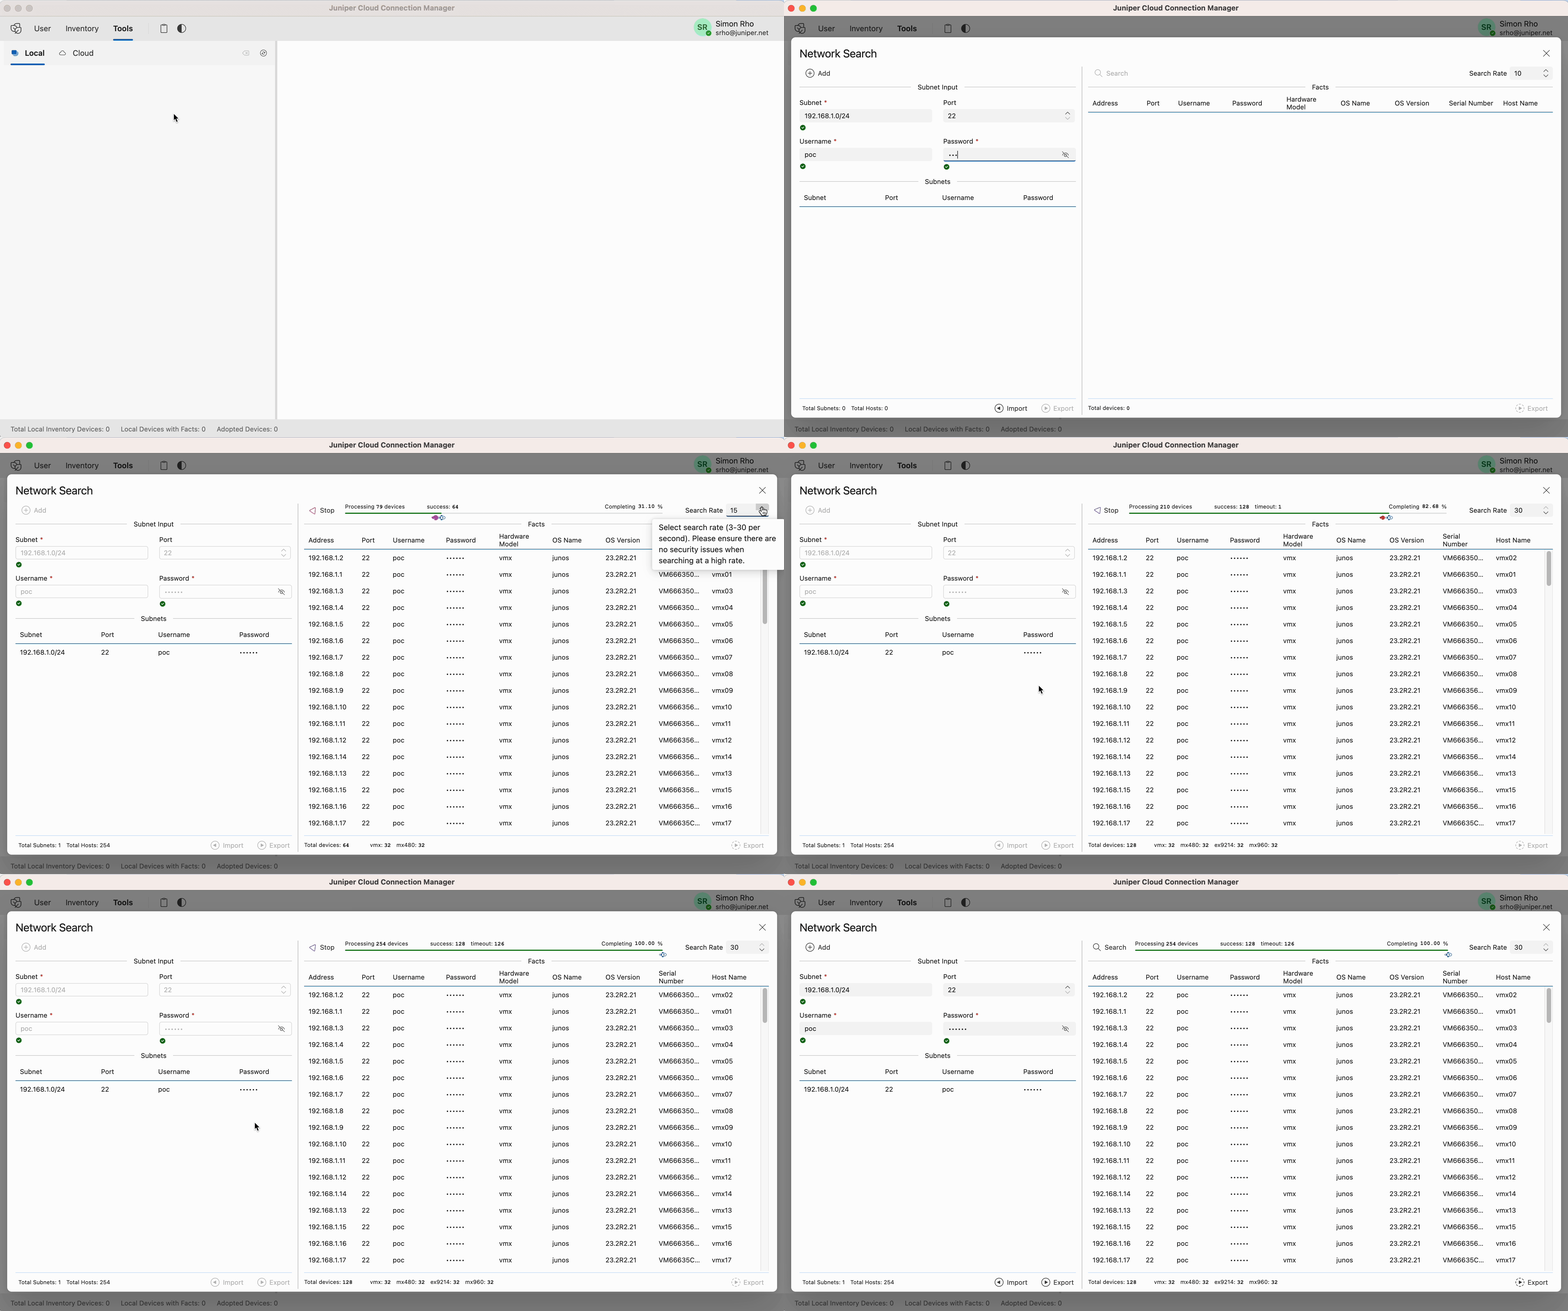
- Network Search Support: Network subnet search to generate an inventory file is in the tech preview stage.
-
Download the appropriate installer for your system from the GitHub releases page:
- For Intel-based macOS: Download jccm-darwin-x64.dmg
- For ARM-based macOS: Download jccm-darwin-arm64.dmg
- For Intel-based Windows: Download jccm-windows-x64-setup.exe
-
Install the application:
- Double-click the downloaded
.dmgfile. - Drag and drop the JCCM application to the
Applicationsfolder.
- Double-click the downloaded
-
Resolve macOS Gatekeeper issue:
- macOS Gatekeeper might prevent the application from running, showing an error that the app is "damaged and can’t be opened." This happens because the app is from an unidentified developer.
- To fix this, open the terminal and run the following command to remove the quarantine attribute:
xattr -cr /Applications/Juniper\ Cloud\ Connection\ Manager.app
-
Run the JCCM application from the
Applicationsfolder.
To ensure proper inventory management, the Excel file must include the following mandatory fields in the headers:
- organization: Name of the organization
- site: Site location of the device
- address: Address of the site
- port: Port number for the SSH server in the device
- username: Username for device access
- password: Password for device access
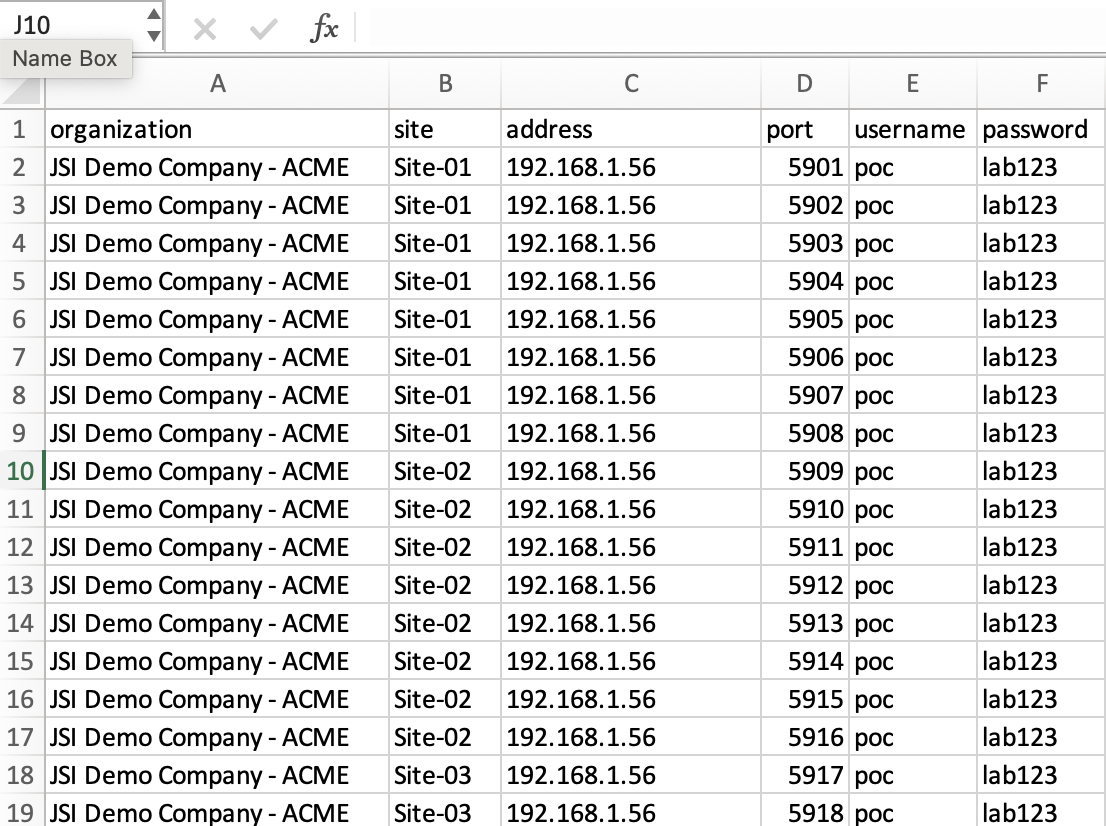
Here is an example of how the device inventory file should be formatted:
| organization | site        | address         | port | username | password  |
|--------------|-------------|-----------------|------|----------|-----------|
| Org1         | Site1       | 192.168.1.1     | 22   | admin    | password1 |
| Org2         | Site2       | 10.0.0.2        | 22   | user     | password2 |
| Org3         | Headquarters| 172.16.0.1      | 22   | root     | rootpass  |
Below is a visual example of how the inventory file should look:
- Create a new Excel file: Open Excel and create a new spreadsheet.
- Add headers: Add the headers
organization,site,address,port,username, andpasswordin the first row. - Fill in the details: For each device, fill in the details under the appropriate headers.
- Save the file: Save the file in
.xlsxformat.
-
User Login:
- Open the JCCM application.
- Enter your credentials and log in to the system.
-
Import Inventory:
- Navigate to the "Inventory" section.
- Click on "Import Inventory" and upload your device inventory file. Supported excel file formats - xlsx.
-
Get Facts:
- Select the devices from your inventory.
- Click on "Get Facts" to retrieve detailed information about the selected devices, including configurations, health status, and performance metrics.
-
Adopt Devices:
- Choose the devices you wish to adopt.
- Right-click on the device, site, or organization and select "Adopt Devices" to begin the adoption process.
-
Release Devices:
- Select the devices you want to release.
- Click on "Release Devices" to remove them from the selected cloud services, ensuring they are no longer managed by JCCM.
-
Open SSH Terminal:
- Navigate to the "Terminal" section.
- Select a device and open an SSH terminal within the application window for direct management and troubleshooting.
Currently supported platforms:
- macOS (Intel x86_64 and ARM64)
- Windows (Intel x86_64)
This project is licensed under the MIT License. See the LICENSE file for more details.


