This is a simple Struts application which provides for an online supercar store which has some performance/code issues. The application can be built with Maven.

The application is based on a Struts front end deployed on Apache Tomcat, using a MySQL back end. MySql 5.7 is recommended.
The app uses a MySQL DB in the backend, the default schema is expected to be the "supercars" schema, and MySQL running on the same host as the application. The database build scripts are in "src/main/resources/db"
There are three scripts you will need to run in order:
- mysql-01.sql
- mysql-02.sql
- mysql-03.sql
The datasouce is defined in context.xml in src/webapp/META-INF
- Have Git installed and working
sudo yum install git - Use Git to obtain the WAR File code
sudo mkdir appdynamics sudo chown -R [your-user]:[your-user] /opt/appdynamics (if you are not executing as the root user) cd /opt/appdynamics git clone https://github.com/Appdynamics/DevNet-Labs.git - Install Java
- Run the below (may change based on your linux distribution)
sudo yum install java-1.8.0 (may vary based on your linux distro) - Check the Java Version
  java -version
  ===OUTPUT===
  openjdk version "1.8.0_265"
  OpenJDK Runtime Environment (build 1.8.0_265-b01)
  OpenJDK 64-Bit Server VM (build 25.265-b01, mixed mode)
- Run the below (may change based on your linux distribution)
- Install Tomcat
- We can download Apache tomcat 7 tar.gz either from its official Web site or using wget command from the terminal.
- Install wget command to directly download Tomcat on our host fromt the internet
sudo yum install wget (may vary based on your linux distro) - Install Tomcat
sudo wget https://downloads.apache.org/tomcat/tomcat-7/v7.0.106/bin/apache-tomcat-7.0.106.tar.gz - Extract Apache Tomcat 7 under the /usr/local/ folder
sudo mkdir /usr/local/apache sudo tar -zxpvf apache-tomcat-7.0.106.tar.gz -C /usr/local/apache cd /usr/local/apache sudo mv apache-tomcat-7.0.106 apache-tomcat-7 sudo chown -R [your-user]:[your-user] /usr/local/apache (if you are not executing as the root user) - Before starting the Tomcat Service let’s first set the required CATALINA_HOME environment variable using below commands :
  echo "export CATALINA_HOME='/usr/local/apache/apache-tomcat-7/'" >> ~/.bashrc
  source ~/.bashrc
- Run Tomcat
- By default no user or account is allowed to access Manager GUI Page and Admin Page. So to grant access to the users add the following lines in the file “/usr/local/apache/apache-tomcat-7/conf/tomcat-users.xml” at the end just above tag
Then add the below just above tag to create a User Admin Who can access manager and admin section both
sudo vi /usr/local/apache/apache-tomcat-7/conf/tomcat-users.xml<!-- User linuxtechi who can access only manager section --> <role rolename="manager-gui" /> <user username="manager" password="password" roles="manager-gui" /> <!-- User Admin Who can access manager and admin section both --> <role rolename="admin-gui" /> <user username="admin" password="password" roles="admin-gui" /> - Start Tomcat
/usr/local/apache/apache-tomcat-7/bin/startup.sh - Open Tomcat URL in the browser to verify its isntallation
Go to http://{ip-address-or-Hostname}:8080/
- By default no user or account is allowed to access Manager GUI Page and Admin Page. So to grant access to the users add the following lines in the file “/usr/local/apache/apache-tomcat-7/conf/tomcat-users.xml” at the end just above tag
- Install MySQL 5.7 Community Version
sudo yum install wget wget https://dev.mysql.com/get/mysql57-community-release-el7-9.noarch.rpm sudo rpm -ivh mysql57-community-release-el7-9.noarch.rpm sudo yum install mysql-server - Start the Service
sudo systemctl start mysqld - Verify the Service Status
service mysqld status ===OUTPUT=== Redirecting to /bin/systemctl status mysqld.service ● mysqld.service - MySQL Server Loaded: loaded (/usr/lib/systemd/system/mysqld.service; enabled; vendor preset: disabled) Active: active (running) since Mon 2020-09-28 13:02:28 UTC; 11s ago Docs: man:mysqld(8) http://dev.mysql.com/doc/refman/en/using-systemd.html Process: 2742 ExecStart=/usr/sbin/mysqld --daemonize --pid-file=/var/run/mysqld/mysqld.pid $MYSQLD_OPTS (code=exited, status=0/SUCCESS) Process: 2689 ExecStartPre=/usr/bin/mysqld_pre_systemd (code=exited, status=0/SUCCESS) Main PID: 2745 (mysqld) CGroup: /system.slice/mysqld.service └─2745 /usr/sbin/mysqld --daemonize --pid-file=/var/run/mysqld/mysqld.pid Sep 28 13:02:20 ip-172-31-0-231.eu-central-1.compute.internal systemd[1]: Starting MySQL Server... Sep 28 13:02:28 ip-172-31-0-231.eu-central-1.compute.internal systemd[1]: Started MySQL Server. - Secure MySQL
-During the installation process, a temporary password is generated for the MySQL root user. Locate it in the mysqld.log with this command:
Make note of the password, which you will need in the next step to secure the installation and where you will be forced to change it. -Execute the secure mysql installation tool
sudo grep 'temporary password' /var/log/mysqld.logEnter the following:mysql_secure_installationNew password: "Welcome1!" Remove anonymous users? n Disallow root login remotely? n Remove test database and access to it? n Reload privilege tables now? y
- Now we will run the Database Scripts, that create the Database Schema, Tables, and Data for our Appliation
- Navigate to our Script location
cd /opt/appdynamics/DevNet-Labs/applications/Supercar-Trader/src/main/resources/db - Run the following databse scripts
 mysql -u root -pWelcome1! < mysql-01.sql
 mysql -u root -pWelcome1! < mysql-02.sql
 mysql -u root -pWelcome1! < mysql-03.sql
-
Use the Tomcat Manager to deploy the war file
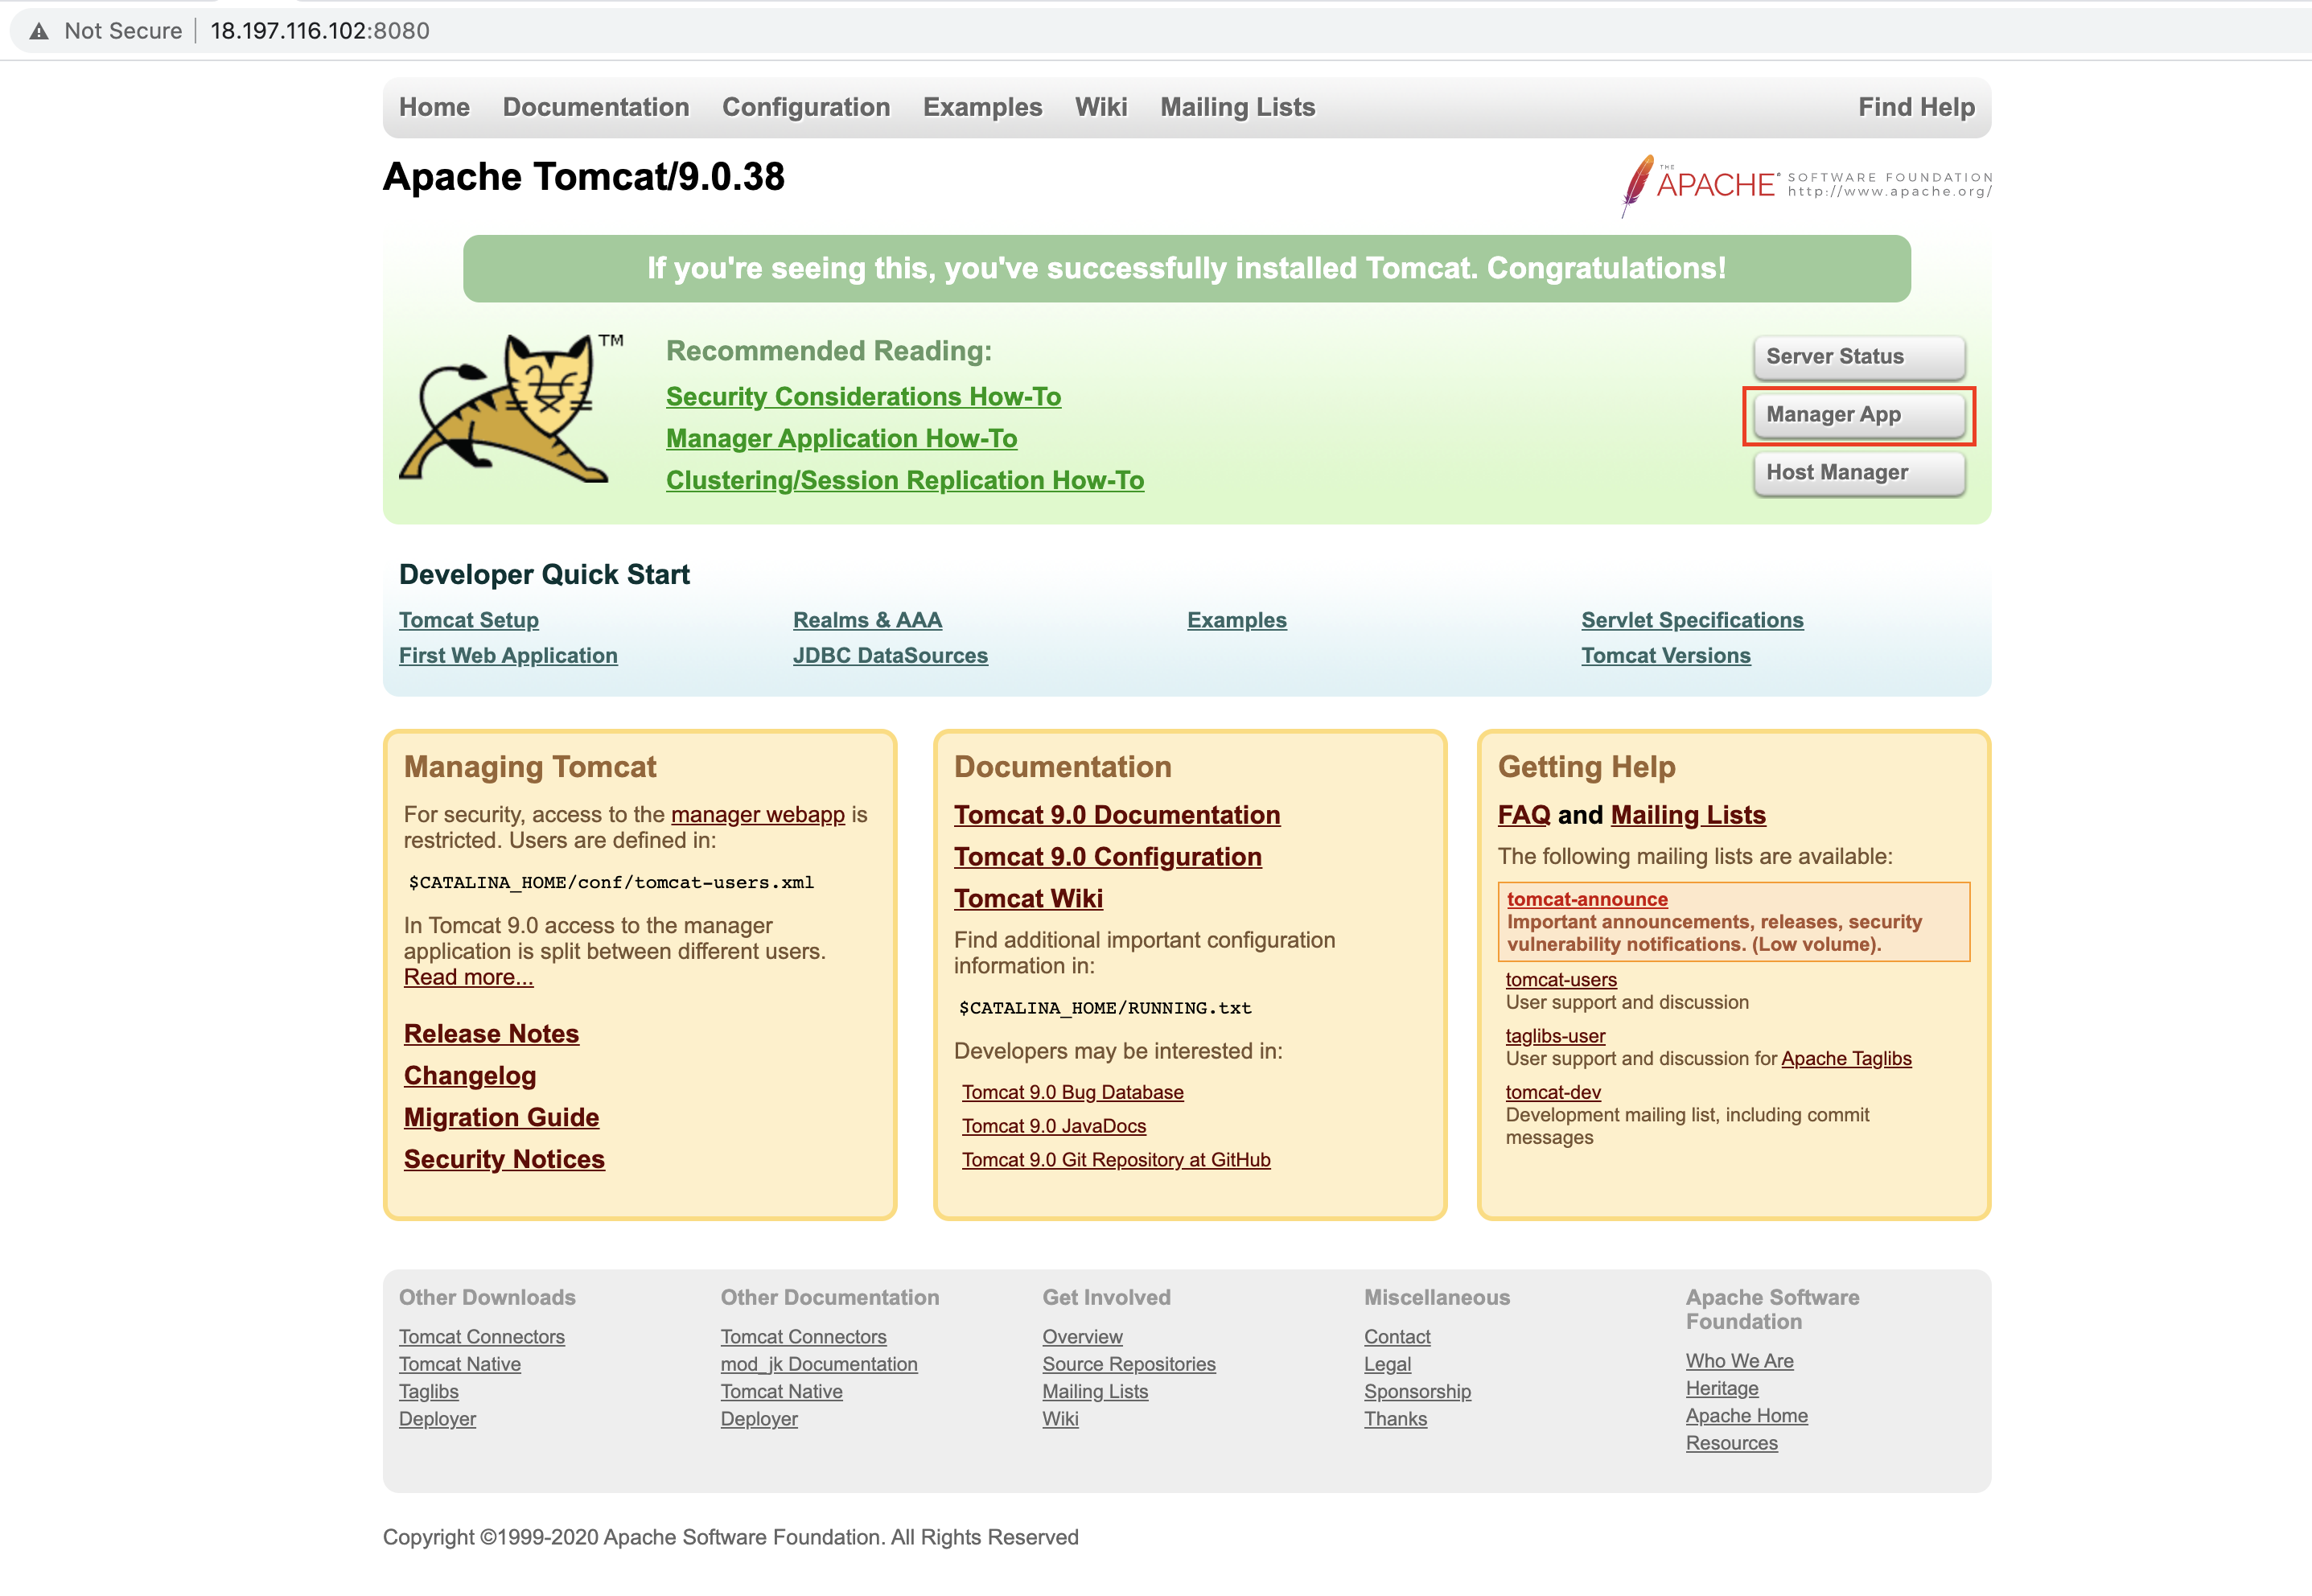
- Go to Tomcat GUI at http://{ip-address-or-Hostname}:8080/
- Click on Manager App button on the right where you'll be prompted to enter the Manager Credentails that we added in the “/usr/local/apache/apache-tomcat-7/conf/tomcat-users.xml” file
- To Deploy an Applicationn, You can either upload the WAR file through the Tomcat Manager web page or specify the path of the WAR file if it exists on Tomcat host
- Since we've built our WAR file and it already exists on the Server, we will use the second approach:
- Scroll
- Scroll Down to the "Deploy directory or WAR file located on server" Section
- Contect Path: Defines the URL that end users will access the application from. So we will add "/Supercar-Trader" where our application can be accessed from a URL like http://{ip-address-or-Hostname}:8080/Supercar-Trader
- WAR or Directory Path: THe path of WAR file we generated from the Maven Build, which should be located at "/opt/appdynamics/DevNet-Labs/applications/Supercar-Trader/Supercar-Trader.war"
- Click Deploy

-
Now the app is available on "http://{ip-address-or-Hostname}:8080/Supercar-Trader" on your Tomcat instance


If you will be proceeding to DevNet Labs, please note the below Differences:
- Start Tomcat Command: /usr/local/apache/apache-tomcat-7/bin/startup.sh instead of sudo systemctl start apache-tomcat-7.service
- Stop Tomcat Command: /usr/local/apache/apache-tomcat-7/bin/shutdown.sh instead of sudo systemctl stop apache-tomcat-7.service