Compose to create working TeamCity server with PostgreSQL and Agents
This configuration use only official images:
teamcity server, teamcity agent, postgres
Keep in mind, if you already have used this compose ver. 0.5.0 with TeamCity 2017.1.x you can not migrate your data (backups) into compose ver. 0.6.0 with latest TeamCity 2018.1.1, because JetBrains don't support import projects backups from previous major version. See: TeamCity Documentation. Instead you need to rerun your 0.5.0 compose with new teamcity-server (2018.1.1) and migrate data to new format. After this, you may make correct backup for compose 0.6.0 and upgrade to version without anon volumes.
Clone this repository or download the zip.
git clone https://github.com/Egregors/teamcity-docker-compose.git
First of all, you should set your Postgres username and password variables in env.example and rename env.example to .env
Don't push .env file in public repositories!
It's all. PostgreSQL already configured according to the JetBrains recommendations
To add HTTPs nginx-proxy with Let's Encrypt certificates (see https://github.com/JrCs/docker-letsencrypt-nginx-proxy-companion) just set your domain name and email in .env file:
POSTGRES_PASSWORD=mysecretpass
POSTGRES_USER=postgresuser

SERVER_URL=http://server:8111

# set your domain name and email!
VIRTUAL_HOST=ci.example.com
LETSENCRYPT_HOST=ci.example.com
LETSENCRYPT_EMAIL=username@example.ru
If you don't need HTTPs support – remove nginx, nginx-proxy and letsencrypt-nginx-proxy-companion services
from your docker-compose file (like in docker-compose-without-ssl.yml)
Next, build the images:
cd teamcity-docker-compose
docker-compose build
Now you can start up the service and continue configuring settings in Web Interface:
docker-compose up
After initialisation Web Interface will be available on https://yourdockerhost/ (with HTTPs support) or http://yourdockerhost:8111/
Open https://yourdockerhost/ or http://yourdockerhost:8111/
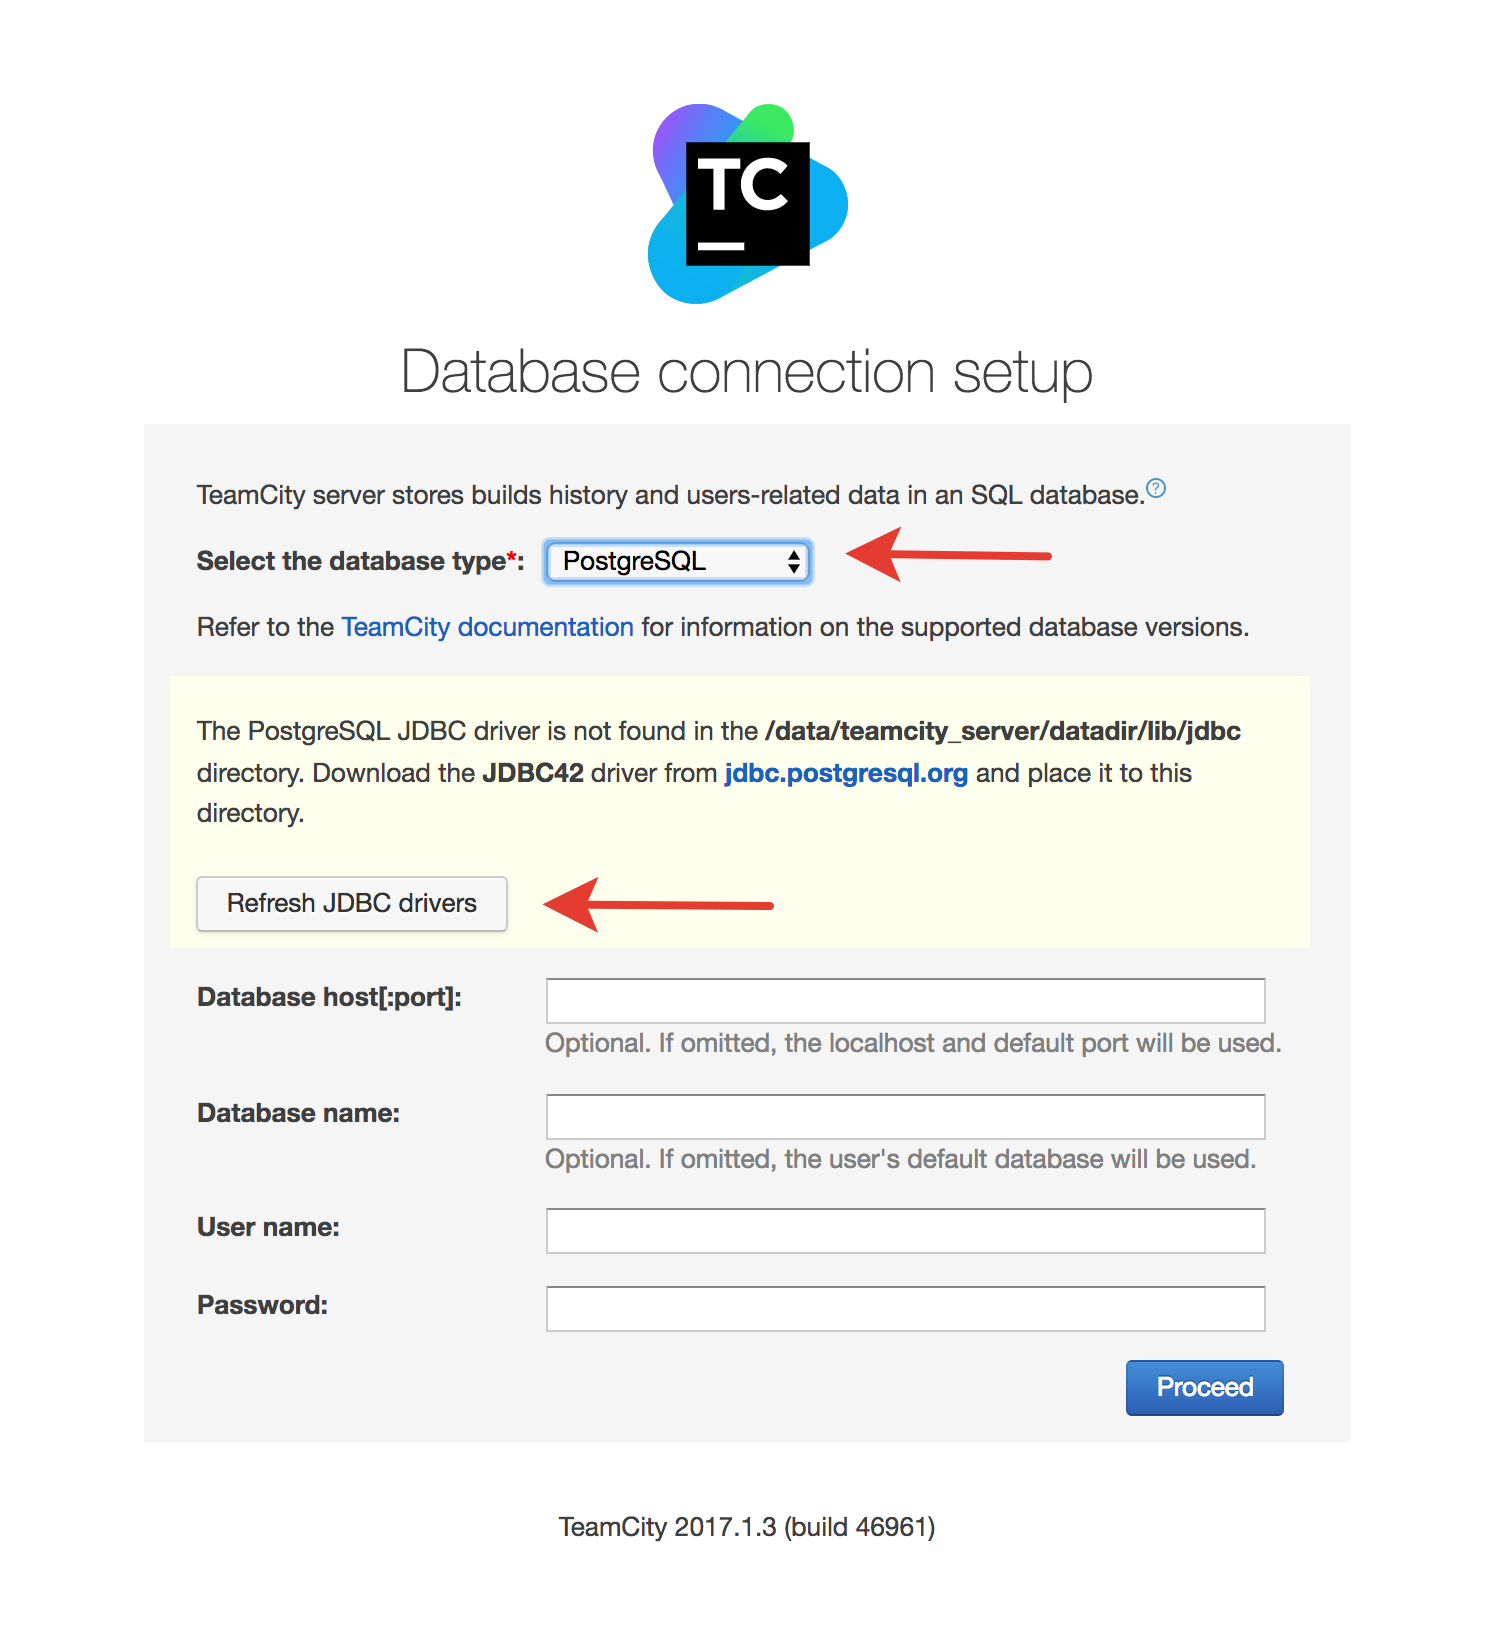
Set PostgreSQL as database type, upload JDBC driver into
/opt/teamcity/data/lib/jdbc/ then click «Refresh JDBC drivers»
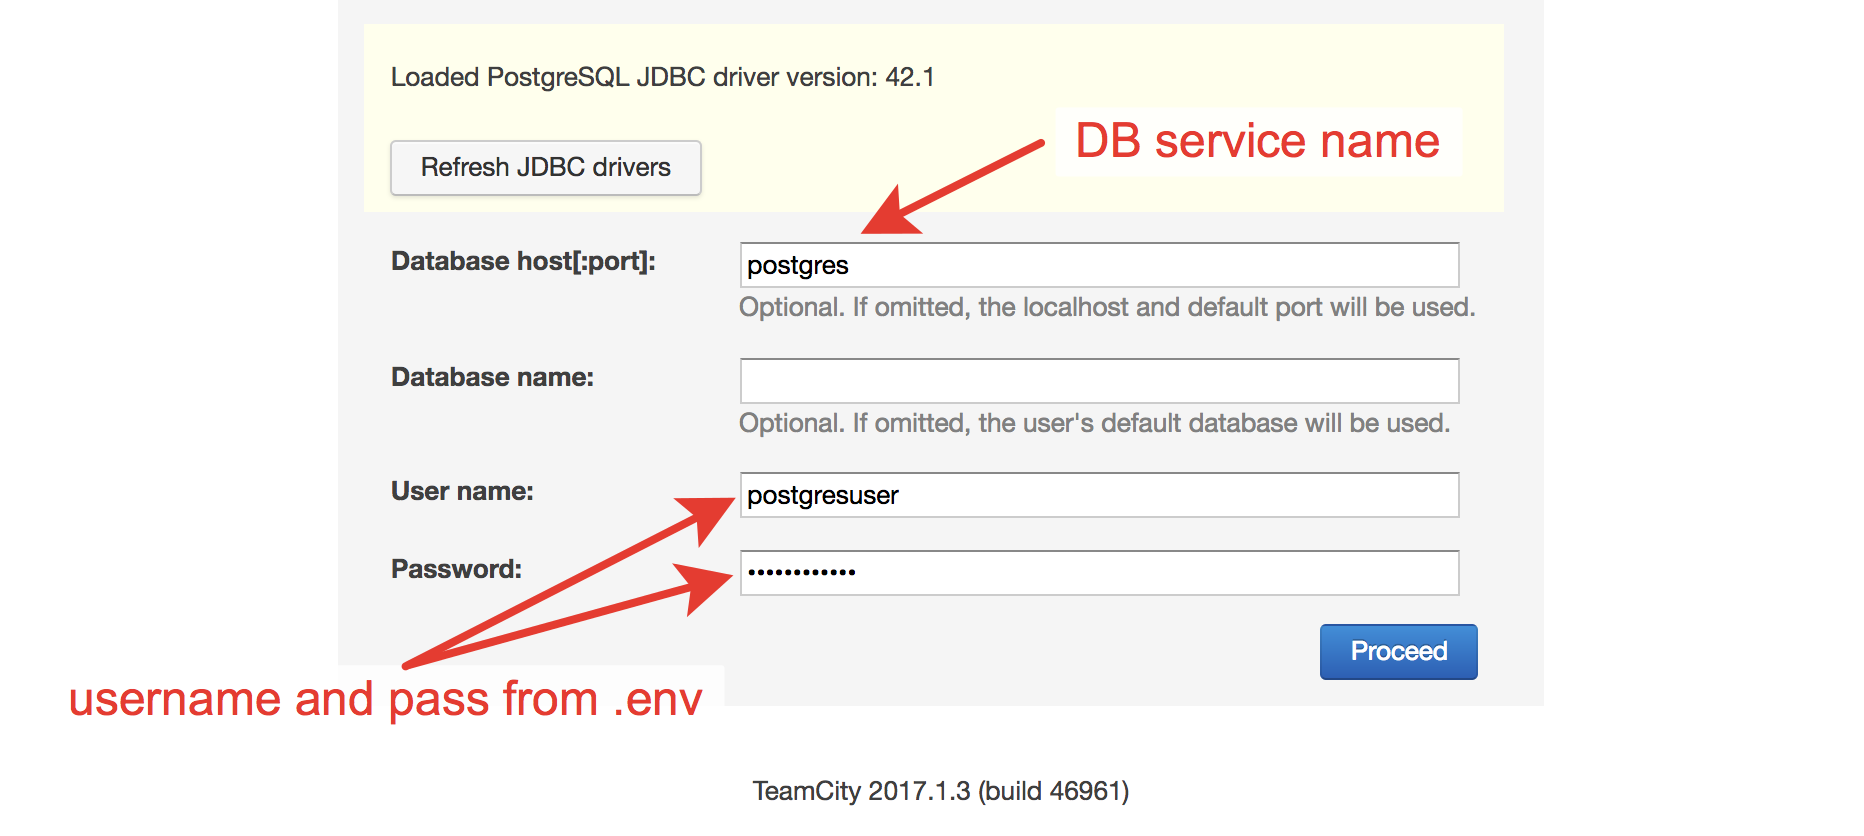
Configure DB connection:
Authorize your Agent:
Done, TeamCity basically ready to work.
Scaling you workers (agents) supported as well. Just use docker-compose scale command:
docker-compose scale teamcity-agent=3
Keep in mind: currently, agents are stateless
You may use JetBrains way to backup or restore your server
If you see a notice that a new version is available, you may update your TeamCity that way:
# build new version
docker-compose build --pull --no-cache

# stop and remove old containers
docker-compose stop
docker-compose rm

# create and up new containers
docker-compose up -d
After an update, you need to reauthorize your agents.
Sometimes, during update you may get «maintenance is required» message instead of login page.
It's ok! To login in a maintenance mode you need to enter an authentication token. You may find it in the logs:
docker-compose logs -f
Try to find something like this:
teamcity-server_1 | [TeamCity] Administrator can login from web UI using authentication token: 8755994969038184734
You can use our preconfigured custom agents with already installed necessary dependencies
Agent info
Run server + agent:
docker-compose -f docker-compose-custom-agent.yml build
docker-compose -f docker-compose-custom-agent.yml up -d
Agent info
Bug reports, bug fixes and new features are always welcome. Please open issues and submit pull requests for any new code.


