This tutorial is loosely based on the Airflow tutorial in the official documentation. It will walk you through the basics of setting up Airflow and creating an Airflow workflow. This tutorial was published on the blog of GoDataDriven.
You can skip this section if Airflow is already set up. Make sure that you can run airflow commands, know where to put your DAGs and have access to the web UI.
Airflow is installable with pip via a simple pip install apache-airflow.
Either use a separate python virtual environment or install it in your default python environment.
To use the conda virtual environment as defined in environment.yml in this git-repo:
- Install miniconda.
- Make sure that conda is on your path:
$ which conda
~/miniconda2/bin/conda
- Create the virtual environment from
environment.yml:
$ conda env create -f environment.yml
- Activate the virtual environment:
$ source activate airflow-tutorial
You should now have an (almost) working Airflow installation.
Alternatively, install Airflow yourself by running:
$ pip install apache-airflow
Airflow used to be packaged as airflow but is packaged as apache-airflow since version 1.8.1.
Make sure that you install any extra packages with the right Python package: e.g. use pip install apache-airflow[dask] if you've installed apache-airflow and do not use pip install airflow[dask].
Leaving out the prefix apache- will install an old version of Airflow next to your current version, leading to a world of hurt.
You may run into problems if you don't have the right binaries or Python packages installed for certain backends or operators.
When specifying support for e.g. PostgreSQL when installing extra Airflow packages, make sure the database is installed; do a brew install postgresql or apt-get install postgresql before the pip install apache-airflow[postgres].
Similarly, when running into HiveOperator errors, do a pip install apache-airflow[hive] and make sure you can use Hive.
Before you can use Airflow you have to initialize its database. The database contains information about historical & running workflows, connections to external data sources, user management, etc. Once the database is set up, Airflow's UI can be accessed by running a web server and workflows can be started.
The default database is a SQLite database, which is fine for this tutorial. In a production setting you'll probably be using something like MySQL or PostgreSQL. You'll probably want to back it up as this database stores the state of everything related to Airflow.
Airflow will use the directory set in the environment variable AIRFLOW_HOME to store its configuration and our SQlite database.
This directory will be used after your first Airflow command.
If you don't set the environment variable AIRFLOW_HOME, Airflow will create the directory ~/airflow/ to put its files in.
Set environment variable AIRFLOW_HOME to e.g. your current directory $(pwd):
# change the default location ~/airflow if you want:
$ export AIRFLOW_HOME="$(pwd)"
or any other suitable directory.
Next, initialize the database:
$ airflow initdb
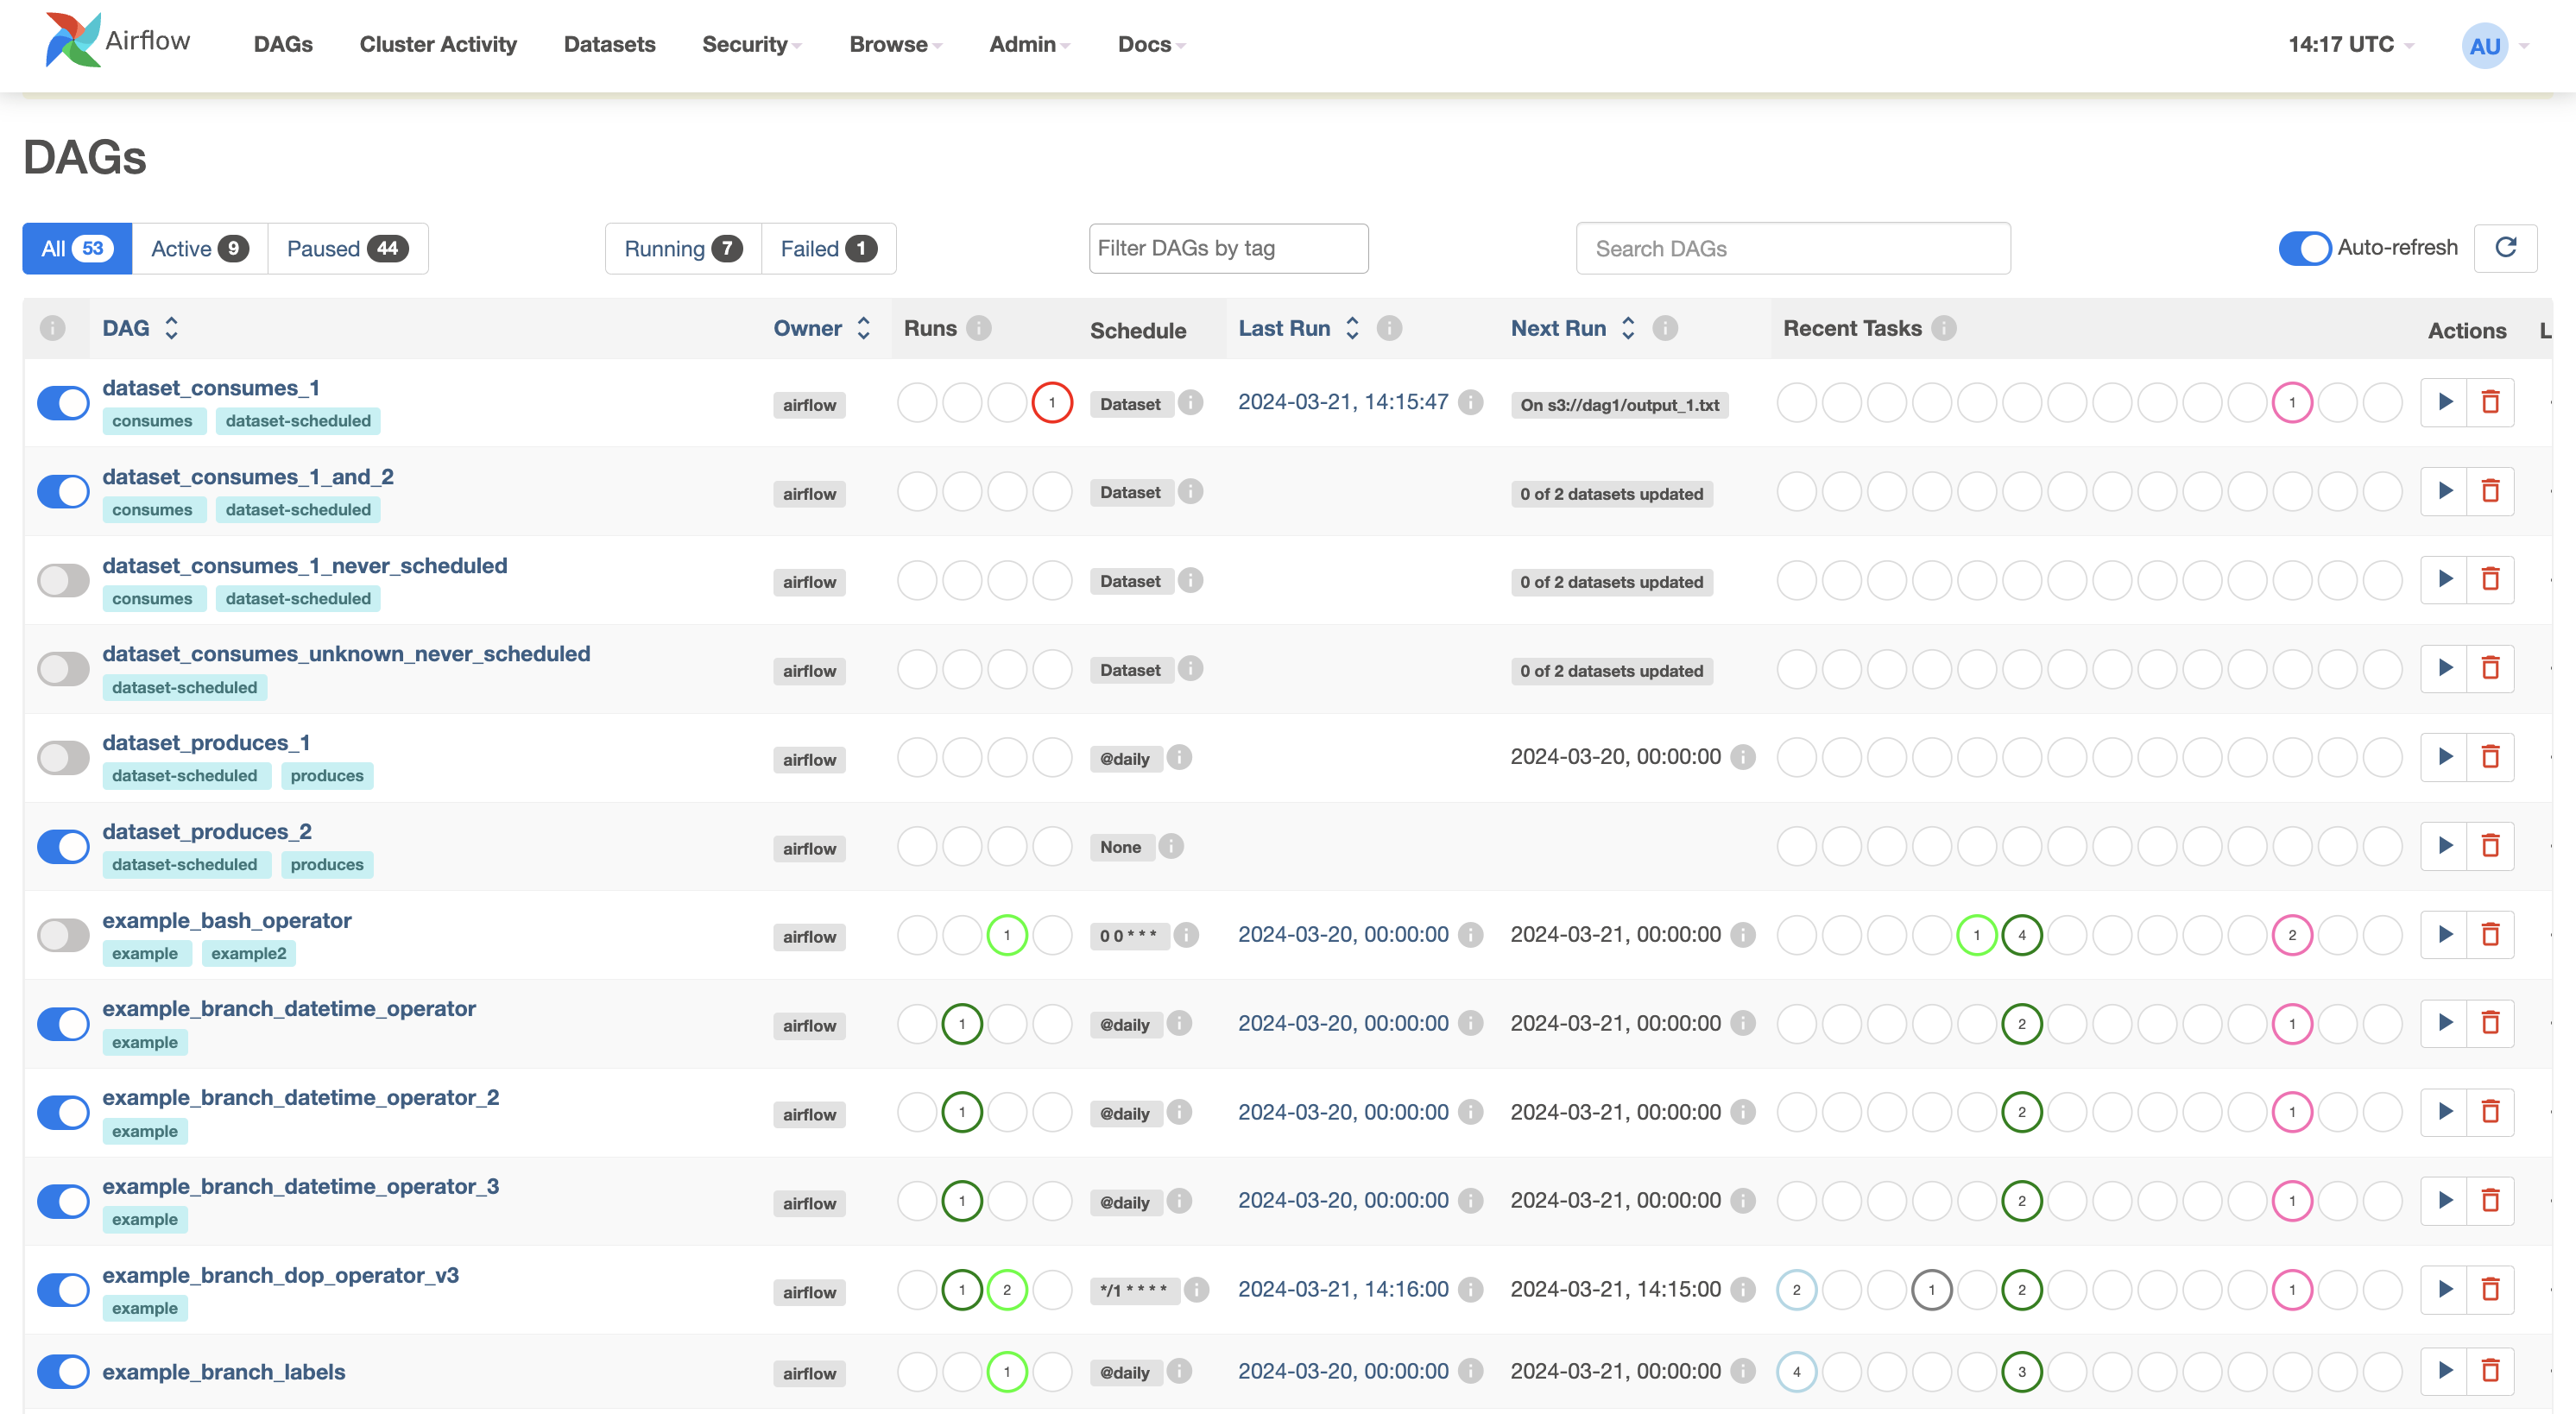
Now start the web server and go to localhost:8080 to check out the UI:
$ airflow webserver --port 8080
It should look something like this:
With the web server running workflows can be started from a new terminal window.
Open a new terminal, activate the virtual environment and set the environment variable AIRFLOW_HOME for this terminal as well:
$ source activate airflow-tutorial
$ export AIRFLOW_HOME="$(pwd)"
Make sure that you're an in the same directory as before when using $(pwd).
Run a supplied example:
$ airflow run example_bash_operator runme_0 2017-07-01
And check in the web UI that it has run by going to Browse -> Task Instances.
This concludes all the setting up that you need for this tutorial.
- Both Python 2 and 3 are be supported by Airflow.
However, some of the lesser used parts (e.g. operators in
contrib) might not support Python 3. - For more information on configuration check the sections on Configuration and Security of the Airflow documentation.
- Check the Airflow repository for
upstartandsystemdtemplates. - Airflow logs extensively, so pick your log folder carefully.
- Set the timezone of your production machine to UTC: Airflow assumes it's UTC.
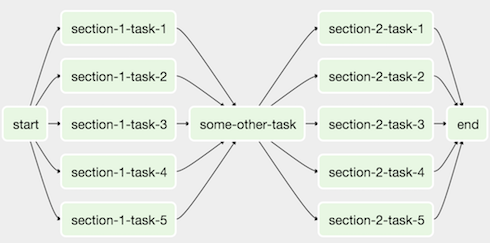
We'll create a workflow by specifying actions as a Directed Acyclic Graph (DAG) in Python. The tasks of a workflow make up a Graph; the graph is Directed because the tasks are ordered; and we don't want to get stuck in an eternal loop so the graph also has to be Acyclic.
The figure below shows an example of a DAG:
The DAG of this tutorial is a bit easier. It will consist of the following tasks:
- print
'hello' - wait 5 seconds
- print
'world
and we'll plan daily execution of this workflow.
Go to the folder that you've designated to be your AIRFLOW_HOME and find the DAGs folder located in subfolder dags/ (if you cannot find, check the setting dags_folder in $AIRFLOW_HOME/airflow.cfg).
Create a Python file with the name airflow_tutorial.py that will contain your DAG.
Your workflow will automatically be picked up and scheduled to run.
First we'll configure settings that are shared by all our tasks. Settings for tasks can be passed as arguments when creating them, but we can also pass a dictionary with default values to the DAG. This allows us to share default arguments for all the tasks in our DAG is the best place to set e.g. the owner and start date of our DAG.
Add the following import and dictionary to airflow_tutorial.py to specify the owner, start time, and retry settings that are shared by our tasks:
import datetime as dt

default_args = {
    'owner': 'me',
    'start_date': dt.datetime(2017, 6, 1),
    'retries': 1,
    'retry_delay': dt.timedelta(minutes=5),
}
These settings tell Airflow that this workflow is owned by 'me', that the workflow is valid since June 1st of 2017, it should not send emails and it is allowed to retry the workflow once if it fails with a delay of 5 minutes.
Other common default arguments are email settings on failure and the end time.
We'll now create a DAG object that will contain our tasks.
Name it airflow_tutorial_v01 and pass default_args:
from airflow import DAG

with DAG('airflow_tutorial_v01',
         default_args=default_args,
         schedule_interval='0 * * * *',
         ) as dag:
With schedule_interval='0 * * * *' we've specified a run at every hour 0; the DAG will run each day at 00:00.
See crontab.guru for help deciphering cron schedule expressions.
Alternatively, you can use strings like '@daily' and '@hourly'.
We've used a context manager to create a DAG (new since 1.8).
All the tasks for the DAG should be indented to indicate that they are part of this DAG.
Without this context manager you'd have to set the dag parameter for each of your tasks.
Airflow will generate DAG runs from the start_date with the specified schedule_interval.
Once a DAG is active, Airflow continuously checks in the database if all the DAG runs have successfully ran since the start_date.
Any missing DAG runs are automatically scheduled.
When you initialize on 2016-01-04 a DAG with a start_date at 2016-01-01 and a daily schedule_interval, Airflow will schedule DAG runs for all the days between 2016-01-01 and 2016-01-04.
A run starts after the time for the run has passed.
The time for which the workflow runs is called the execution_date.
The daily workflow for 2016-06-02 runs after 2016-06-02 23:59 and the hourly workflow for 2016-07-03 01:00 starts after 2016-07-03 01:59.
From the ETL viewpoint this makes sense: you can only process the daily data for a day after it has passed.
This can, however, ask for some juggling with date for other workflows.
For Machine Learning models you may want to use all the data up to a given date, you'll have to add the schedule_interval to your execution_date somewhere in the workflow logic.
Because Airflow saves all the (scheduled) DAG runs in its database, you should not change the start_date and schedule_interval of a DAG.
Instead, up the version number of the DAG (e.g. airflow_tutorial_v02) and avoid running unnecessary tasks by using the web interface or command line tools
Timezones and especially daylight savings can mean trouble when scheduling things, so keep your Airflow machine in UTC. You don't want to skip an hour because daylight savings kicks in (or out).
Tasks are represented by operators that either perform an action, transfer data, or sense if something has been done. Examples of actions are running a bash script or calling a Python function; of transfers are copying tables between databases or uploading a file; and of sensors are checking if a file exists or data has been added to a database.
We'll create a workflow consisting of three tasks: we'll print 'hello', wait for 10 seconds and finally print 'world'.
The first two are done with the BashOperator and the latter with the PythonOperator.
Give each operator an unique task ID and something to do:
    from airflow.operators.bash_operator import BashOperator
    from airflow.operators.python_operator import PythonOperator

    def print_world():
        print('world')

    print_hello = BashOperator(task_id='print_hello',
                               bash_command='echo "hello"')
    sleep = BashOperator(task_id='sleep',
                         bash_command='sleep 5')
    print_world = PythonOperator(task_id='print_world',
                                 python_callable=print_world)
Note how we can pass bash commands in the BashOperator and that the PythonOperator asks for a Python function that can be called.
Dependencies in tasks are added by setting other actions as upstream (or downstream).
Link the operations in a chain so that sleep will be run after print_hello and is followed by print_world; print_hello -> sleep -> print_world:
print_hello >> sleep >> print_world
After rearranging the code your final DAG should look something like:
import datetime as dt

from airflow import DAG
from airflow.operators.bash_operator import BashOperator
from airflow.operators.python_operator import PythonOperator


def print_world():
    print('world')


default_args = {
    'owner': 'me',
    'start_date': dt.datetime(2017, 6, 1),
    'retries': 1,
    'retry_delay': dt.timedelta(minutes=5),
}


with DAG('airflow_tutorial_v01',
         default_args=default_args,
         schedule_interval='0 * * * *',
         ) as dag:

    print_hello = BashOperator(task_id='print_hello',
                               bash_command='echo "hello"')
    sleep = BashOperator(task_id='sleep',
                         bash_command='sleep 5')
    print_world = PythonOperator(task_id='print_world',
                                 python_callable=print_world)


print_hello >> sleep >> print_world
First check that DAG file contains valid Python code by executing the file with Python:
$ python airflow_tutorial.py
You can manually test a single task for a given execution_date with airflow test:
$ airflow test airflow_tutorial_v01 print_world 2017-07-01
This runs the task locally as if it was for 2017-07-01, ignoring other tasks and without communicating to the database.
Now that you're confident that your dag works, let's set it to run automatically! To do so, the scheduler needs to be turned on; the scheduler monitors all tasks and all DAGs and triggers the task instances whose dependencies have been met. Open a new terminal, activate the virtual environment and set the environment variable AIRFLOW_HOME for this terminal, and type
$ airflow schedulerOnce the scheduler is up and running, refresh the DAGs page in the web UI. You should see airflow_tutorial_v01 in the list of DAGs with an on/off switch next to it. Turn on the DAG in the web UI and sit back while Airflow starts backfilling the dag runs!
- Make your DAGs idempotent: rerunning them should give the same results.
- Use the the cron notation for
schedule_intervalinstead of@dailyand@hourly.@dailyand@hourlyalways run after respectively midnight and the full hour, regardless of the hour/minute specified. - Manage your connections and secrets with the Connections and/or Variables.
You now know the basics of setting up Airflow, creating a DAG and turning it on; time to go deeper!
- Change the interval to every 30 minutes.
- Use a sensor to add a delay of 5 minutes before starting.
- Implement templating for the
BashOperator: print theexecution_dateinstead of'hello'(check out the original tutorial and the example DAG). - Implement templating for the
PythonOperator: print theexecution_datewith one hour added in the functionprint_world()(check out the documentation of thePythonOperator).

