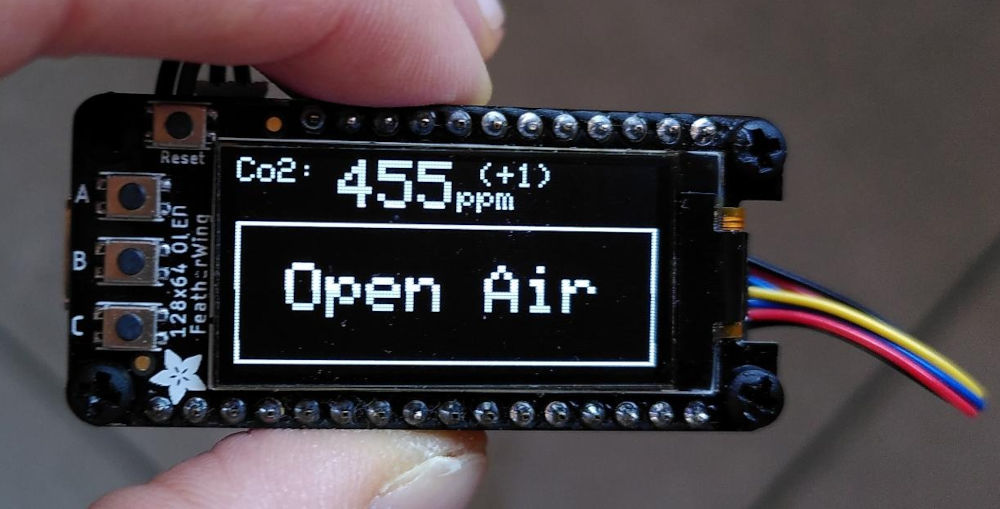
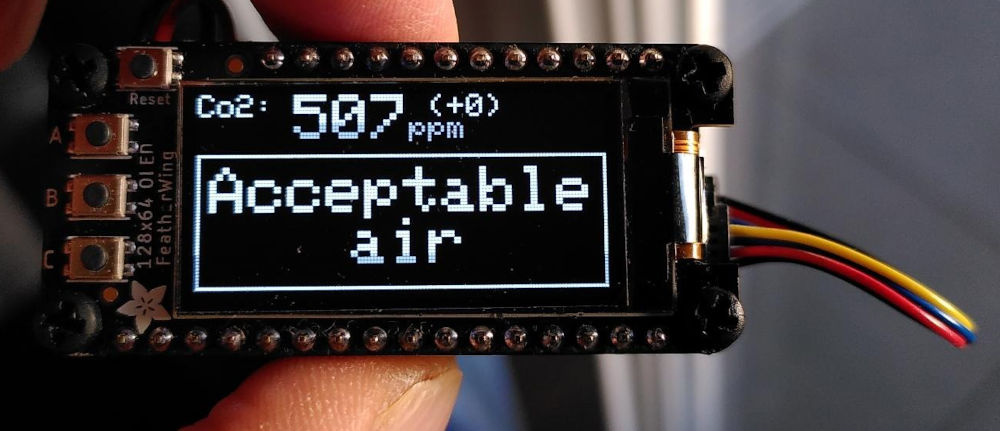
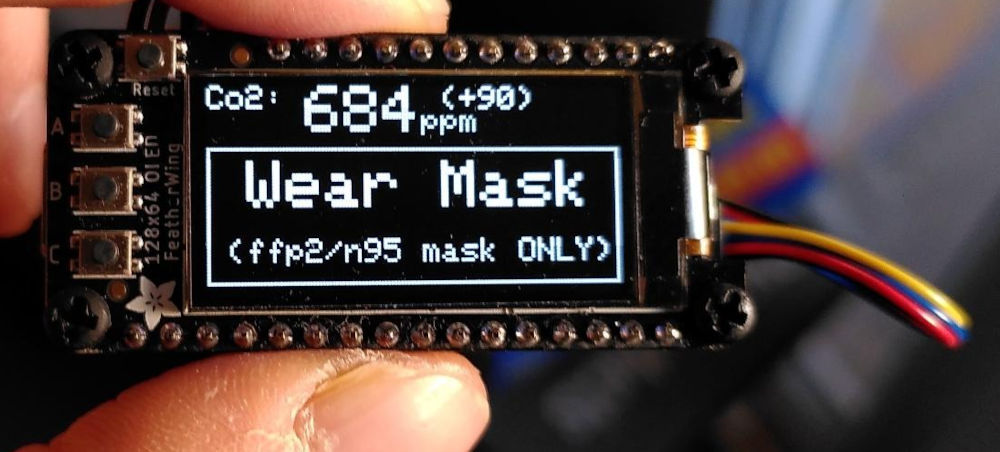
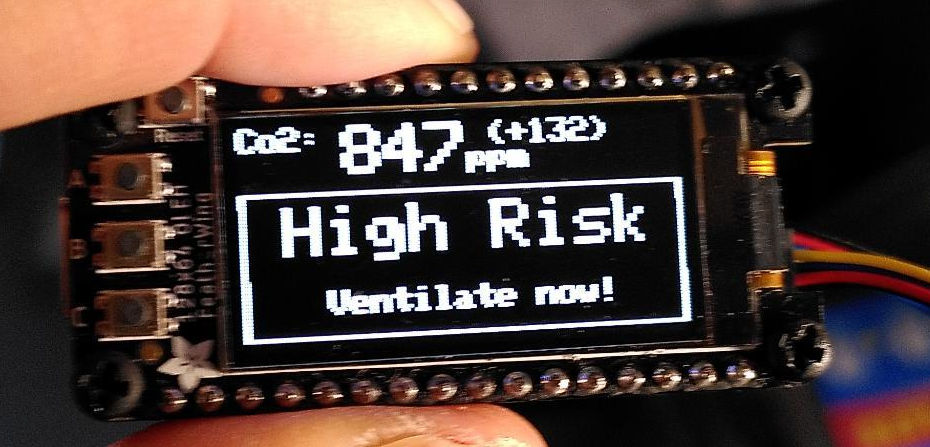
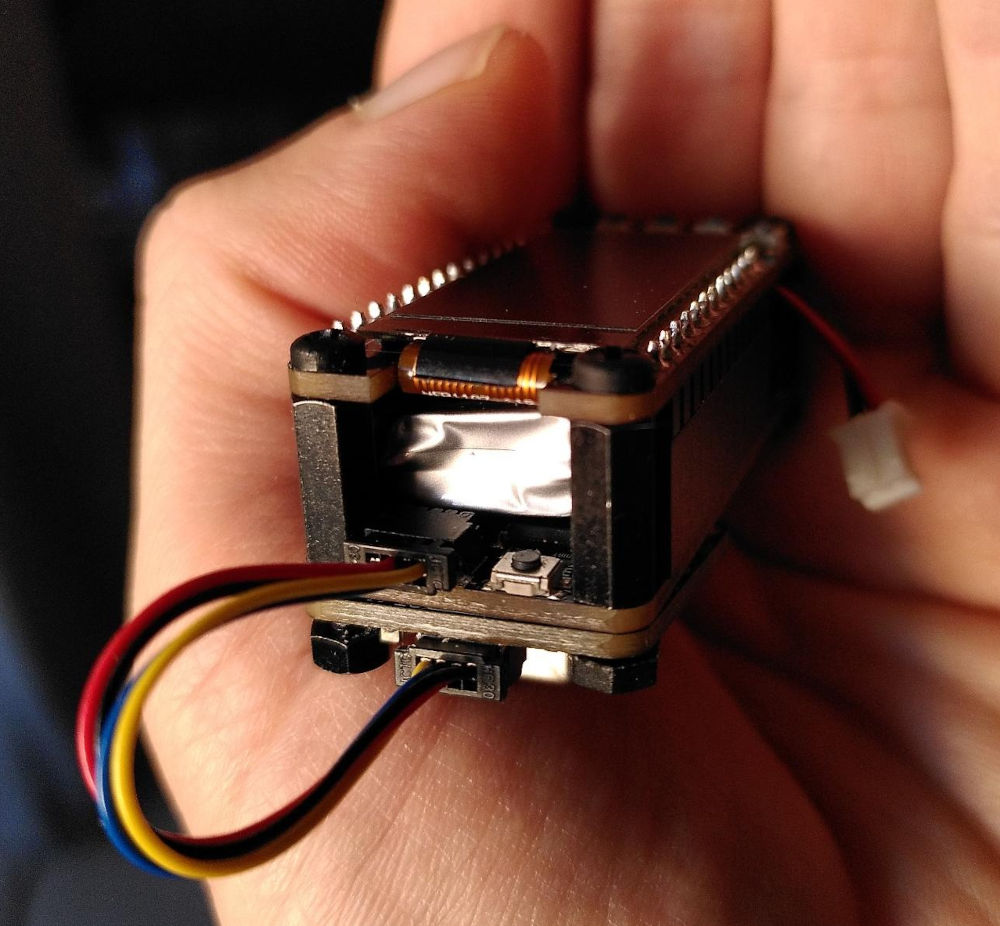
This is a Co2 concentration sensor for ambient air.
Its goal is to provide indirect assesment of the estimated risk of covid transmissibility in closed space where many people are breathing shared air.
It uses what I understand to be very precise and dependable electroacoustic direct CO2 sensors (Sensirion SCD40)
I hope it might be useful for people who want to stop guessing "when it's time to vent the air" and start KNOWING when the risk is increased.
Only what is measured can be managed.
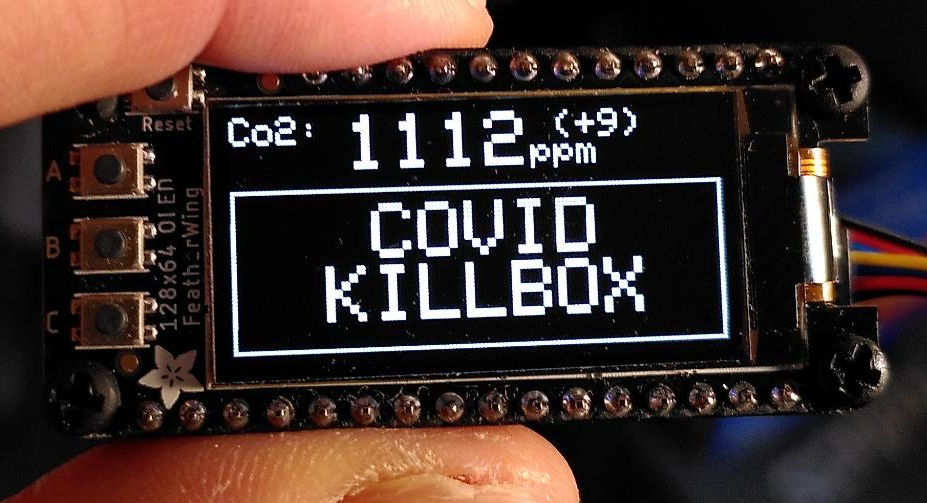
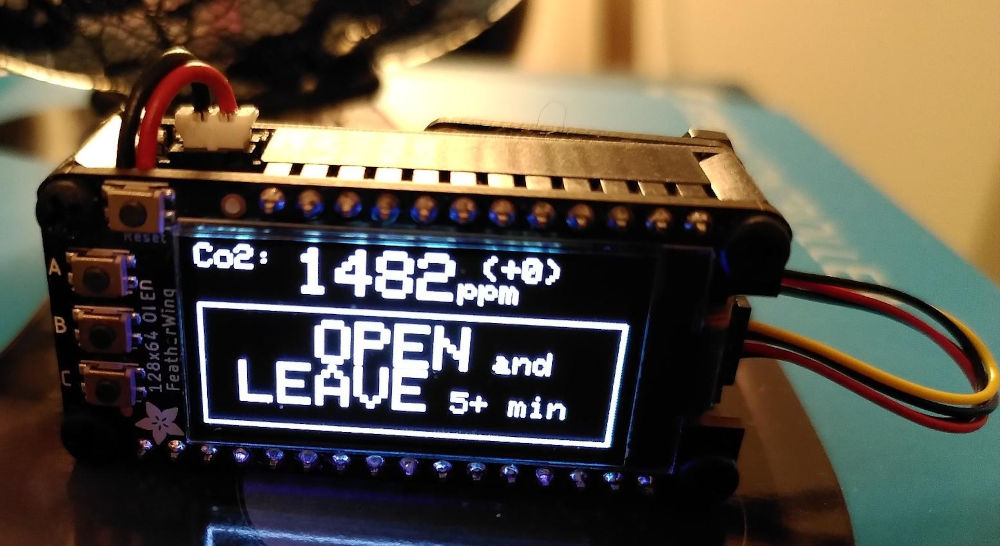
The main screen is the most useful high-level view of the current situation. It displays:
- current Co2 ppm concentration in the air, refreshed every 10s
- difference with the previously measured Co2 concentration ("is it going up/down? by how much?)
- A righly legible box showing actually useful/actionable instructions, depending on the risk level.
Values used are:
Below 470ppm: Open Air
Below 600ppm: Acceptable Air (good for situations where masks are not practical, like eating in a restaurant
Below 800ppm: Wear Mask (air should be safe as long as a FILTERING mask is being used. Of course many other factors are to be considered by the user)
Below 1000ppm: High Risk (air is probably unsafe even with a mask on, instruct user to initiate ventilation NOW before things get even worse. This should indicate improper/insufficient air renewal)
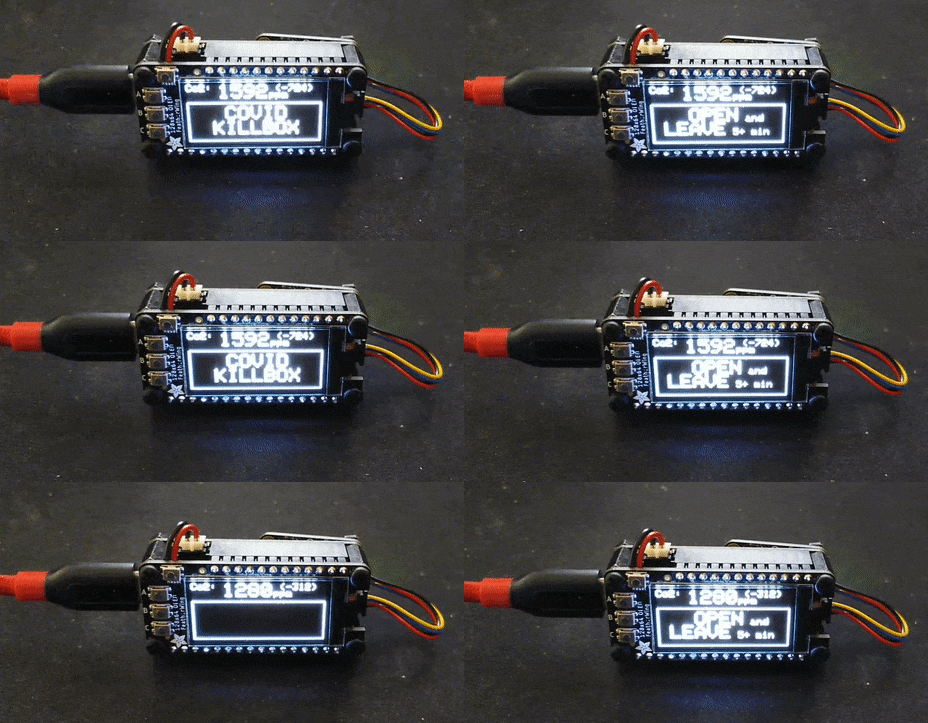
Over 1000ppm: COVID KILLBOX (air cannot possibly be made safe, instruct user to OPEN AND LEAVE for at least 5 minutes.)
This last emergency level blinks to attract user attention at a glance.
(a buzzing sound device was decided against for user convenience reasons, it would be too annoying in most situations and providing the possibility to enable/disable it would make the UX a lot more confusing)
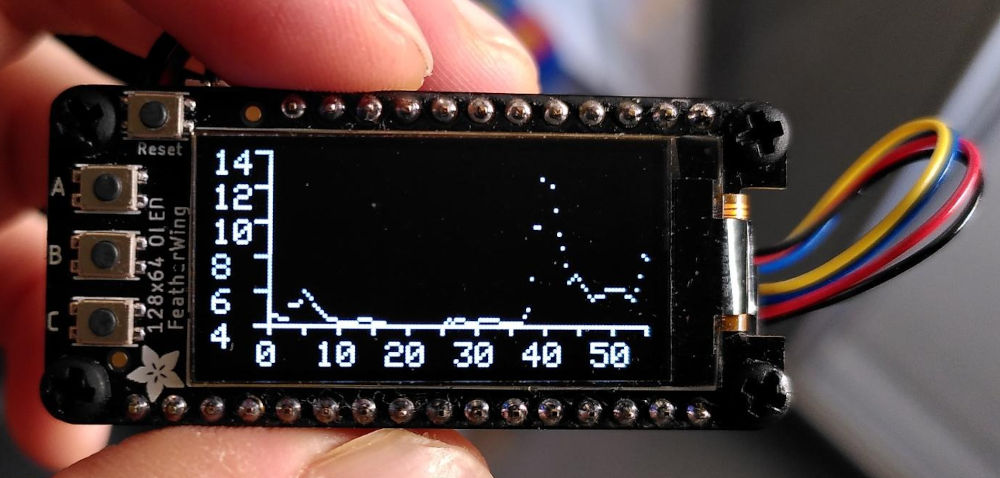
From the main screen, pressing "A" gets into graph mode
This will plot up to the last 55min of 30s-interval measurements
max Y plotted is 1400ppm (you should not even be around air over 1200ppm in the first place, unless actually breathing over the sensor) mix Y plotted is 400ppm (earth's atmosphere has a concentration of around 410-430ppm as a minimum. Only artificial air can get lower than 400.)
The plot will automatically shift once 55min of measurements are drawn
Pressing "A" again toggles back the main screen.
Pressing "B" enters the calibration screen.
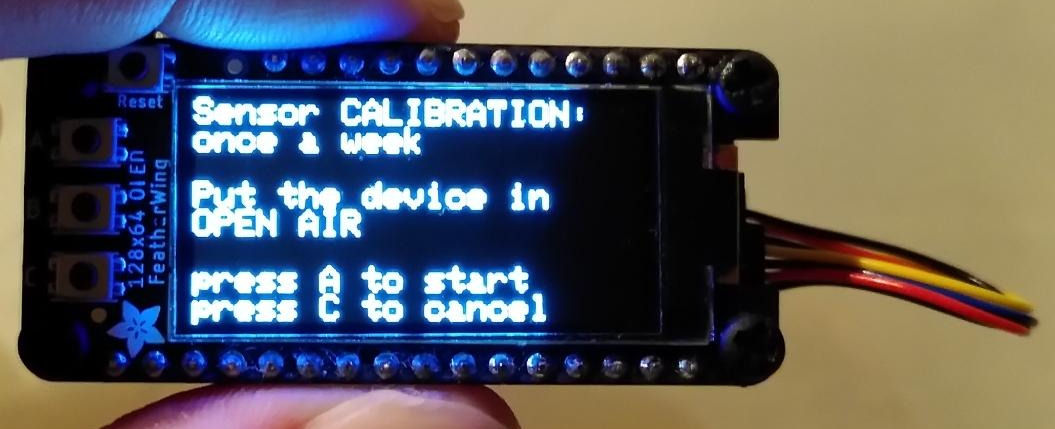 The UX expects users to press the button out of curiosity, so the first screen should be informative only and require confirmation to do anything.
It is also wise to inform the user that this should be done more or less weekly (to be on the safe side)
Pressing "A" to initiate calibration shows the actual calibration screen
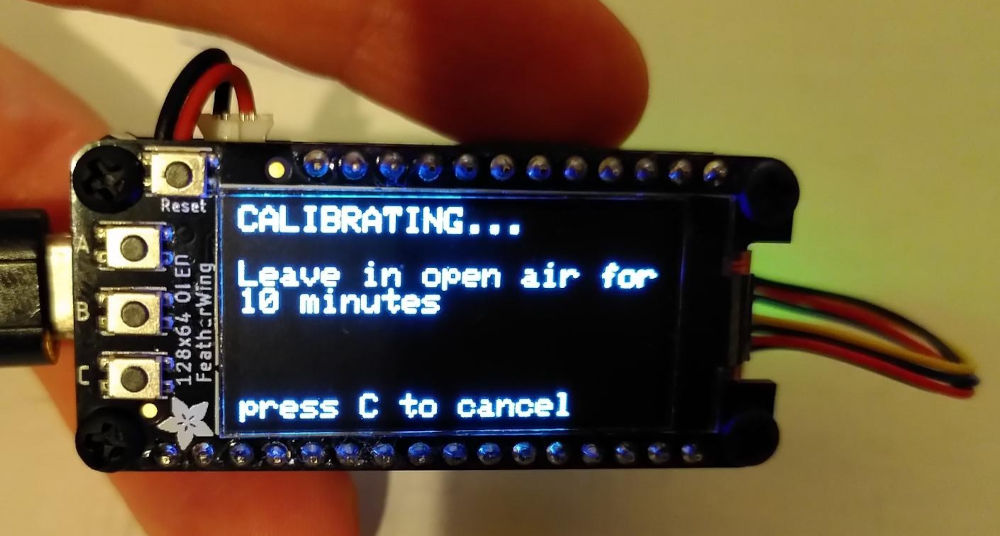 This is a simple timer of 10min, updated in real time, so that the user understands it is vital to put the device in open air. It should only take 5mins for the sensor to start measuring baseline atmospheric CO2 concentrations but I'm accounting for the time the user will take to actually reach open air :)
Nothing actually happens until the counter reaches zero, at which point a forced calibration is sent to the sensor, fixing it to the arbitrary baseline of 430ppm which should be very close to the CO2 concentration measured in open atmospheric air on planet earth ;)
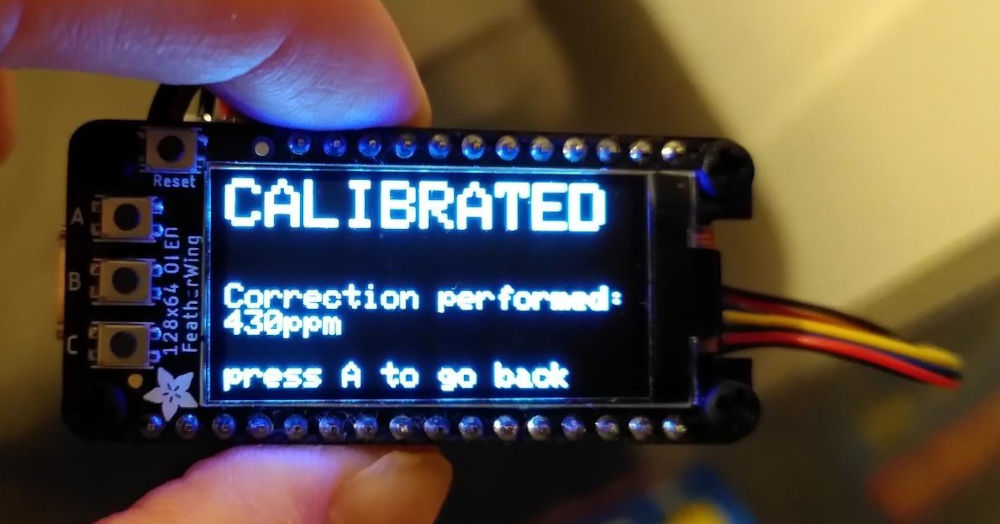
Once calibration was performed, inform the user (who very likely walked away and wants explicit feedback) and display by how much the calibration had to shift
Showing the calibration delta allows the user to, from experience, know how often calibration is necessary, if the calibration was likely botched or not, and generally a good indication that everything went well.
As this device might be used by people is risk assesment for situations where actual health and/or life/death decisions might take place, it is very important to indicate possible mis-calibrations or obviously erroneous data is being measured.
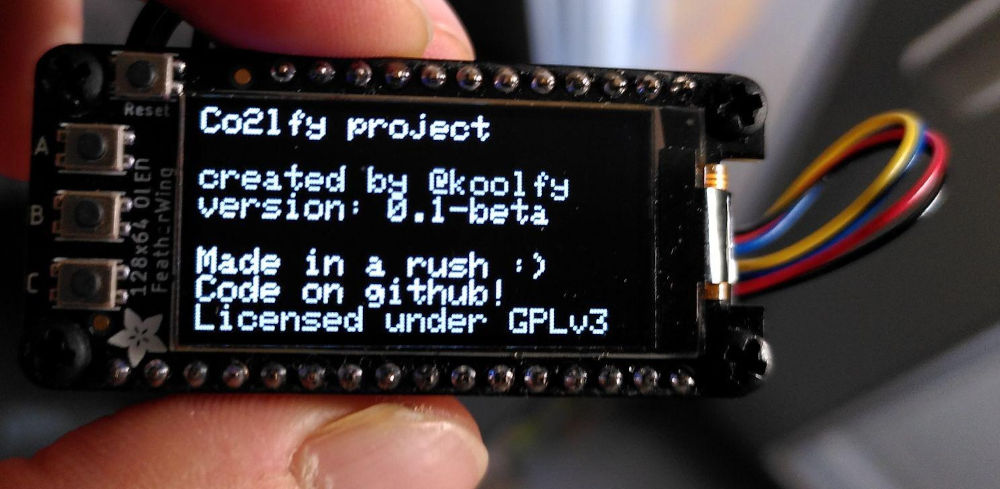
From the main screen, pressing "C" displays a simple "credits" (or "about") section showing somewhat useful infos We don't know how the device will end up on someone's hands so providing references to find further documentation or who to complain about is always useful :)
I am planning on adding code to export measurements as a CSV file onto a micro-SD card. Timestamp will be kept consistent by a RTC with a small flat battery
I already have the hardware and PCB at home. I just need some sleep before I tackle that last part ;)
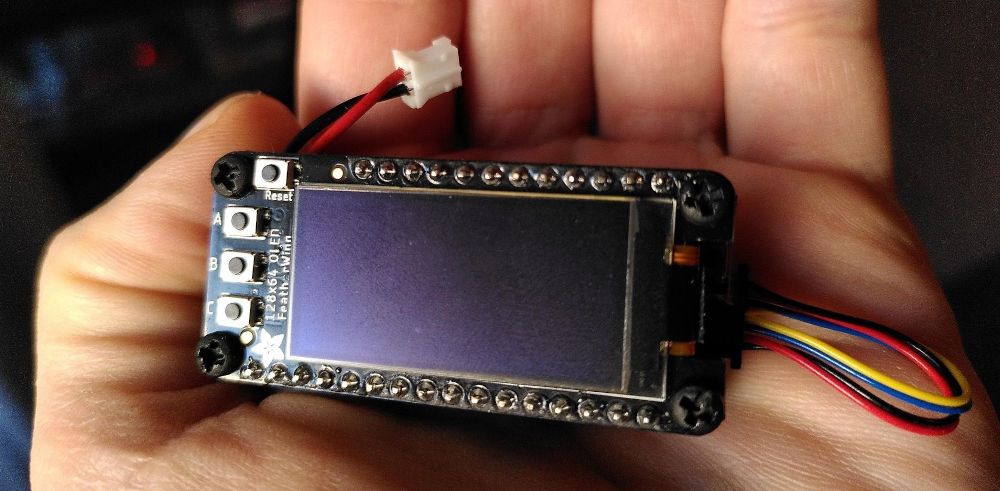
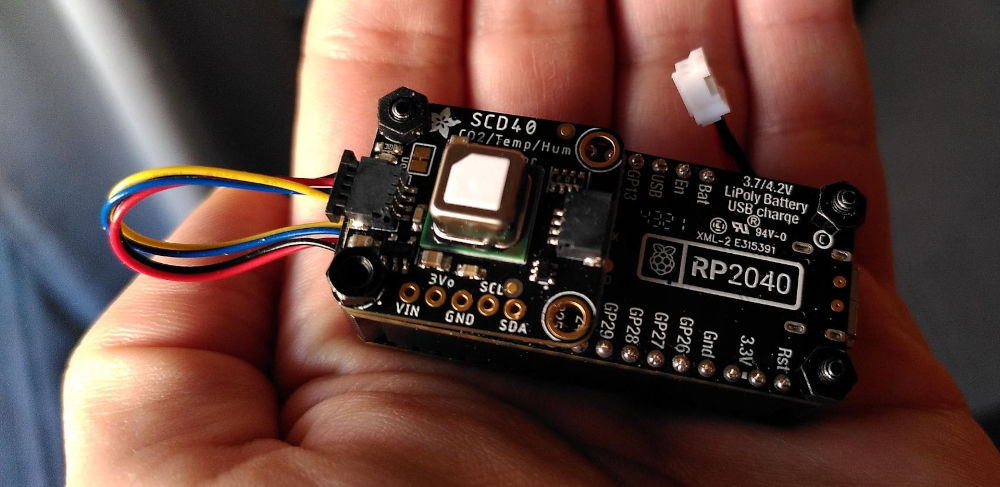
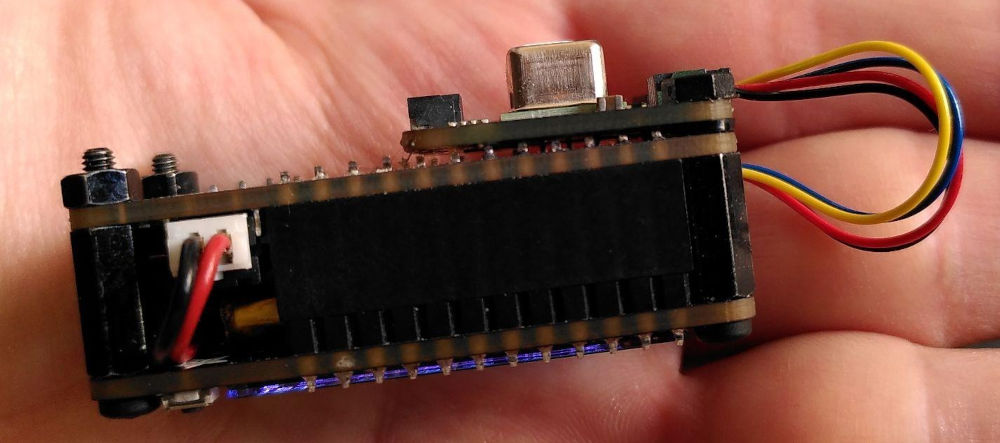
Body is held together by both the male/female headers coupling the OLED display PCB with the feather rp2040 PCB, as well as M2 spacers and screws
Battery is very neatly enclosed and protected by the headers.
It can still be unplugged via the JST cable
Note that to have a proper fit with only 2 screws on the SCD40 sensor, I added two small M2.5 spacers to it can ride under the feather rp2040 solders tightly
Sensirion SCD40/41 will both work For ease of assembly, I suggest using the adafruit PCBs that provide I2C STEMMA QT connectors https://www.adafruit.com/product/5187
SCD41 will work out of the box, it's a bit more expensive to allow it to go to 10 000ppm (not really relevant for us) https://www.adafruit.com/product/5190
SCD41 could be a good fallback solution if SCD40 is out of stock
SCD4X datasheet can be found at: https://sensirion.com/media/documents/C4B87CE6/61652F80/Sensirion_CO2_Sensors_SCD4x_Datasheet.pdf
Sensirion SCD30 could be made to work as well, with minor modifications, but is more expensive, bulky, etc. https://www.adafruit.com/product/4867
- SCD40/41 use photoacoustic measurements, as first described here in 2015: https://www.sciencedirect.com/science/article/pii/S1877705815025072
- SCD30 uses the old tried and tested NDIR (non-dispersive-infra-red)
They should provide very similar accuracy, the photoacoustic is newer and slightly cheaper to produce. Also much more compact.
They both measure "true" Co2 concentration, instead of trying to guess Co2 concentration by indirect means like cheaper sensors. They should both be perfectly adequate for COVID usecases, as long as they are properly calibrated by the user.
I chose to use the RP2040 adafruit feather for the following reasons:
- cheap
- includes STEMMA/QT connector for I2C plug-and-play
- low power draw (no need for ESP32 wifi/bluetooth nonsense)
- compact form-factor
- USB-C connector, auto-charging
- JST connector for LI-Po battery, perfect form factor for a 400mah unit
Sadly, this board does not allow us to measure battery voltage/charge. This is another reason to maximize battery life so it's less of a concern for the user
https://www.adafruit.com/product/4884
WATCH OUT: current I2C implementation uses main I2C pins as "Wire1" instead of "Wire". Anything using the Stemma/QT port or the main SDA/SCD pins needs to be initiated with "Wire1" in the code, not the default and commonly used "Wire" in all libraries/examples. This cost me a few nights to figure out.
I chose the monochromatic Adafruid 128x64 OLED I2C display https://www.adafruit.com/product/4650
We need buttons for the user interface, as we absolutely need at least to provide forced manual calibration capability.
While the display can be drawn through I2C, buttons are simple pull-down pins, so they need to be soldered to the main board :( Adafruit does not sell assembled versions of this display, so this requires soldering a male header set
WATCH OUT: this display uses SH1107 controller instead of SSD1306! I wasted two nights of code on this confusion.
Used a Li-Po 400mah battery with a perfect form-factor for Adafruit Featers https://www.adafruit.com/product/3898
From my testing it seems to provide around 6-8h of battery life using the OLED display. Maybe this can be optimized but I doubt it.
Being unable to measure battery voltage from the board makes it impossible to go to any kind of "power saving mode" when battery is low Usecase for the device also requires the screen to be always-on and legible, so it can be put on a table and checked at a glance.
1x Stemma/QT I2C cable, connecting the rp2040 feather to the SCD40 https://www.adafruit.com/product/4399
Total cost is around $80 per unit, plus shipping and importation taxes (for Europe for example)
Shipping to europe was about 30€ with UPS
Not sure how cost effective this is compared to alternatives, the total price is dominated by the sensor, followed by display and main board. I don't think we can go much lower without sacrificing important things.
A critical goal of this project was to remain easy to disassemble and allow the replacement of any single part and comporent in case of failure, upgrade, etc.
This means the battery can be replaced, the display can be replaced, the sensor can be replaced, the main board can be replaced, or swapped.
I'm not interested in a design that requires more soldering (less accessible to the general public) and sacrifices repairability. E-waste is a serious issue and covid is not an excuse for bad design :)
I hightly encourage you to keep repairability and ease of assembly as main focus of any units you might want to assemble on your own.
COMING SOON
https://github.com/Sensirion/arduino-i2c-scd4x
Arduino basic GFX lib: https://github.com/adafruit/Adafruit-GFX-Library
Adafruit SH110X OLED library: https://github.com/adafruit/Adafruit_SH110x
This project was made for people close to me who need assistance with no-nonsense covid health protocols. Fully assembled co2 sensors are sold out, hugely expensive, and not calibrated for COVID usecases and thresholds.
I wanted to get this into the hands of teachers and people who might have a high impact in bending the Omicron surge down. As a result, it was very important to keep UX absolutely simple and clear to use.
I aimed for a zero-solder assembly, but the main feather rp2040 does not come with female headers assembled and the display does not come with male headers assembled. They need to be coupled for the buttons to be usable, and we absolutely need buttons for the calibration process.
Whatever you do with this code/project, do NOT waste CO2 sensors to play around juste because you think this is cool to have in a drawer. Make sure every single CO2 sensor you buy will find its way into a functional assembled unit, and this unit into the hands of someone who might have real-life use for it.
Teachers and people forced to work in closed spaces with numerous people, who can reduce risk by properly managing airflow and ventilation should be the main focus.
Keep in mind we all play a role in the supply chain stress of the co2 sensors around the world. Be responsible.
Also don't add a million overkill features that only nerds will ever use and that will confuse the heck of "regular people". Keep usability in mind.
For example, the design of the main screen was driven by the decision that the end user cares less about the co2 ppm number than the high-level threat assessment and safety instructions. Focus on what the user needs to be SAFE.
