mipnerf_pl
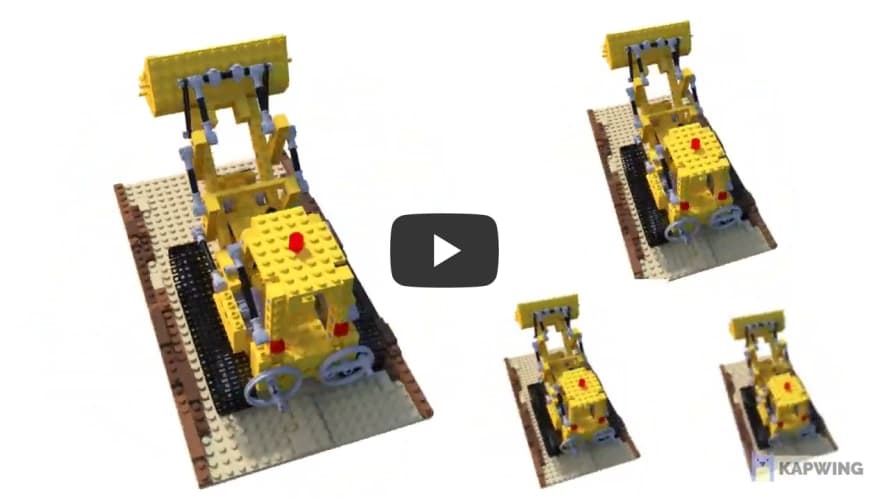
Unofficial pytorch-lightning implement of Mip-NeRF, Here are some results generated by this repository (pre-trained models are provided below):
| Multi Scale Train And Multi Scale Test | Single Scale | |||||||||||||
|---|---|---|---|---|---|---|---|---|---|---|---|---|---|---|
| PNSR | SSIM | PSNR | SSIM | |||||||||||
| Full Res | 1/2 Res | 1/4 Res | 1/8 Res | Aveage (PyTorch) |
Aveage (Jax) |
Full Res | 1/2 Res | 1/4 Res | 1/8 Res | Average (PyTorch) |
Average (Jax) |
Full Res | ||
| lego | 34.412 | 35.640 | 36.074 | 35.482 | 35.402 | 35.736 | 0.9719 | 0.9843 | 0.9897 | 0.9912 | 0.9843 | 0.9843 | 35.198 | 0.985 |
The top image of each column is groundtruth and the bottom image is Mip-NeRF render in different resolutions.
The above results are trained on the lego dataset with 300k steps for single-scale and multi-scale datasets respectively, and the pre-trained model can be found here.
Feel free to contribute more datasets.
Installation
We recommend using Anaconda to set up the environment. Run the following commands:
# Clone the repo
git clone https://github.com/hjxwhy/mipnerf_pl.git; cd mipnerf_pl
# Create a conda environment
conda create --name mipnerf python=3.9.12; conda activate mipnerf
# Prepare pip
conda install pip; pip install --upgrade pip
# Install PyTorch
pip3 install torch torchvision --extra-index-url https://download.pytorch.org/whl/cu113
# Install requirements
pip install -r requirements.txt
Dataset
Download the datasets from the NeRF official Google Drive and unzip nerf_synthetic.zip. You can generate the multi-scale dataset used in the paper with the following command:
# Generate all scenes
python datasets/convert_blender_data.py --blender_dir UZIP_DATA_DIR --out_dir OUT_DATA_DIR
# If you only want to generate a scene, you can:
python datasets/convert_blender_data.py --blender_dir UZIP_DATA_DIR --out_dir OUT_DATA_DIR --object_name lego
Running
Train
To train a single-scale lego Mip-NeRF:
# You can specify the GPU numbers and batch size at the end of command,
# such as num_gpus 2 train.batch_size 4096 val.batch_size 8192 and so on.
# More parameters can be found in the configs/lego.yaml file.
python train.py --out_dir OUT_DIR --data_path UZIP_DATA_DIR --dataset_name blender exp_name EXP_NAME
To train a multi-scale lego Mip-NeRF:
python train.py --out_dir OUT_DIR --data_path OUT_DATA_DIR --dataset_name multi_blender exp_name EXP_NAME
Evaluation
You can evaluate both single-scale and multi-scale models under the eval.sh guidance, changing all directories to your directory. Alternatively, you can use the following command for evaluation.
# eval single scale model
python eval.py --ckpt CKPT_PATH --out_dir OUT_DIR --scale 1 --save_image
# eval multi scale model
python eval.py --ckpt CKPT_PATH --out_dir OUT_DIR --scale 4 --save_image
# summarize the result again if you have saved the pnsr.txt and ssim.txt
python eval.py --ckpt CKPT_PATH --out_dir OUT_DIR --scale 4 --summa_only
Render Spheric Path Video
It also provide a script for rendering spheric path video
# Render spheric video
python render_video.py --ckpt CKPT_PATH --out_dir OUT_DIR --scale 4
# generate video if you already have images
python render_video.py --gen_video_only --render_images_dir IMG_DIR_RENDER
Visualize All Poses
The script modified from nerfplusplus supports visualize all poses which have been reorganized to right-down-forward coordinate. Multi-scale have different camera focal length which is equivalent to different resolutions.
Citation
Kudos to the authors for their amazing results:
@misc{barron2021mipnerf,
      title={Mip-NeRF: A Multiscale Representation for Anti-Aliasing Neural Radiance Fields},
      author={Jonathan T. Barron and Ben Mildenhall and Matthew Tancik and Peter Hedman and Ricardo Martin-Brualla and Pratul P. Srinivasan},
      year={2021},
      eprint={2103.13415},
      archivePrefix={arXiv},
      primaryClass={cs.CV}
}
Acknowledgements
Thansks to mipnerf, mipnerf-pytorch, nerfplusplus, nerf_pl


