End-to-end Telegram bot development and deployment
Disclaimer
FSB/KGB disclaimer: Never use Telegram to send important information (e.g., Personal Identifiable Information (PII), identity documents, bank information, payment details)! [source]
Prepare Telegram
Download Mobile Telegram application
Download Telegram for Android or Telegram for iPhone / iPad.
Note: To download APK file directly, navigate to https://telegram.org/android and click Download Telegram. The Telegram.apk will be downloaded automatically.
Create Telegram Account (optional)
Create new Telegram account or reuse your current/old one.
Note: Mobile phone number is required.
Download Telegram Desktop
Navigate to https://desktop.telegram.org/ to download Telegram Desktop. Download and install Telegram Desktop.
Log in to Telegram Desktop
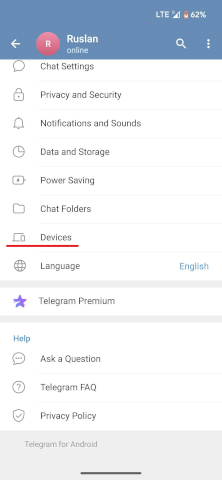
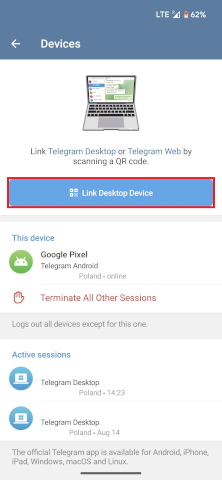
Scan QR code from Mobile Telegram:
- Open Mobile Telegram application on your phone.
- Go to
Settings>Devices>Link Desktop Device.
- Scan QR code to Log In.
BotFather
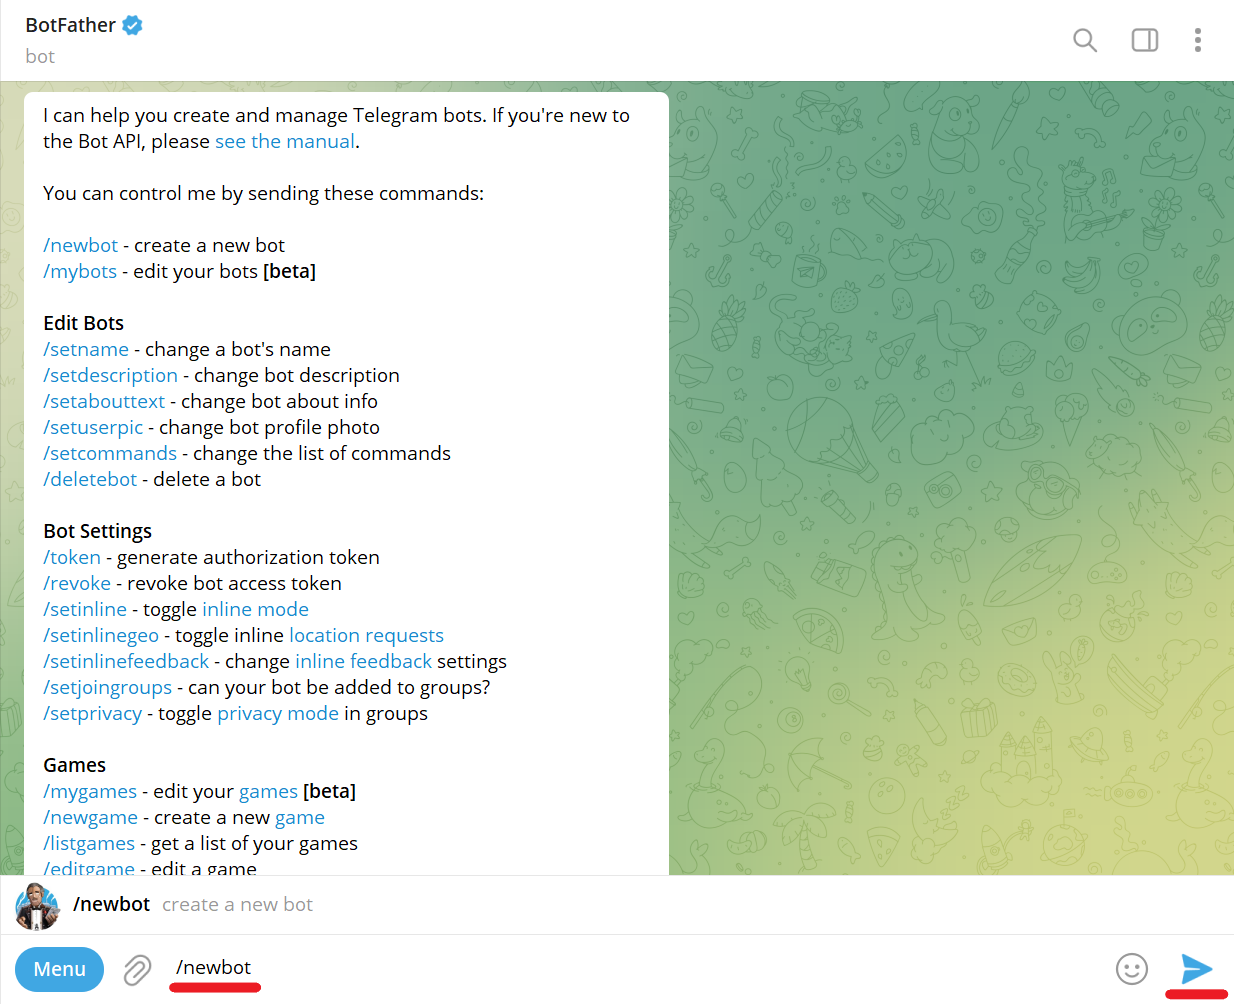
Create a new bot with BotFather
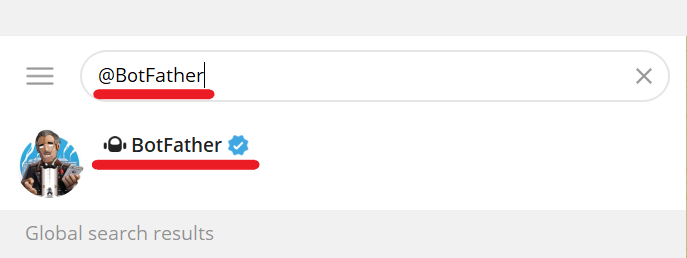
Search for @BotFather Telegram bot:
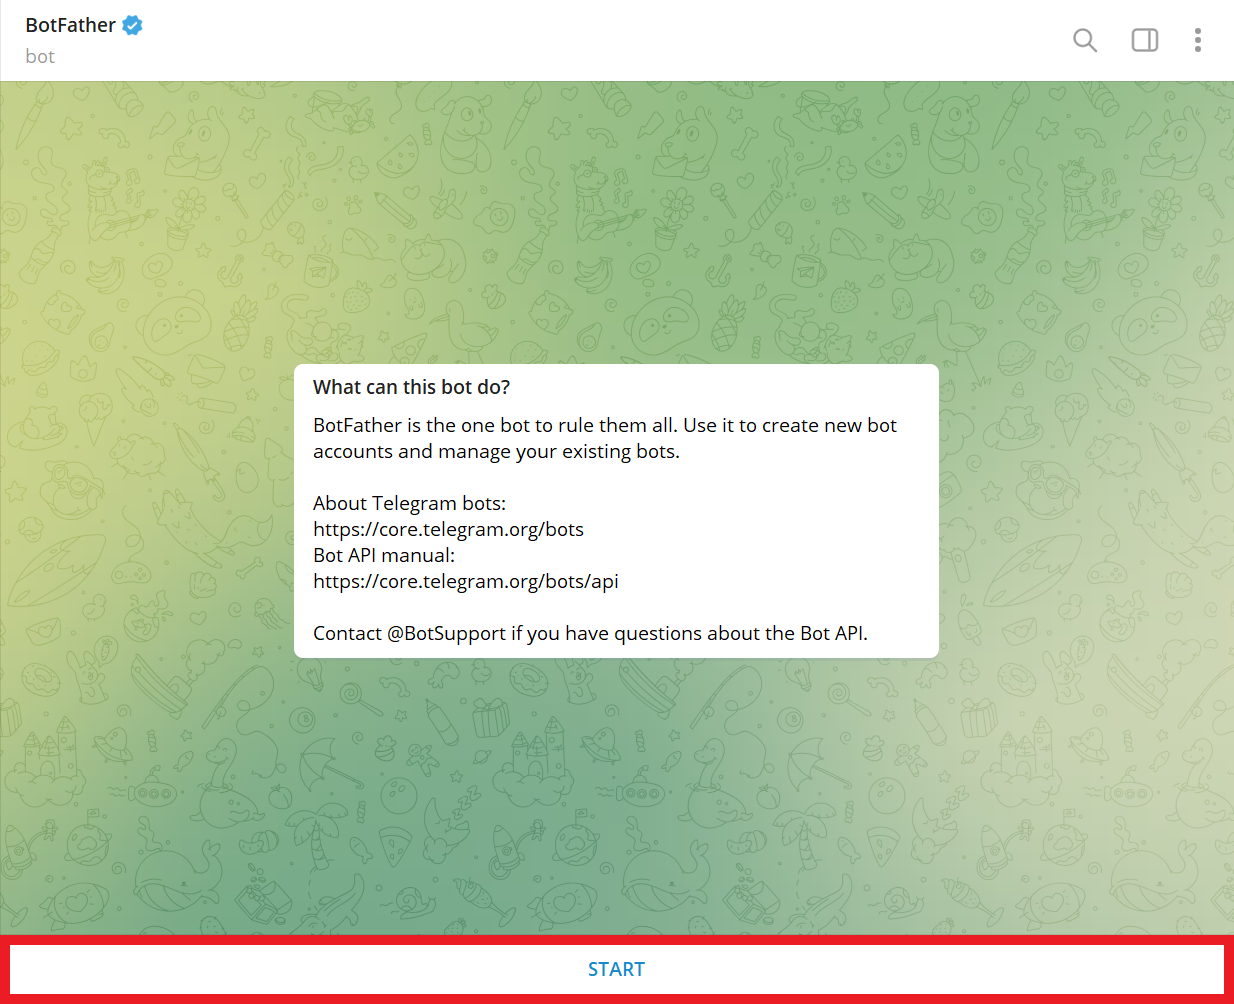
Select official @BotFather Telegram bot and and click START button:
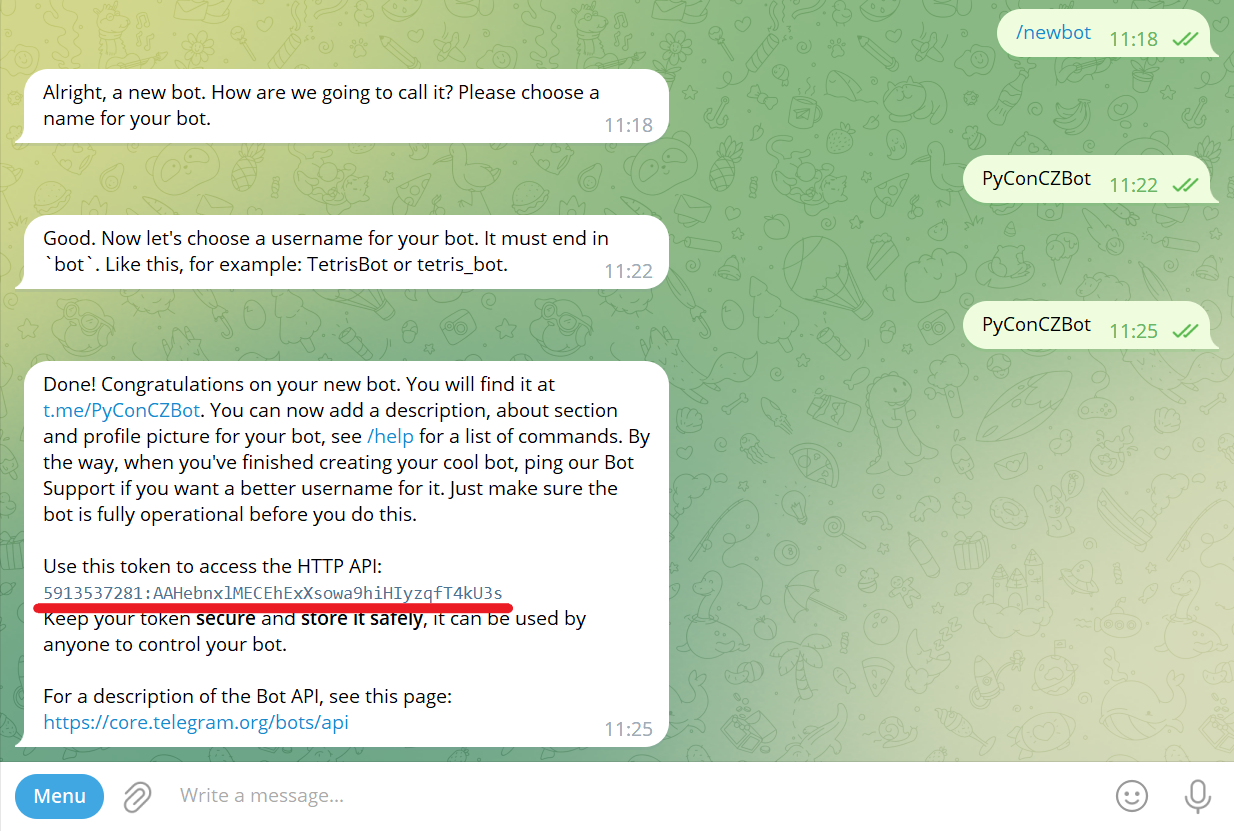
Send bot name (e.g., PyConCZBot):
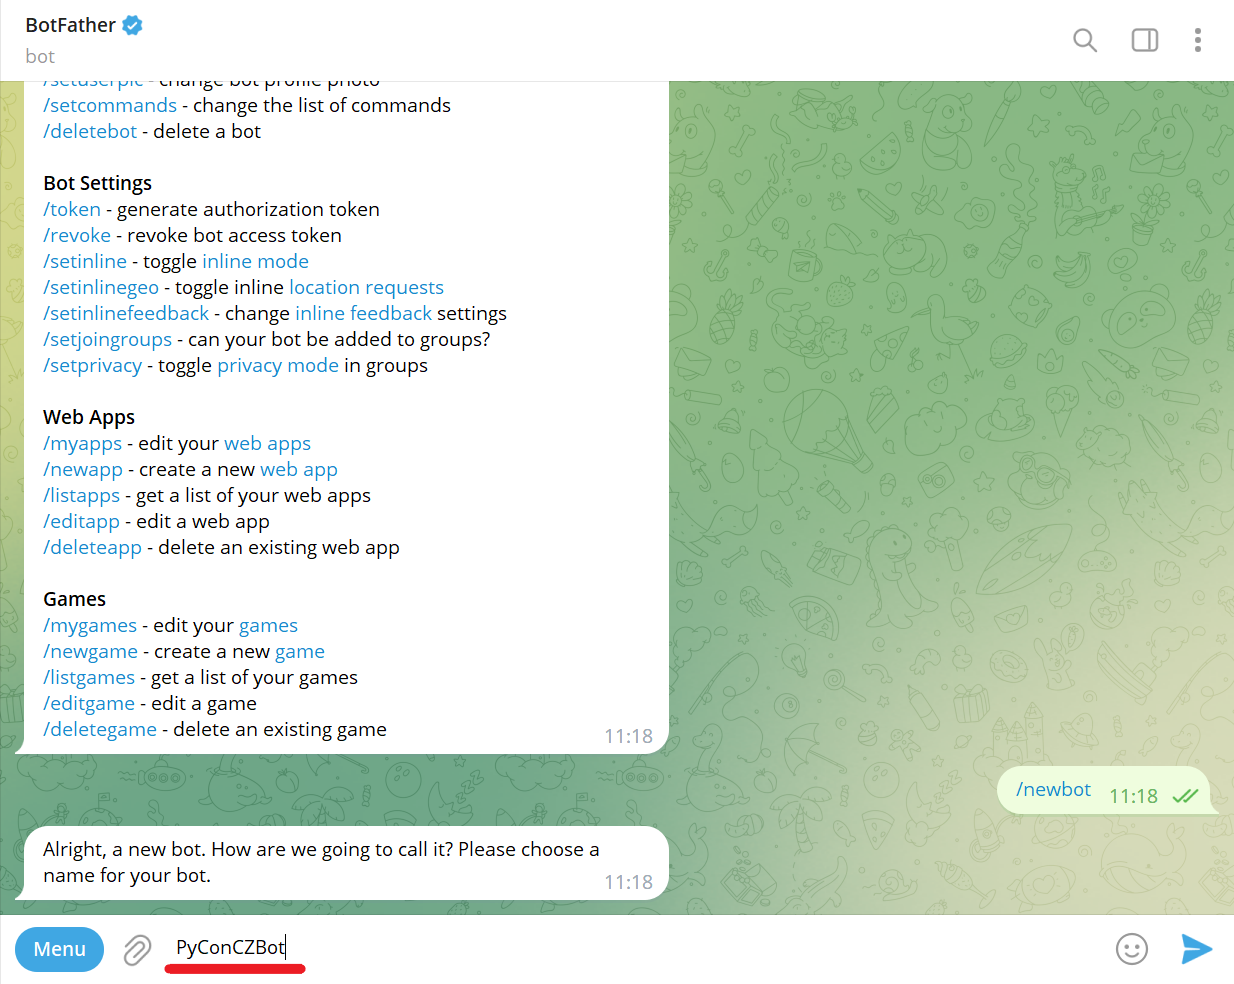
Send bot username (e.g., PyConCZBot). It must end with bot:

Copy and save the token (e.g., 5913537281:AAHebnxlMECEhExXsowa9hiHIyzqfT4kU3s):
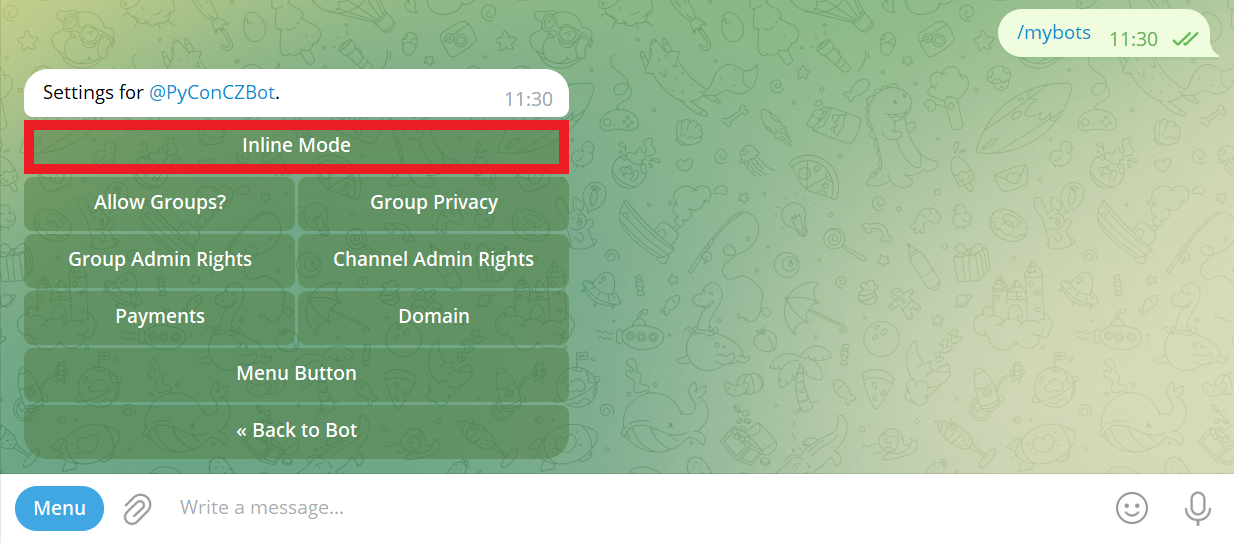
Turn on inline mode
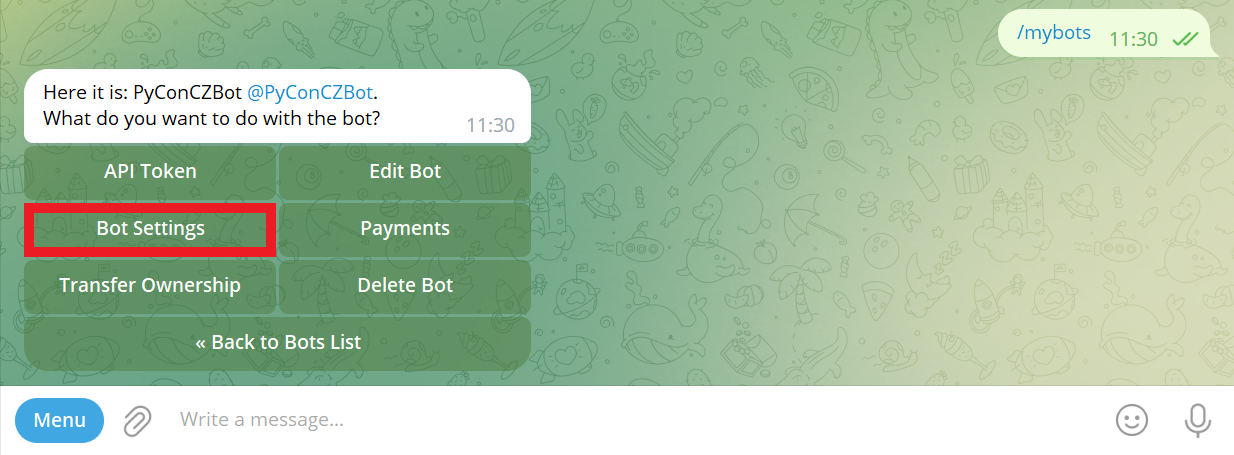
To turn on inline mode send /mybots command to @BotFather Telegram bot first:
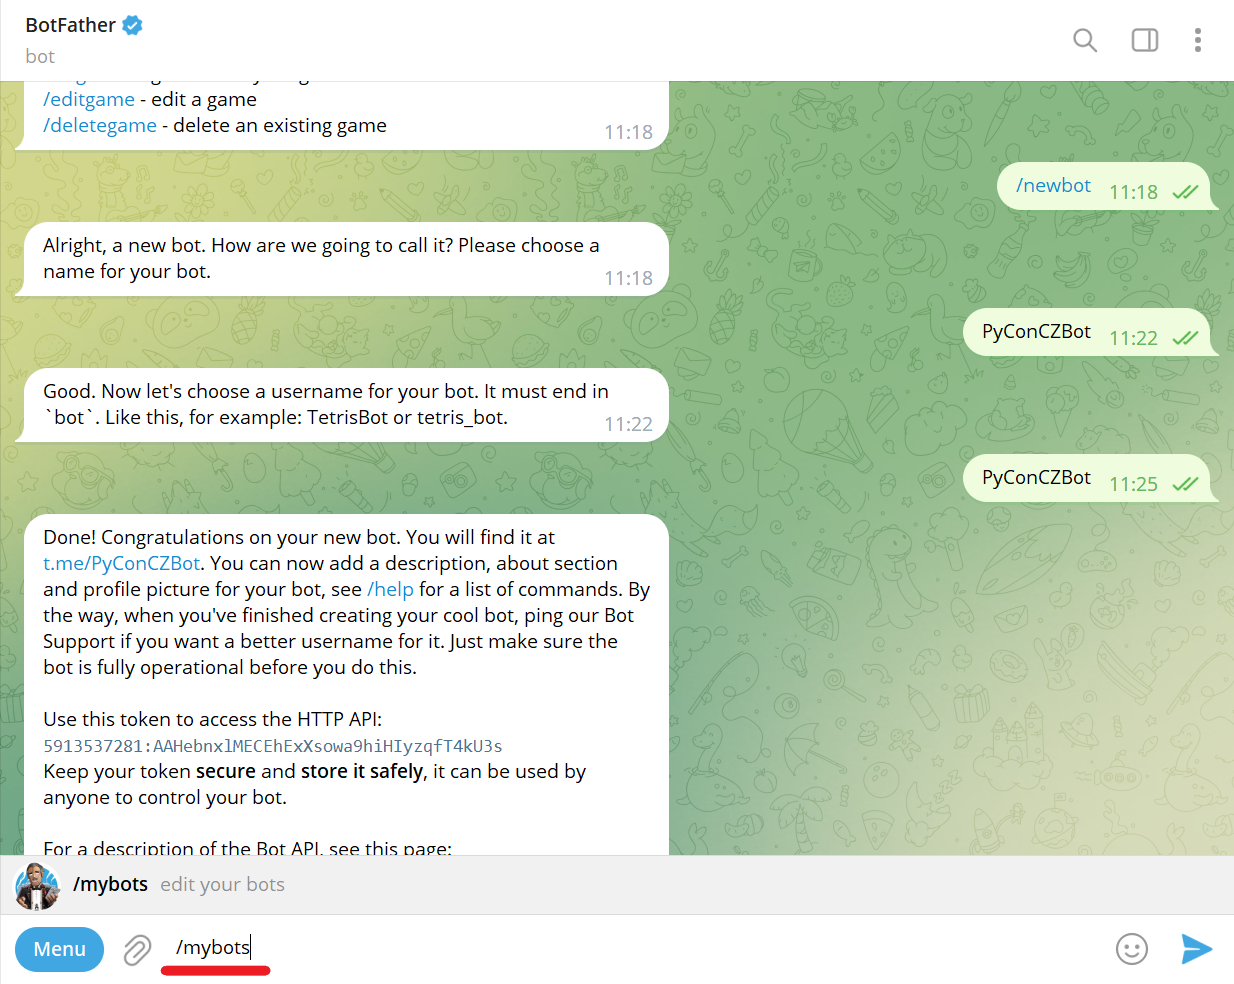
Choose a bot from the list (e.g., @PyConCZBot):

Add inline placeholder
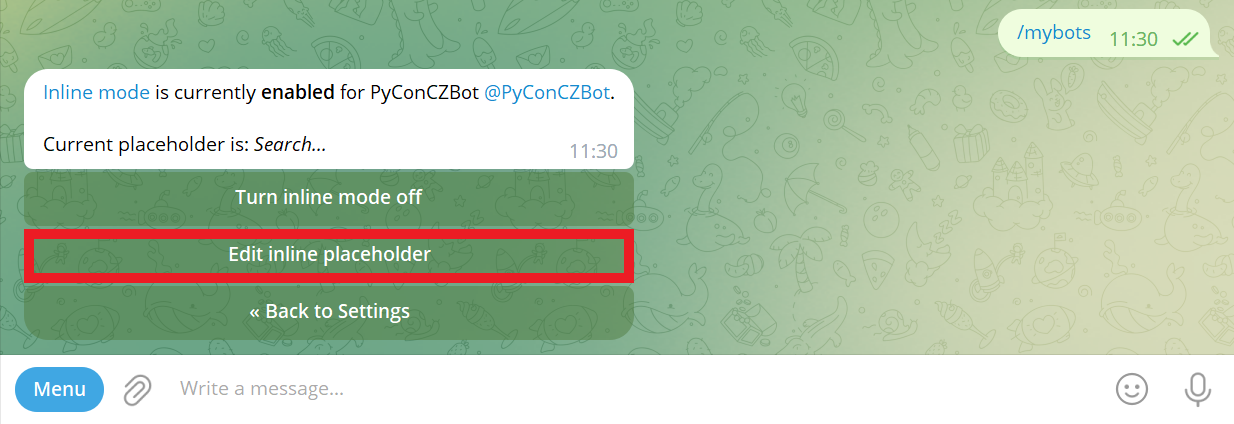
Click Edit inline placeholder button:
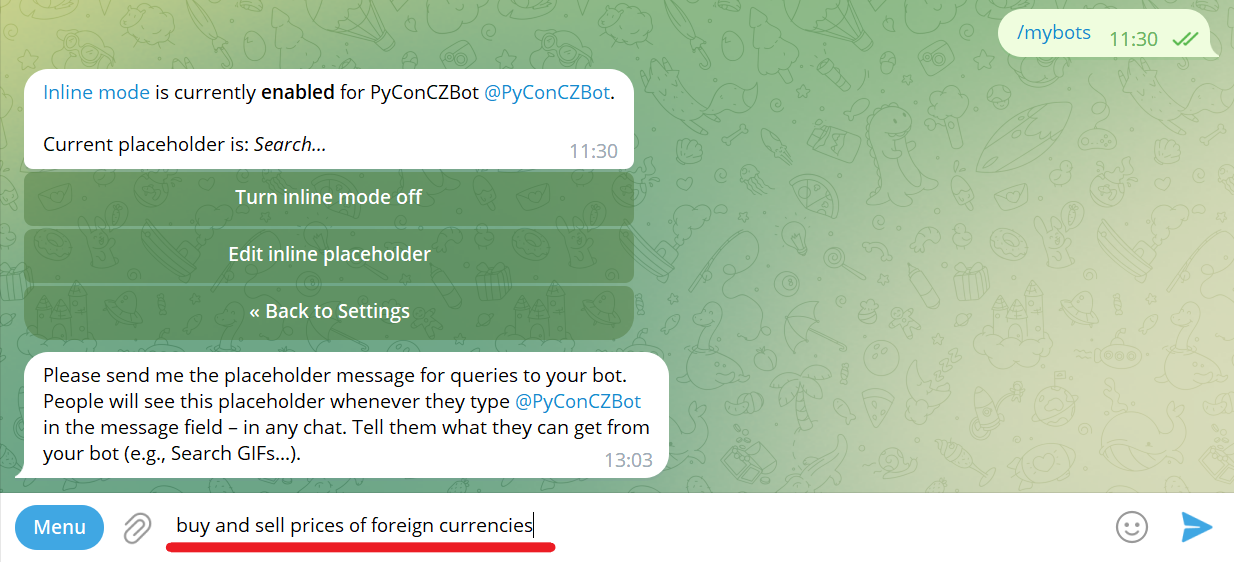
Send placeholder (e.g., buy and sell prices of foreign currencies):
Success! Inline setting updated:

Host Telegram bot locally
Hello world bot with pyTelegramBotAPI
Lets start with Hello, World! bot written on pyTelegramBotAPI.
$ git clone https://github.com/korniichuk/telegram-pycon-cz-2023.git
$ cd telegram-pycon-cz-2023
Install requirements:
$ pip install -r requirements.txtCreate .env file with token:
$ touch .envCopy and past token to .env file:
$ echo TOKEN=<TOKEN> > .env
Example:
$ echo TOKEN=5913537281:AAHebnxlMECEhExXsowa9hiHIyzqfT4kU3s > .envStart Hello, World! bot:
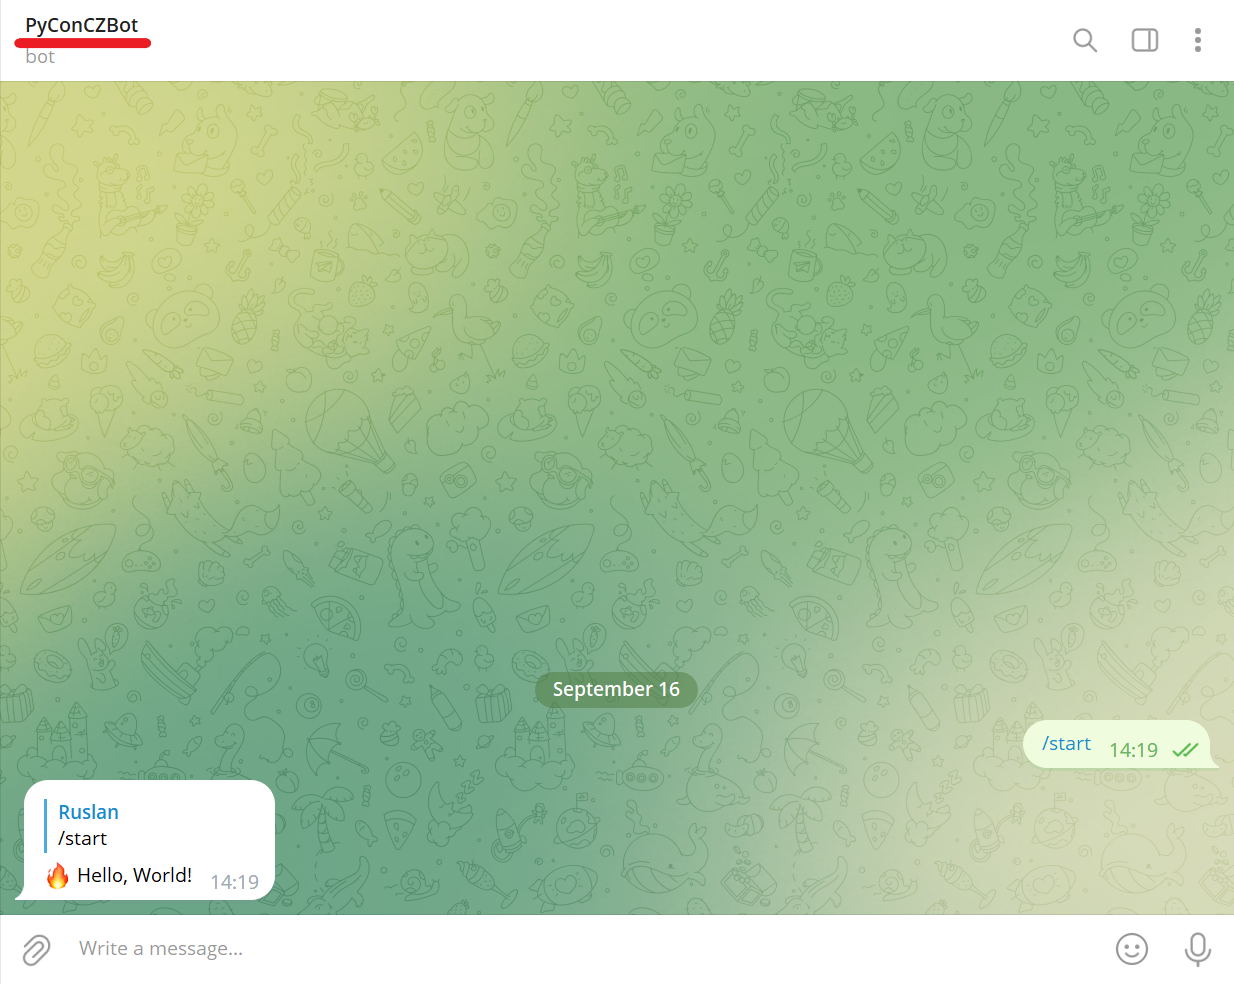
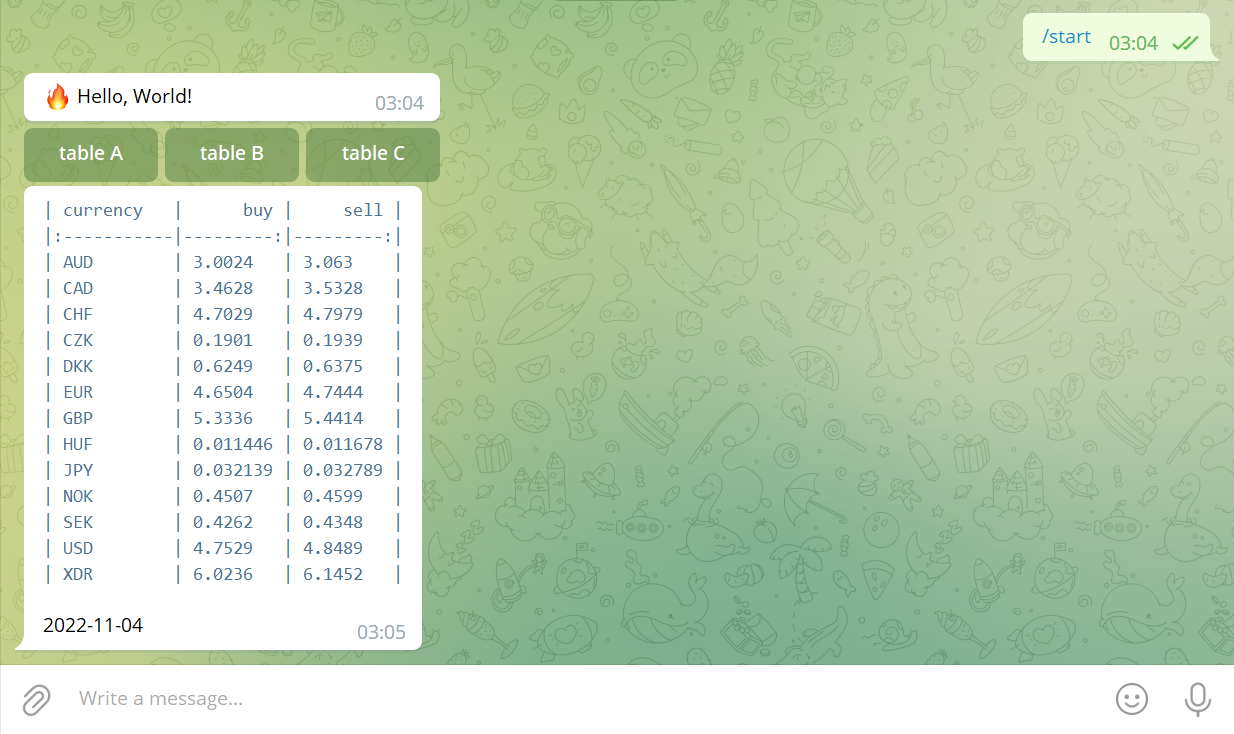
$ python3 bot1.pyNavigate to your Telegram bot (e.g., @PyConCZBot) and click START button:
You can achieve the same result with /start command.
Stop bot1.py before proceeding to the next step.
LivePerson: The Best Conversational AI Platform for Business
Synchronous NBP bot with pyTelegramBotAPI
To show more features of Telegram bot development, we will use exchange rates data provided by the central bank of the Republic of Poland (Polish: Narodowy Bank Polski aka NBP).
NBP Web API: https://api.nbp.pl/en.html
Start bot2.py:
$ python3 bot2.pyNavigate to your Telegram bot (e.g., @PyConCZBot) and send /start command.
Test table A, table B, and table C buttons:
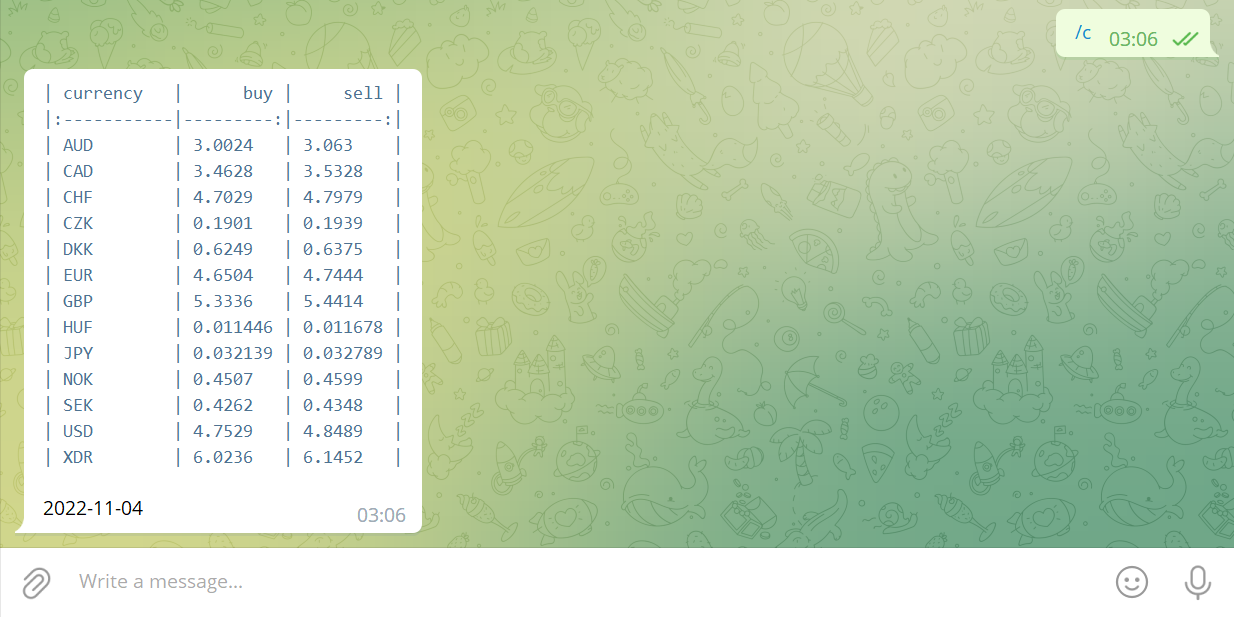
Send /a, /b, and /c commands:
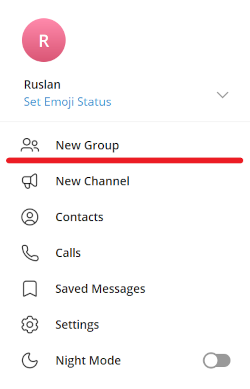
In Telegram Desktop, click the hamburger menu button ≡. Select New Group:
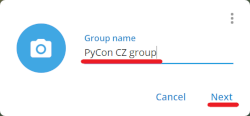
Enter Telegram Group name (e.g., PyCon CZ group). Click Next:
Add your Telegram bot (e.g., @PyConCZBot) to the group. Click Create.
Note: You can add your friend(s) to the group (optional).
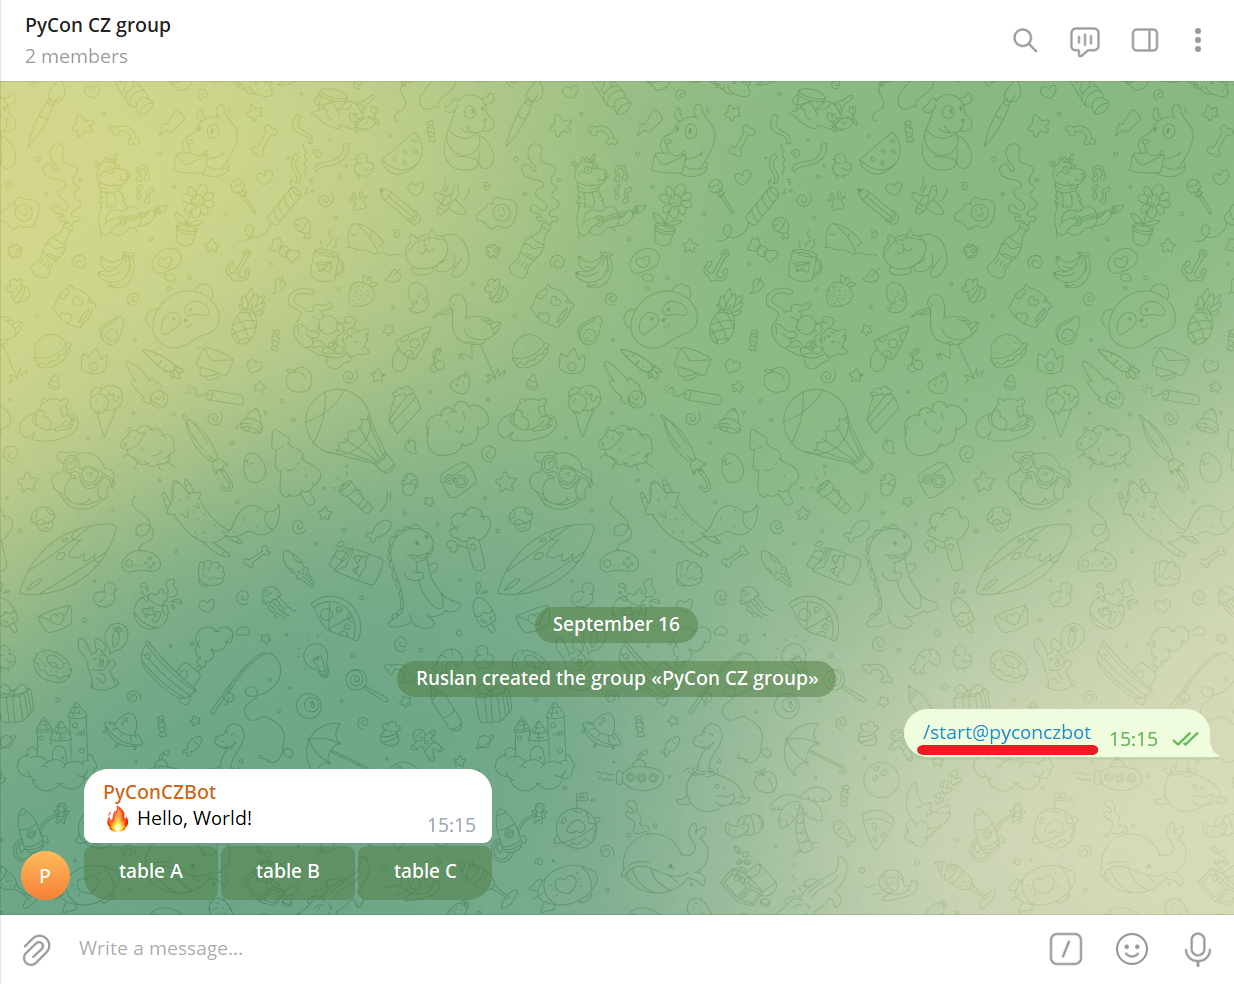
Test /start@<you_bot_username> (e.g., /start@pyconczbot) command:
So, communication with Telegram bots is not always easy. You had to send them messages in separate chats or add them to your groups.
However, with the inline mode, bots become omnipresent and can be used as a tool in any of your chats, groups or channels – it doesn't matter, whether the bot is a member or not.
Open chat with your friend(s) or create a new Telegram group, and type the username of your bot (e.g., @pyconczbot).
You can see inline placeholder now (e.g., buy and sell prices of foreign currencies):
Type space and rate command (e.g., @pyconczbot rate):
Asynchronous NBP bot with pyTelegramBotAPI
$ python3 bot3.pyAsynchronous NBP bot with python-telegram-bot
The following example is written on python-telegram-bot.
$ python3 bot4.pyAsynchronous NBP bot with aiogram
The following example is written on aiogram.
$ python3 bot5.pyNote: Parse mode Markdown is legacy since Telegram Bot API 4.5, retained for backward compatibility [source].
There is never a bad time to donate to Ukraine Army!
Deploy on AWS with SAM
Install SAM
$ wget https://github.com/aws/aws-sam-cli/releases/latest/download/aws-sam-cli-linux-x86_64.zip
$ unzip aws-sam-cli-linux-x86_64.zip -d sam-installation
$ sudo ./sam-installation/install

$ sam --version
Source: https://docs.aws.amazon.com/serverless-application-model/latest/developerguide/install-sam-cli.html
Token
Insert your token to template.yaml file. For example, from:
TOKEN: <TOKEN>
to:
TOKEN: 5913537281:AAHebnxlMECEhExXsowa9hiHIyzqfT4kU3s
SAM build
$ cd aws-serverless-application-model
$ sam build
SAM deploy
$ sam deploy --guidedEnter Stack Name (e.g., telegram). Enter AWS Region (e.g., eu-west-1).
Confirm changes before deploy [Y/n]
Enter Y.
Allow SAM CLI IAM role creation [Y/n]:
Enter Y.
Disable rollback [y/N]:
Enter N.
MyLambdaFunction Function Url has no authentication. Is this okay? [y/N]:
Enter Y.
Save arguments to configuration file [Y/n]:
Enter Y.
Enter SAM configuration file name (e.g., samconfig.toml).
Enter SAM configuration environment (e.g., default).
Deploy this changeset? [y/N]:
Check changes and enter Y.
Copy and save the Lambda URL Value from terminal (e.g., https://ylr4zrg2t7kega7bj7oglvzu2y0zgbni.lambda-url.eu-west-1.on.aws/).
Setting Telegram bot WebHook
All you have to do is to call the setWebhook method in the Bot API via the following url:
https://api.telegram.org/bot<TOKEN>/setWebhook?url=<URL>
Where:
TOKEN-- token you got from BotFather when you created your bot,URL-- Lambda URL for the MyLambdaFunction (must be HTTPS).
Example:
https://api.telegram.org/bot5913537281:AAHebnxlMECEhExXsowa9hiHIyzqfT4kU3s/setWebhook?url=https://ylr4zrg2t7kega7bj7oglvzu2y0zgbni.lambda-url.eu-west-1.on.aws/
{"ok":true,"result":true,"description":"Webhook was set"}
Source: https://xabaras.medium.com/setting-your-telegram-bot-webhook-the-easy-way-c7577b2d6f72
Delete Telegram bot WebHook
To delete Telegram bot WebHook:
https://api.telegram.org/bot{TOKEN}/setWebhook?url=
Example:
https://api.telegram.org/bot5913537281:AAHebnxlMECEhExXsowa9hiHIyzqfT4kU3s/setWebhook?url=
{"ok":true,"result":true,"description":"Webhook was deleted"}
SAM delete
To delete the sample application that you created, use the AWS CLI:
$ sam deleteDeploy on AWS with Elastic Beanstalk
The following example is written on pyTelegramBotAPI. See aiogram example: https://stackoverflow.com/a/64911415
AWS CLI
Install AWS CLI:
$ curl "https://awscli.amazonaws.com/awscli-exe-linux-x86_64.zip" -o "awscliv2.zip"
$ unzip awscliv2.zip
$ sudo ./aws/install

$ aws --versionEB CLI
Install EB CLI:
$ pip install awsebcli

$ eb --version
Source: https://docs.aws.amazon.com/elasticbeanstalk/latest/dg/eb-cli3-install-advanced.html
EB init
Navigate to aws-elastic-beanstalk folder and initialize the directory with the EB CLI:
$ cd ../aws-elastic-beanstalk
$ eb init
Select a default region (e.g., eu-west-1). Enter a new application name for your Elastic Beanstalk application (e.g., telegram).
It appears you are using Python. Is this correct?
(Y/n):
Enter Y.
Select a platform branch (e.g., Python 3.8 running on 64bit Amazon Linux 2). Details: https://docs.aws.amazon.com/elasticbeanstalk/latest/platforms/platforms-supported.html#platforms-supported.python
Do you want to set up SSH for your instances?
(Y/n):
Enter Y.
EB create
Create a new Elastic Beanstalk environment:
$ eb createEnter Environment Name (e.g., telegram-dev).
Enter DNS CNAME prefix (e.g., telegram-dev).
Select a load balancer type (e.g., application).
Would you like to enable Spot Fleet requests for this environment? (y/N):
Enter N.
EB setenv
To set Telegram token as an environment variable in the EB CLI, run the following command:
$ eb setenv TOKEN=<TOKEN>Example:
$ eb setenv TOKEN=5913537281:AAHebnxlMECEhExXsowa9hiHIyzqfT4kU3sSource: https://repost.aws/knowledge-center/elastic-beanstalk-pass-variables
EB deploy
To deploy new source code to the environment:
$ eb deployEB open
Open the EB application URL in a browser:
$ eb openIf you can see exclamation mark, Telegram bot deployed successfully:
Domain name
This part is out of workshop scope!
We need to purchase and configure a custom domain name (e.g., telegrambot.click for 3 USD) for our Elastic Beanstalk environment.
SSL certificate
This part is out of workshop scope! We need use HTTPS to allow secure connection.
To set up SSL we need to obtain SSL certificate:
- Navigate to AWS Certificate Manager (ACM).
- Click
Request certificatelink orRequestbutton. SelectRequest a public certificate. ClickNext. - Add two domain names: one for website (e.g.,
korniichuk.click) and one wildcard domain (e.g.,*.korniichuk.click). It will cover all subdomains including www or any other. - Select
DNS validationand clickRequestbutton.
Because we delegated domain management to AWS, we need to validate ownership by expanding any domain and clicking Create records in Route 53.
SSL certificate will be issued after a while (it can take up to 48 hours - usually within 30 minutes after nameservers delegation is completed).
Source: https://dev.to/bnn1/deploying-dockerized-nextjs-app-to-aws-eb-part-3-setting-custom-domain-45bm
Add listener
This part is out of workshop scope!
- Open the Elastic Beanstalk console, and in the Regions list, select your AWS Region (e.g.,
eu-west-1). - In the navigation pane, choose
Environments, and then choose the name of your environment from the list (e.g.,telegram-dev). - In the navigation pane, choose
Configuration. - In the
Load balancerconfiguration category, chooseEdit. Note: If the Load balancer configuration category doesn't have anEditbutton, your environment doesn't have a load balancer. - On the
Modify Application Load Balancerpage, chooseAdd listener. - For
Port, type the incoming traffic443port. - For
Protocol, chooseHTTPS. - For
SSL certificate, choose your certificate. ChooseAdd. Scroll down and clickApply
Important: Adding listener this way (via Elastic Beanstalk) will fix security group automatically. For adding listener via EC2 you need to fix security group manually.
Source: https://docs.aws.amazon.com/elasticbeanstalk/latest/dg/configuring-https-elb.html
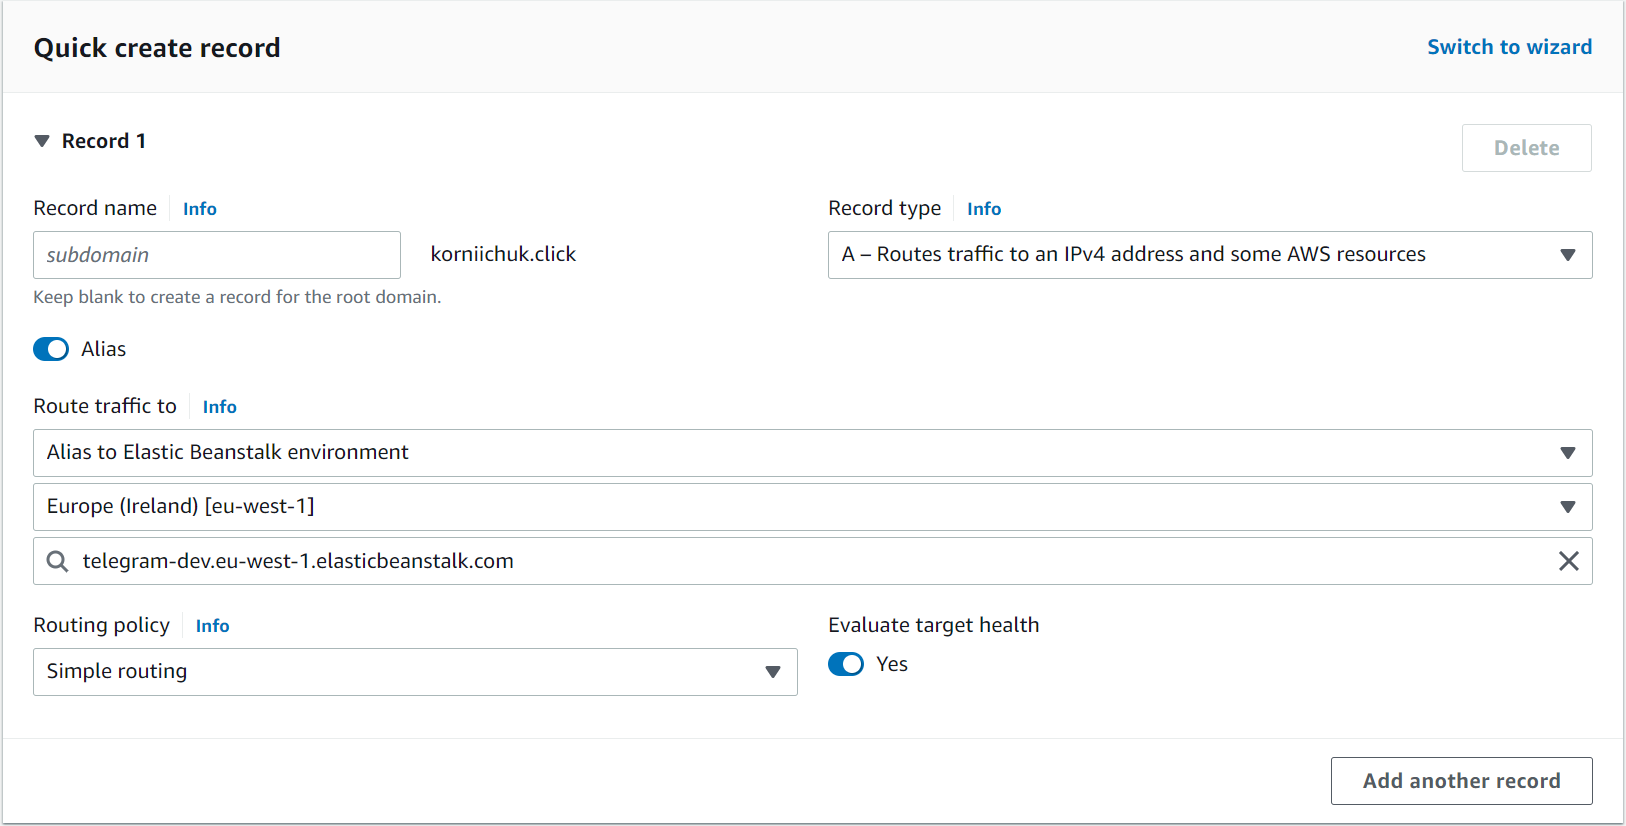
Add DNS record
This part is out of workshop scope!
EB terminate
To delete bot from AWS cloud, terminate the environment:
$ eb terminate

