Server with Express, Node.js
Storing Data in MongoDB
Frontend with React
Create .env file in the root directory of the project and add:
PORT=5070
NODE_ENV=development
BASE_URL=http://localhost:3000
COOKIE_KEY=somecookiekey
MONGO_URI=yourMongodbUrl
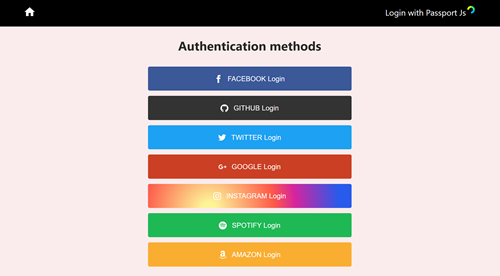
Add applications in your developer accounts on Google, Twitter, Facebook, GitHub, Spotify, Amazon.
Create application inside of each developer account, add Redirection/Callback URLs which correspond to the server routes
Copy Client(app) ID and SECRET and add them to .env file in the root directory of the project
Authentication with Twitter
Create new application in the twitter developer account
Navigate to App Details->Authentication settings->Edit
Make active Enable 3-legged OAuth option and add Callback URLs it should correspond to the routes where the users will be redirected after they logged in, for example: http://localhost:5070/auth/twitter/redirect
Ensure that Terms of service URL and Privacy policy URL fields have values, if not - generate URLs and add them.
Enable Request email address from usersoptions and Save settings.
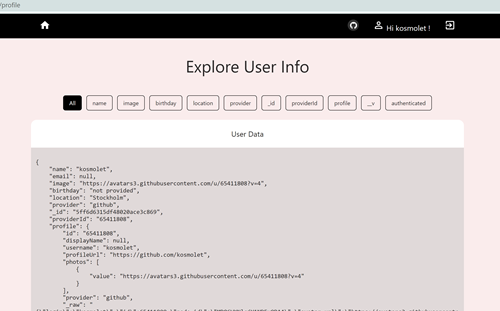
Also includeEmail: true should be included in the passport.use( new TwitterStrategy( {} ) in the passport.js config file (done) in order to receive user’s email in the response-profile
Once app is created navigate to the Keys and tokens on app details and click View Keys. Copy API key and API key secret and add them to the .env file in root directory of the project:
TWITTER_CONSUMER_KEY=API key
TWITTER_CONSUMER_SECRET=API key secret
Authentication with Facebook
Create new application in the facebook developer account
Once app is created navigate to the app dashboard, and find Facebook Login product.
Click Set Up, and then on the subsequent screen, click Web. Enter your base URL in the Site URL and complete adding the product. Redirect URLs should be added for production website, localhost redirects works by default
In the left-hand side menu bar select Settings->Basic and copy App ID and App Secret and add them to the .env file:
FACEBOOK_CLIENT_ID=App ID
FACEBOOK_CLIENT_SECRET=App Secret
Authentication with GitHub
Navigate to github in the Settings / Developer settings click New OAuth App
Register a new OAuth application: enter your base URL in the Homepage URL field and add Authorization callback URL , it should correspond to the route where the users will be redirected after they logged in, for example: http://localhost:5070/auth/github/redirect
Once the app is created click Generate client secret in App Details and copy Client ID and Client secret and add them to the .env file:
GITHUB_CLIENT_ID=Client ID
GITHUB_CLIENT_SECRET=Client secret
Authentication with Amazon
Create new application in the Amazon developer account
Once app is created navigate to Security Profile->Web Settings and add Allowed Origins(base URL) and Allowed Return URLs: http://localhost:5070/auth/amazon/redirect
Copy Client ID and Client Secret and add to the .env file:
AMAZON_CLIENT_ID=Client ID
AMAZON_CLIENT_SECRET=Client Secret
Authentication with Spotify
Create new application in the Spotify developer account
Once app is created navigate to App details->Edit Settings and add Website(base URL) and Redirect URIs: http://localhost:5070/auth/spotify/redirect
Copy Client ID and Client Secret and add to the .env file:
SPOTIFY_CLIENT_ID=Client ID
SPOTIFY_CLIENT_SECRET=Client Secret
Authentication with Google
Create a project in the Google developer console.
Navigate to APIs & Services tab. Create OAuth consent screen
Once screen is created navigate to Credentials->Edit/Create and add URIs(base URL) and Authorized redirect URIs: http://localhost:5070/auth/google/redirect
Copy Client ID and Client Secret and add to the .env file:
GOOGLE_CLIENT_ID=Client ID
GOOGLE_CLIENT_ID=Client Secret
Authentication with Instagram
Create new application in the Facebook developer account
Once app is created navigate to Products->Add Instagram and add OAuth Redirect URIs(only https are accepted)
Test users can be added in User Token Generator->Instagram Testers to generate long-lived access tokens
Copy Client ID and Client Secret and add to the .env file:
INSTAGRAM_CLIENT_ID=Instagram App ID
INSTAGRAM_CLIENT_SECRET=Instagram App Secret
Install dependencies for server npm i in root/server folder
Install dependencies for client cd client npm i
Start server and client concurrently: by navigating to server directory cd .. and running npm run dev command