Edge computing is one of the indispensable technology nowadays. Edge computing enables the processing of data physically nearer to the devices that generate the data. Edge computing increases the speed at which data is processed and also reduces the load on the server. There are many commercial edge processing devices out there specifically made for this purpose only.
Edge computing devices process the data at edge locations closer to where it originates. When the data generated is at a lower rate, edge processing applications can process the data very quickly. But when the data generated at a high rate processing of the data becomes cumbersome. To tackle this situation, we need to containerize the application to make it horizontally scalable. Here Kubernetes fills the gap.
Kubernetes is a production-grade orchestration software for containerized applications. Kubernetes has quickly become a key component of Edge computing. Kubernetes is initially developed by Google and later donated to the Open Source community. It is CNCF graduated software and widely used in diverse production environments.
When we think about and Open Source and inexpensive hardware for edge computing, Raspberry Pi is one of the best choices we have. Raspberry Pi has decent computing power and also widely supported. Even though Raspberry Pi is great, installing Kubernetes and running on it seamlessly faces many challenges. Kubernetes is a massive software component and commonly run on server environments. For Edge devices, we need a lightweight Kubernetes distribution. We have many choices like KubeEdge, MicroK8s, K3S, etc... Among this, K3S is recently released and got huge attention. It is a lightweight and certified Kubernetes distribution and can run on many low-end devices like Raspberry Pi.
For this article, we are going to use K3S. We will explore KudeEge and MicroK8s later.
In this article, we will explore how to create a bare minimum cluster using 3 Raspberry Pis, one master, and two worker nodes. I am using Raspberry Pi 4 as a master and 2 Raspberry Pi 3 as worker nods. But you can choose whatever combination you like.
Here are the steps to create the cluster:
- Set up the microSD card and install Raspbian Lite Image
- Configure SSH and WiFi
- Configure the Raspberry Pi
- Install K3S Server on the master
- Install K3S Agent on worker nodes
- Install the Kubernetes Dashboard for monitoring the cluster
Before we start, please make sure to download the Raspberry Pi Imager or balenaEtcher and installed it on the system. Also, download and keep the Raspberry Pi Buster Lite image. We don't need the Raspbian Desktop version since we will be using Raspberry Pi headless.
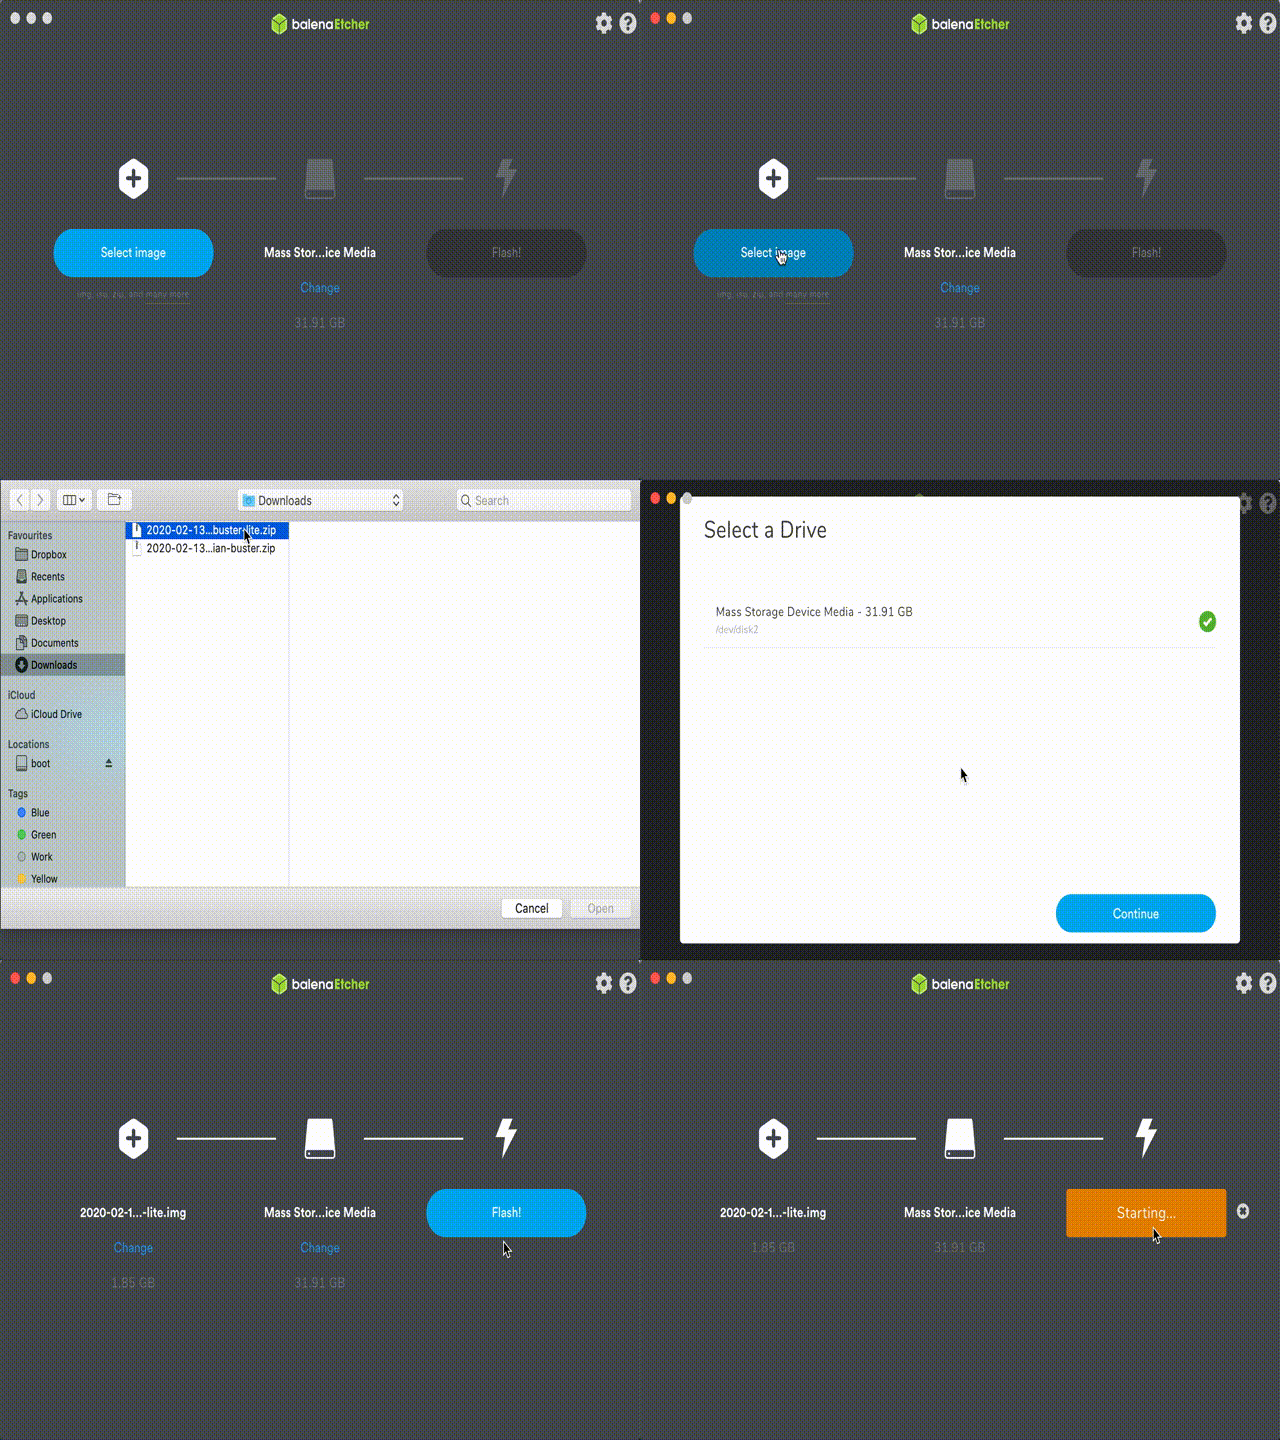
Set up the microSD card and install Raspbian Lite Image I am using balenaEtcher to set up the microSD card. You can use balenaEtcher or Raspberry Pi Imager.
Configure SSH and WiFi Since we are using the Rasbian Lite image, we should configure SSH and WiFi before inserting it into Raspberry Pi.
Configure the Raspberry Pi After SSH and WiFi set up is complete, insert the microSD card on Raspberry Pi and turn on the device.
Now we will change a couple of default settings. We will change the default password, hostname, and the default GPU Memory Split from 64 to 16. Since we are not using any Graphical User Interface, we can safely change the GPU memory to the minimum allowed 16 MB. Note the hostname you have given.
Install K3S Server on the master K3S provides a convenient shell script to install. Installing is as simple as invoking the following command:
curl -sfL https://get.k3s.io | sh -
This script will check the platform ad download the correct installation file and start the installation process. Once the installation is complete, the K3S server service will start automatically. You can check the status by the following command.
sudo systemctl status k3s
The installation of the Kubernetes is now complete. We need to pay attention to two things. The kubeconfig file stored at /etc/rancher/k3s/k3s.yaml and the node token stored at /var/lib/rancher/k3s/server/node-token. We need the kubeconfig file to configure access to the cluster. The node-token file contains a token to join the master. You should copy this token.
Install K3S Agent on worker nodes We can use the same script to install on worker nodes. But before running this script, we need to set two environment variables. K3S_URL to specify server URL and K3S_TOKEN to specify the node token. Assuming the hostname of your master node is k3smaster, the following commands set the environment variables.
export K3S_URL="https://k3smaster:6443"
export K3S_TOKEN="<<replace  with  your  token>>"
Now you can run the script to install the K3S agent.
curl -sfL https://get.k3s.io | sh -
Repeat these steps to set up the other worker node.
The setup process is complete. Now you have a working Kubernetes cluster running on Raspberry Pi with one master node and two worker nodes.
To access the cluster, you need to copy the contents of the kubeconfig and copy it to the config file on your system. You can find the config file at $HOME/.kube/ folder. Now you can access the cluster from your system.
You can use the kubectl command to access the cluster. The get nodes command should return the cluster nodes.
kubectl get nodes

rpimaster Ready master 33h v1.17.4+k3s1
rpinode2 Ready <none> 28h v1.17.4+k3s1
rpinode1 Ready <none> 29h v1.17.4+k3s1
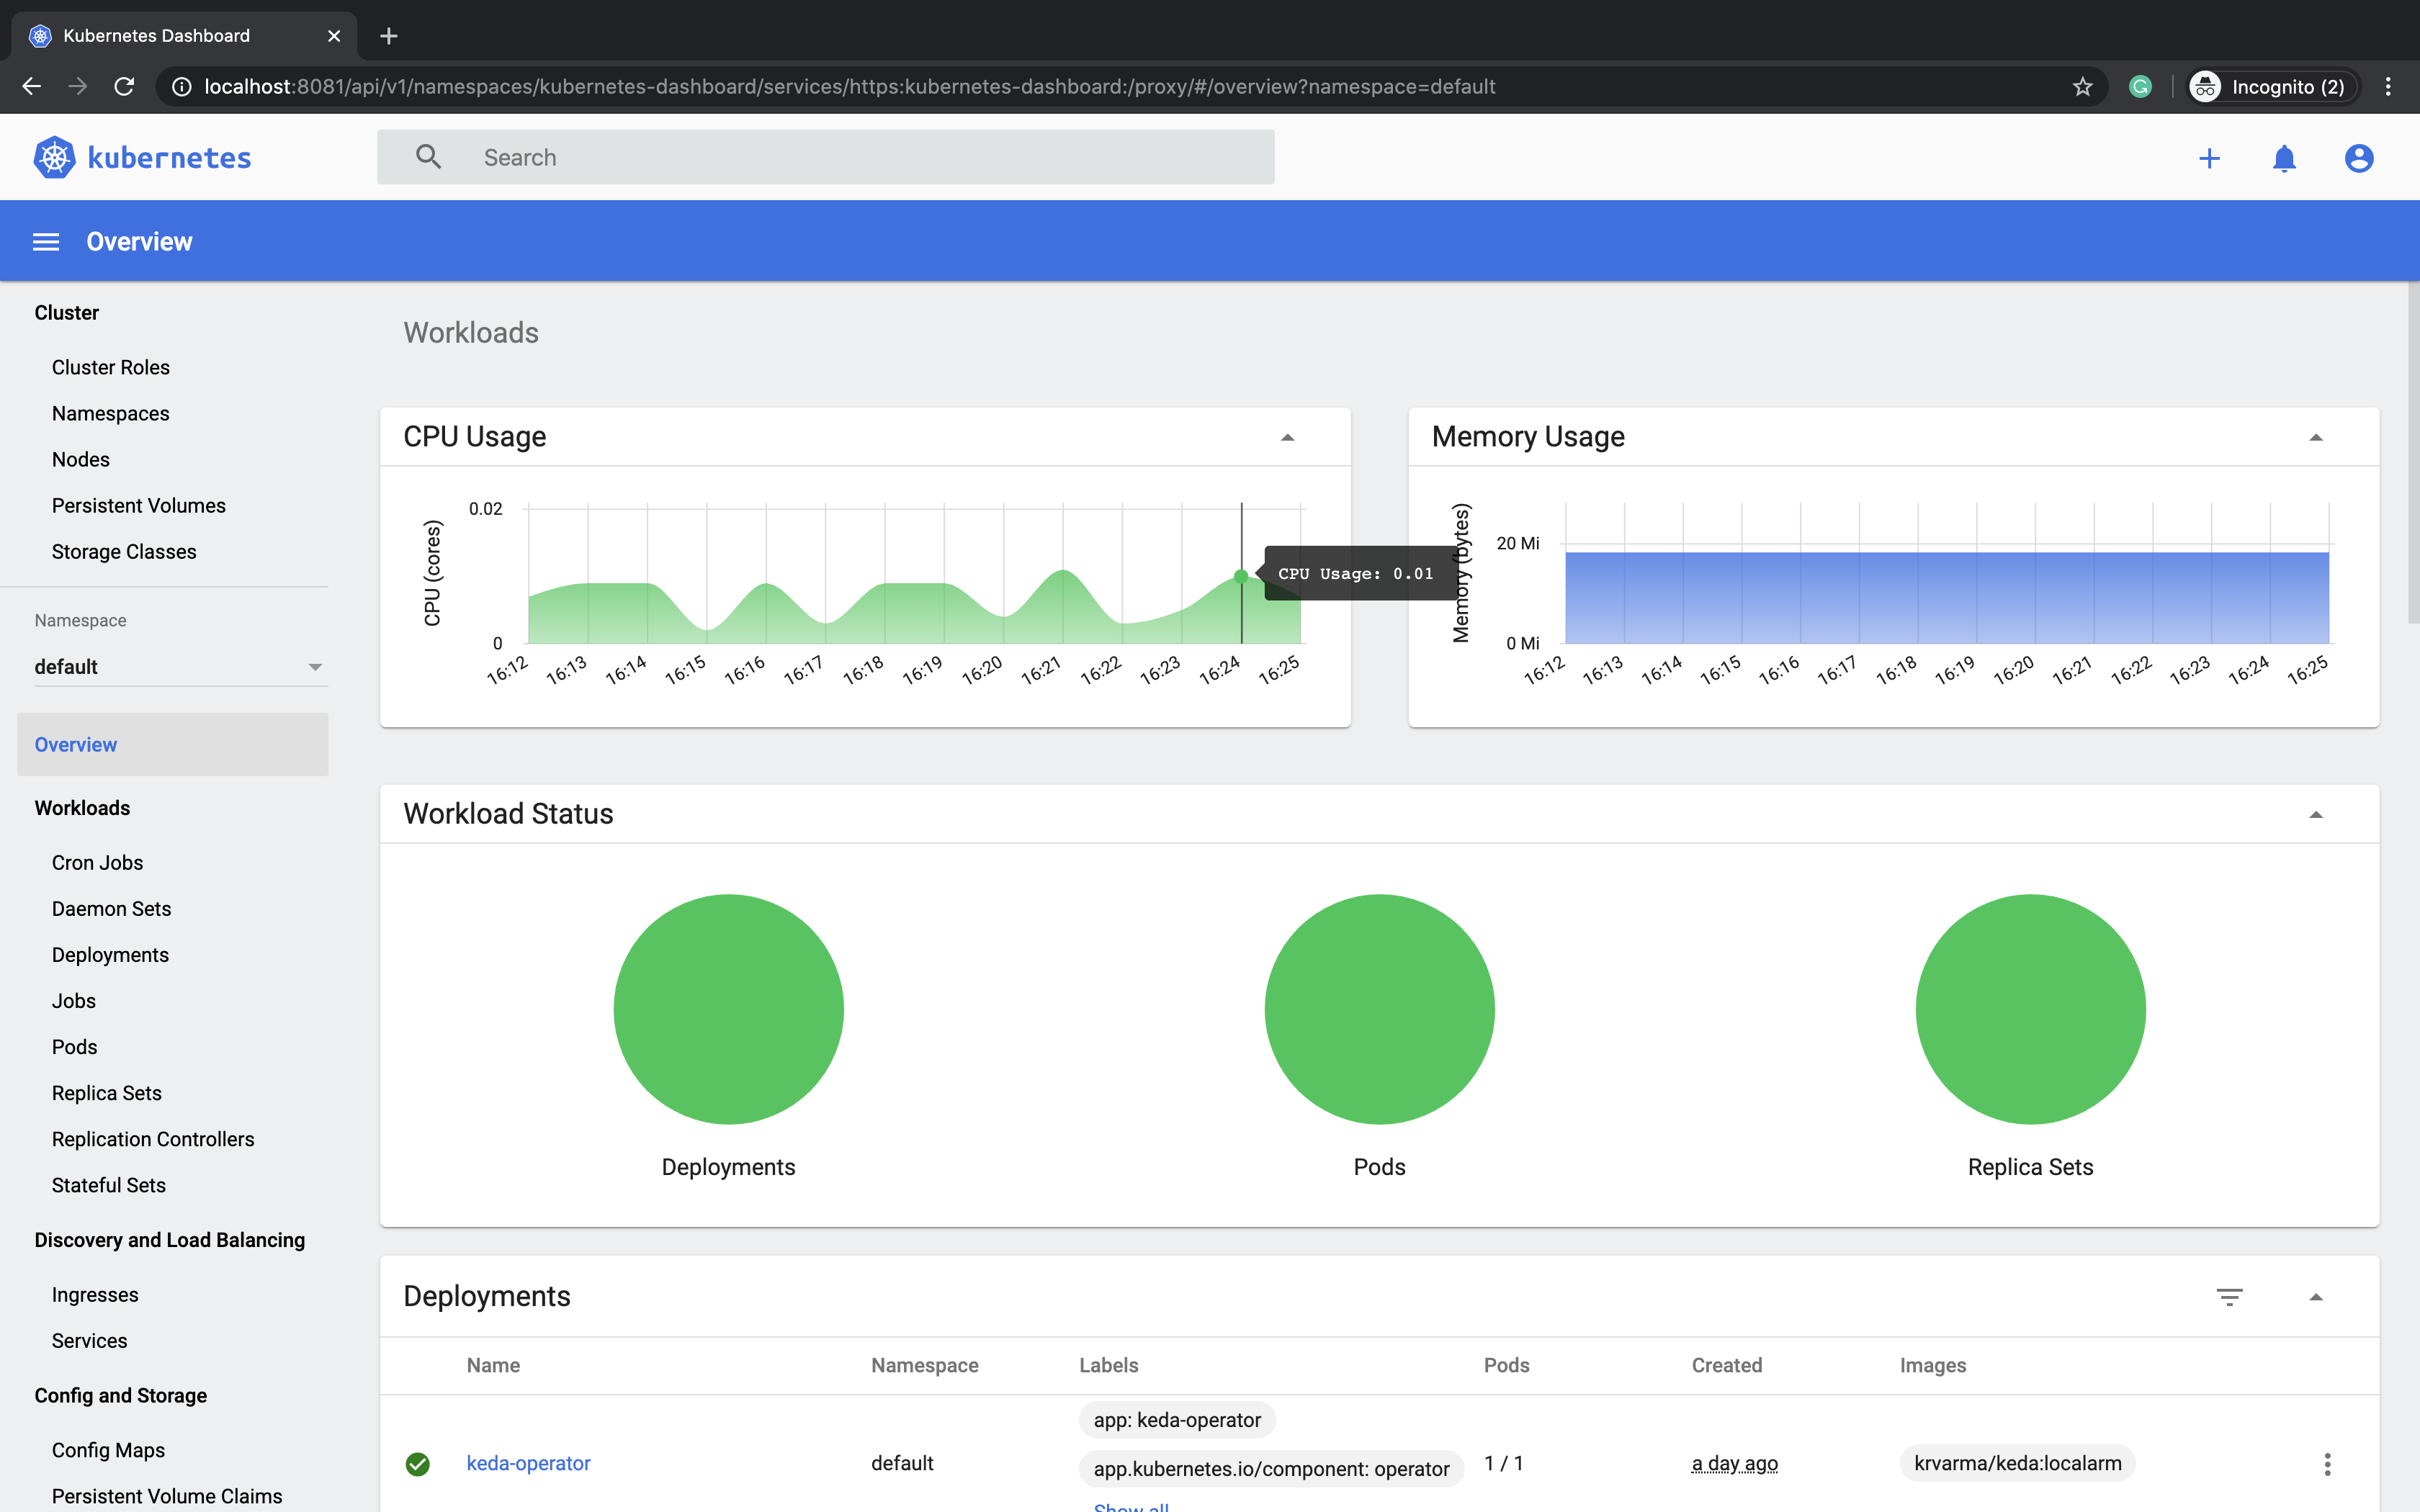
Install the Kubernetes Dashboard for monitoring the cluster We can now install the Kubernetes Dashboard. The installation procedure is a little bit complex. You should follow these steps to install and access the Dashboard.
Run the following command to install the Dashboard.
kubectl apply -f https://raw.githubusercontent.com/kubernetes/dashboard/v2.0.0/aio/deploy/recommended.yaml
We should create a user named admin-user to access and login to the Dashboard. The following command will create the admin user.
cat <<EOF  |  kubectl  apply  -f  -
---
apiVersion: v1
kind: ServiceAccount
metadata:
    name: admin-user
	namespace: kubernetes-dashboard
---
apiVersion: rbac.authorization.k8s.io/v1
kind: ClusterRoleBinding
metadata:
    name: admin-user
roleRef:
    apiGroup: rbac.authorization.k8s.io
    kind: ClusterRole
    name: cluster-admin
subjects:
    - kind: ServiceAccount
      name: admin-user
	  namespace: kubernetes-dashboard
---
EOF
Use this command to get the secret to log on to the Dashboard.
kubectl -n kubernetes-dashboard describe secret $(kubectl -n kubernetes-dashboard get secret | grep admin-user | awk '{print $1}')
This command will output the token along with much other information, copy the token. Now run the following command to start the Kubernetes Proxy.
kubectl proxy --port=8081
Navigate to http://localhost:8081/api/v1/namespaces/kubernetes-dashboard/services/https:kubernetes-dashboard:/proxy/#/login. The page will prompt you to enter the Bearer Token, enter the token to log in.


