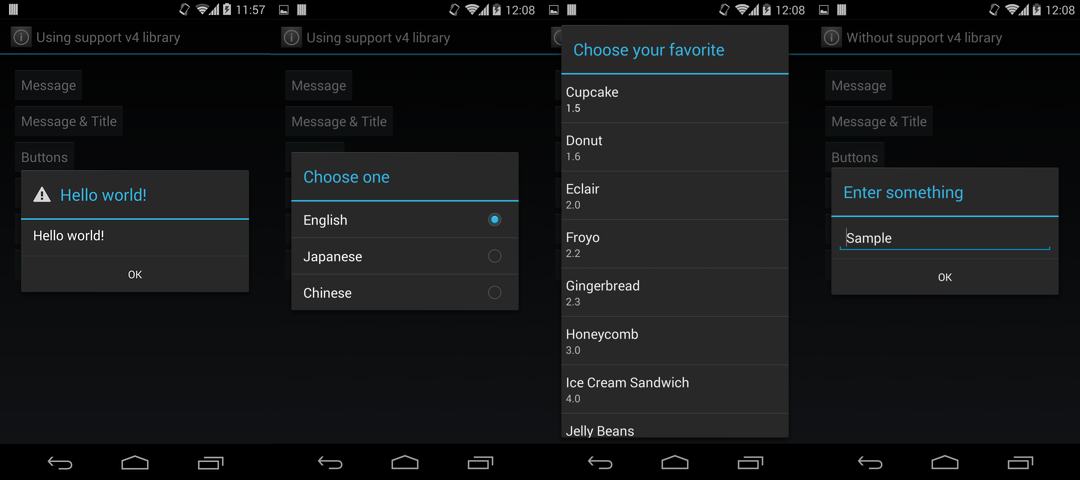
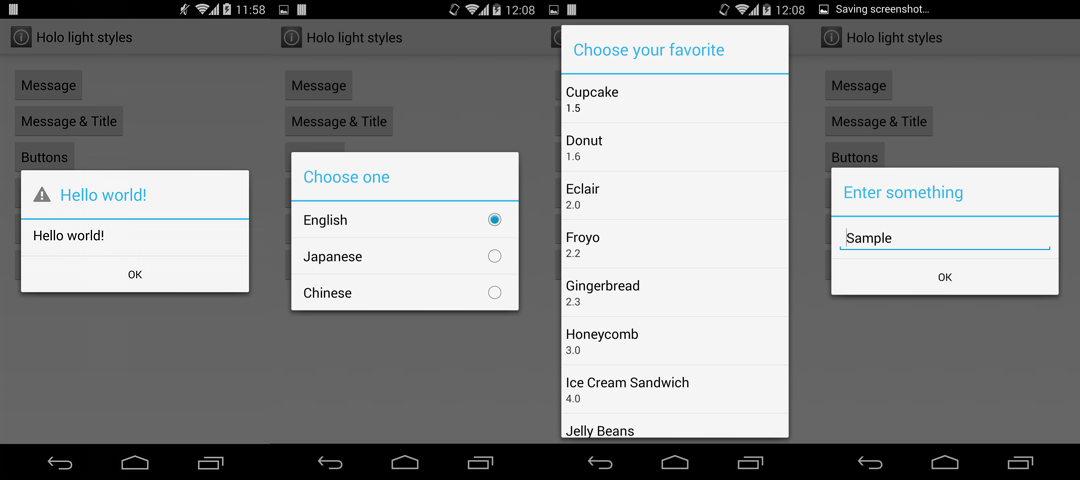
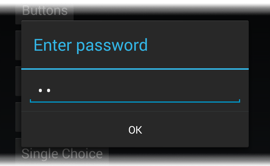
SimpleAlertDialog is a library for using DialogFragment like AlertDialog in the Android application.
- Available from API level 4 (Android 1.6 Donut) to 19 (Android 4.4 KitKat) and L.
- Holo style for all versions.
- Simple interface like
AlertDialog.Builder. - Convenient callbacks are provided to handle basic events.
- Dialog's lifecycle is synchronized with parent activity or fragment, which will suppress
IllegalStateException. - Supports both the
Activityon API level 11+ and theFragmentActivityin the android-support-v4 library.
dependencies {
    compile 'com.github.ksoichiro:simplealertdialog:1.2.1@aar'
}The 'simplealertdialog' folder is the main library. Please import it into the Eclipse, Android Studio or other IDEs.
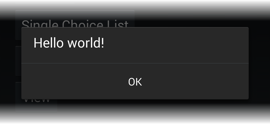
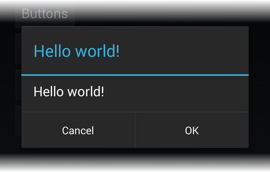
If you want to show just a message and OK button:
new SimpleAlertDialogFragment.Builder()
        .setMessage("Hello world!")
        .setPositiveButton(android.R.string.ok)
.create().show(getFragmentManager(), "dialog");If you want to handle button click event, build dialog like this:
new SimpleAlertDialogFragment.Builder()
        .setMessage("Hello world!")
        .setPositiveButton(android.R.string.ok)
        .setNegativeButton(android.R.string.cancel)
        .setRequestCode(1)
        .create().show(getFragmentManager(), "dialog");
Make the activity to implement SimpleAlertDialog.OnClickListener:
public class NormalActivity extends Activity
        implements SimpleAlertDialog.OnClickListener
Then write handlers:
@Override
public void onDialogPositiveButtonClicked(SimpleAlertDialog dialog,
        int requestCode, View view) {
    if (requestCode == 1) {
        Toast.makeText(this, "OK button clicked", Toast.LENGTH_SHORT).show();
    }
}

@Override
public void onDialogNegativeButtonClicked(SimpleAlertDialog dialog,
        int requestCode, View view) {
    if (requestCode == 1) {
        Toast.makeText(this, "Cancel button clicked", Toast.LENGTH_SHORT).show();
    }
}
Don't forget to set the request code.
If you handle multiple dialogs in an Activity or Fragment, those dialogs call the same event handlers, so the request code is necessary to distinguish them.
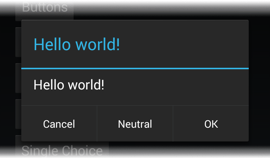
Like AlertDialog.Builder, you can use a neutral button like this:
new SimpleAlertDialogFragment.Builder()
        .setMessage("Hello world!")
        .setPositiveButton(android.R.string.ok)
        .setNeutralButton(R.string.neutral)
        .setNegativeButton(android.R.string.cancel)
        .setRequestCode(1)
        .create().show(getFragmentManager(), "dialog");
To handle neutral button taps, implement SimpleAlertDialog.OnNeutralButtonClickListener interface in addition to SimpleAlertDialog.OnClickListener.
public class NormalActivity extends Activity
        implements SimpleAlertDialog.OnNeutralButtonClickListener
The implement callback.
@Override
public void onDialogNeutralButtonClicked(SimpleAlertDialog dialog, int requestCode, View view) {
    if (requestCode == 1) {
        Toast.makeText(this, "Neutral button clicked", Toast.LENGTH_SHORT).show();
    }
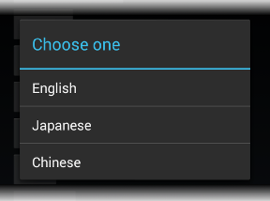
}You can use the string items style dialog.
Create dialog:
new SimpleAlertDialogFragment.Builder()
        .setTitle("Choose one")
        .setItems(R.array.single_choice)
        .setRequestCode(REQUEST_CODE_ITEMS)
        .create().show(getFragmentManager(), "dialog");
Implement the interface:
implements SimpleAlertDialog.OnItemClickListenerImplement callbacks:
@Override
public void onOnItemClick(final SimpleAlertDialog dialog, int requestCode,
        int which) {
    if (requestCode == REQUEST_CODE_ITEMS) {
        // Do something
    }
}To show string items with icons, create dialog like this:
new SimpleAlertDialogFragment.Builder()
        .setTitle("Choose one")
        .setItems(R.array.icon_items, new int[]{
                R.drawable.ic_action_aci_document3,
                R.drawable.ic_action_aci_edit,
                R.drawable.ic_action_aci_search})
        .setRequestCode(REQUEST_CODE_ICON_ITEMS)
        .create().show(getFragmentManager(), "dialog");
To handle list item taps, use SimpleAlertDialog.OnItemClickListener just like string items.
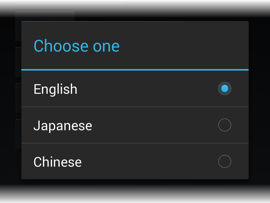
You can use the single choice list style dialog.
Create dialog:
new SimpleAlertDialogFragment.Builder()
        .setTitle("Choose one")
        .setSingleChoiceCheckedItem(0) // This enables a single choice list
        .setRequestCode(REQUEST_CODE_SINGLE_CHOICE_LIST)
        .create().show(getFragmentManager(), "dialog");
Implement the interface:
implements SimpleAlertDialog.SingleChoiceArrayItemProviderImplement callbacks:
@Override
public CharSequence[] onCreateSingleChoiceArray(final SimpleAlertDialog dialog, int requestCode) {
    if (requestCode == REQUEST_CODE_SINGLE_CHOICE_LIST) {
        return getResources().getTextArray(R.array.single_choice);
    }
    return null;
}

@Override
public void onSingleChoiceArrayItemClick(final SimpleAlertDialog dialog, int requestCode,
        int position) {
    if (requestCode == REQUEST_CODE_SINGLE_CHOICE_LIST) {
        // Do something
    }
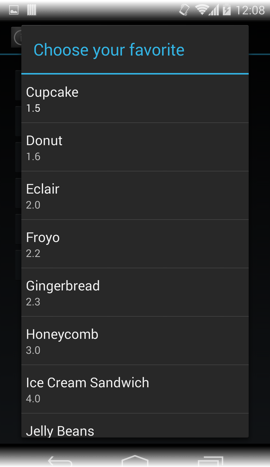
}You can use your custom ListAdapter in the dialog.
Create dialog:
new SimpleAlertDialogFragment.Builder()
        .setTitle("Choose your favorite")
        .setUseAdapter(true) // This enables a custom adapter
        .setRequestCode(REQUEST_CODE_ADAPTER)
        .create().show(getFragmentManager(), "dialog");
Implement the interface:
implements SimpleAlertDialog.ListProviderImplement callbacks:
@Override
public ListAdapter onCreateList(SimpleAlertDialog dialog, int requestCode) {
    if (requestCode == REQUEST_CODE_ADAPTER) {
        // Create your custom adapter
        return new SweetsAdapter(this, SWEETS_LIST);
    }
    return null;
}

@Override
public void onListItemClick(SimpleAlertDialog dialog, int requestCode, int position) {
    if (requestCode == REQUEST_CODE_ADAPTER) {
        // Do something
    }
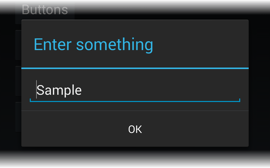
}You can use your custom view in the dialog.
Create dialog:
new SimpleAlertDialogFragment.Builder()
        .setTitle("Enter something")
        .setUseView(true) // This enables a custom view
        .setRequestCode(REQUEST_CODE_VIEW)
        .create().show(getFragmentManager(), "dialog");
Implement the interface:
implements SimpleAlertDialog.ViewProviderImplement callbacks:
@Override
public View onCreateView(SimpleAlertDialog dialog, int requestCode) {
    if (requestCode == REQUEST_CODE_VIEW) {
        final View view = LayoutInflater.from(this).inflate(R.layout.view_editor, null);
        ((EditText) view.findViewById(R.id.text)).setText("Sample");
        return view;
    }
    return null;
}If you want to use a view with an EditText, you don't have to create layout files: just call setEditText() on Builder.
new SimpleAlertDialogFragment.Builder()
        .setTitle("Enter something")
        .setEditText("Sample", InputType.TYPE_CLASS_TEXT)
        .setRequestCode(REQUEST_CODE_EDIT_TEXT)
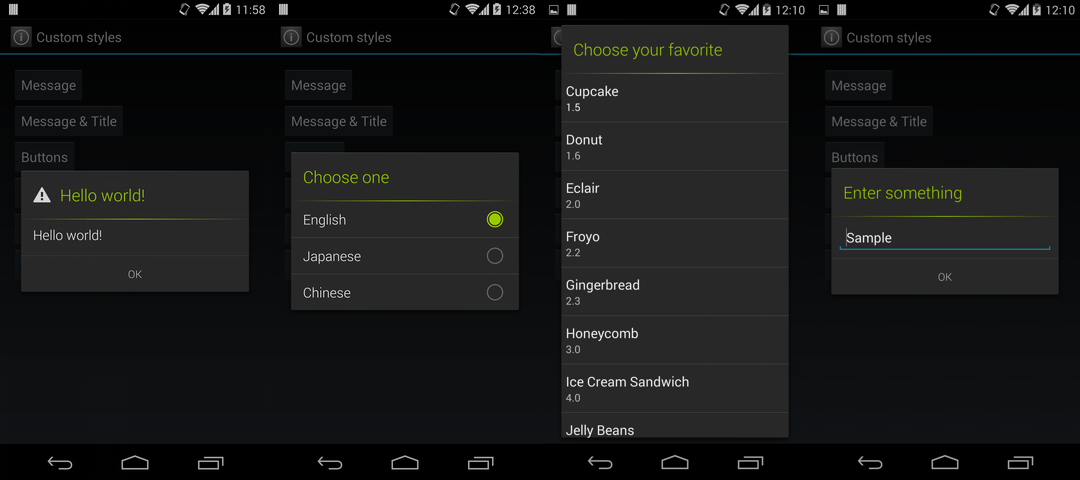
.create().show(getFragmentManager(), "dialog");You can customize each part of the dialog.
Define simpleAlertDialogStyle in your theme:
<style name="CustomTheme" parent="CustomBaseTheme">
    <item name="simpleAlertDialogStyle">@style/SimpleAlertDialogStyle</item>
</style>
This style can be constructed like this:
<style name="SimpleAlertDialogStyle" parent="@style/Theme.SimpleAlertDialog">
    <!-- Title separator styles -->
    <item name="sadTitleSeparatorBackground">@drawable/title_separator</item>
    <item name="sadTitleSeparatorHeight">1dp</item>
    <!-- TextView style of the title -->
    <item name="sadTitleTextStyle">@style/SimpleAlertDialogTitleTextStyle</item>
    <!-- TextView style of the message -->
    <item name="sadMessageTextStyle">@style/SimpleAlertDialogMessageTextStyle</item>
    <!-- TextView style of the OK / Cancel buttons -->
    <item name="sadButtonTextStyle">@style/SimpleAlertDialogButtonTextStyle</item>
    <!-- TextView in the Single choise list item, String items and String items with icons -->
    <item name="sadListItemTextStyle">@style/SimpleAlertDialogListItemTextStyle</item>
    <!-- Drawable for radio button of the single choice list item -->
    <item name="sadListChoiceIndicatorSingle">@drawable/simpleblue_btn_radio</item>
</style>
Styles in the xxxTextStyle will be used as TextAppearance.
So you can customize their styles as if they were just a TextView.
<style name="SimpleAlertDialogTitleTextStyle">
    <item name="android:textColor">#FF99CC00</item>
    <item name="android:fontFamily">sans-serif-light</item>
</style>
If you want to use styles based on Holo Light, set replace the parent attribute to @style/Theme.SimpleAlertDialog.Light:
<style name="SimpleAlertDialogStyle" parent="@style/Theme.SimpleAlertDialog.Light">First of all, define your style.
Put some codes like following to your res/values/styles.xml:
    <style name="SimpleAlertDialogCustomTheme" parent="android:Theme.Dialog">
        <item name="android:windowAnimationStyle">@style/SimpleAlertDialogCustomAnimation</item>
    </style>

    <style name="SimpleAlertDialogCustomAnimation" parent="android:Animation.Dialog">
        <item name="android:windowEnterAnimation">@anim/fade_in</item>
        <item name="android:windowExitAnimation">@anim/fade_out</item>
    </style>
Then apply it to your dialog:
findViewById(R.id.btn_themed).setOnClickListener(new View.OnClickListener() {
    @Override
    public void onClick(final View v) {
        new SimpleAlertDialogSupportFragment.Builder()
                .setTheme(R.style.SimpleAlertDialogCustomTheme)
                .setMessage("Hello world!")
                .setPositiveButton(android.R.string.ok)
                .create().show(getSupportFragmentManager(), "dialog");
    }
});
You can see window entering/exiting animation defined by @anim/fade_in and @anim/fade_out.
SimpleAlertDialog accesses to its parent fragment by using getTargetFragment().
So you can interact with Fragment by calling setTargetFragment()
when building SimpleAlertDialog.
        new SimpleAlertDialogSupportFragment.Builder()
            // This enables SimpleAlertDialog to recognize that
            // MyFragment is its caller.
            .setTargetFragment(MyFragment.this)
:SimpleAlertDialog is just a kind of DialogFragment, so it must follow the manner of using Fragment or DialogFragment.
DialogFragment has its own lifecycle and it's not the same as the Activity's one.
So if you pass your custom view, callback, etc. directly, it may cause your app crash because Activity and Fragment are reproduced according to their own life cycles, which will result in invalid references(NullPointerExeption or something like that) or will make some parameters passed by Builder null.
To handle this issue, Fragments(DialogFragments) must not have instance fields and can be recreated with no args constructor and all the parameters for Fragment's should be handled with Bundle object.
In consideration of all of these things, I concluded that it is the best solution that SimpleAlertDialog assumes objects got by getActivity() and getTargetFragment() as its callbacks candidates and if they implement some specific interfaces they must be called back.
This solution does not depend on references, so it's safe in terms of life cycles problems.
Therefore, I've adopted a method of using interfaces.
-
Sample applications using this library are included in the simplealertdialog-samples folder.
-
You can also try it on Google Play.
- Soichiro Kashima - soichiro.kashima@gmail.com
Copyright 2014 Soichiro Kashima

Licensed under the Apache License, Version 2.0 (the "License");
you may not use this file except in compliance with the License.
You may obtain a copy of the License at

    http://www.apache.org/licenses/LICENSE-2.0

Unless required by applicable law or agreed to in writing, software
distributed under the License is distributed on an "AS IS" BASIS,
WITHOUT WARRANTIES OR CONDITIONS OF ANY KIND, either express or implied.
See the License for the specific language governing permissions and
limitations under the License.
Part of the drawables are from Android Open Source Project.
Copyright (C) 2010 The Android Open Source Project

Licensed under the Apache License, Version 2.0 (the "License");
you may not use this file except in compliance with the License.
You may obtain a copy of the License at

    http://www.apache.org/licenses/LICENSE-2.0

Unless required by applicable law or agreed to in writing, software
distributed under the License is distributed on an "AS IS" BASIS,
WITHOUT WARRANTIES OR CONDITIONS OF ANY KIND, either express or implied.
See the License for the specific language governing permissions and
limitations under the License.
This library uses chrisbanes/gradle-mvn-push for releasing.
Copyright 2013 Chris Banes

Licensed under the Apache License, Version 2.0 (the "License");
you may not use this file except in compliance with the License.
You may obtain a copy of the License at

    http://www.apache.org/licenses/LICENSE-2.0

Unless required by applicable law or agreed to in writing, software
distributed under the License is distributed on an "AS IS" BASIS,
WITHOUT WARRANTIES OR CONDITIONS OF ANY KIND, either express or implied.
See the License for the specific language governing permissions and
limitations under the License.


