- DC 5V/4A Barrel Jack Power Adapter* - Makersupplies
- HDMI Monitor
- Wireless Keyboard and Mouse*
- USB-A to micro-usb adapter with dataline
- Jumpers - aliexpress
- Wireless network adapter, M2(see below) or USB(not recommended*)
You can also get these additional hardware for a higher quality-of-life (QOL) development experience:
- M2 slot Wireless Adapter - Makersupplies
*If using the 4A DC jack, the USB wireless adapter and bluetooth wireless transceivers tend to suffer interference from the adjacent power jack related to grounding issues. Related symptoms: keyboard/mouse stutter and network loss.
-
Download the Nvidia SDK Manager onto a Debian machine (Ubuntu Desktop 16.04 and 18.04 on x64 system ) or emulator. Download link here
-
Run the SDK Manager, choose the right platforms, as seen below and proceed to the next step:
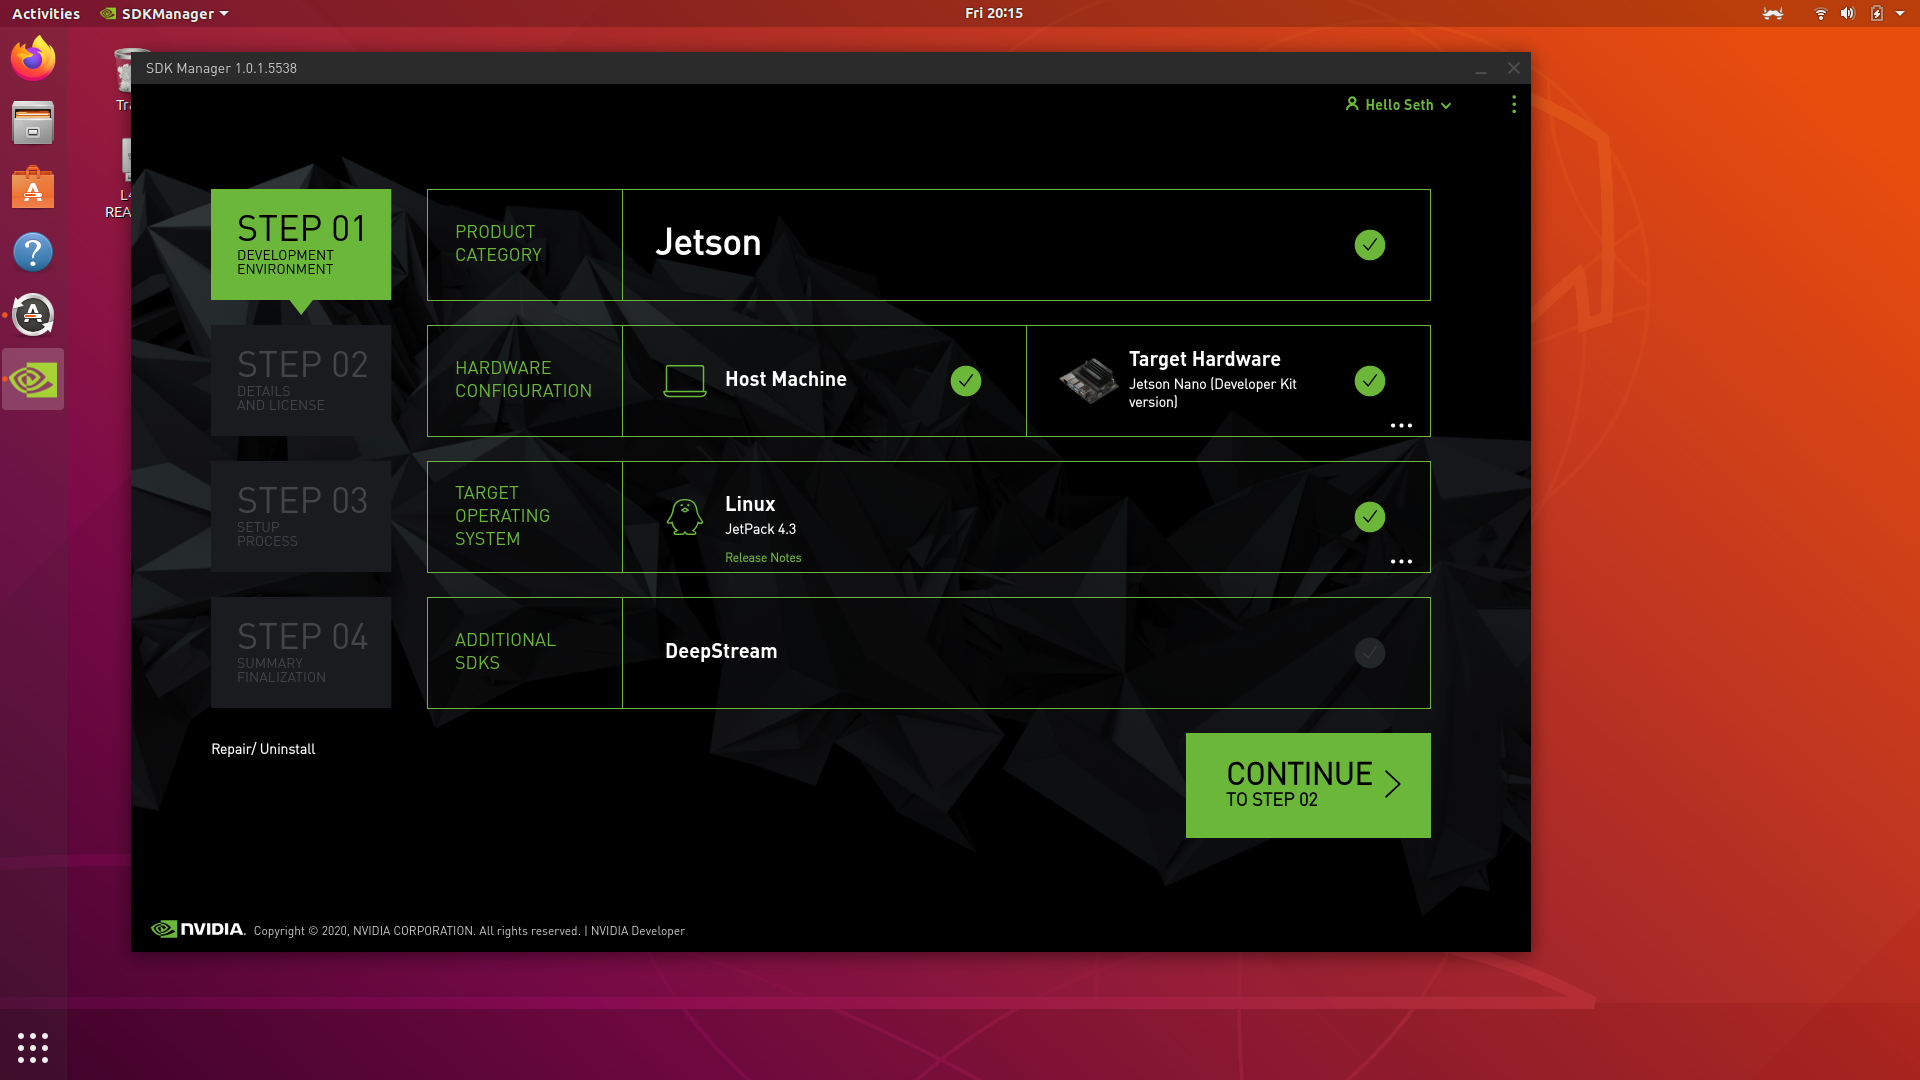 Remember to choose NVIDIA Jetson Nano (Developer Kit Version) and not Jetson Nano (Production version)
 -
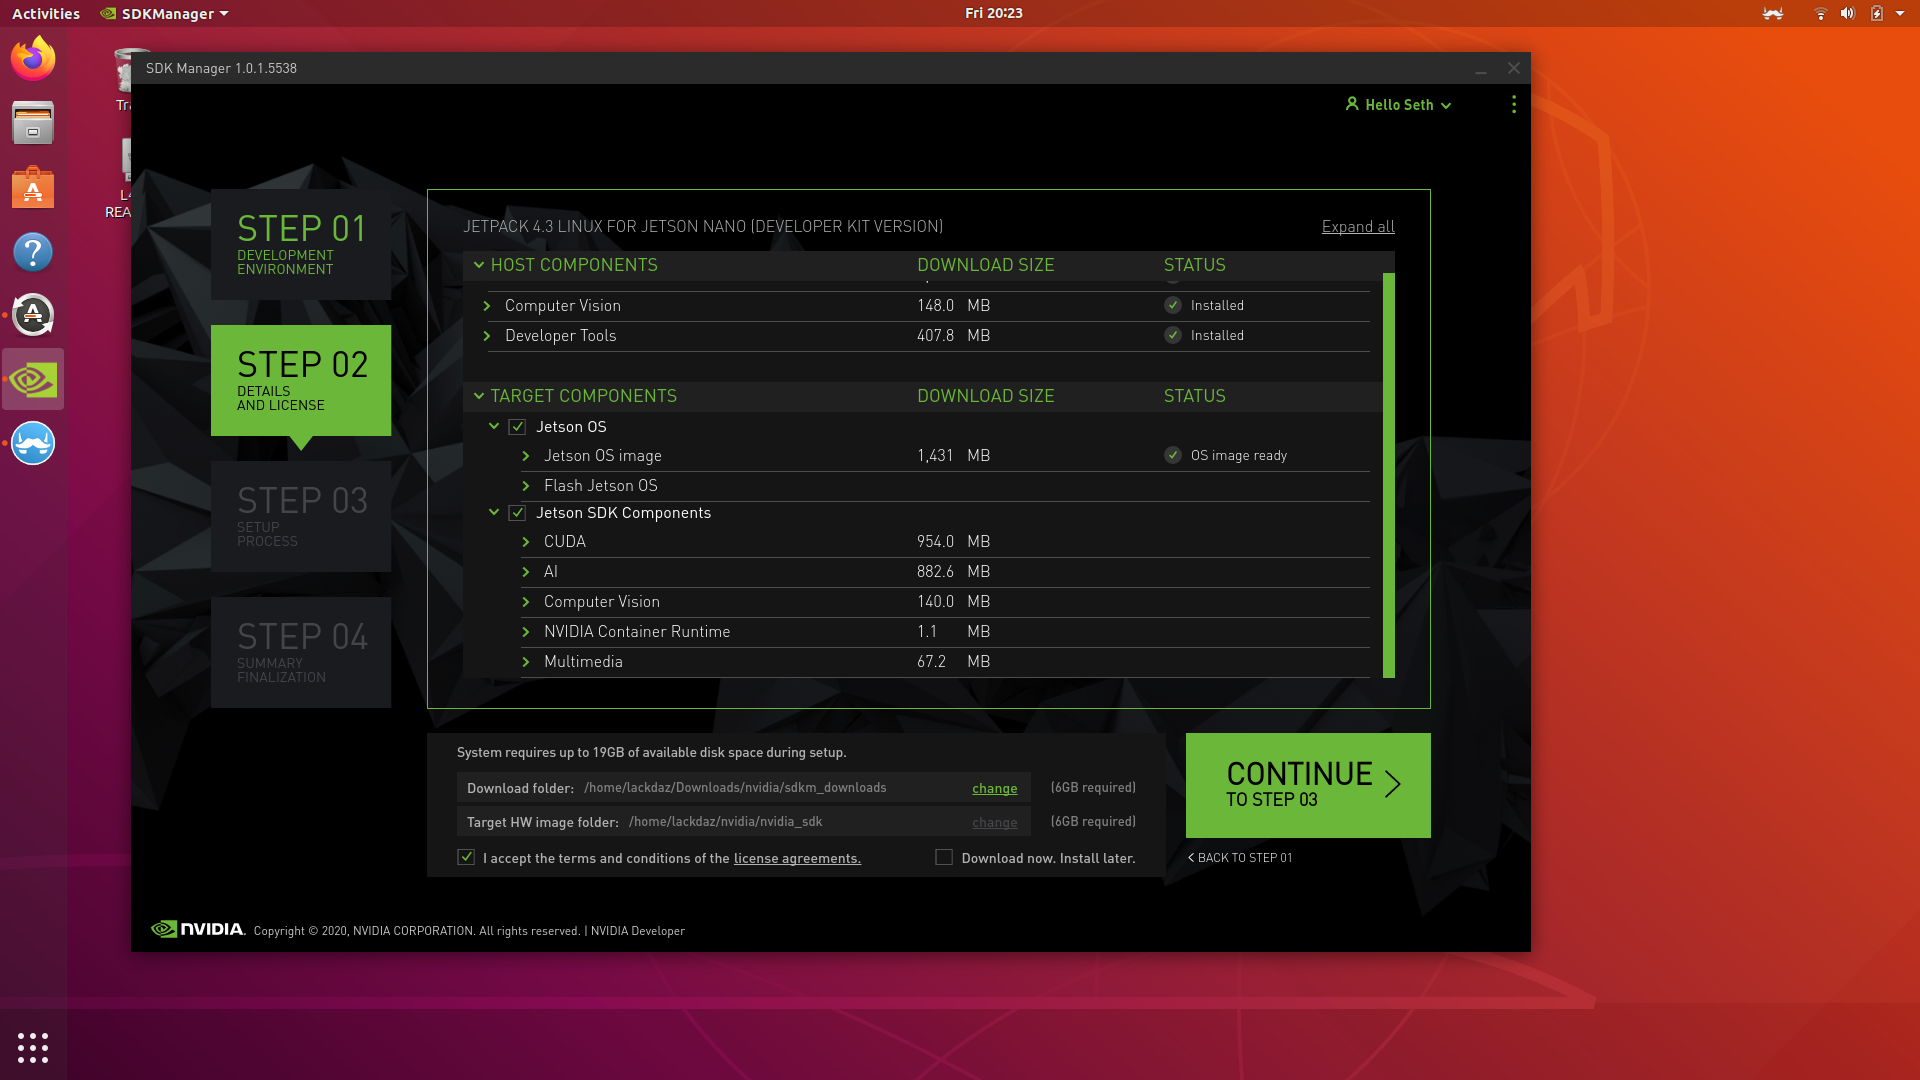
Select Jetson OS and Jetson SDK Components and the downloads will commence (will take some time). Continue to the next step.
-
These steps are tricky. You can follow along with the instructions shown but there are some gotchas. First, you can only use 'Manual Mode' because automatic doesn't work with a SD card that isn't already flashed with the OS. So go ahead and select Manual Mode. I'll go step-by-step from here.
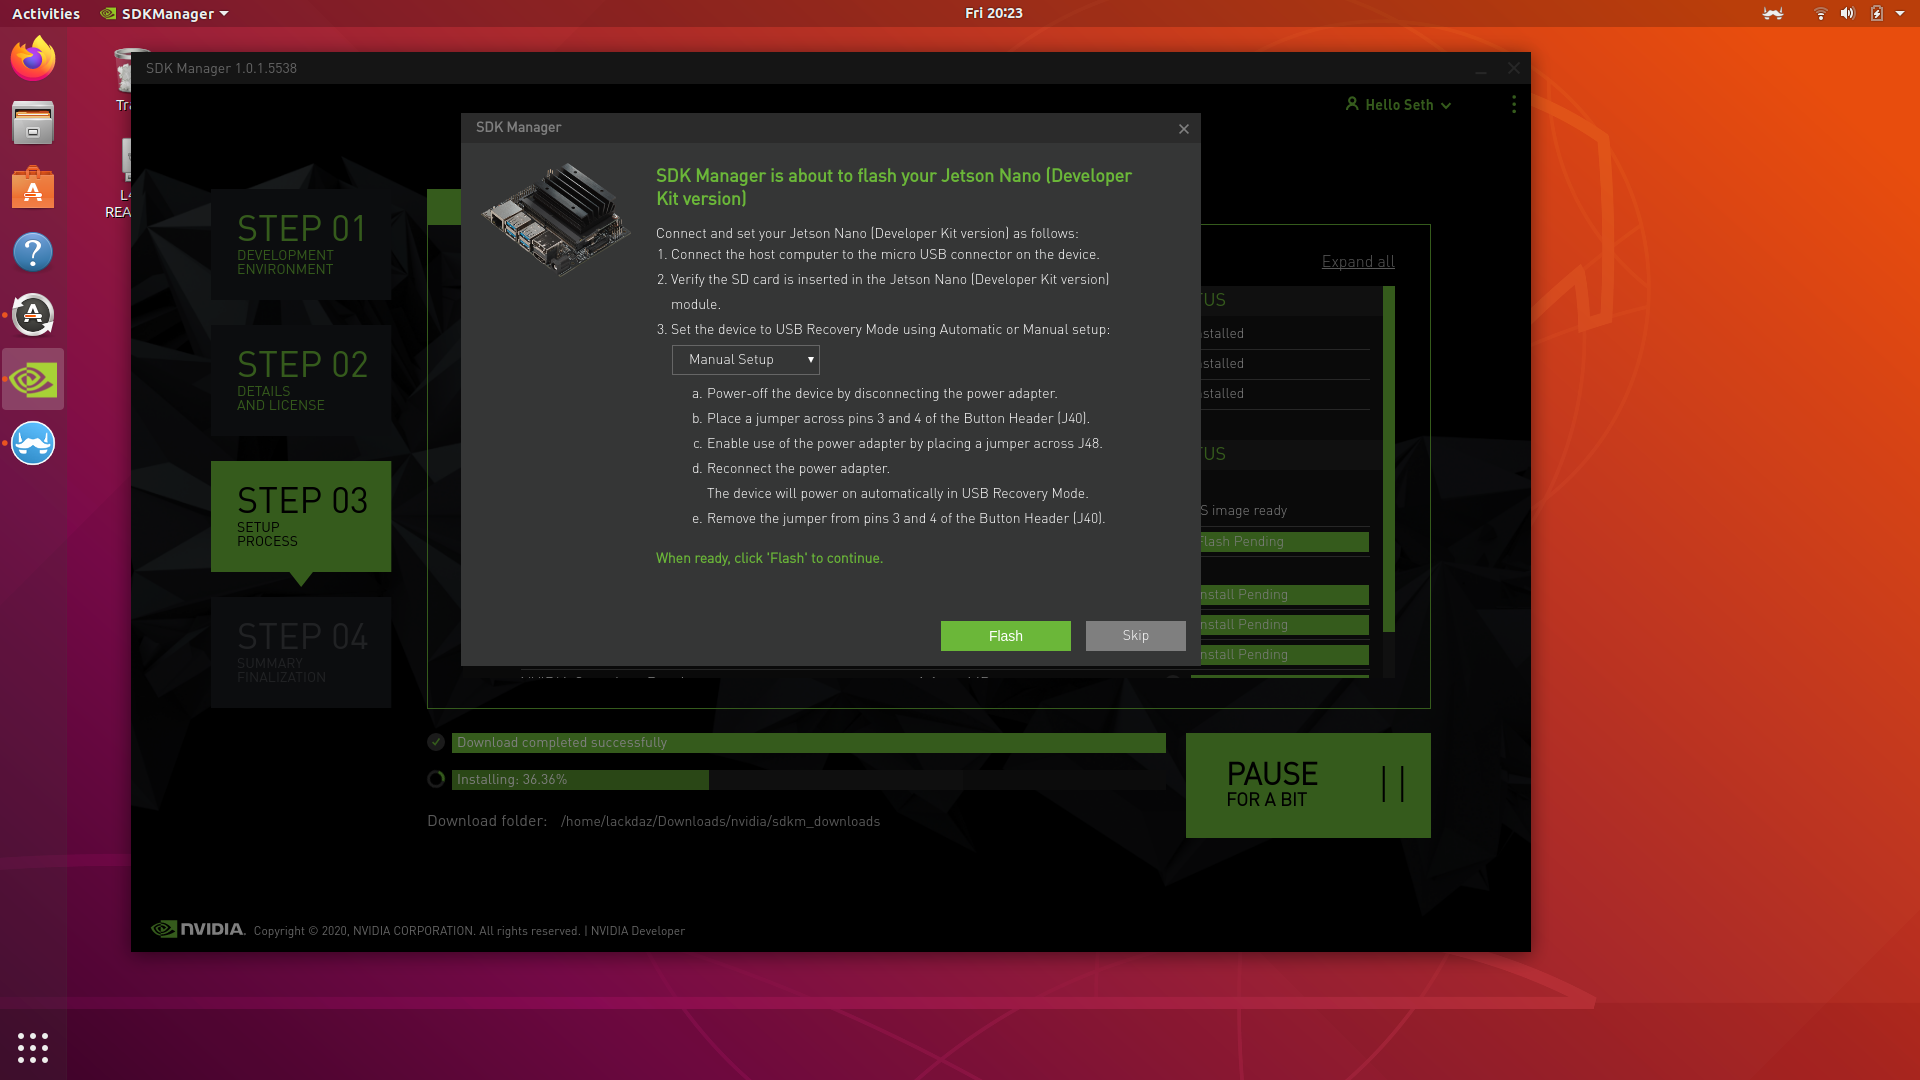
Remember to choose NVIDIA Jetson Nano (Developer Kit Version) and not Jetson Nano (Production version)
-
First unpower the device by removing the DC jack. Remove all peripherals if you haven't done so already
-
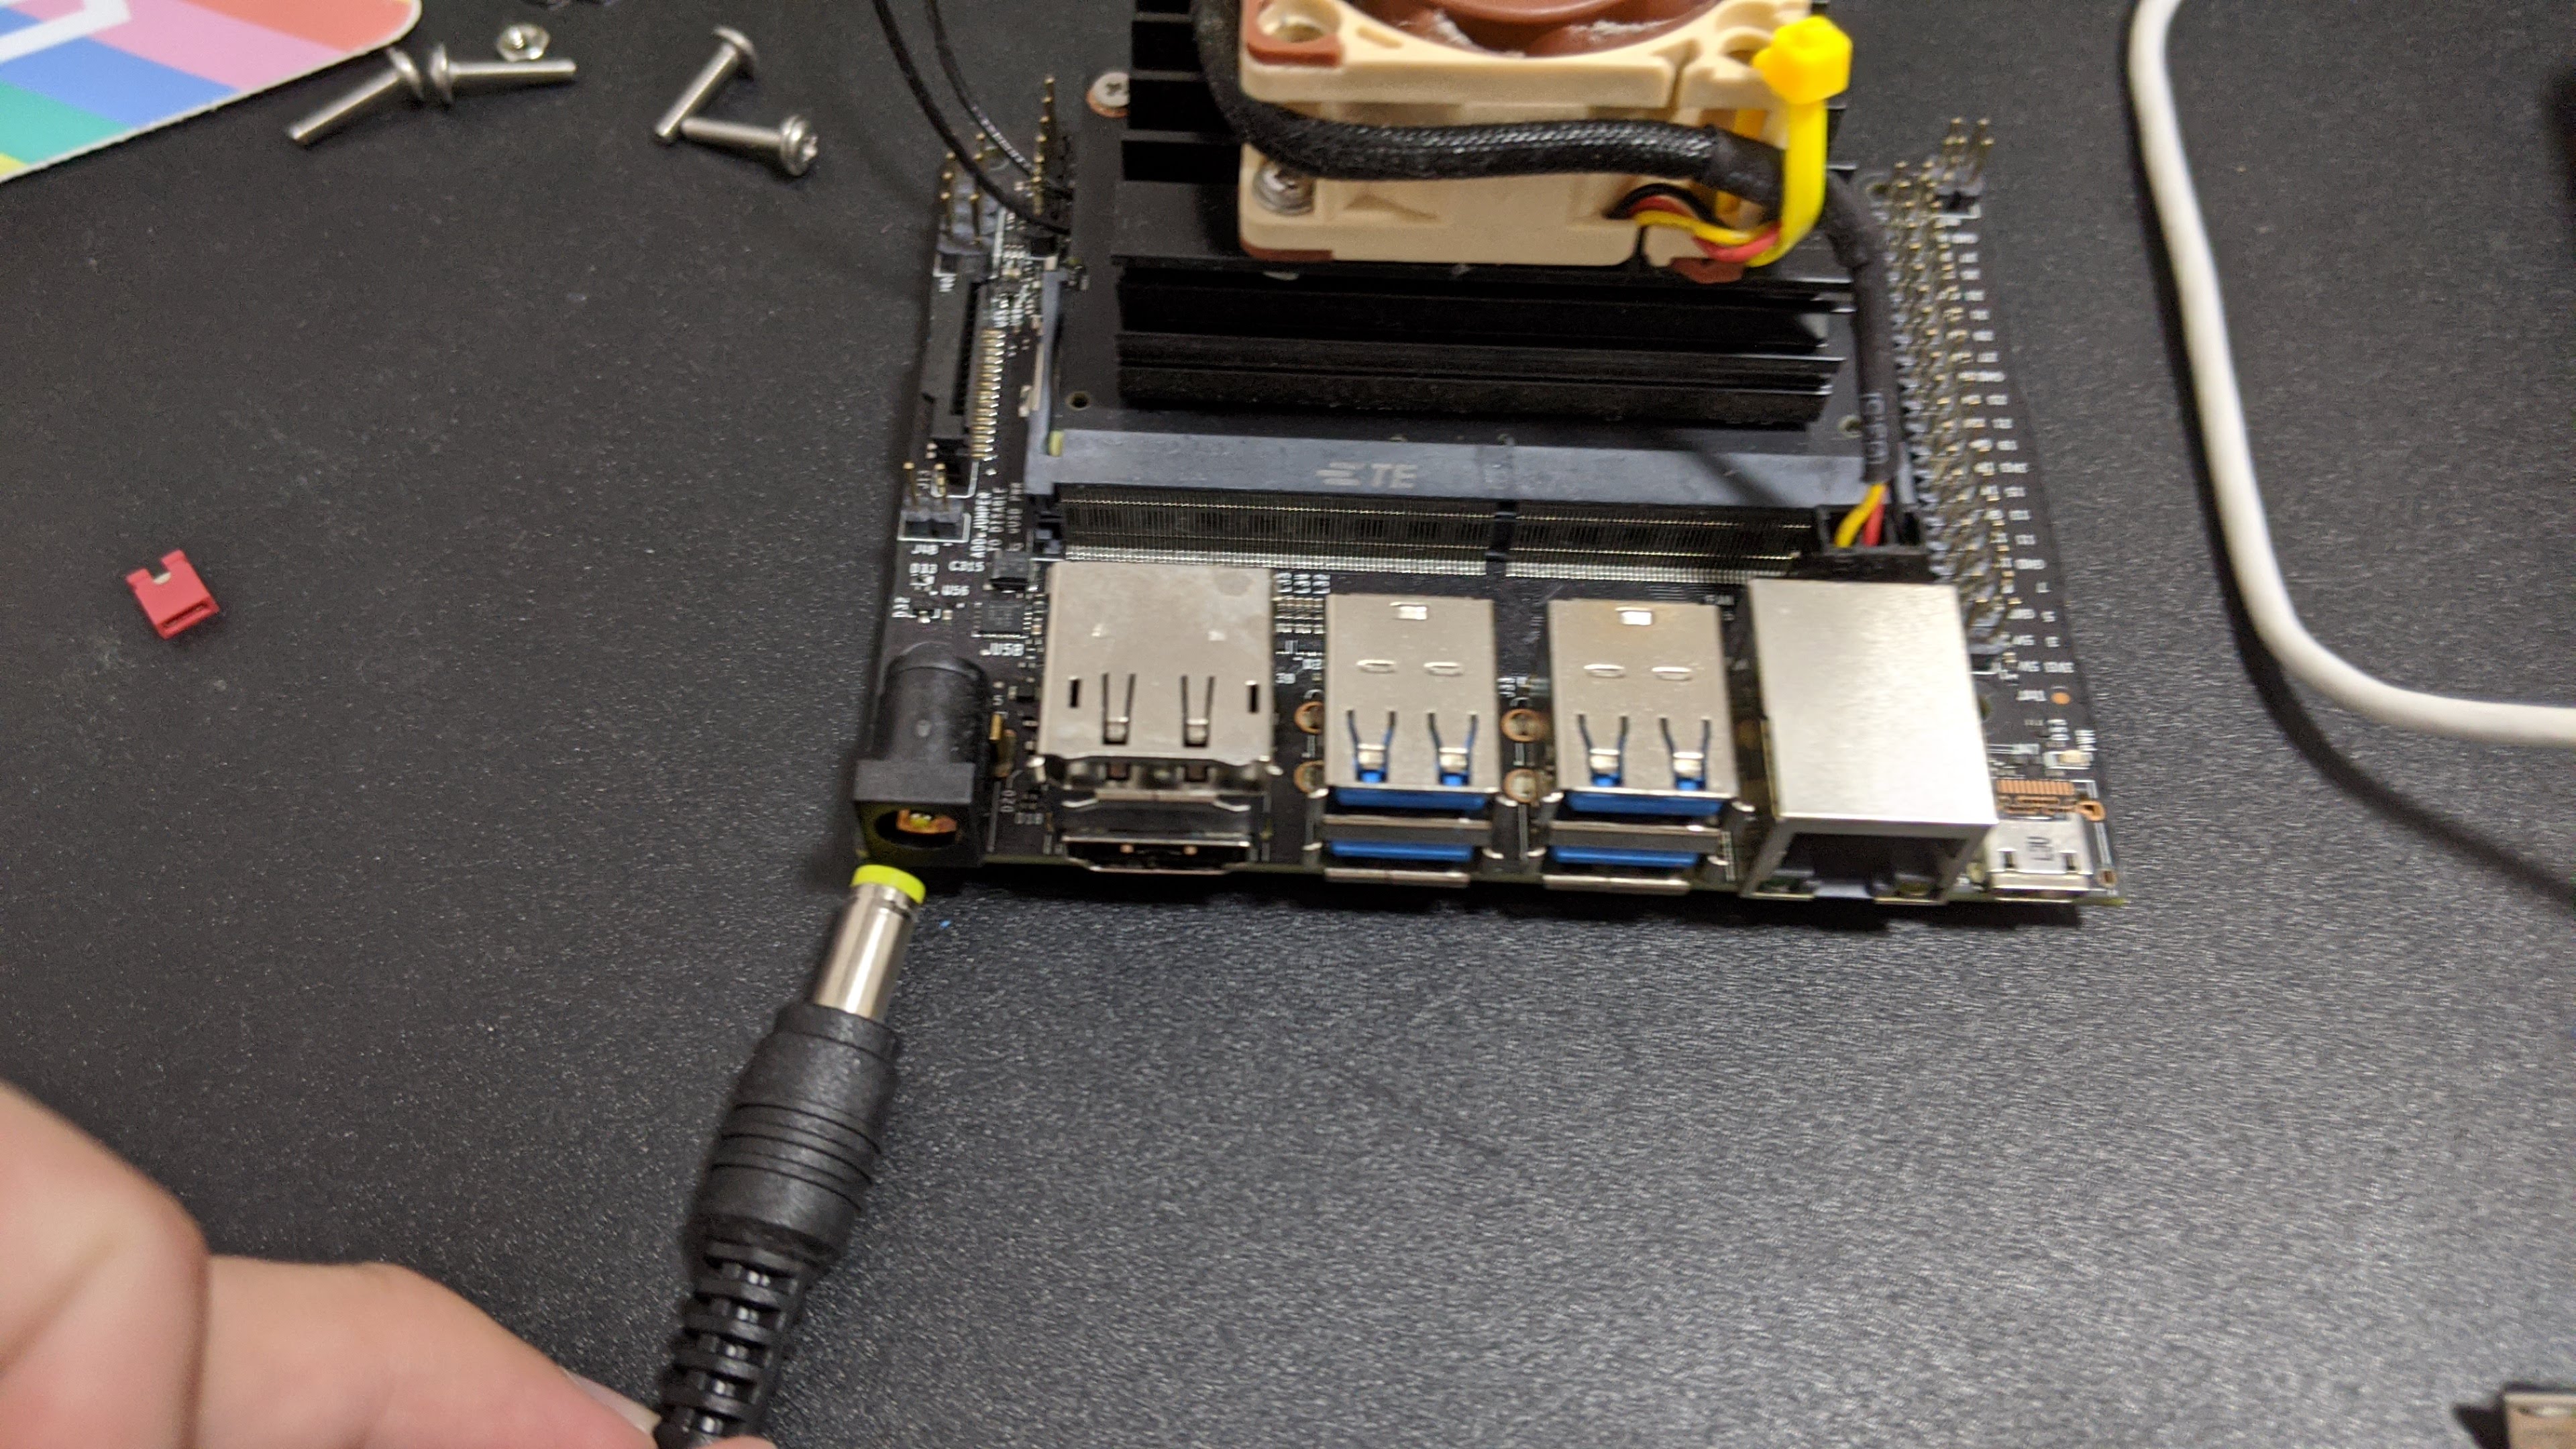
Next, attach a jumper to the J48 pin. This changes the power draw from micro-usb to the barrel jack.
-
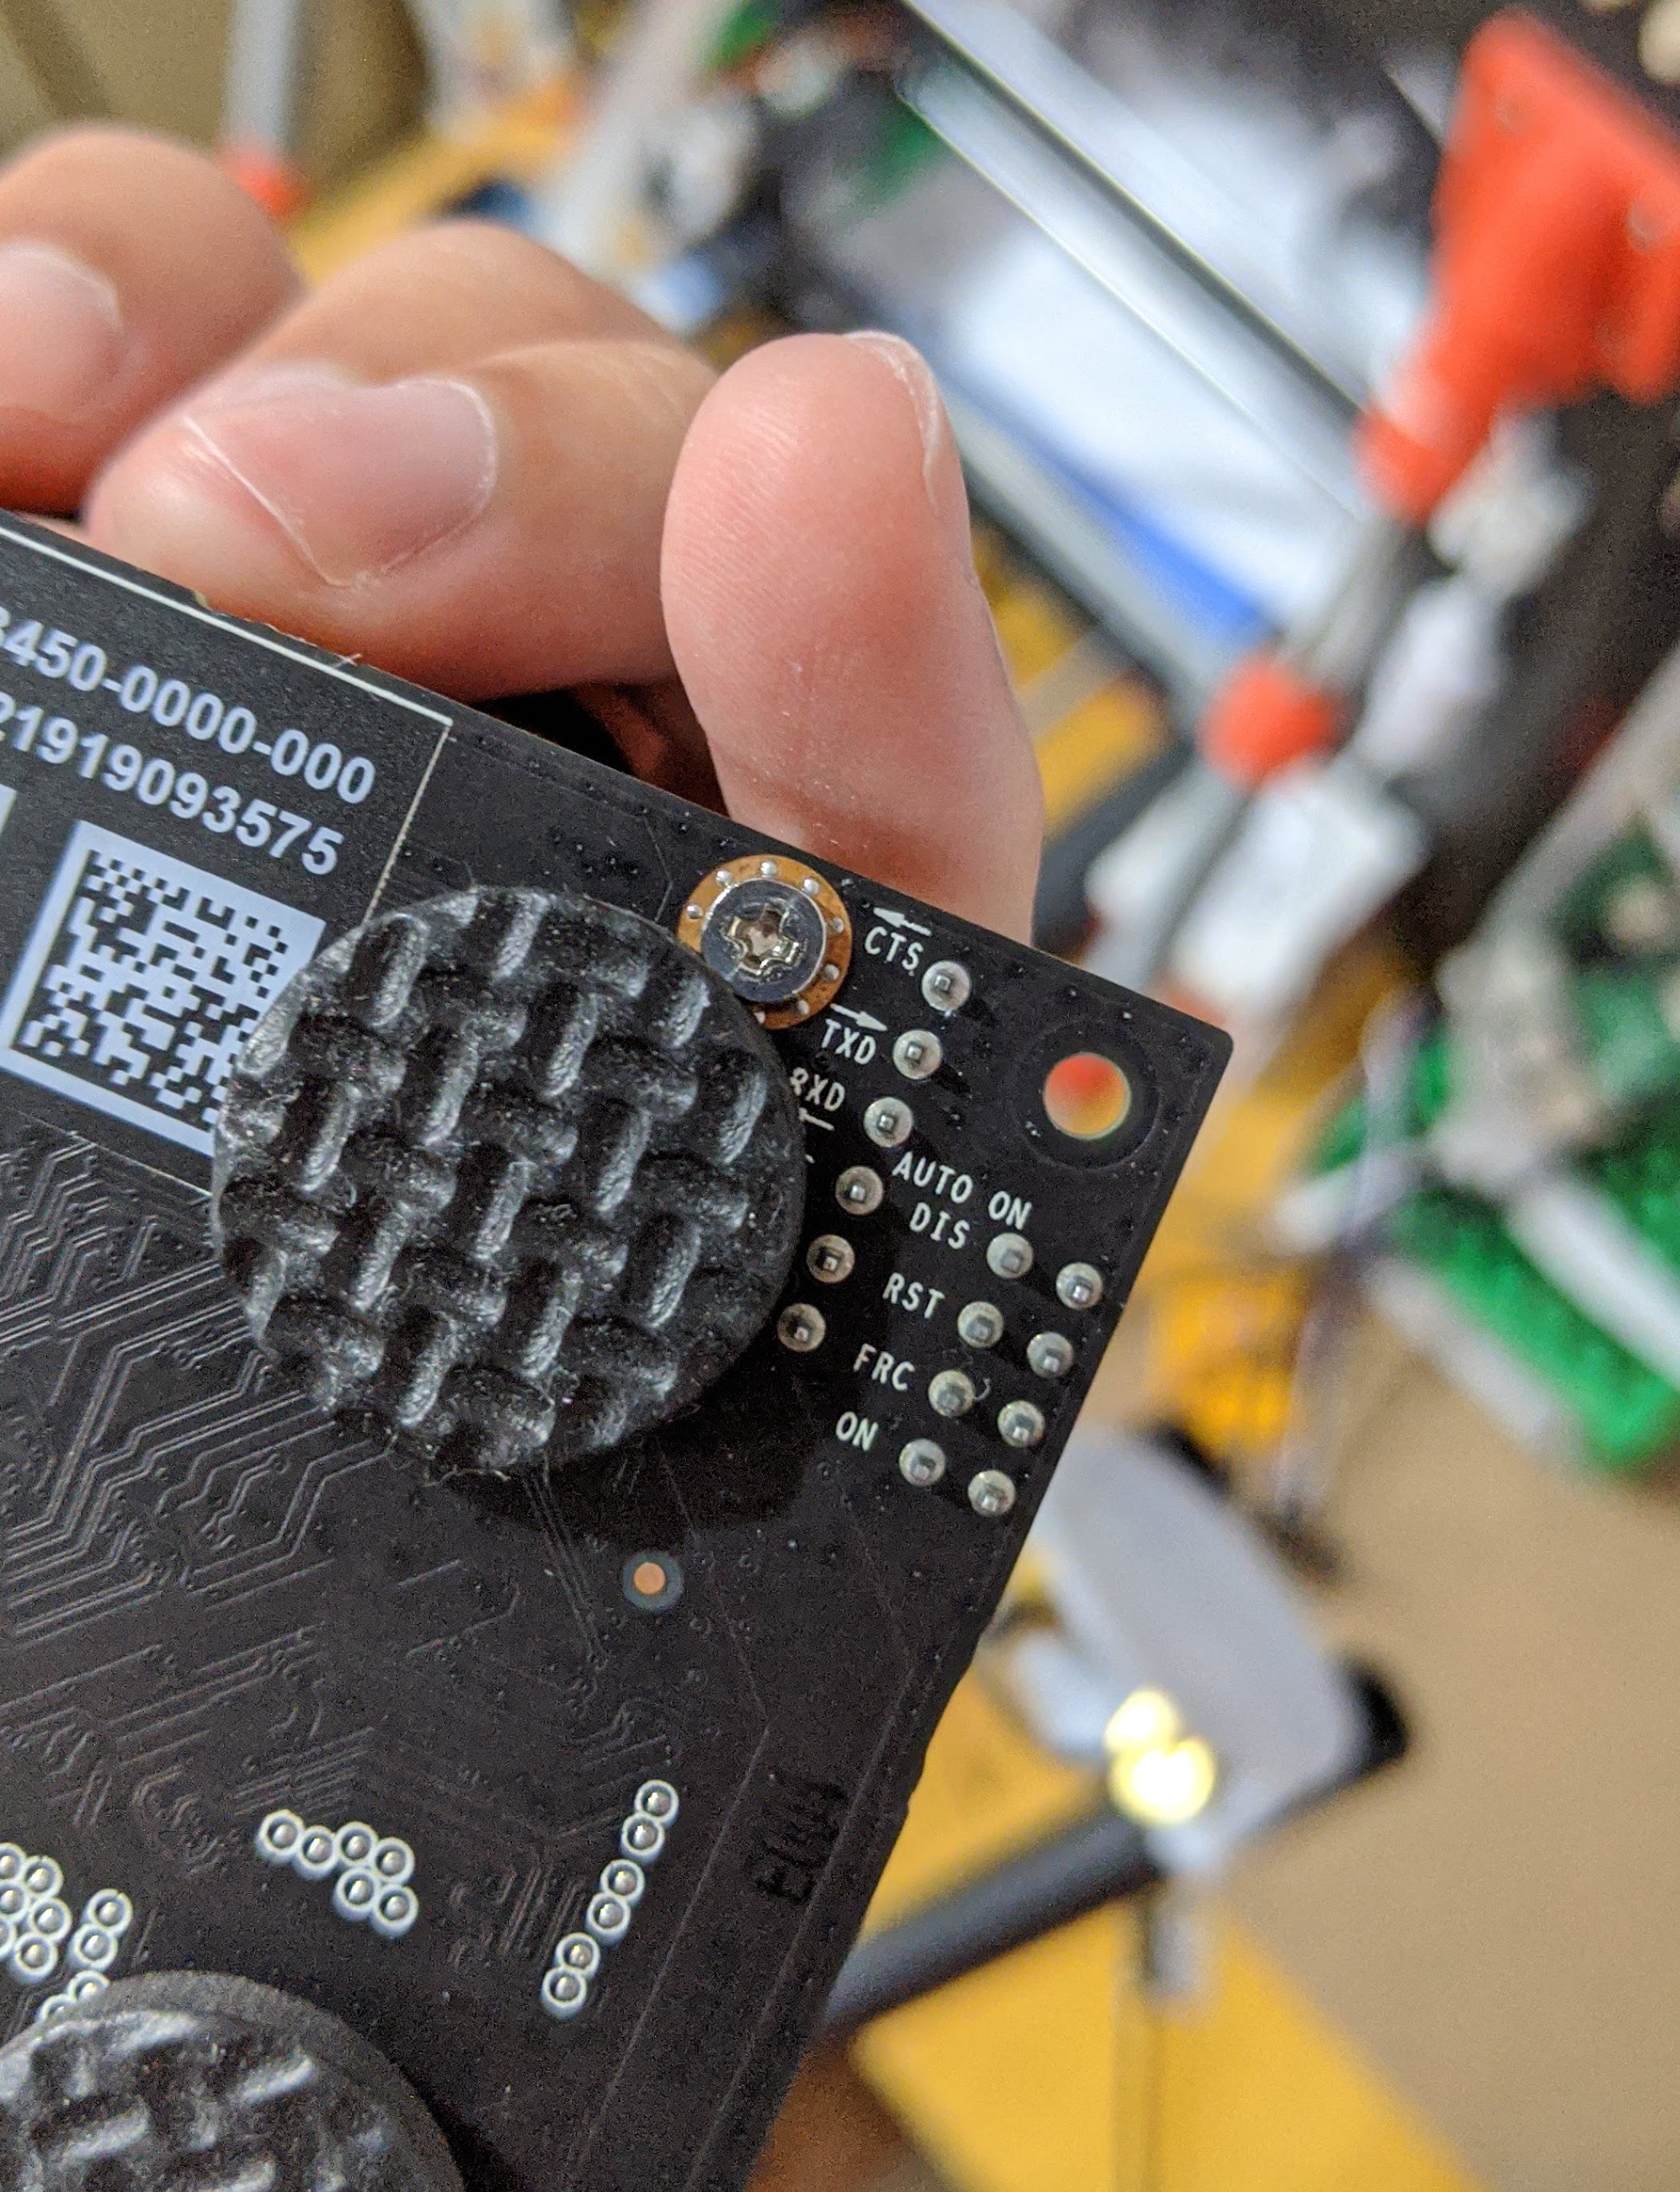
Then, attach the jumper to the J40 pins as pictured (second row from the camera slot).
This boots the Nano is USB recovery mode. If you are not sure, you can always flip the board around to check the labels and look for RST(pictured below)
-
Now, connect the USB-A to micro-usb adapter from the Nano to your x86 host machine.


Also connect your mouse/keyboard wireless transceiver and HDMI display adapter.

-
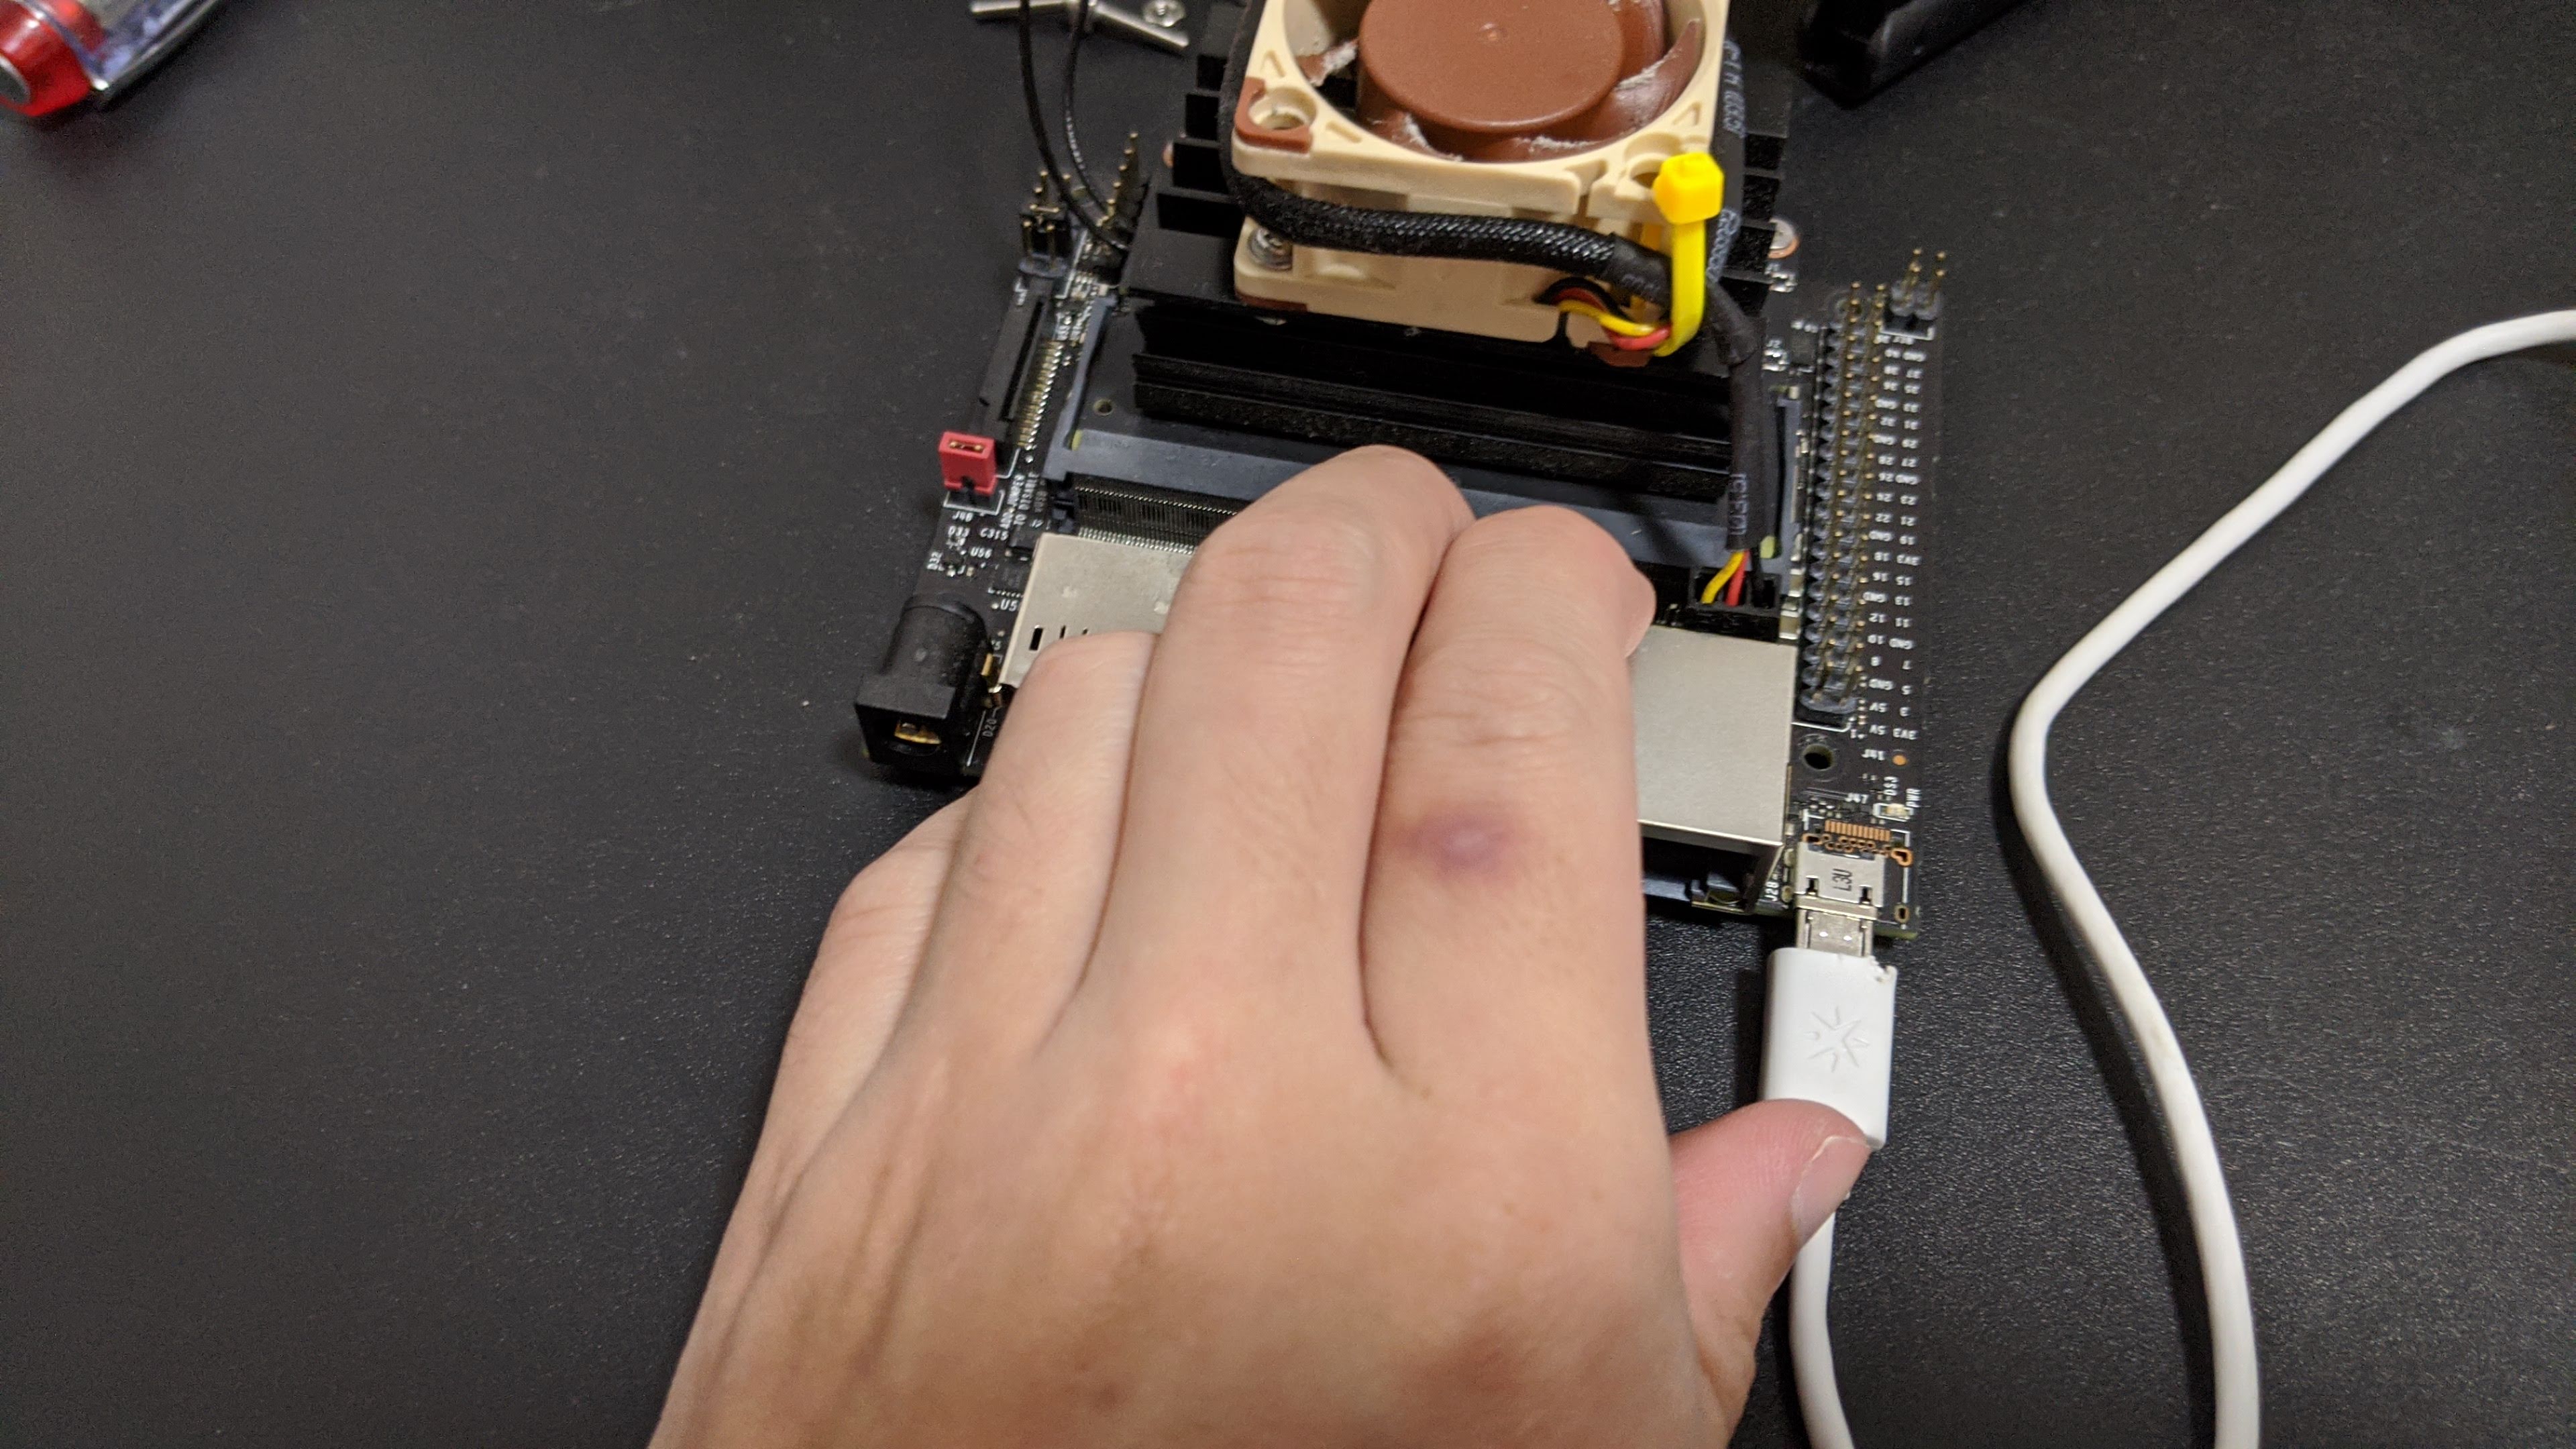
Finally connect the DC barrel jack and power on! A green light should appear and the end result should look something like this:
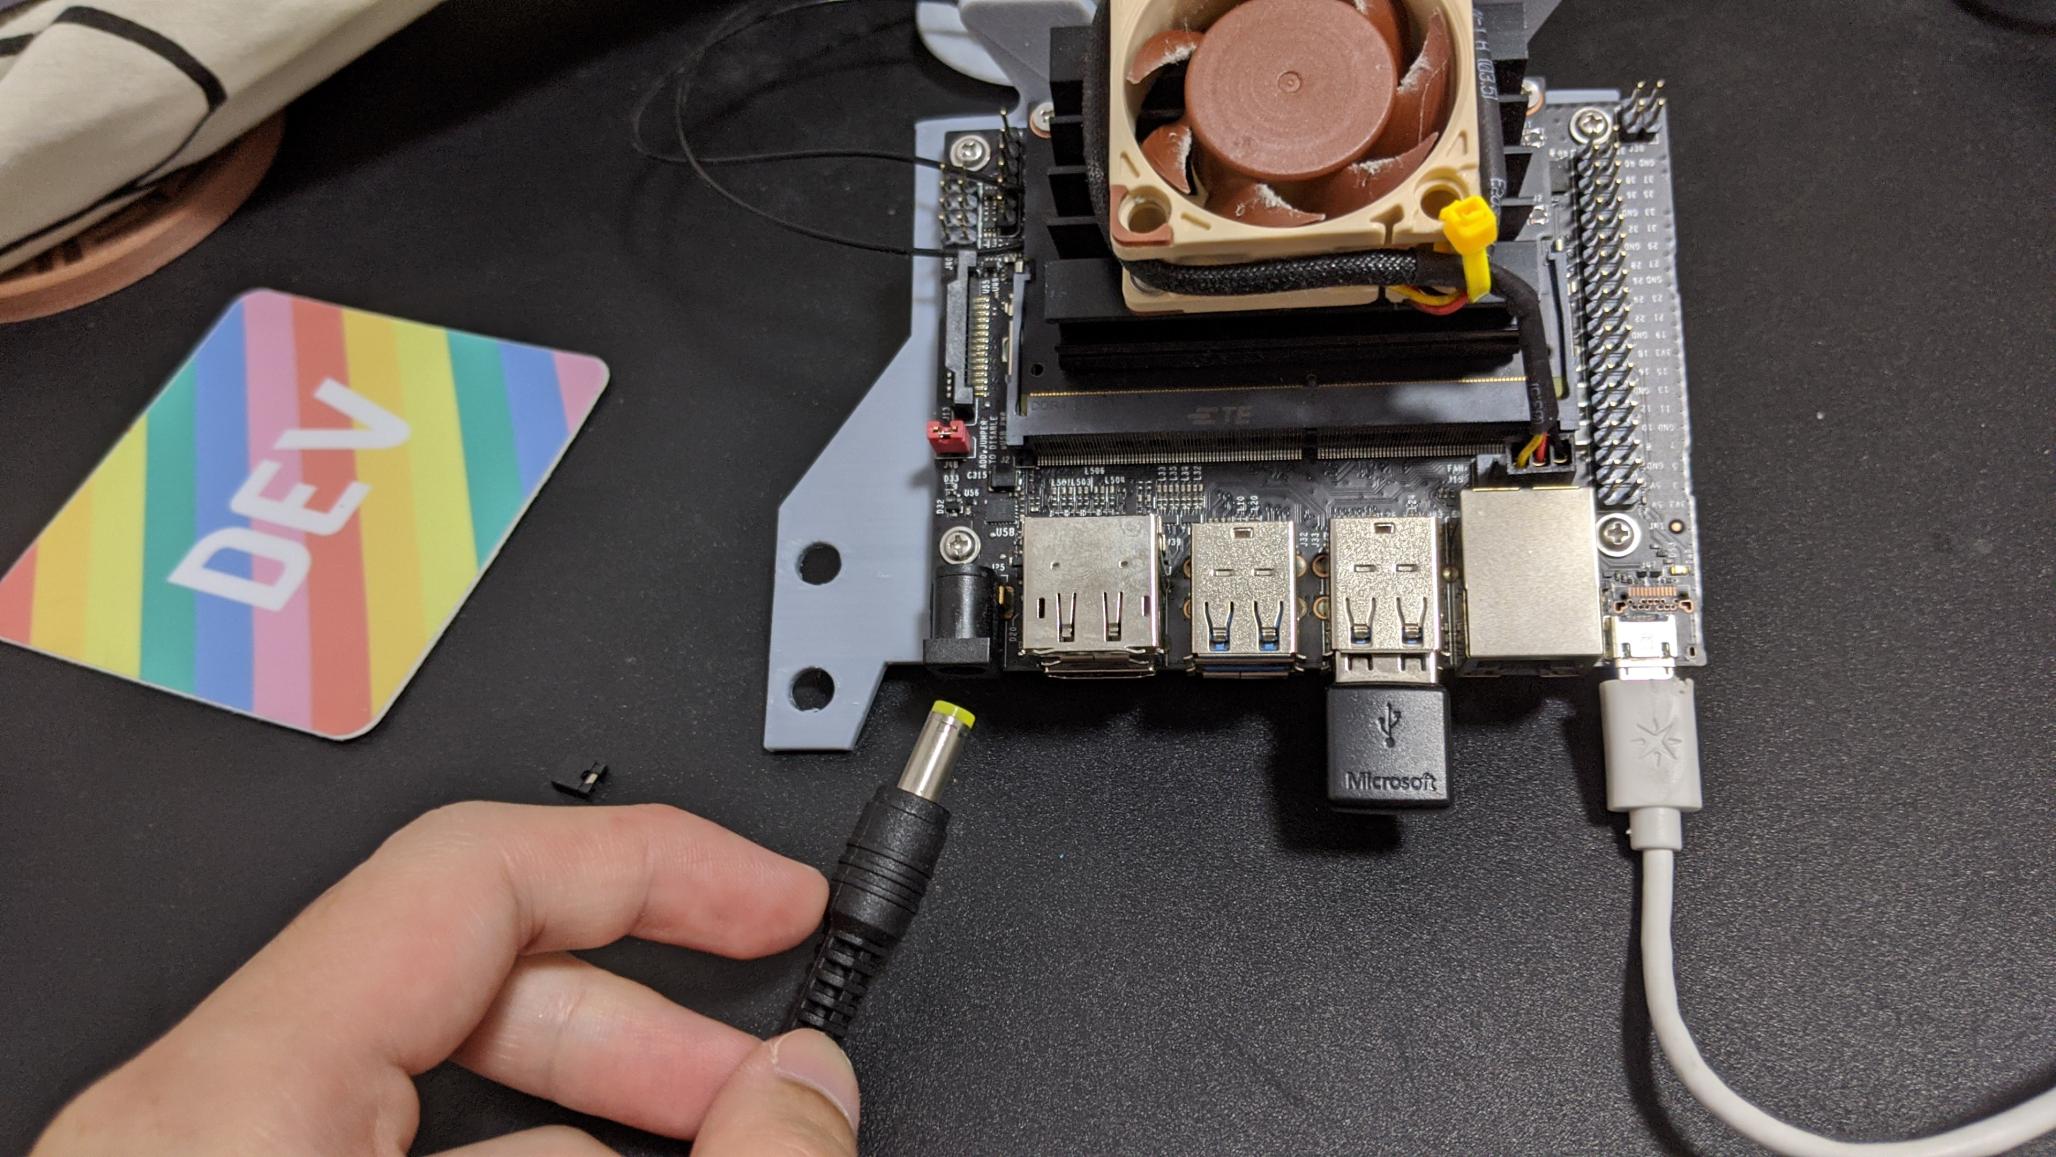 // TODO: Better photo needed here
 -
The SDK Manager should automatically start flashing the SD card. Meanwhile you can remove the J40 jumper(pictured black)

-
When the progress bar hits about 42%. A prompt should appear asking to complete the Configuration Wizard.
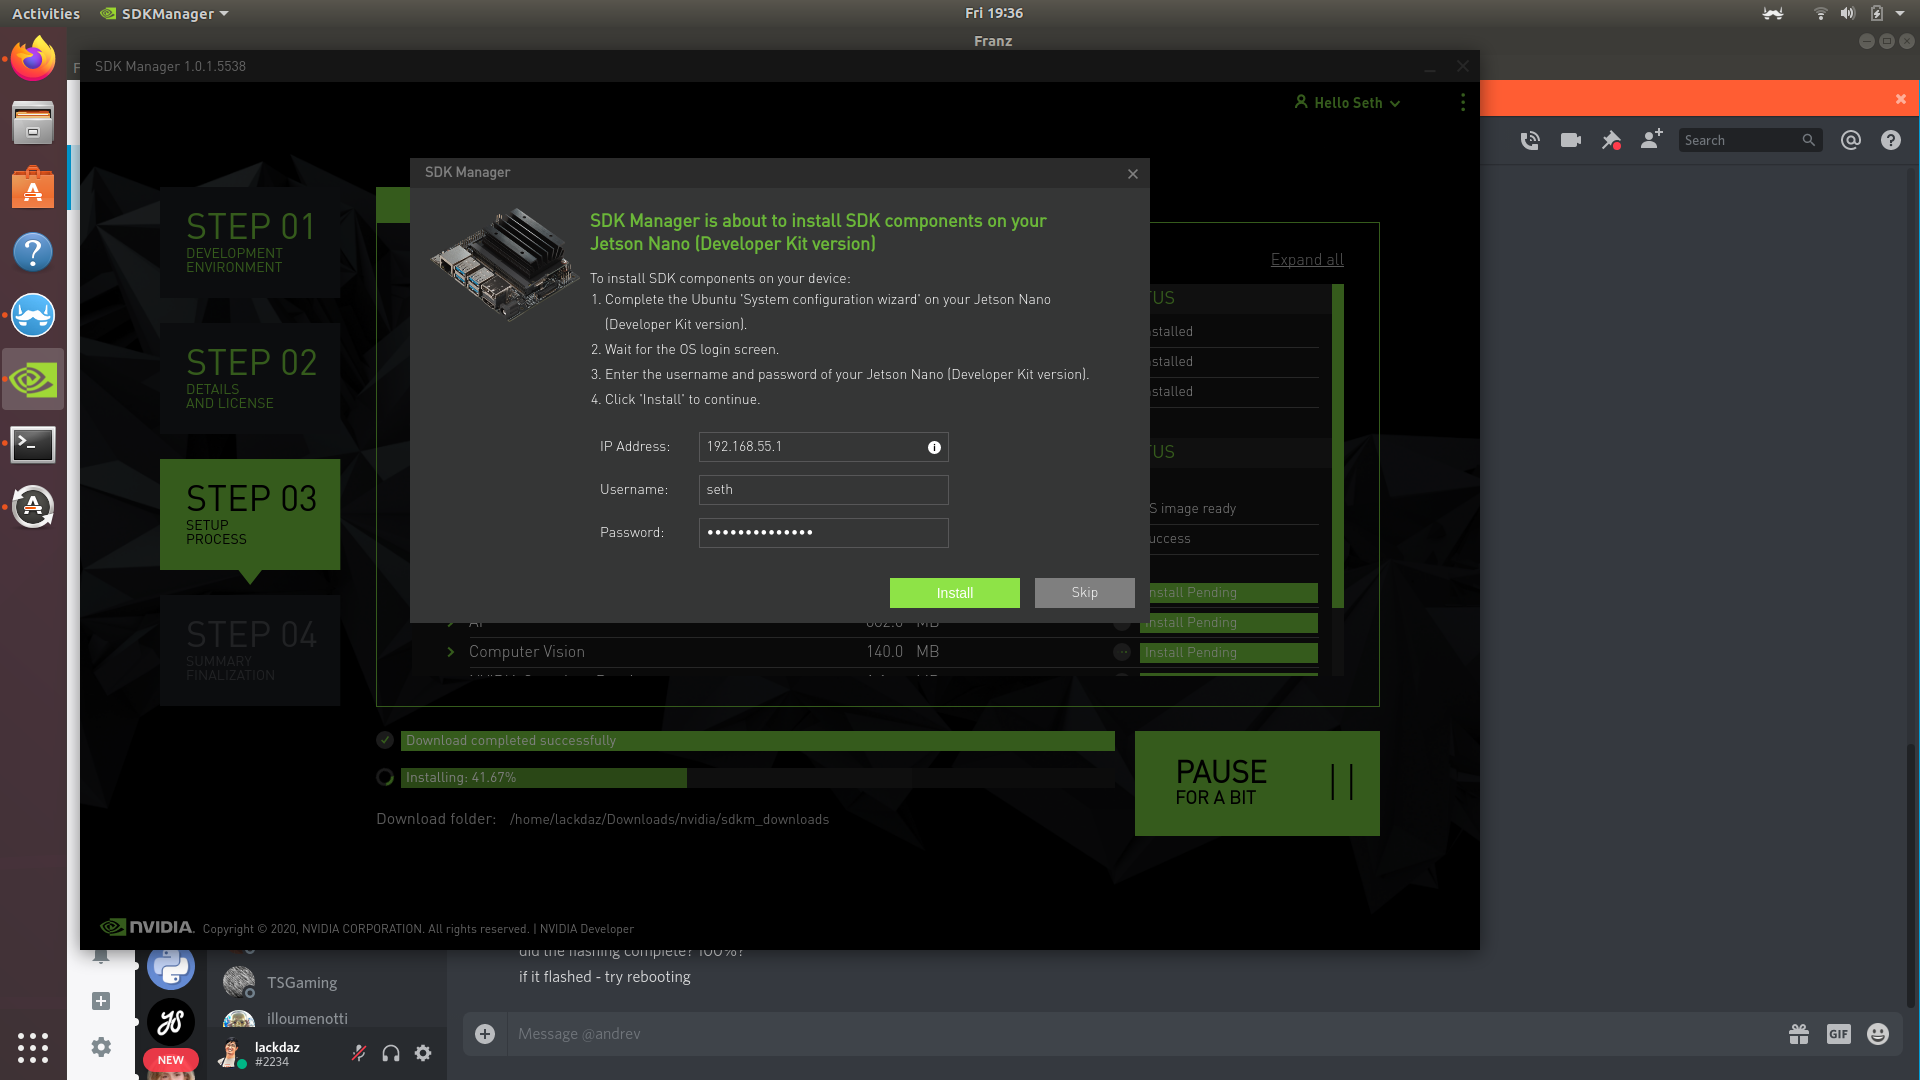
Now switch to the Nano display and a GUI should appear. Complete the configuration steps until the wizard is completed. Switch over to the x86 Host Machine once you have set your username and password and key this into the SDK Manager (and ignore the IP address)
-
The SDK Manager will now proceed to install the additional SDK Components, so just wait until its completed.


On your local x86 machine:
ssh-copy-id -i ~/.ssh/id_rsa <nano-ip>- Key in your nano's password and the ssh keys will be added to
~/.ssh/known_hosts - Try:
ssh -X username@<nano-ip>and you should now have passwordless login
On your Nano:
- You might have to change some sshd settings in
sudo vim /etc/ssh/sshd_config
This is absolutely useful if you wish to run the nano headless and modify on the nano directly
Start an elevated session
sudo -s
Install the community repo key
apt-key adv --keyserver keyserver.ubuntu.com - --recv-keys 0CC3FD642696BFC8
Run the installation script
. <( wget -O - https://code.headmelted.com/installers/apt.sh )Then reboot or exit the sudo shellsudo rebootorexit
- Run
gsettings set org.gnome.desktop.screensaver lock-enabled false
Enable auto-login
-
Even though the auto-login is enabled on the GUI settings. It needs a retoggle to work. Run
sudo vim /etc/gdm3/custom.confand make sure theAutomaticLoginEnableflag isTrueand uncommented, as follows.[daemon] AutomaticLoginEnable=True AutomaticLogin=useror if you are lazy:
sudo sed -i '/AutomaticLoginEnable*/s/^#//; s/False/True/' /etc/gdm3/custom.conf && sed -i '/AutomaticLogin=*/s/^#//' /etc/gdm3/custom.conf
Start an elevated session
sudo -sRun resize scriptcurl -s https://raw.githubusercontent.com/lackdaz/jetson_nano_setup/master/scripts/resize.sh | shThen rebootsudo reboot
The default nano swapfile is 2GB. You can see this by running: zramctl
You will notice that there are four entries (one for each CPU of the Jetson Nano) /dev/zram0 - /dev/zram3. Each entry has an allocated amount of swap memory associated with it, by default 494.6M, for a total of around 2GB. This is half the size of the main memory. You will find this to be adequate for most tasks, but not for dockerised applications. To increase the swapfile size, we are going to use the Jetson Nano convenice script:
git clone https://github.com/JetsonHacksNano/resizeSwapMemory utilities && cd utilities- Then to increase to 8gb:
./setSwapMemorySize.sh -g 8 - Reboot for the changes to take effect:
sudo reboot - Finally check the new swap file size by running
zramctlagain. You should now see 4x2GB(8GB)
$ git config --global user.name "user"$ git config --global user.email "user@gmail.com"git config credential.helper storeorgit config --global credential.helper store(global)git pushin the github repositories you want your credentials saved
- Run:
git clone https://github.com/lackdaz/wallaby.git --recursive
Required for node package management
- Run: curl -s https://gist.githubusercontent.com/lackdaz/15f929aeb0fee44369af1d96635769b8/raw/a23a0c604f1236cb1ae709da9930dc0922b6cdb0/install-node-yarn-arm.sh | bash /dev/stdin param1 param2
- To upgrade docker:
curl -sSL https://get.docker.com/ | sh - To install docker-compose:
sudo apt-get updatesudo apt-get install -y python-pip python-dev libffi-dev libssl-dev libxml2-dev libxslt1-dev libjpeg8-dev zlib1g-devsudo pip install docker-compose=="1.25.5"(latest) Fix user permissions
sudo groupadd dockersudo usermod -aG docker $(whoami)sudo service docker startChecking versions- To check docker version:
sudo docker version - To check compose version:
sudo docker-compose version
It's always nice to hear a little audio
- Just add
pactl set-default-sink 0to~/.bashrcor run this convenience script:
curl -s https://raw.githubusercontent.com/lackdaz/jetson_nano_setup/master/scripts/set_hdmi_audio.sh | sh
- Run:
gsettings set org.gnome.desktop.session idle-delay 0
Silly proprietary Microsoft software
- Run:
sudo apt-get install -y exfat-fuse exfat-utils
Resource Diagnostics Tools
- Install:
sudo -H pip install -U jetson-stats - Run:
sudo jtop - Run:
sudo systemctl enable jetson_performance.service
GNOME Videos seems to be one of the few plug-and-play options that work on the arm64:
- Install:
sudo apt-get install totem libtotem0 - Run:
totem <path-to-video>Alternatively, you can use the native plug-and-play gstreamer player: - Run
gst-play-1.0 file:///home/seth/<path-to-video>or, for more advanced video/audio pipeline building: - Run:
gst-launch-1.0 uridecodebin uri=file:///home/seth/<path-to-video> ! nvoverlaysinkor run a movie at 10x without subtitles - Run:
gst-launch-1.0 filesrc location=~/Videos/Westworld.S03E07.Passed.Pawn.1080p.AMZN.WEB-DL.DDP5.1.H.264-NTb.mkv ! queue ! decodebin3 name=d d.video_0 ! nvvidconv interpolation-method=3 flip-method=0 ! 'video/x-raw(memory:NVMM), format=(string)I420' ! videoconvert ! videorate rate=10.0 ! nvoverlaysink d. ! queue ! audioconvert ! speed speed=10.0 ! alsasink -eUtils - If using webcam, you'll need:
sudo apt install v4l-utilsand then run:v4l2-ctl -d /dev/video1
- Run:
rsync -azP -e 'ssh -p 3091' --delete ~/Videos seth@158.140.136.216:~
Search filename on your terminal, e.g. locate deepstream | grep samples
- Run:
sudo apt-get install -y libopenblas-base mlocate && sudo updatedb(it takes some time to update the database)
- Elevate user session as root:
sudo su - Run:
echo "<user> ALL=NOPASSWD: /sbin/shutdown" >> /etc/sudoers.d/nano_shutdown, where is defined, e.g.foo ALL=NOPASSWD: /sbin/shutdown - Test it out:
sudo reboot now
- Run:
sudo apt-get install git-lfs
- Run
sudo vim /etc/default/apport
A more verbose top
- Run
sudo apt-get install htopand runhtop