This is a simple example of a telegram bot implementation. This code is designed to be run on Yandex Cloud Serverless Function connected to YDB database using TeleBot (pyTelegramBotAPI) python3 package.
This repository can be used as a template for creating more complicated bots.
This implementation supports:
- full logging adapted to Yandex Cloud Functions
- handling user's states, which allows to conveniently process each text input in appropriate context and make complicated logics manageable
- handling a variety of Reply Keyboards and simple text inputs
- testing the bot (TBD)
List of the bot's functions:
- asks for the user's first name, last name and age step-by-step
- checks correctness of the input data (age)
- saves the info into the database (i.e. 'registers' the user)
- shows the info back when required
- supports deleting the database entry (i.e. 'deletes the account')
You can check out the instance of this bot here.
- Visit Yandex Cloud page and click
Consolein upper right corner. Login into Yandex ID, or create an account. - In Yandex Cloud console set up Yandex Cloud billing account, if you don't have one. No payments will be needed to complete this instruction.
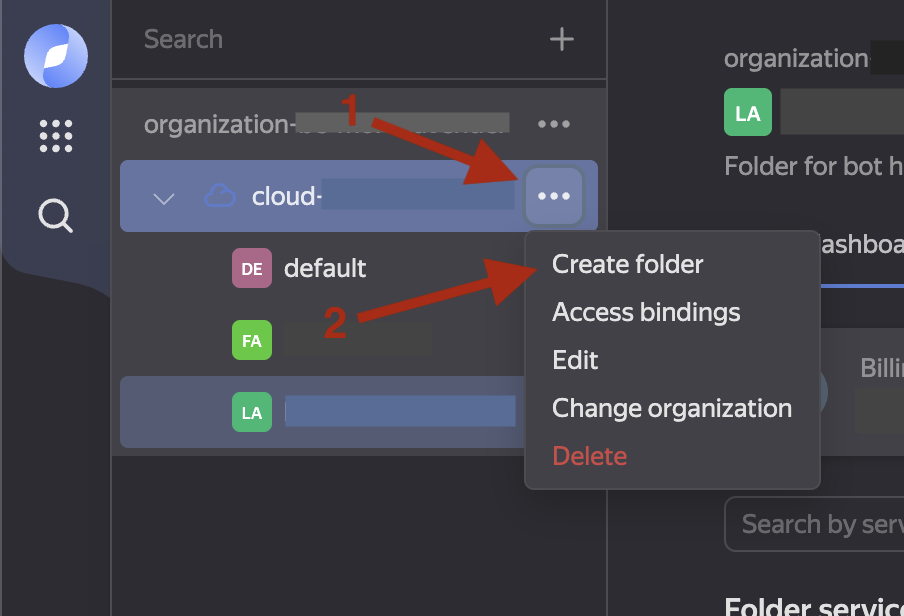
- In Yandex Console create a folder for your resources. Choose any name.
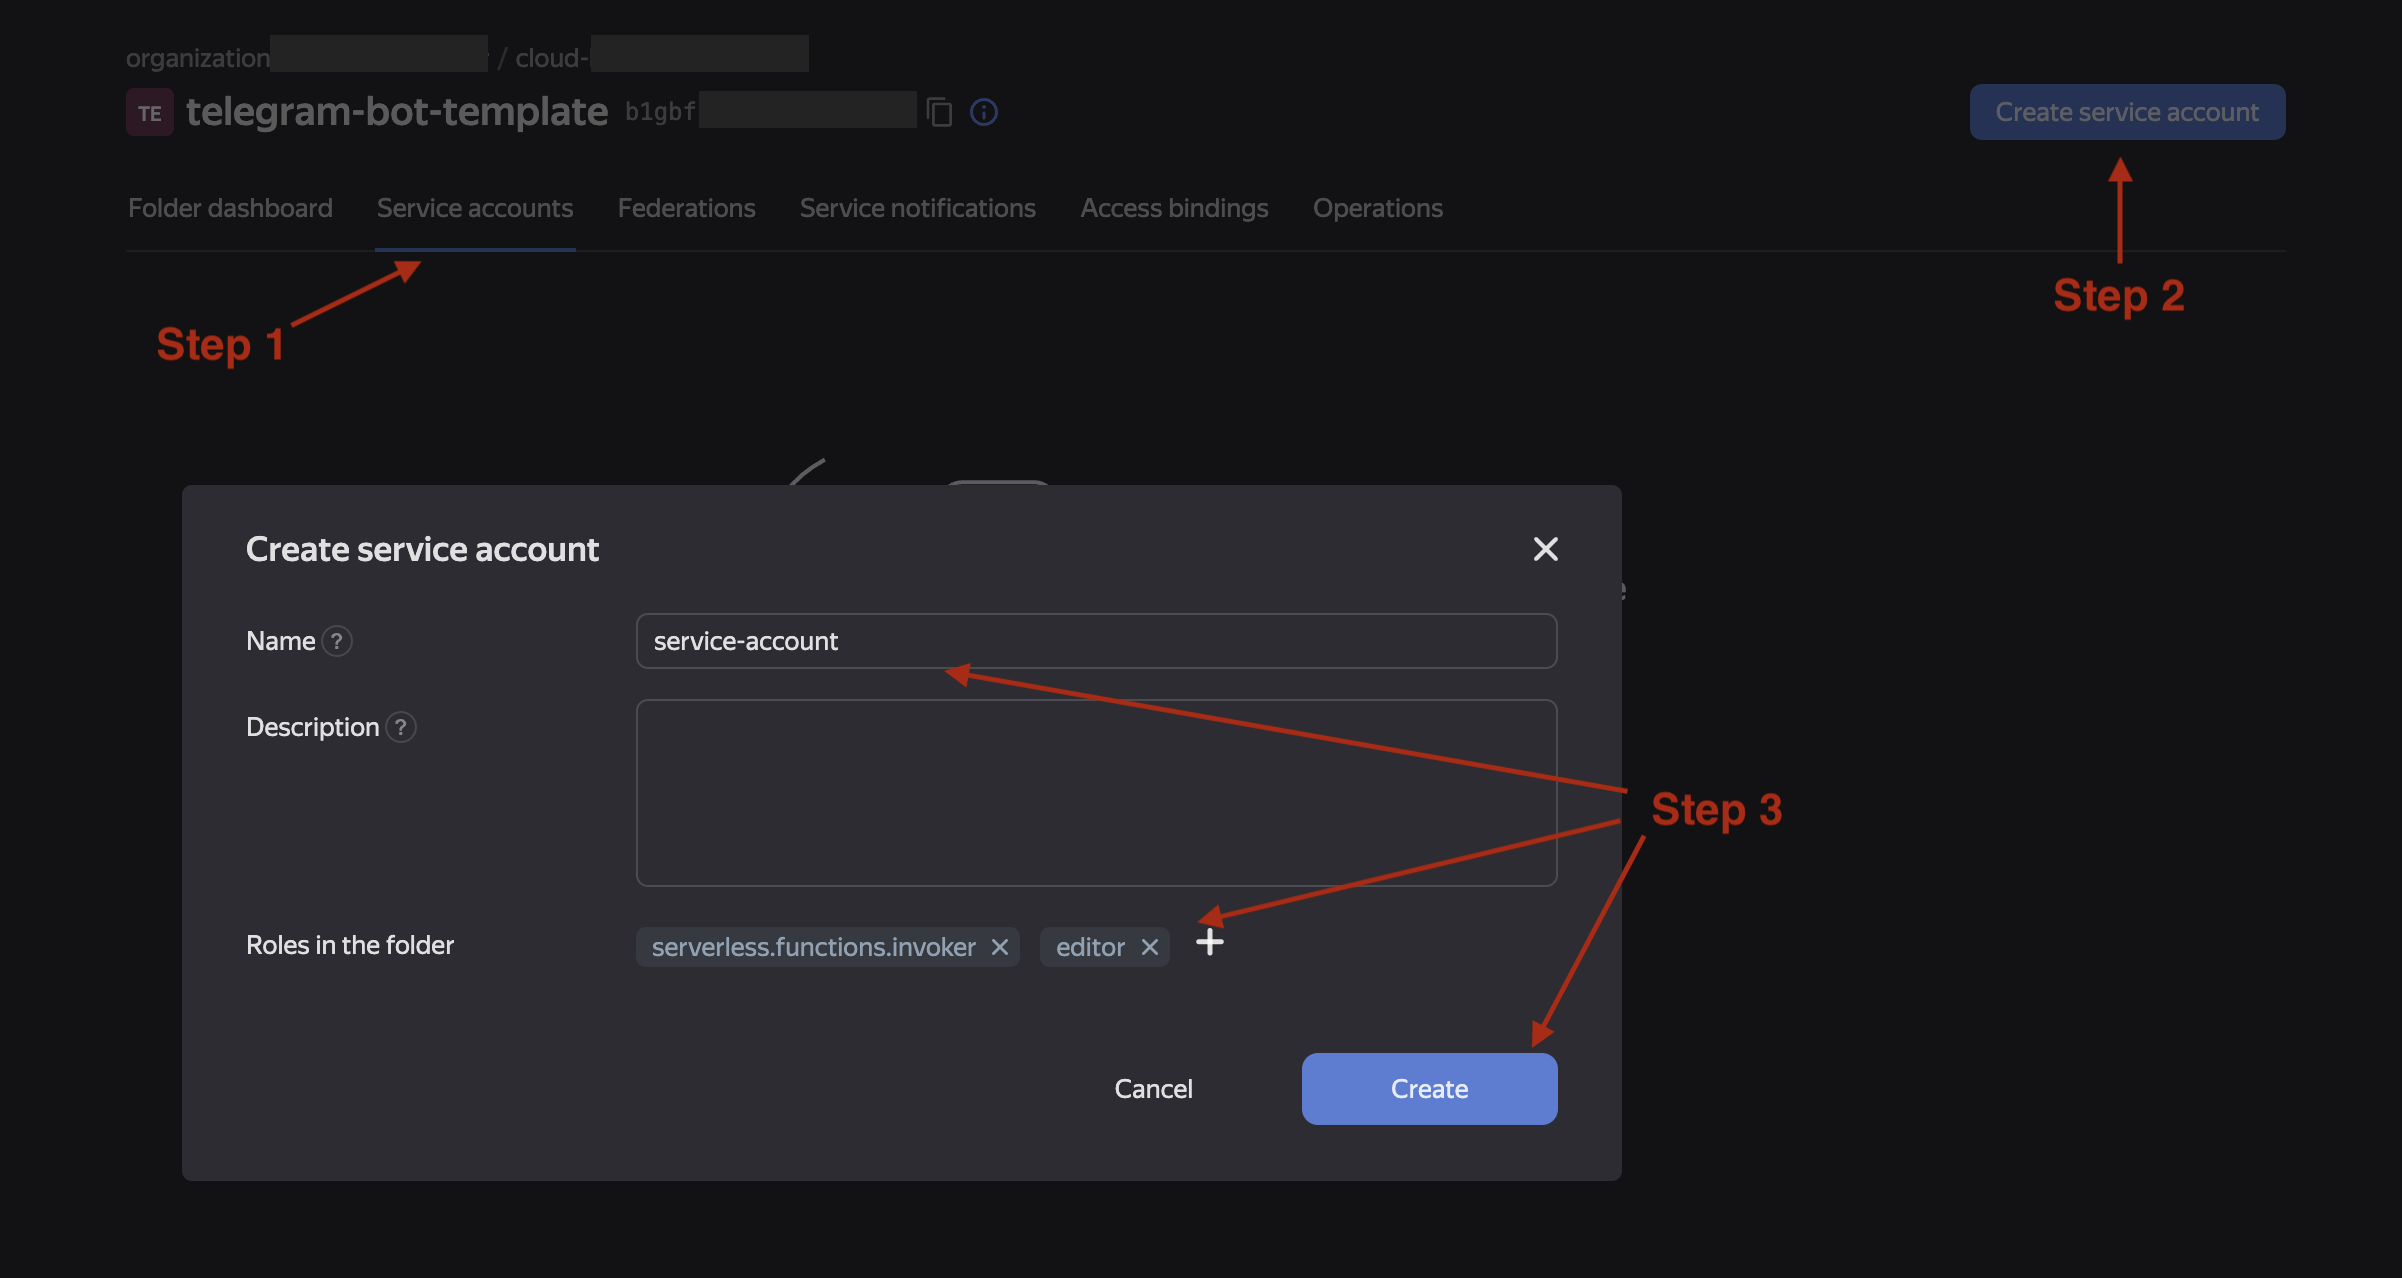
- Create a service account with any name and assign it the
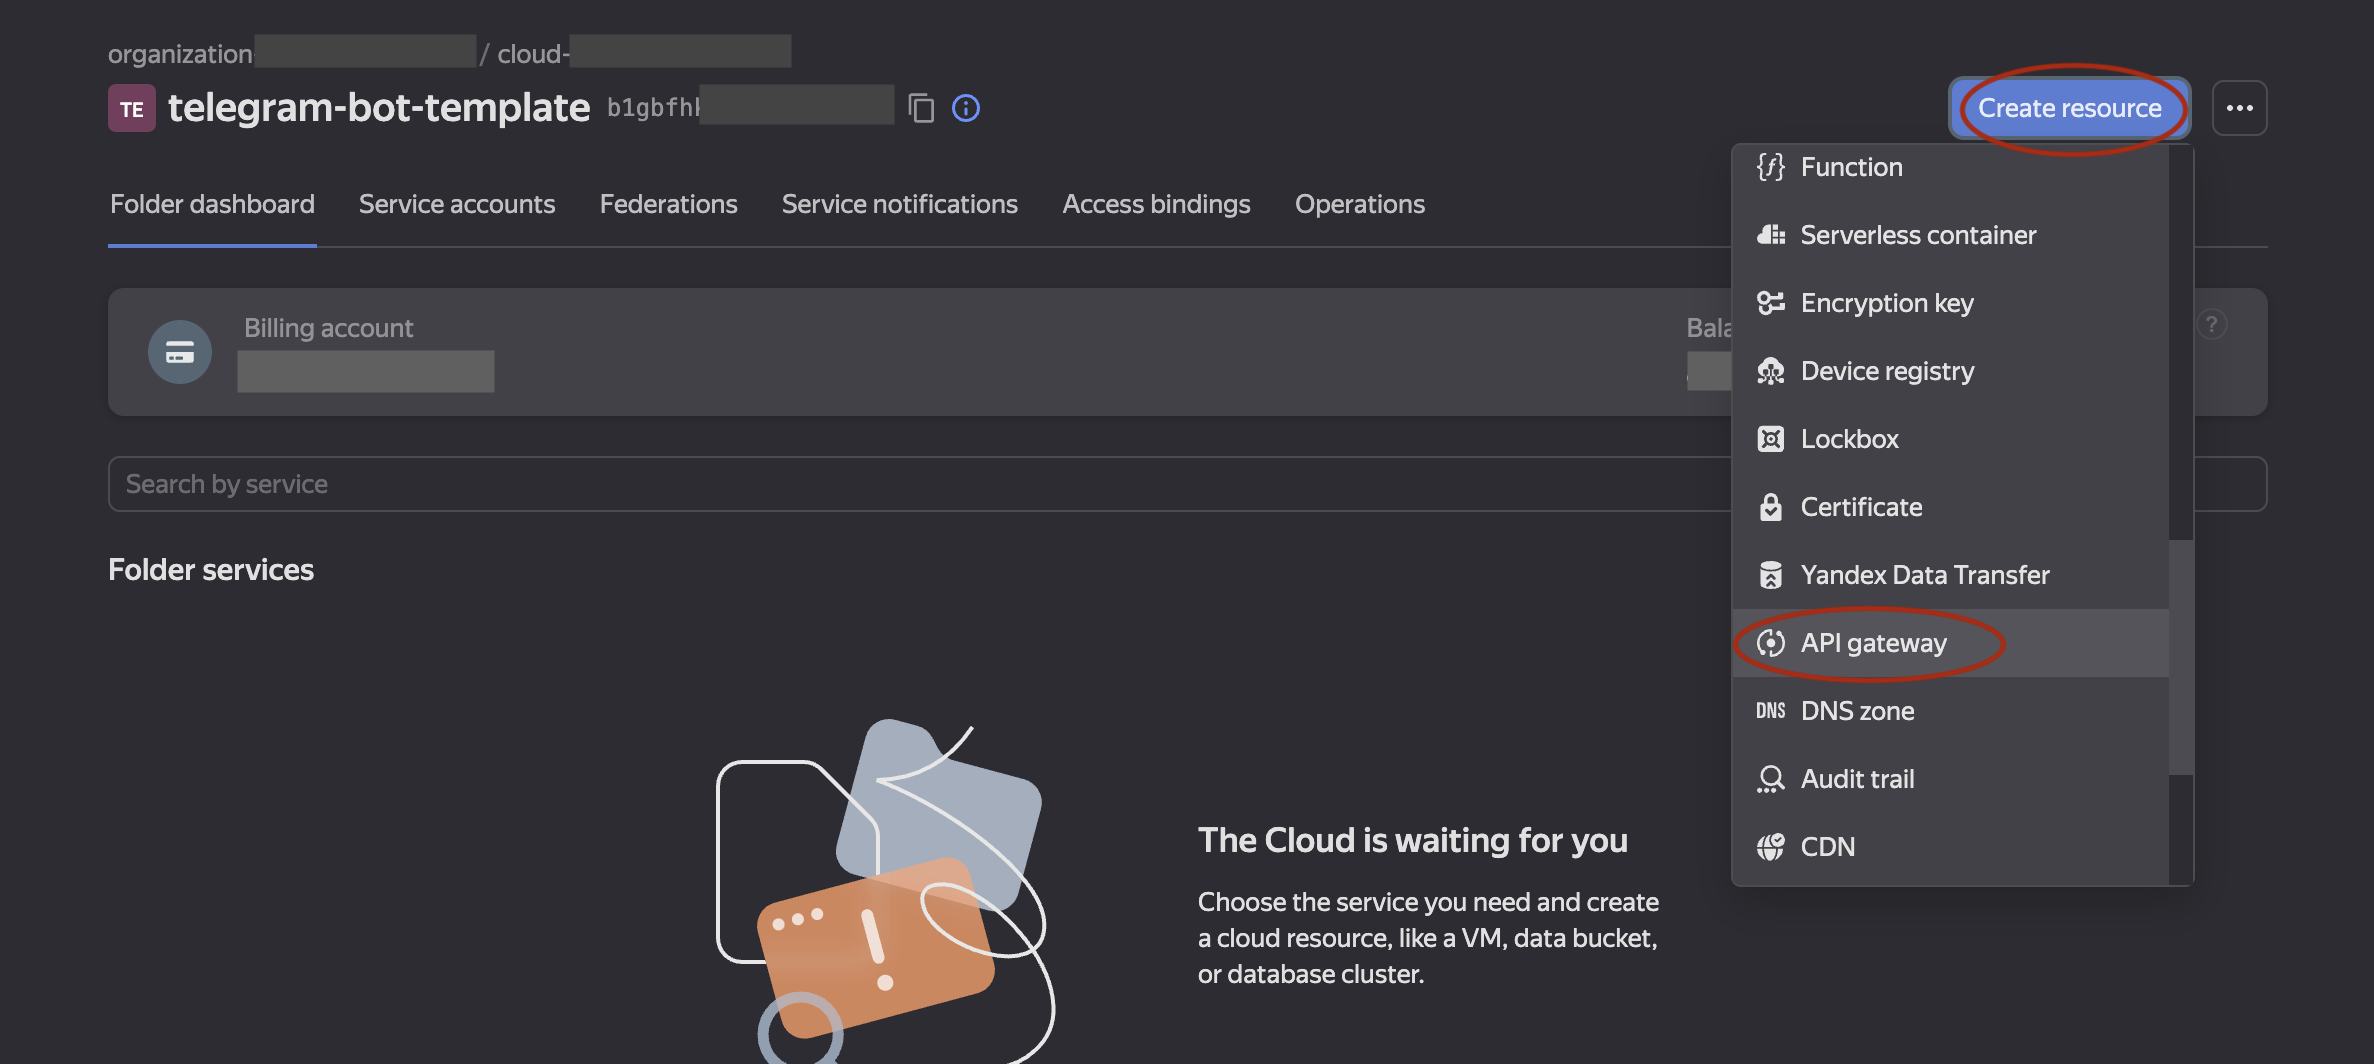
editorand theserverless.functions.invokerroles for your folder. - Create an API gateway with any name and the default specification.
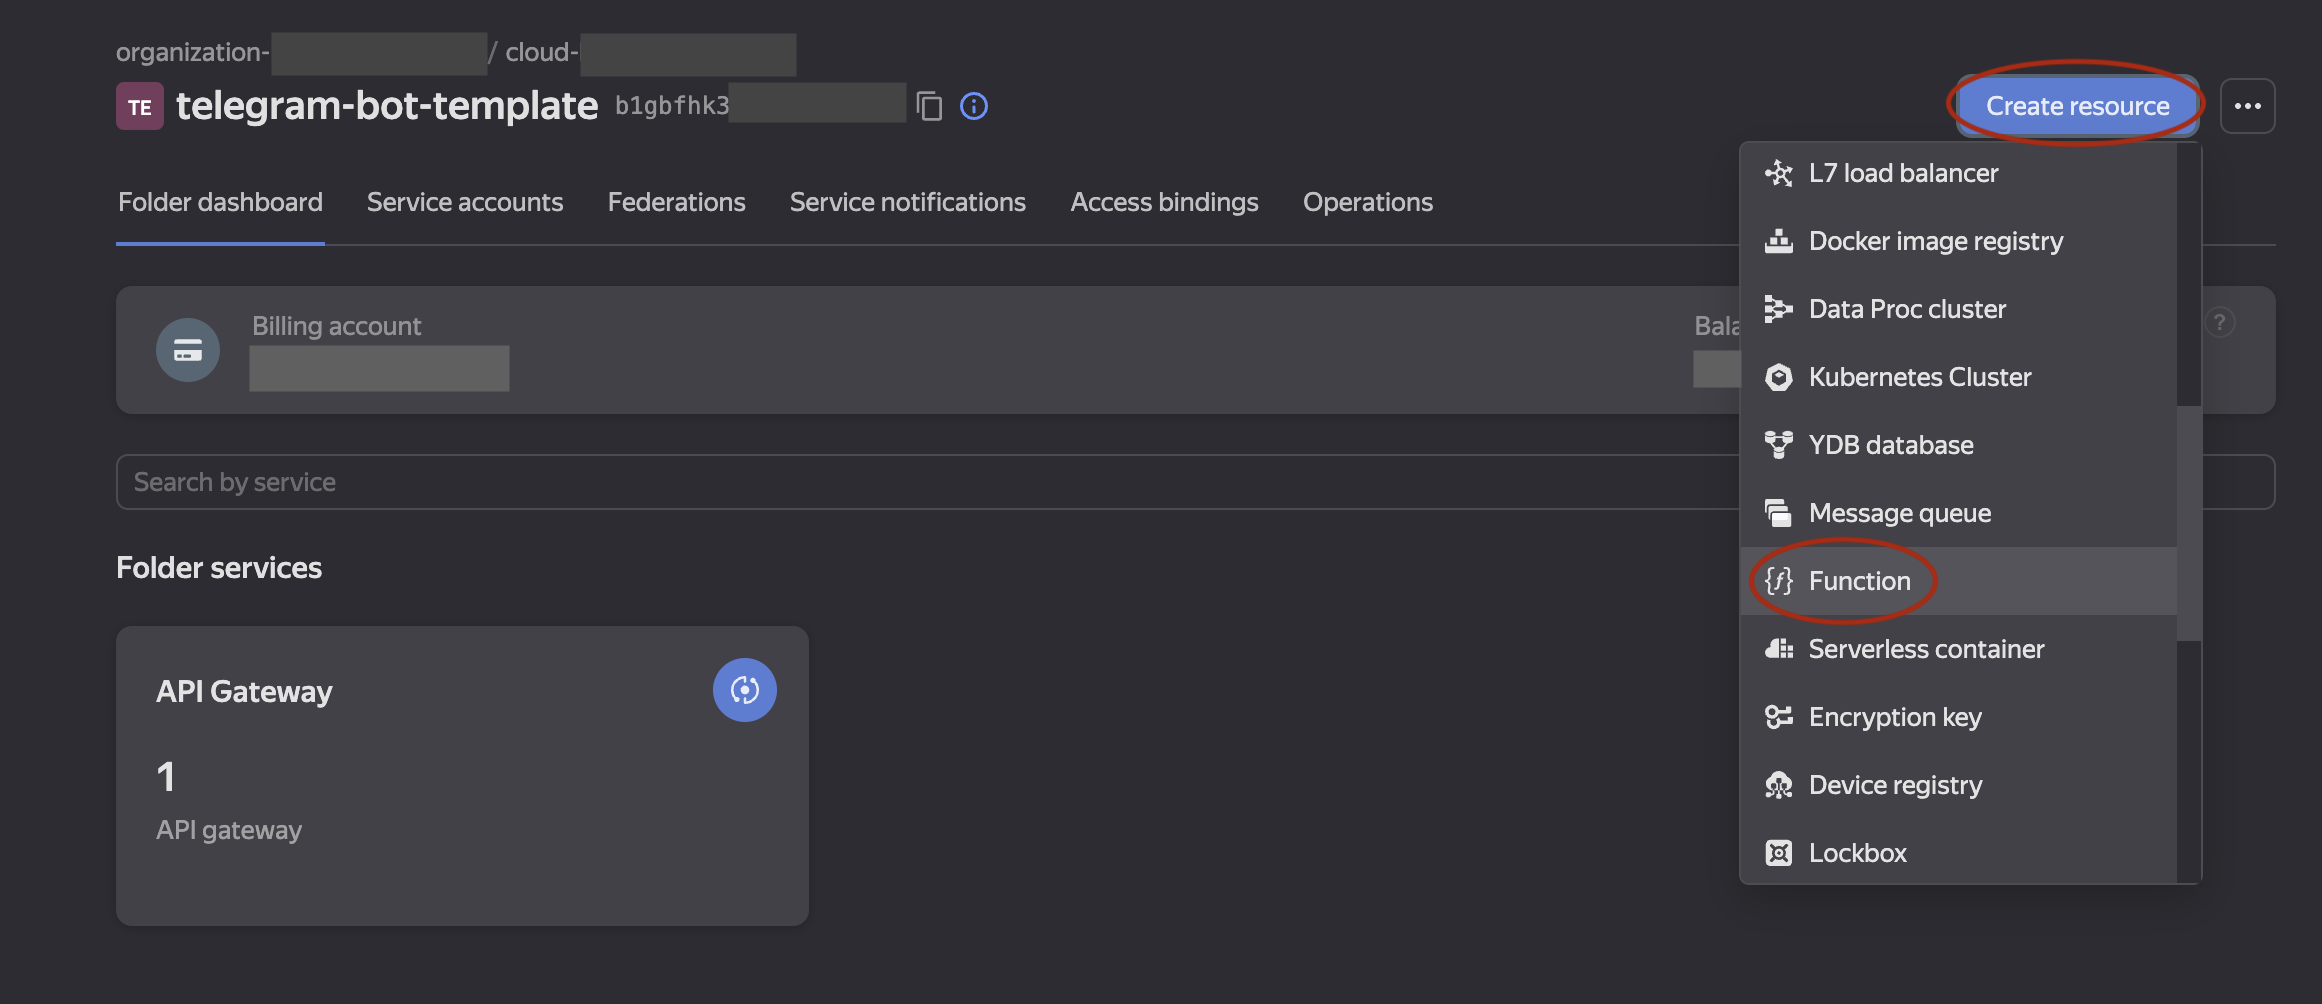
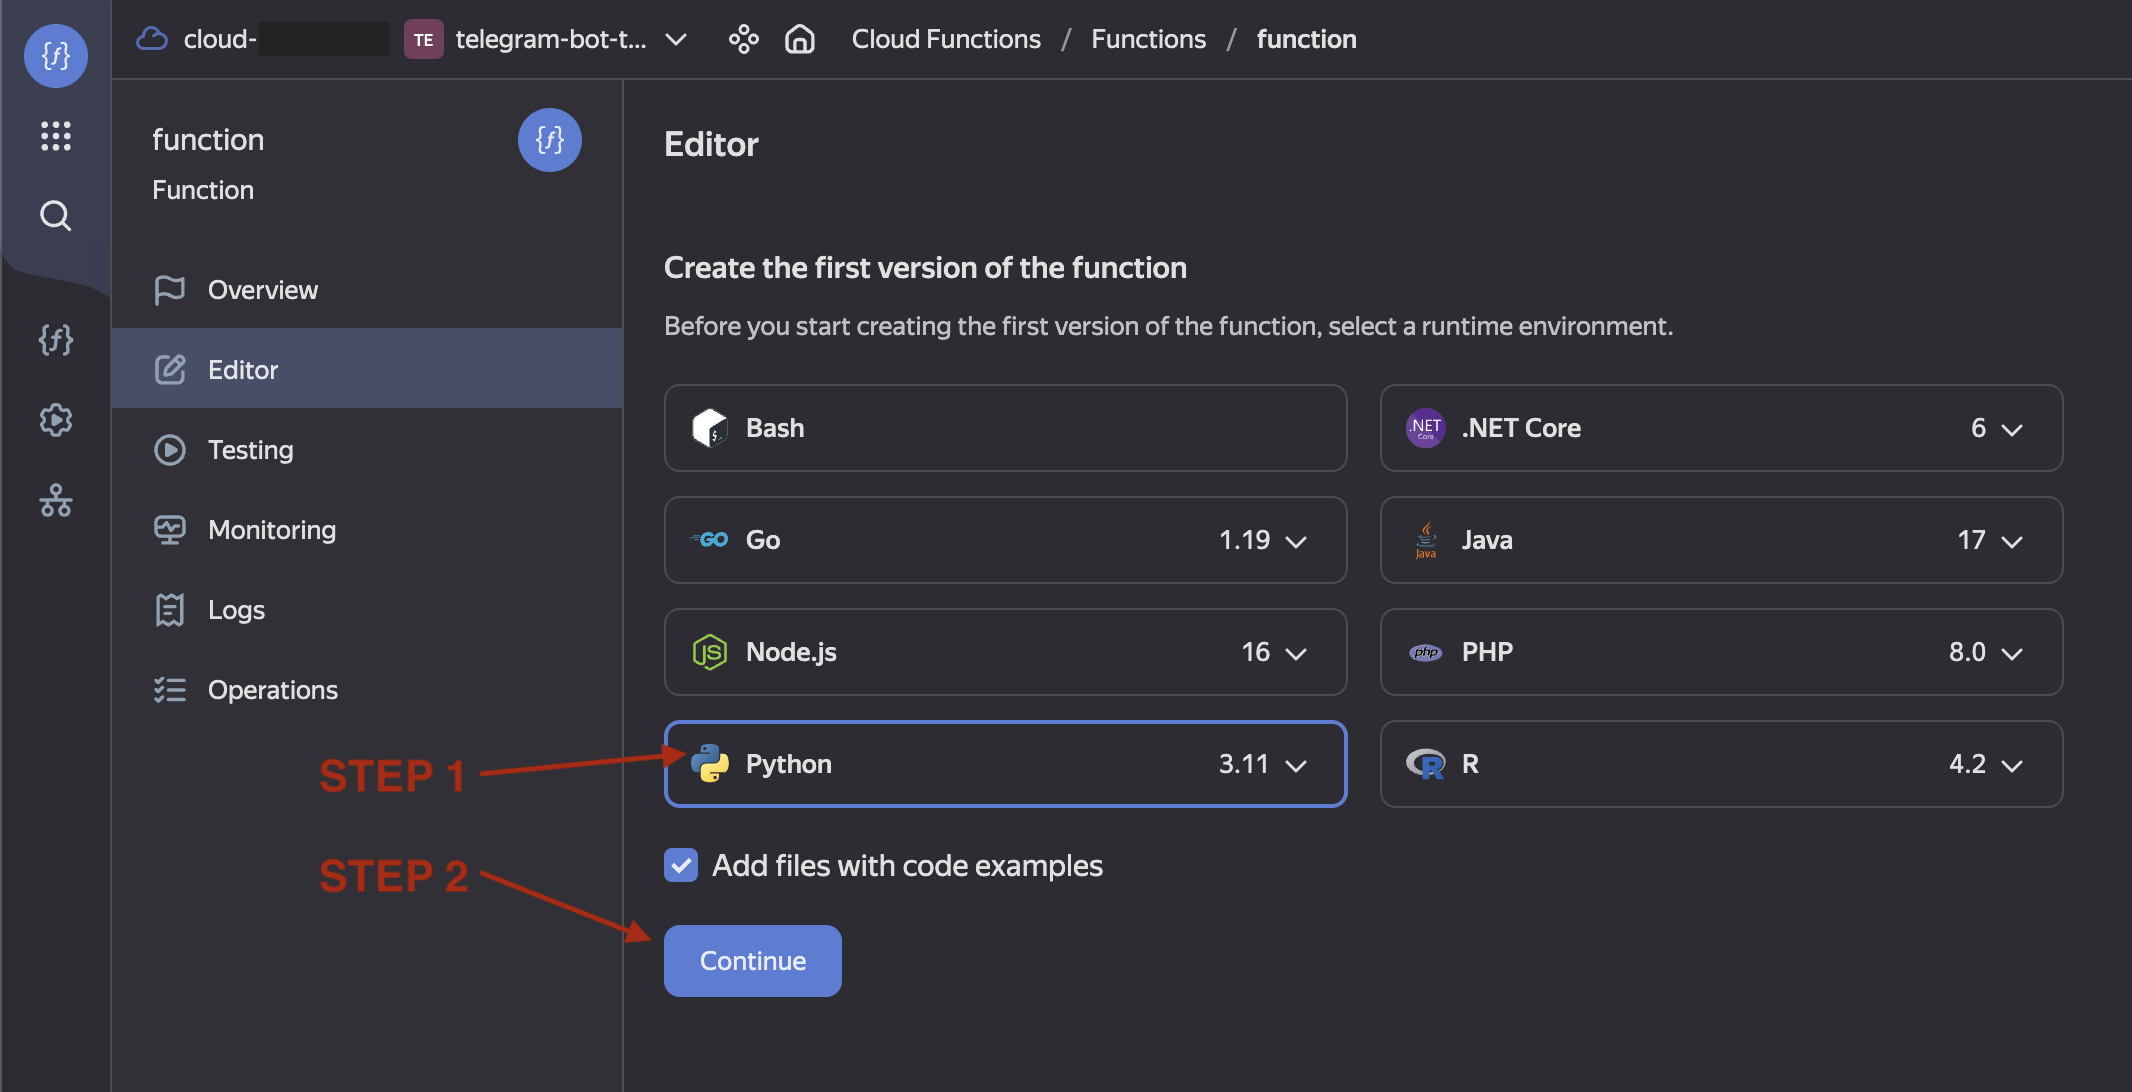
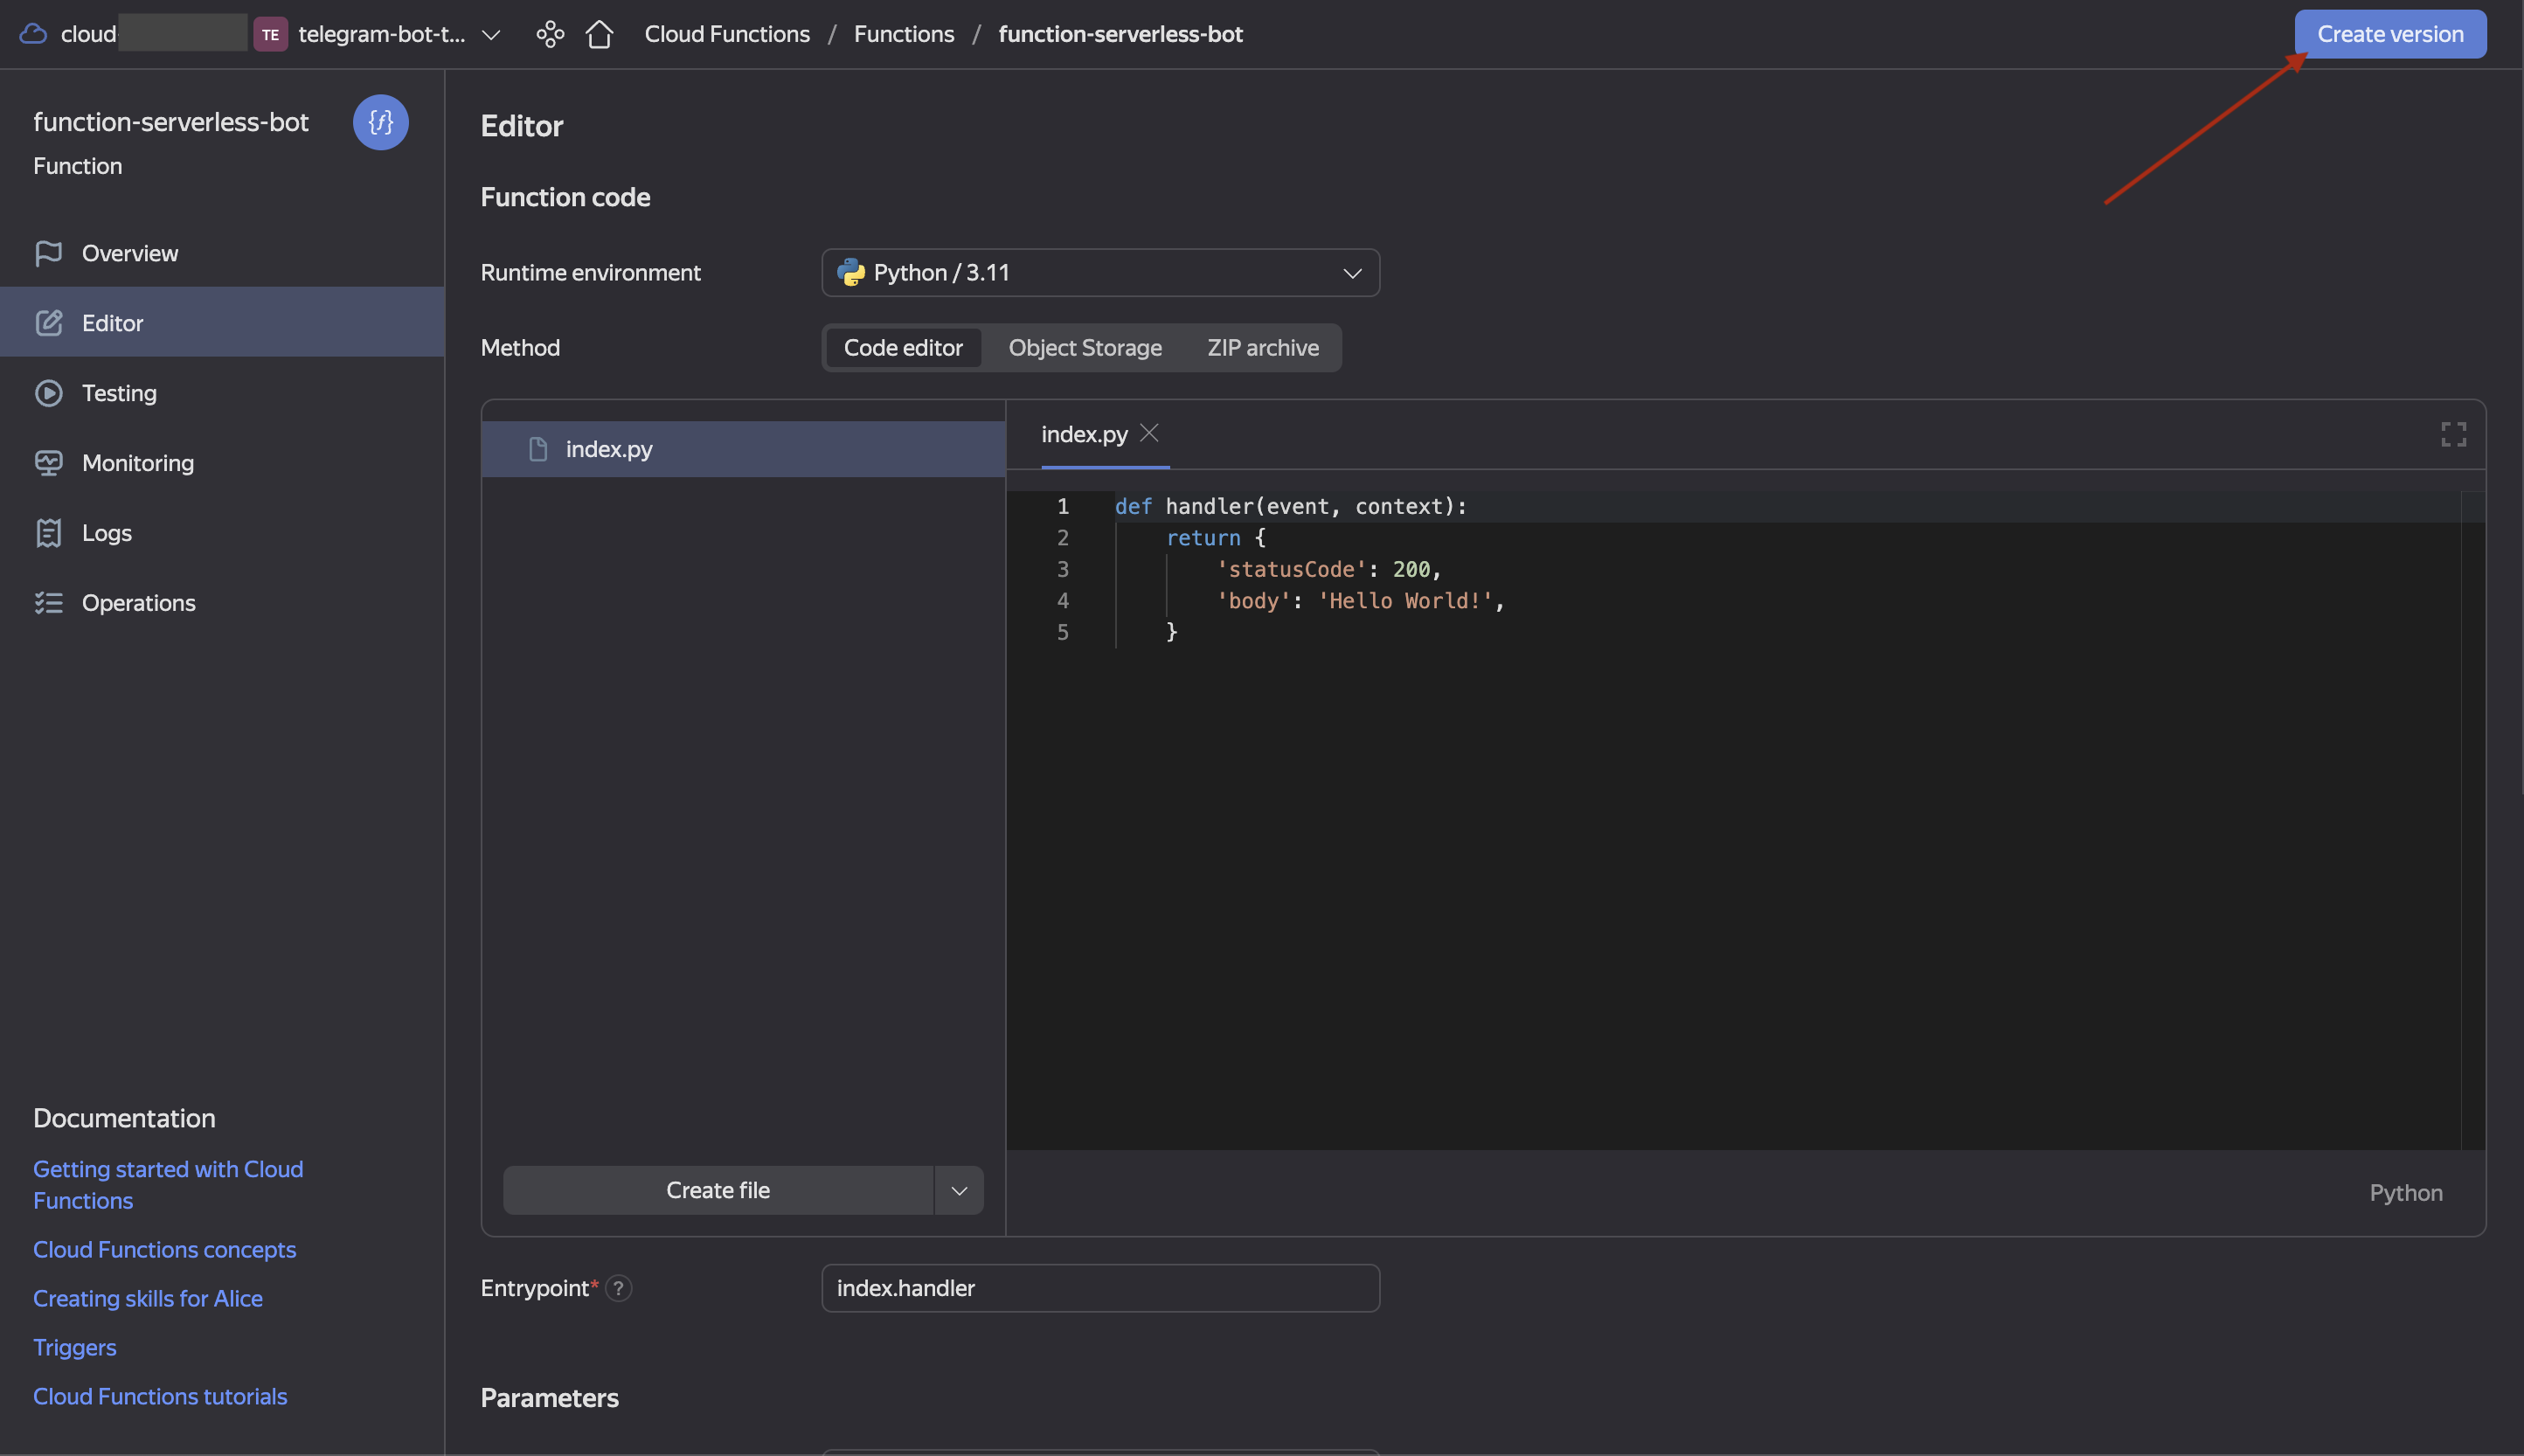
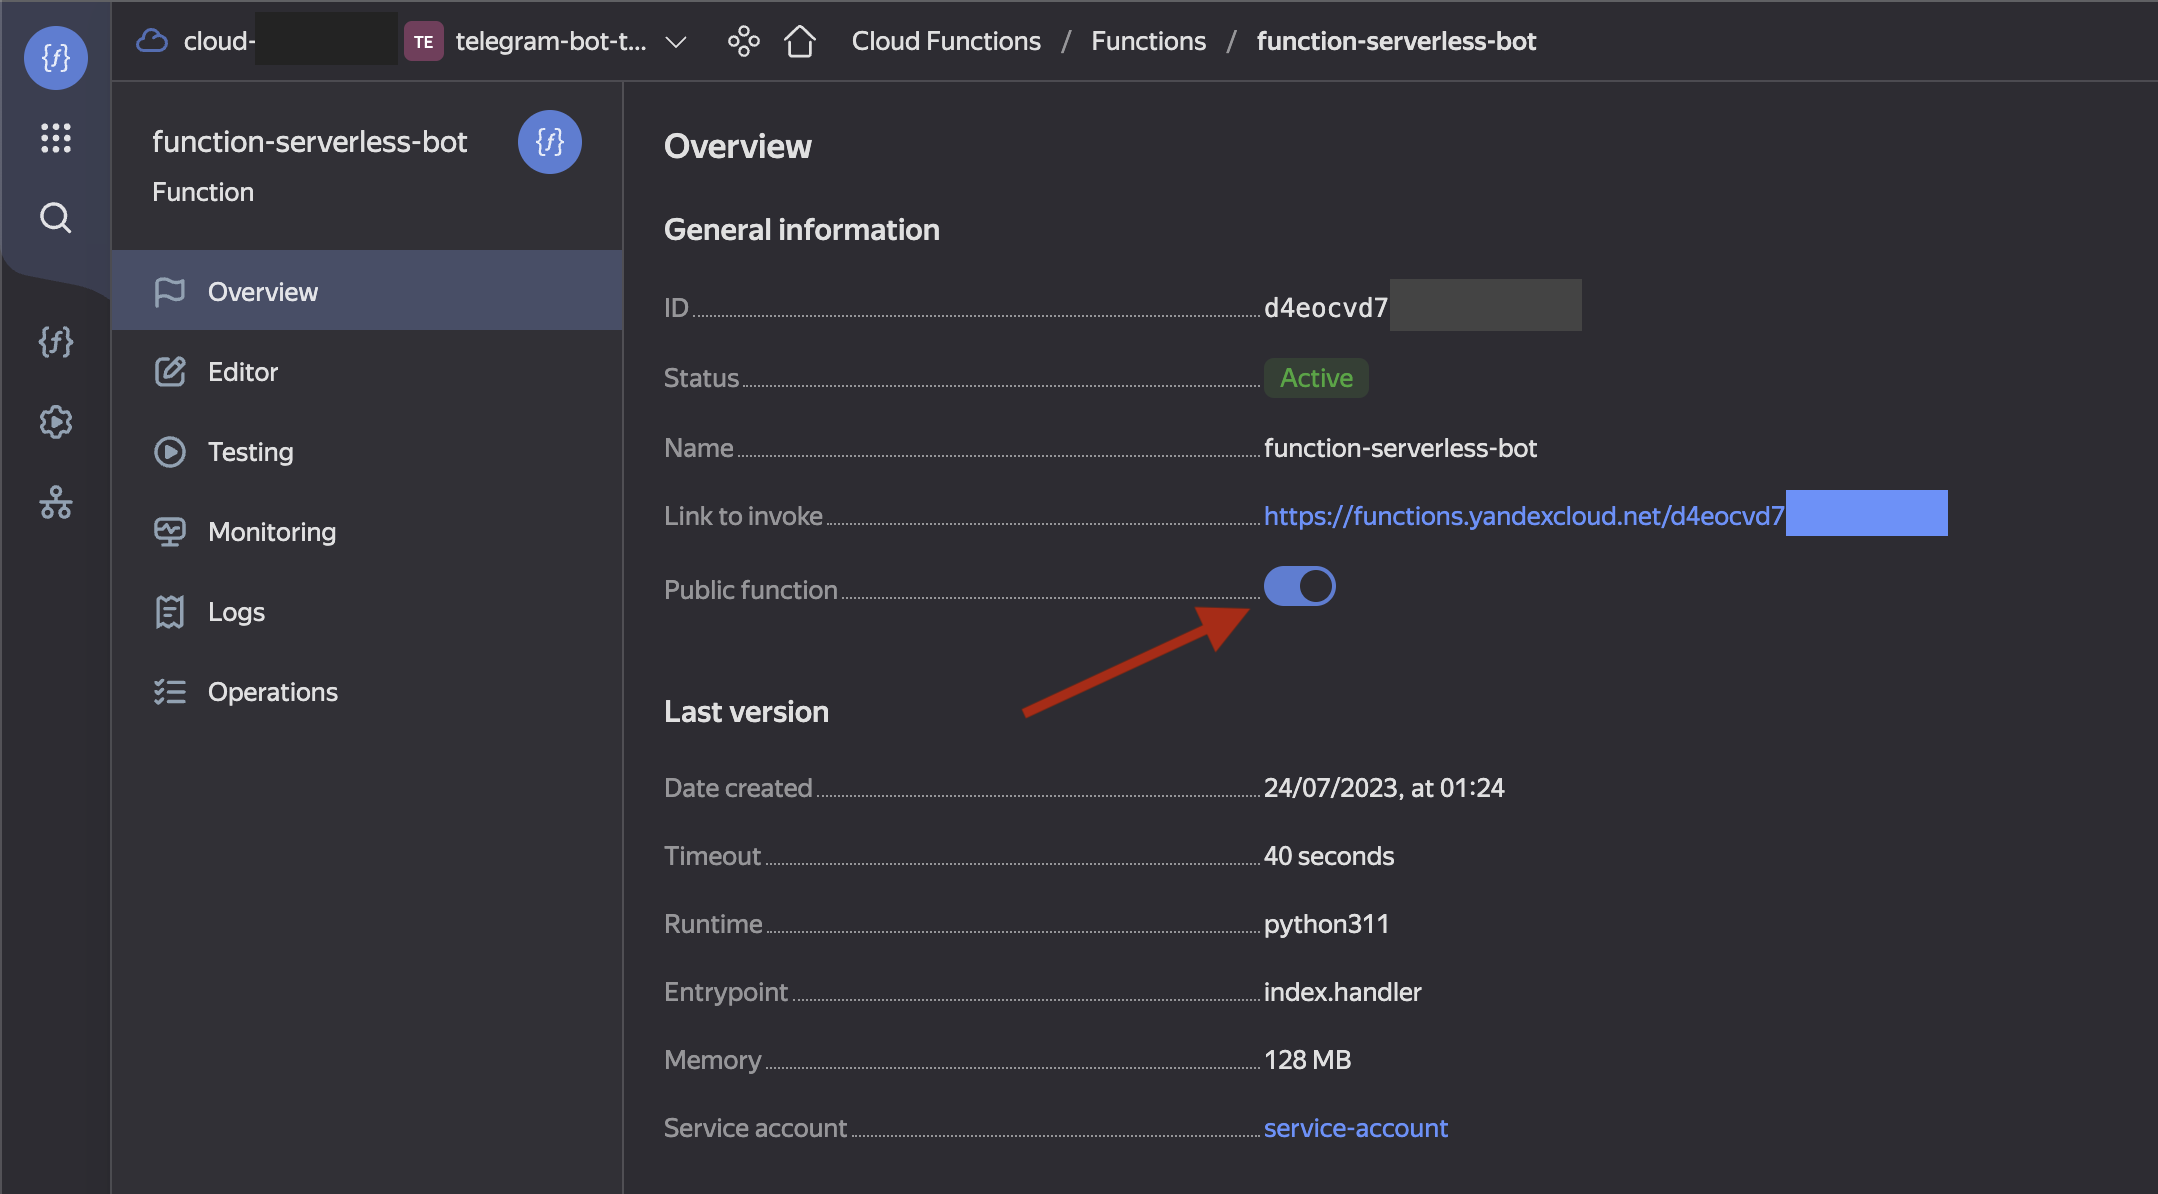
- Create a Serverless Function with Python3.11 environment. Choose any name. In the Editor tab create a first default version, in the Overview tab make it public.
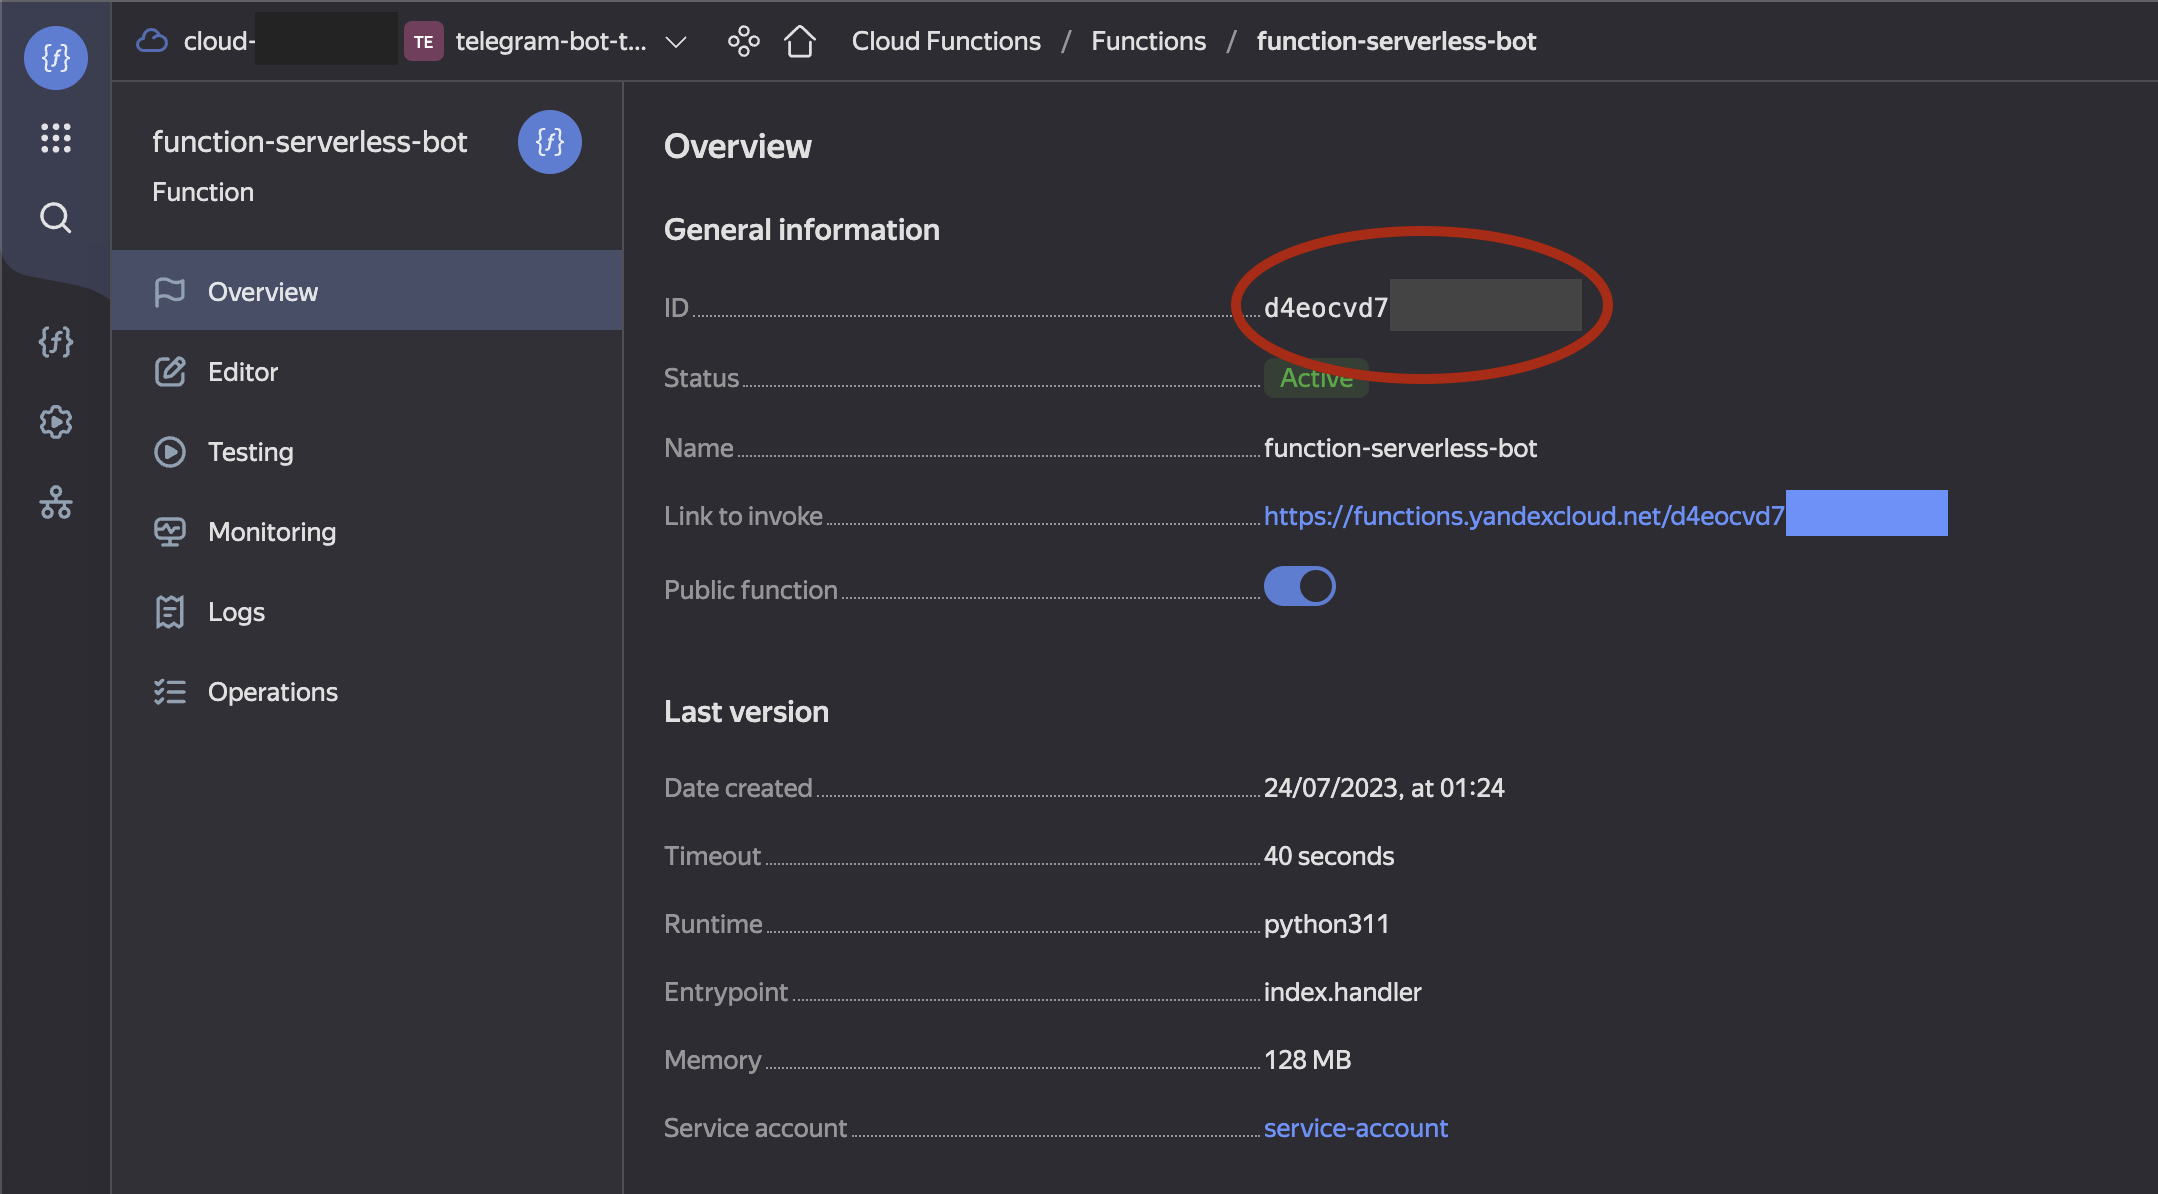
- Copy your function ID and save for the next step.
- Create a link between the API gateway and the Function - edit the API gateway specification and add the following code in the end, replacing
<function ID>with value copied during the last step. Pay attention to the indentation - it should be exactly as in this snippet:
  /fshtb-function:
    post:
      x-yc-apigateway-integration:
        type: cloud_functions
        function_id: <function ID>
      operationId: fshtb-function
- Create a telegram bot by sending
/newbotcommand for BotFather in Telegram. Give it a name and a login, then receive a token for your bot. - (optional) Set up bot commands to create a menu. Send
/setcommandstoBotFather, choose your bot from the list and sent the following list of commands. This list will appear when clicking on the button in the bottom left corner of the bot chat.
- Create a link between the telegram bot and the function. Run the following request from terminal, replacing
<YOUR BOT TOKEN>with the token from BotFather and<API gateway domain>withDefault domainvalue from Overview tab of your API gateway. All went well if you received response{"ok":true,"result":true,"description":"Webhook was set"}.
-
Request
curl \
  --request POST \
  --url https://api.telegram.org/bot<YOUR BOT TOKEN>/setWebhook \
  --header 'content-type: application/json' \
  --data '{"url": "<API gateway domain>/fshtb-function"}'
-
Request for Windows
curl --request POST --url https://api.telegram.org/bot<YOUR BOT TOKEN>/setWebhook --header "content-type:application/json" --data "{\"url\": \"<API gateway domain>/fshtb-function\"}"
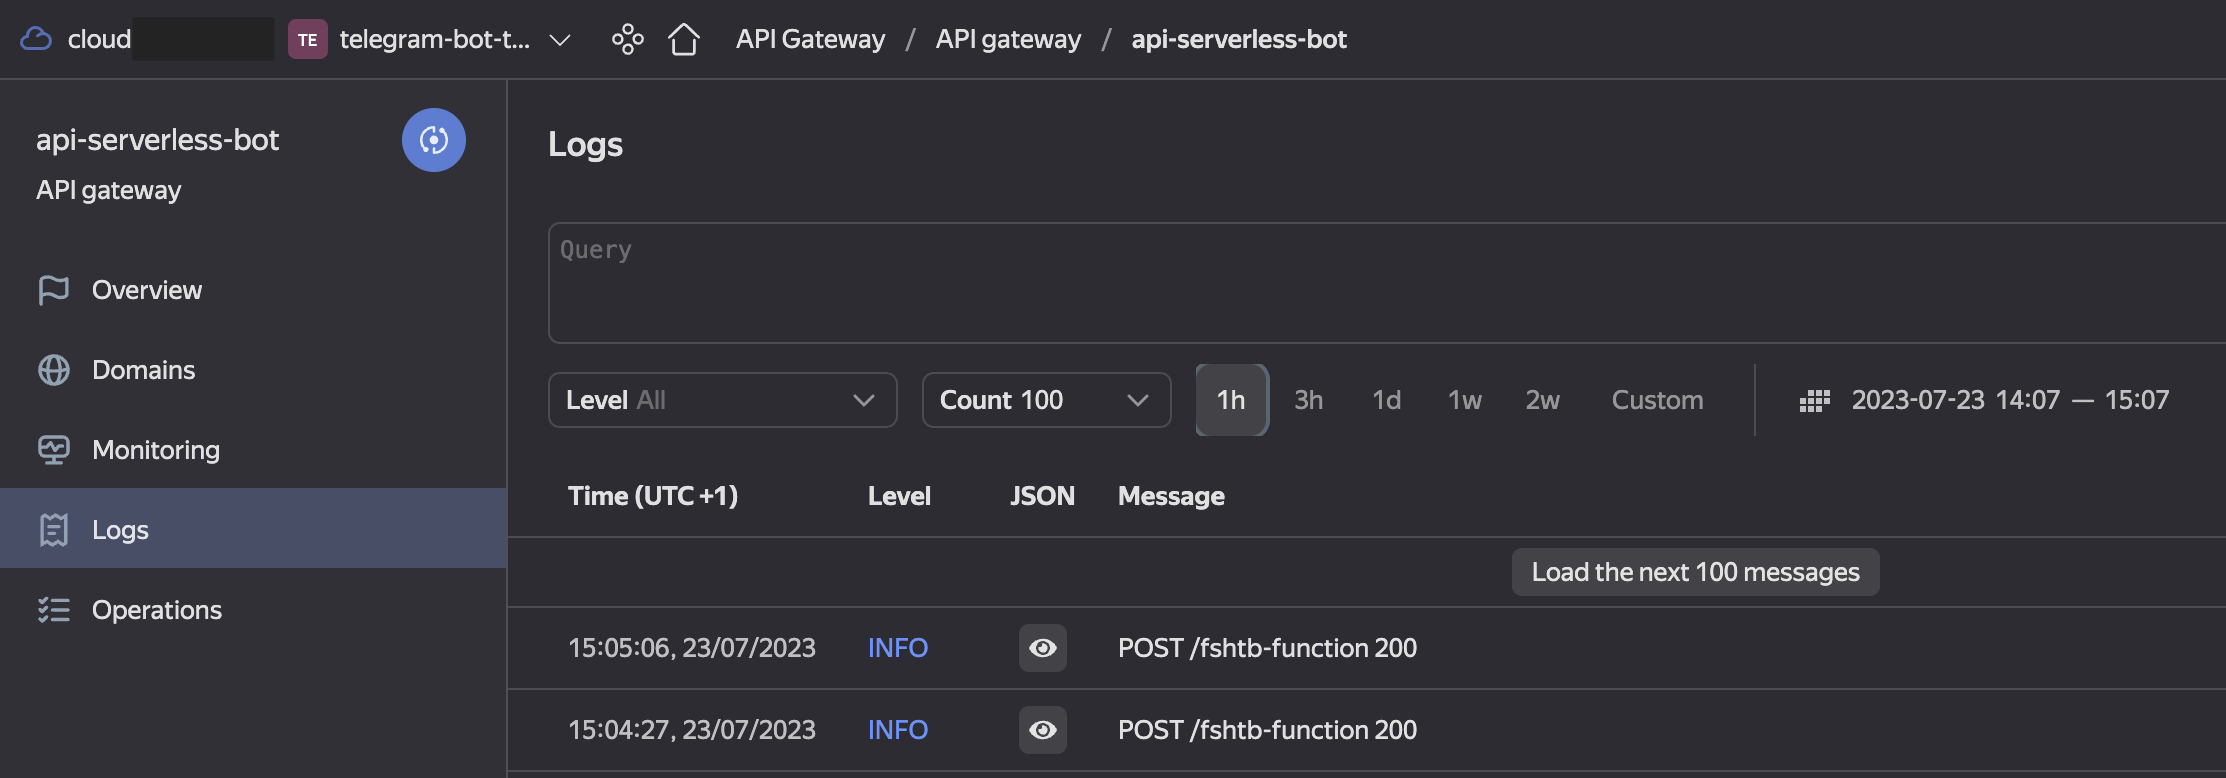
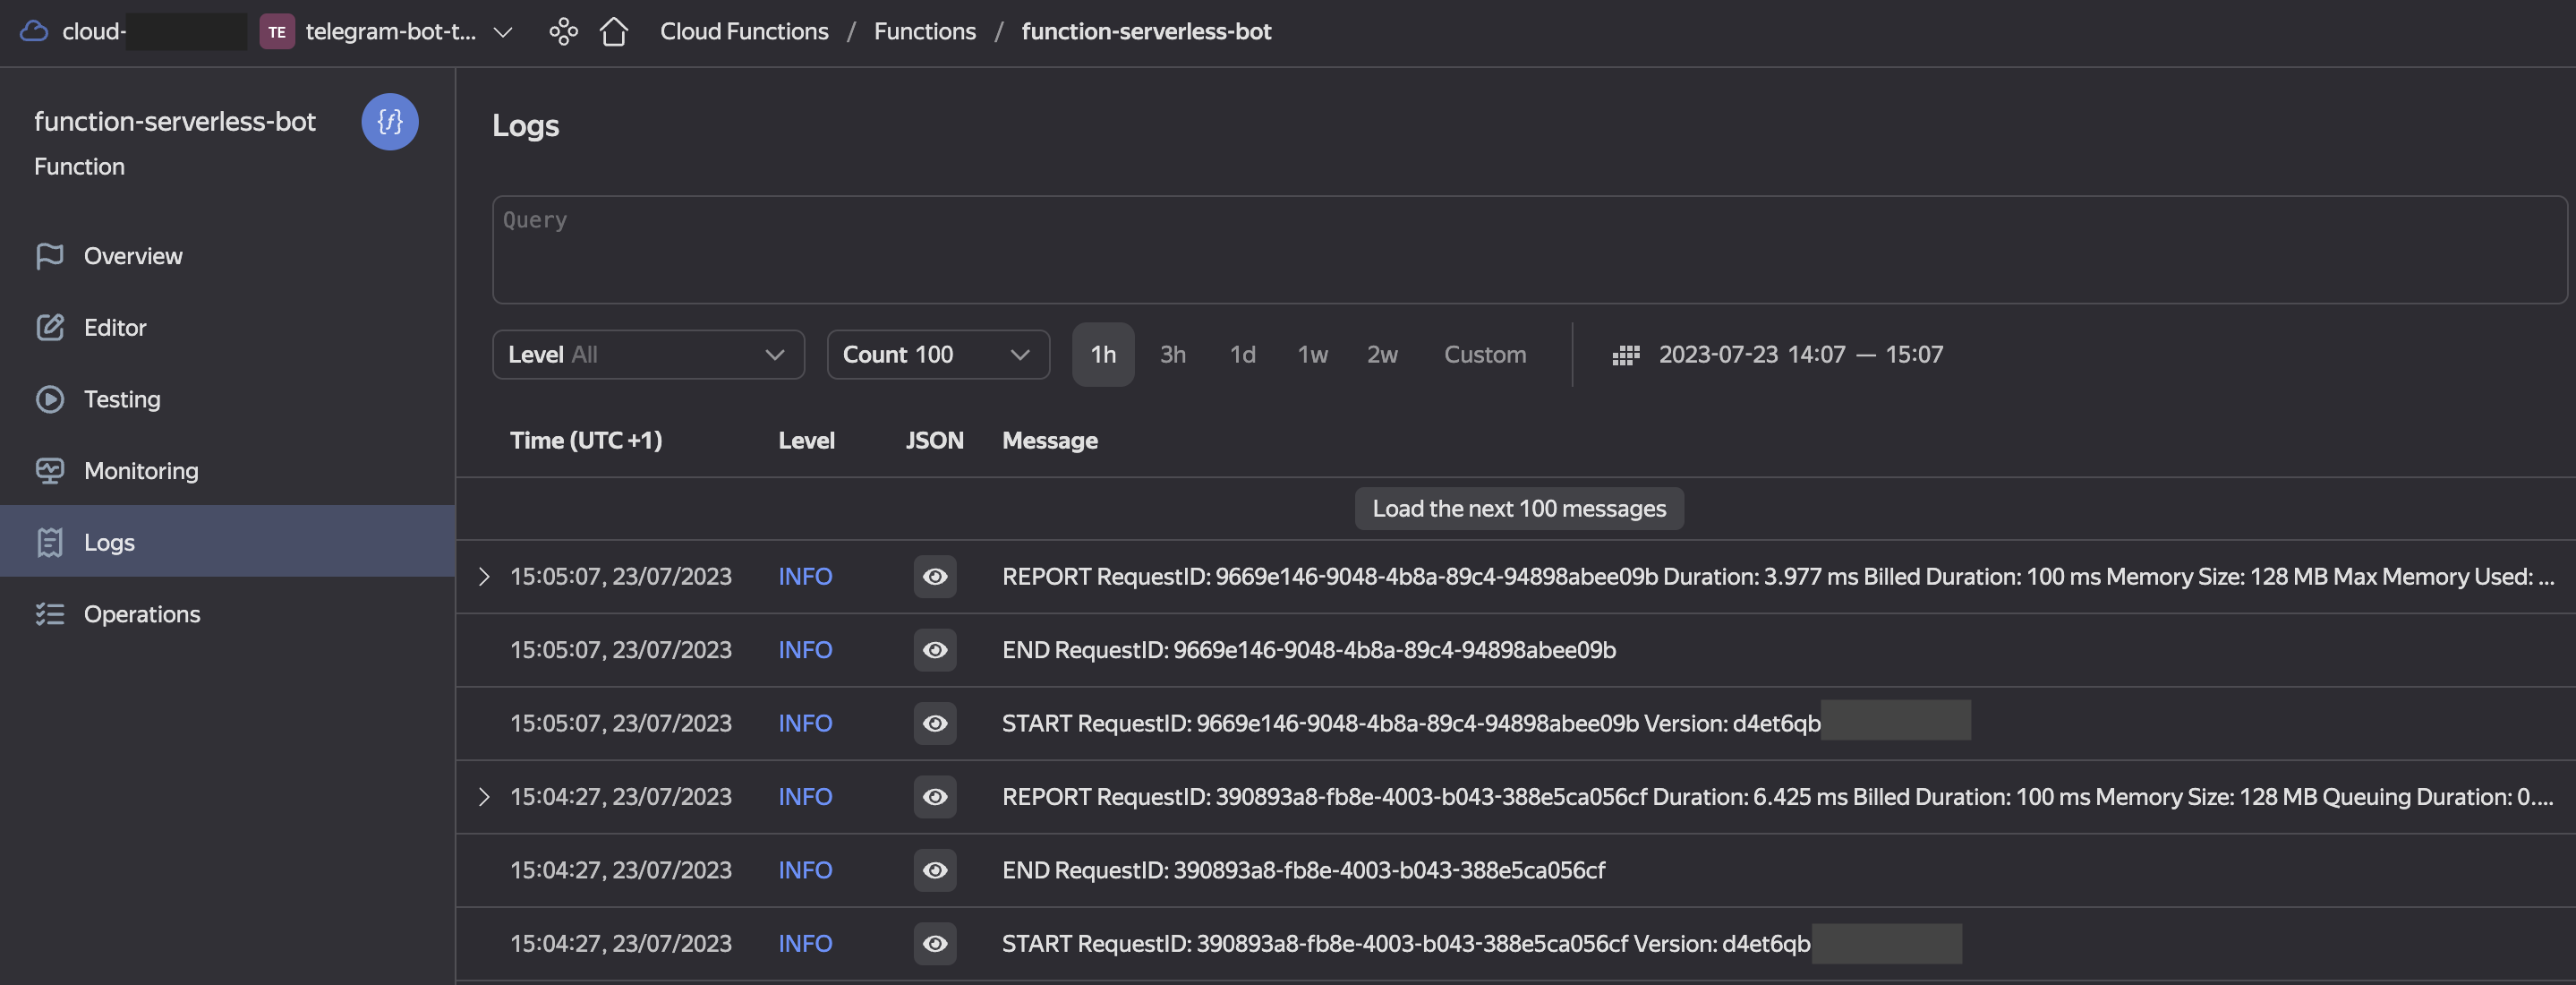
At this stage sending /start to your bot should lead to successful POST requests from API gateway and successful Function invocations, which you can track on their respective Logs tabs.
Note: the function does not do anything yet, except for waking up and going back to sleep.
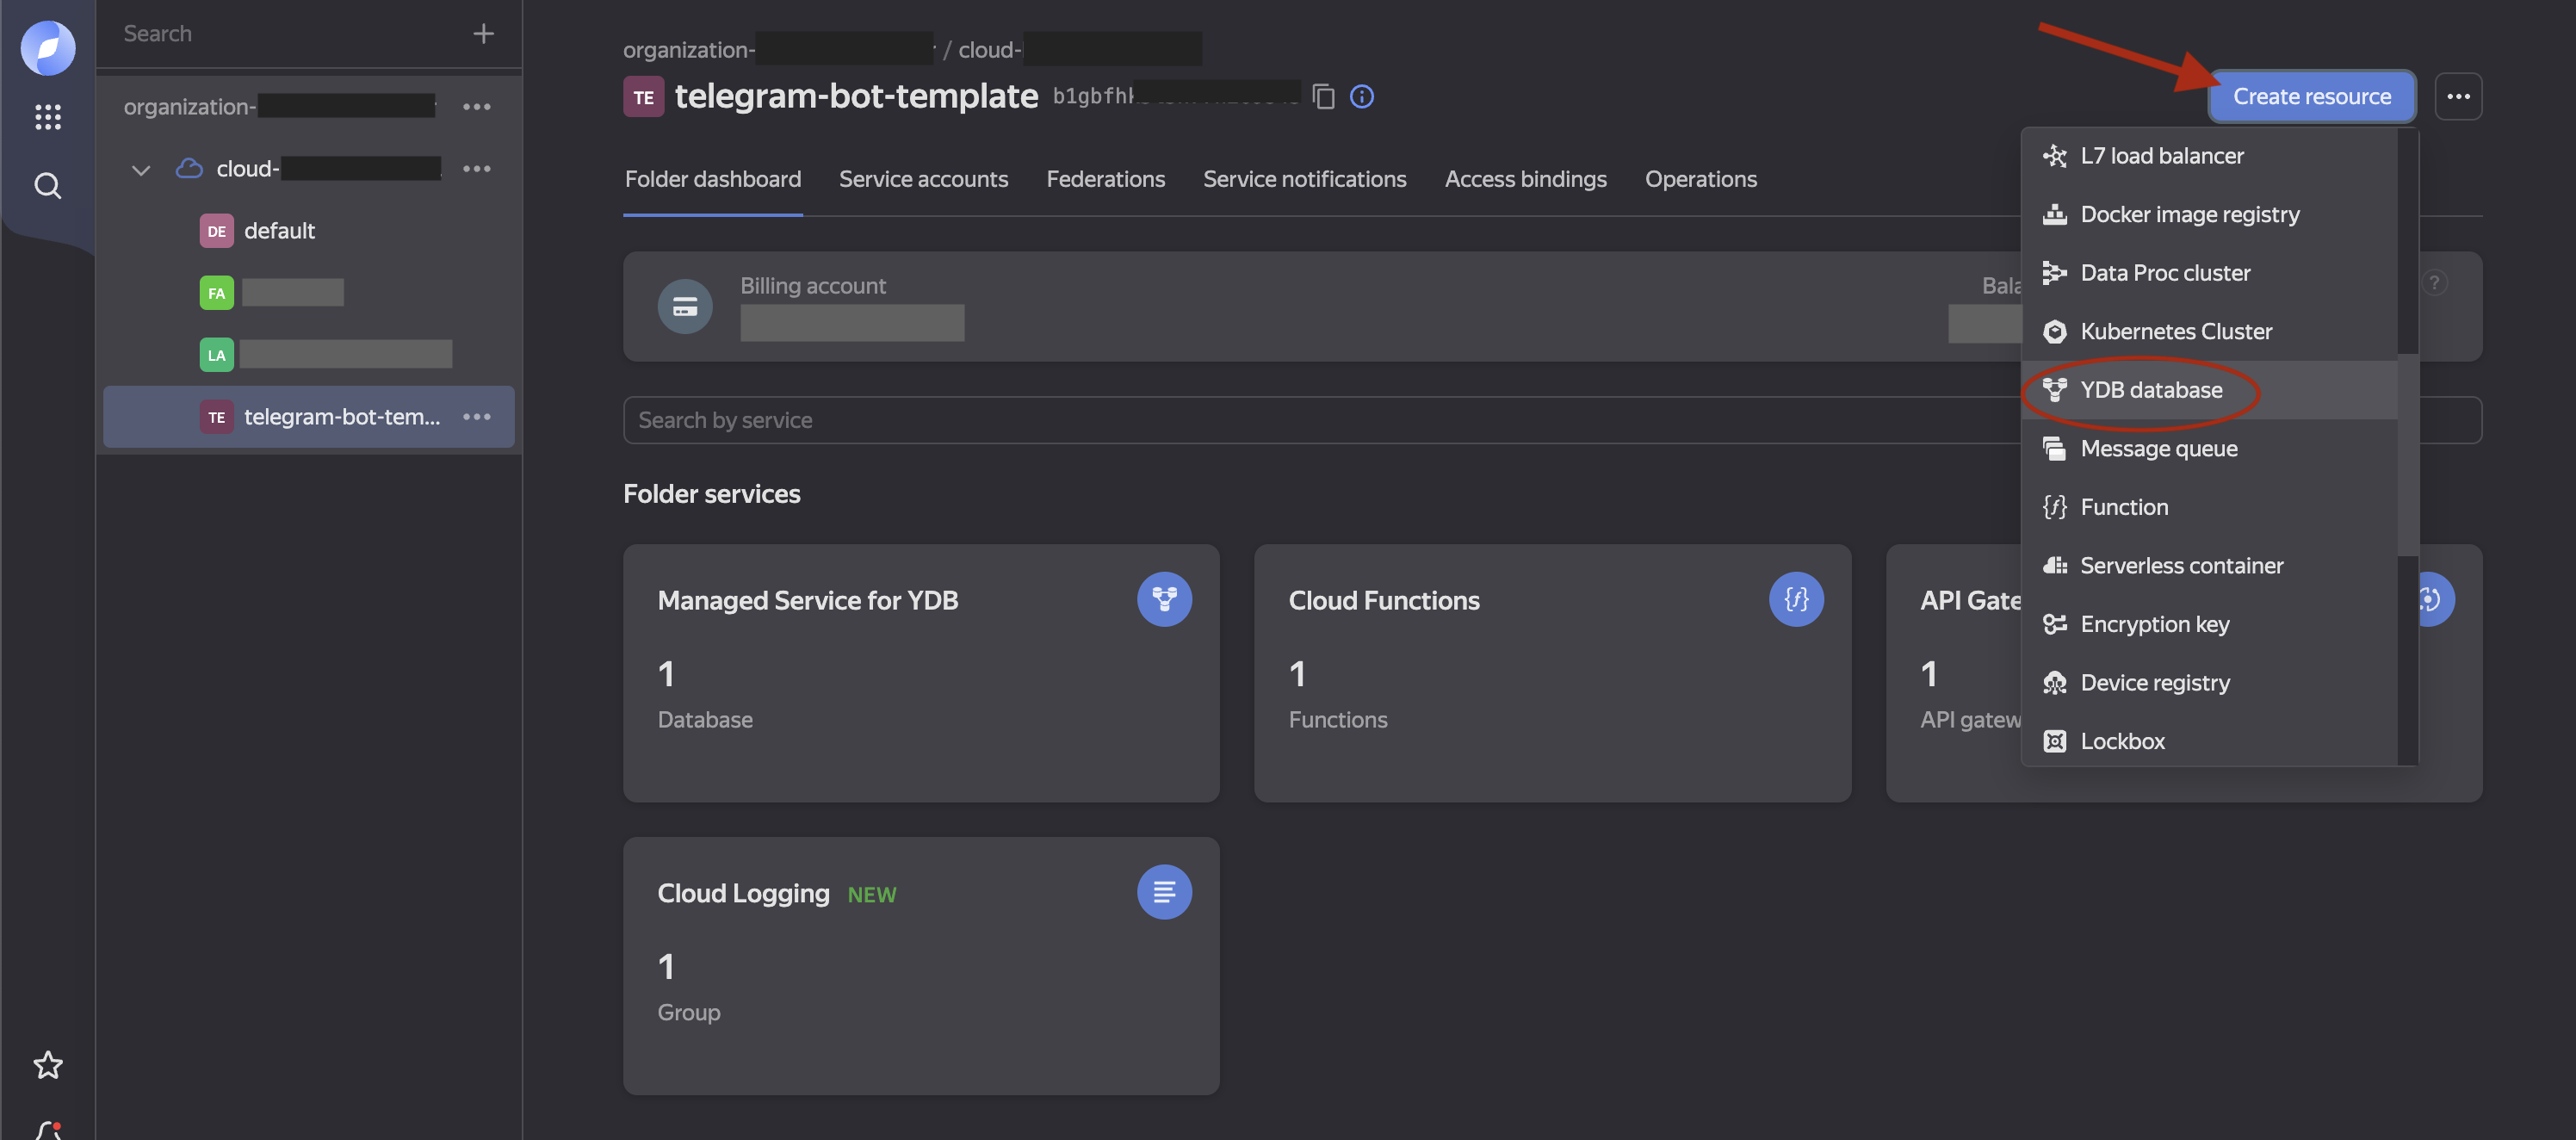
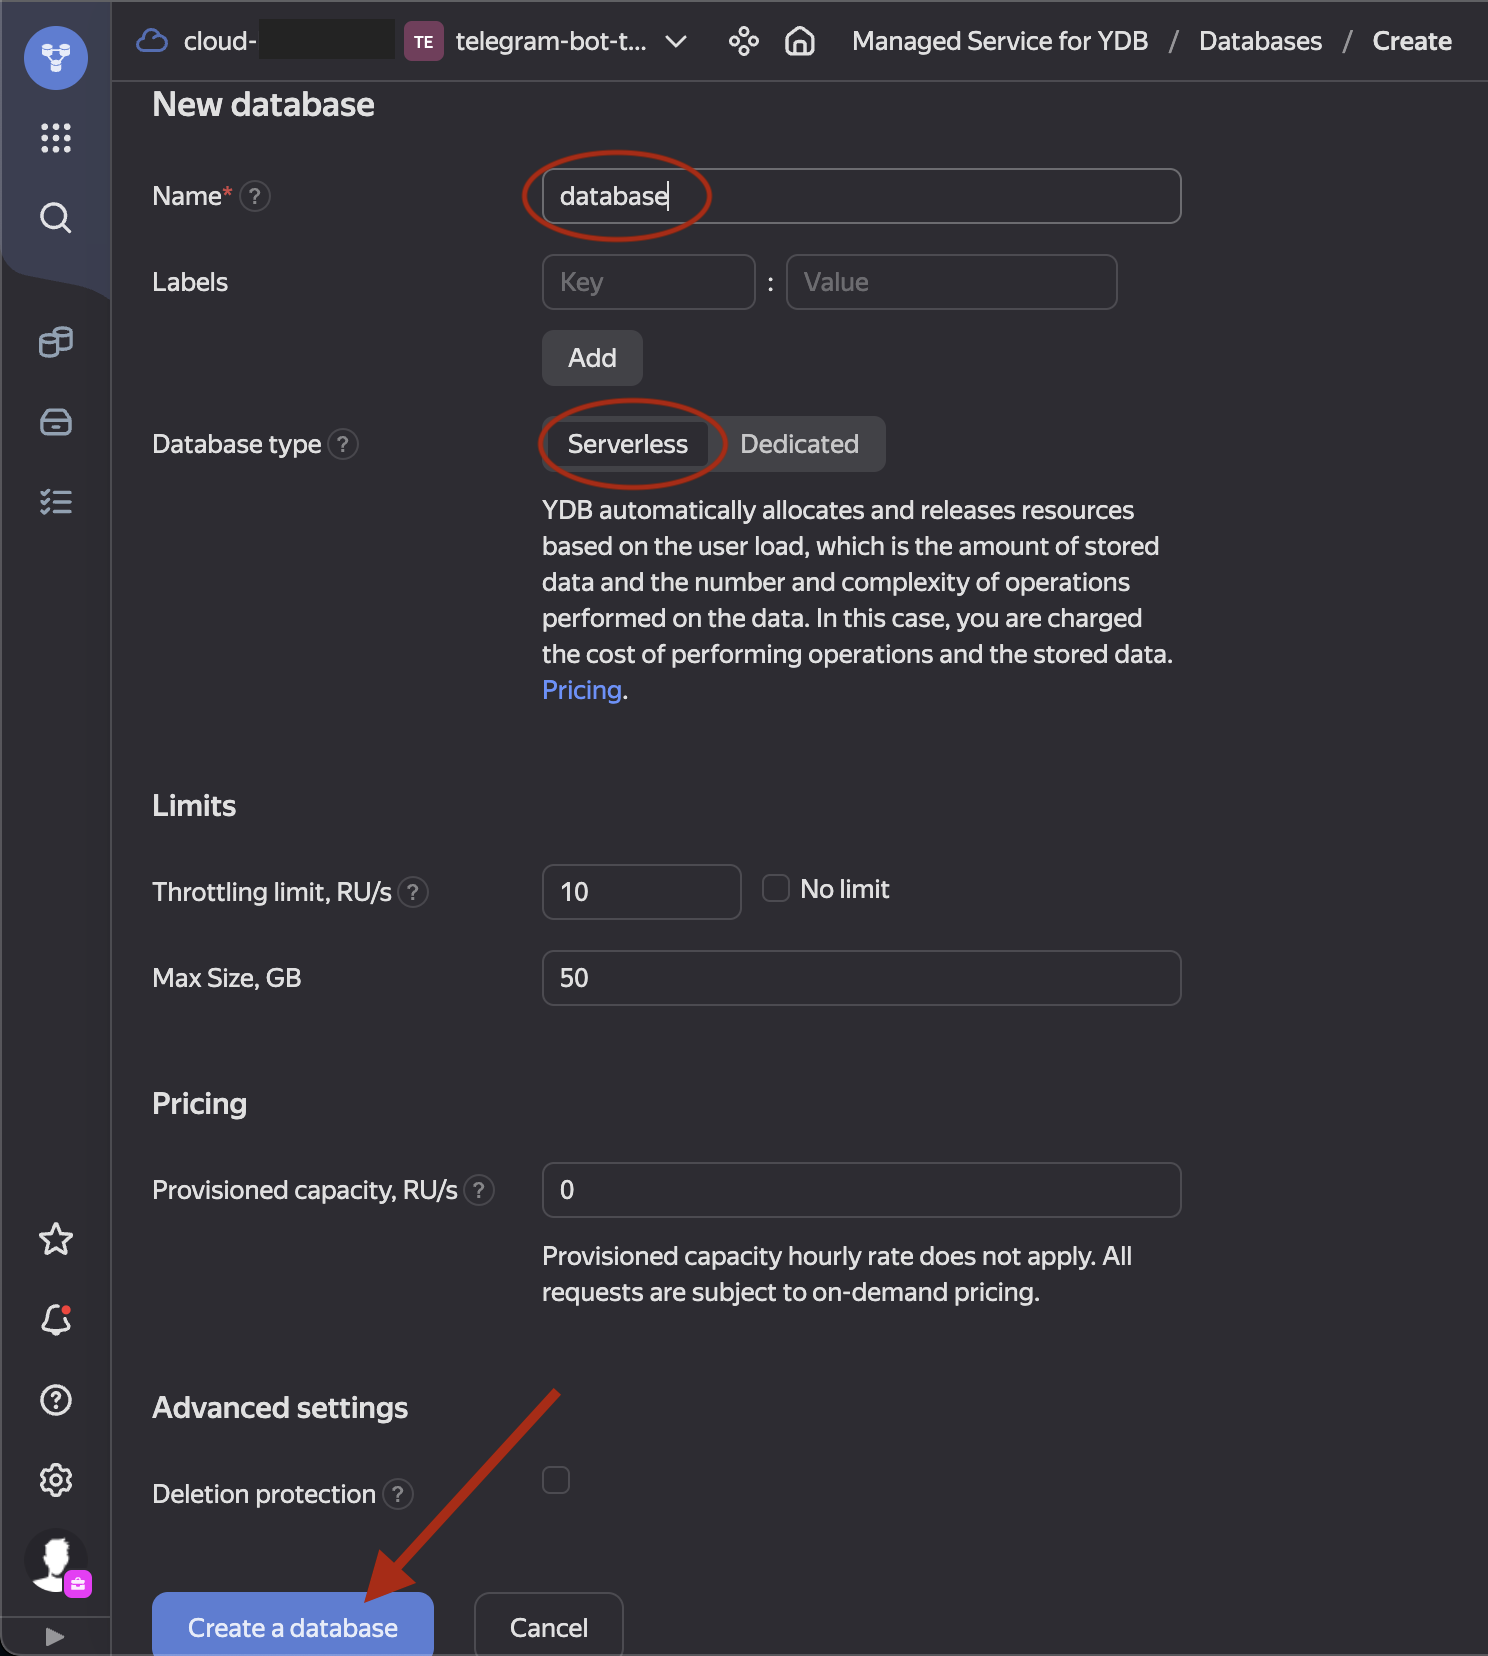
- Create a new serverless YDB database resource with any name in your folder.
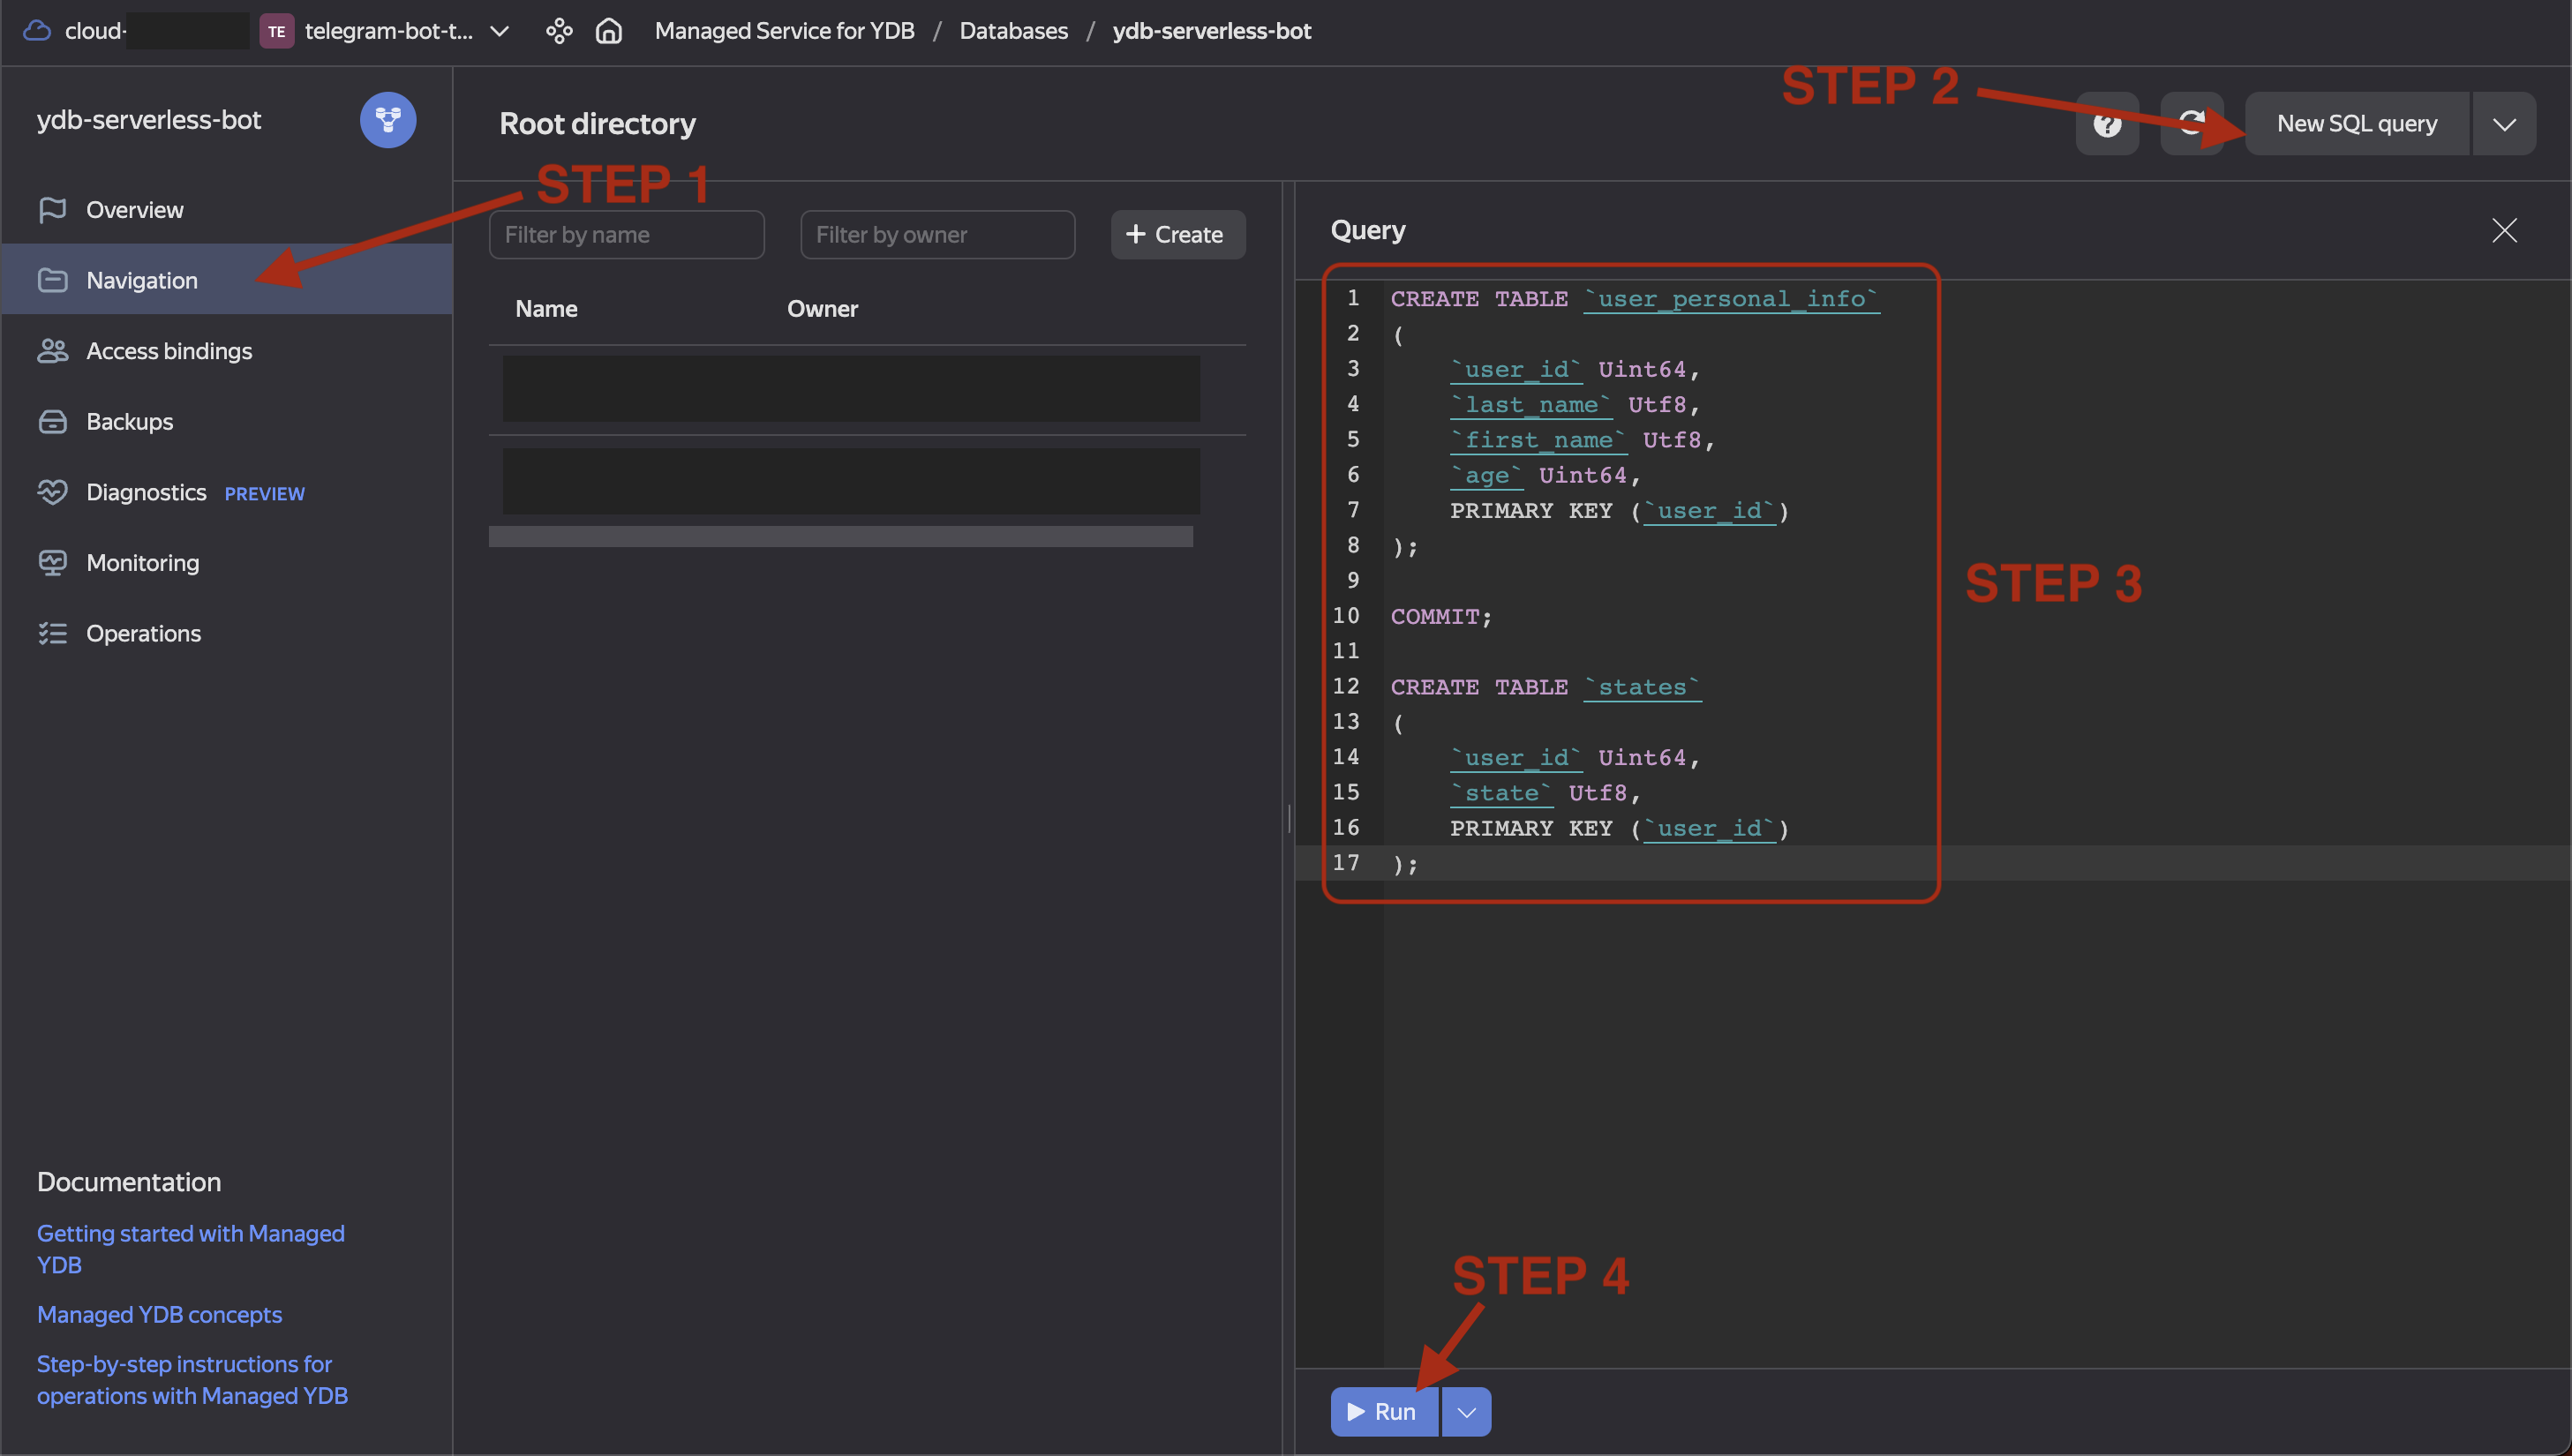
- Go to Navigation tab of the new YDB database, click
New SQL queryand run the following request to create 2 necessary tables.
-
SQL script
CREATE TABLE `user_personal_info`
(
  `user_id` Uint64,
  `last_name` Utf8,
  `first_name` Utf8,
  `age` Uint64,
  PRIMARY KEY (`user_id`)
);

COMMIT;

CREATE TABLE `states`
(
  `user_id` Uint64,
  `state` Utf8,
  PRIMARY KEY (`user_id`)
);
- Download the code from this repository and in terminal go to the directory, which contains
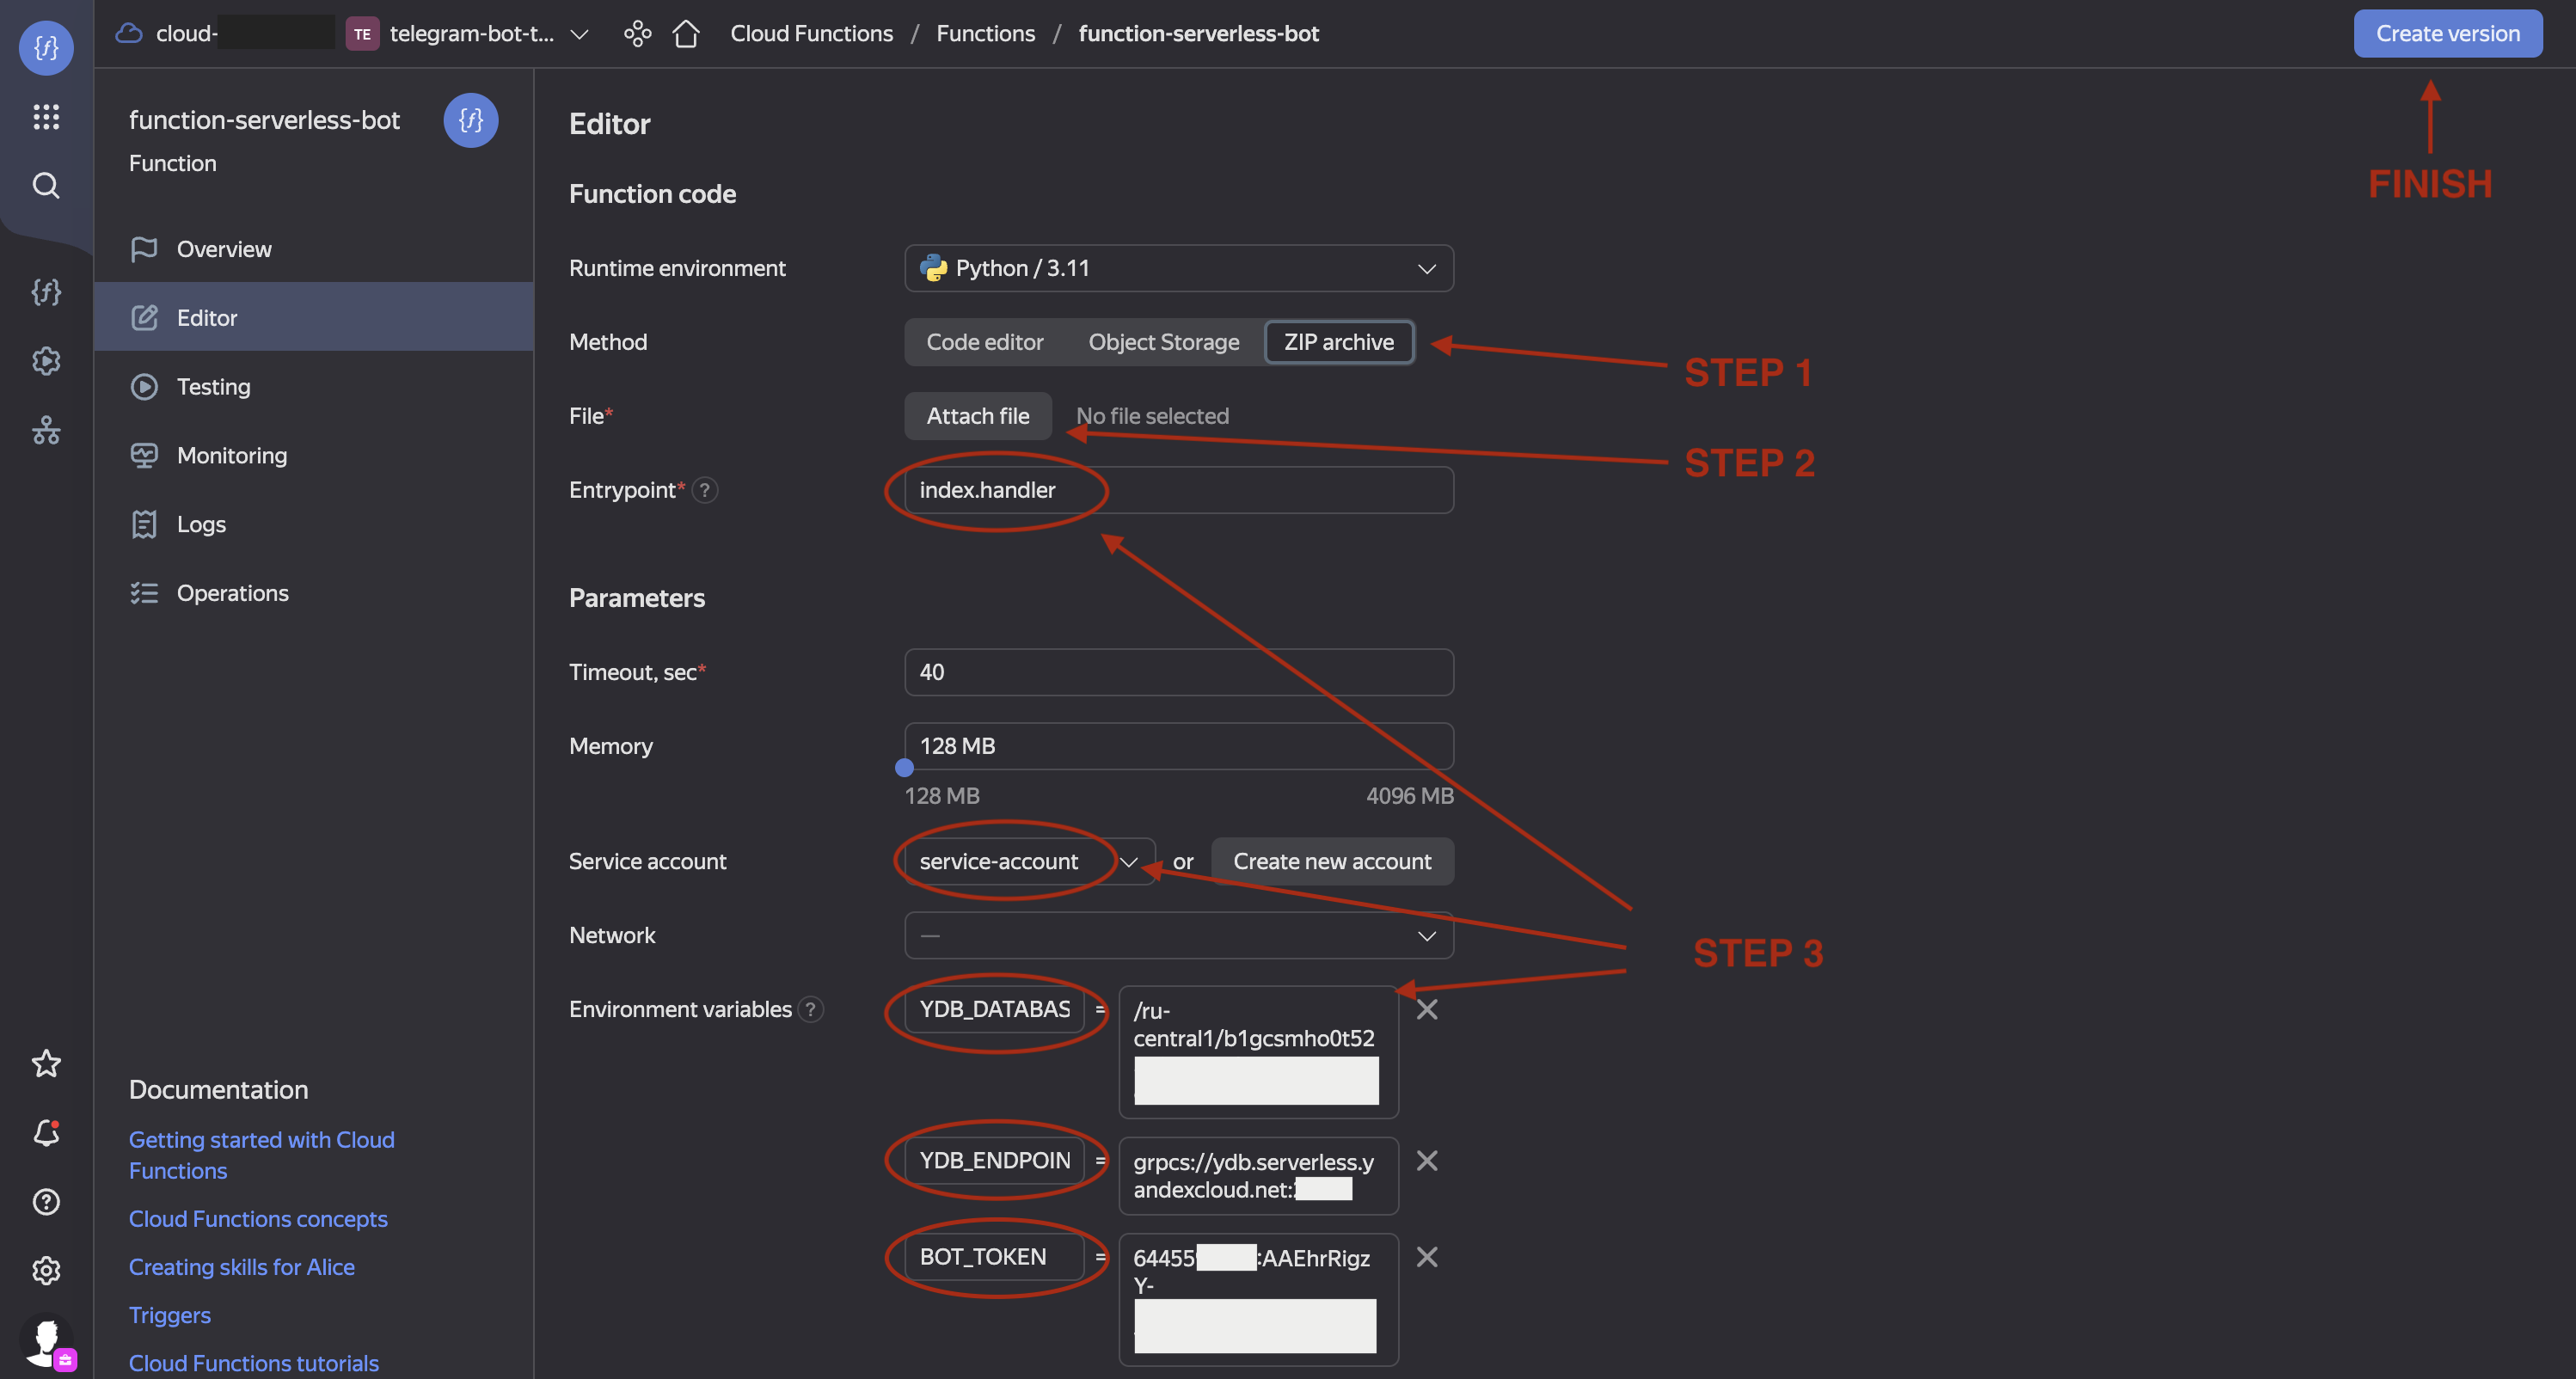
index.py. Create a ZIP archive with the directory contentszip -r ../code.zip *. The command will create an archive in the parent folder. - In Editor tab of function:
- Choose the upload method
ZIP archive. - Click
Attach fileand select the code archive. - Fill
Entrypointfield withindex.handler. - Select your service account.
- Create 3 environment variables:
YDB_DATABASE,YDB_ENDPOINT,BOT_TOKEN.How to choose their values
YDB_DATABASEis a value from YDB database Overview tab:Connection > Database.YDB_ENDPOINTis a value from YDB database Overview tab:Connection > Endpoint.BOT_TOKENis the token you received from BotFather after creating the new bot.
- Choose the upload method
- Click
Create versionand wait for it to be created.
Alternatively, you can use command line interface to do that.
Create Function version using CLI
- Download code from this repository.
- Edit
create_function_version.sh- fill the placeholders with your IDs and tokens to set up all the necessary version parameters. - Prepare Yandex Cloud command line interface - instruction.
- Execute
create_function_version.shto create a ZIP archive with the code and create a new version of your function using Yandex Cloud CLI.
Awesome! Now try your bot!
- Play around with the bot.
- Visit function's Logs tab to see logs for each input message an debug errors if something went wrong. Click the
eyeicon (JSONcolumn) on each log to see additional details.
- Check out the database tables' contents in YDB database Navigation tab.
TBD..
