Notes of github collaboration integrated with Pycharm.
Now start to try the github workflow. This note shows each step of github collaboration with charts or code blocks, to complement Chinglish expression 🙅
First, start with initiate a project, creating a new repository in github.
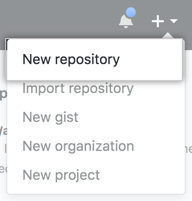
Log in with github account and click "+" in the upper-right corner, then select New Repository.
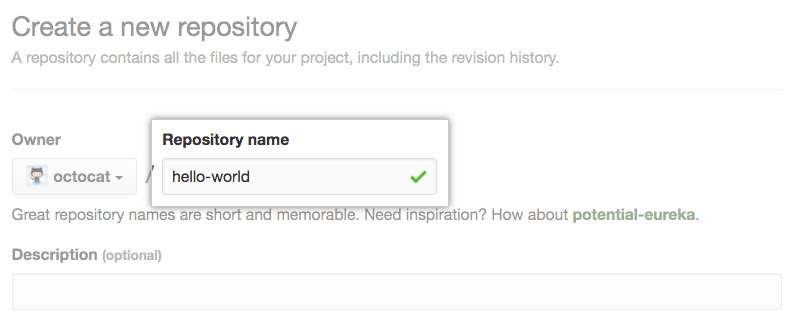
Type a name, and optional description for your repository.
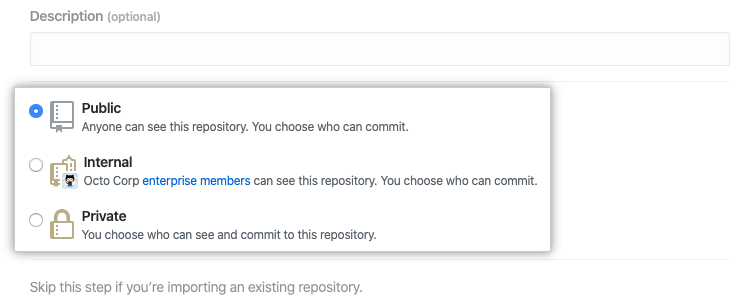
Then, choose visibility of repository, for public or private, which is important if the repository not planned to publish right now.
Now you have an empty repository. Switch to the terminal and locating into your local project, push local project to remote github repository. You can simply follow the codes shown on the new repository page, or try to:
-
clone this empty remote repository (with only directory
.gitin it) to local;git clone https://github.com/username/reponame.git -
locate to local repository (in default branch
master), paste project files to this folder (remove unnecessary directories, e.g.ideaand__pycache__);cd reponame cp project_files . -
add and commit these changes;
git add . git commit -m "Repo init" -
now the local master is ahead of the remote, push to update remote github repository.
git push -u origin mastercheck the remote repository on github, and you will see the initialized repository and the reference to your first commit.
Stop here and enjoy git exploration if teamwork is not required for your repository 👋
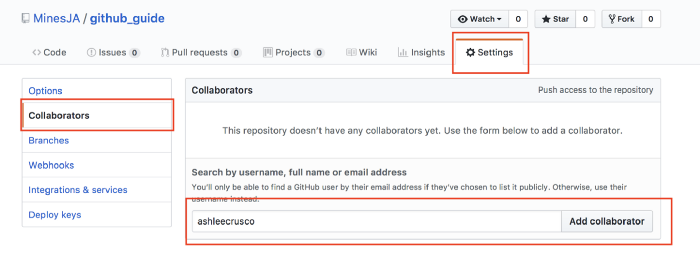
Direct to the Setting page of this repository, and select Collaboratos in the navigator, fill the chart with user name or email of the collaborator, then confirm to sent he/she the invitation email.
The teamwork could be start once the invitation accepted by the user.
If you are the team player in this repository, don't fork the repository (fork will copy a new repository in your account), just clone the repository, and you and your team could work in the same repository.
git clone https://github.com/username/reponame.git
cd reponame
Ready to collaborate? Then keep one central rule in mind: THE MASTER BRANCH SHOULD ALWAYS BE DEPLOYABLE. The proper way is working on branches then merging to the master after review.
After locating to the local repository, you've in the master branch by default, create a new branch
to start your work. Branches should always represent features.
git checkout -b new_feature
list all your local branch with this command, and verify you're in the new_feature branch.
git branch --list
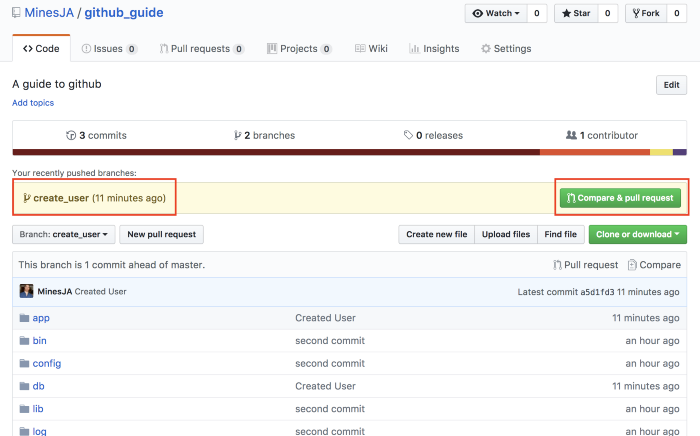
Frequently add and commit to record changes in the branch. push the branch when completed
your work.
git push
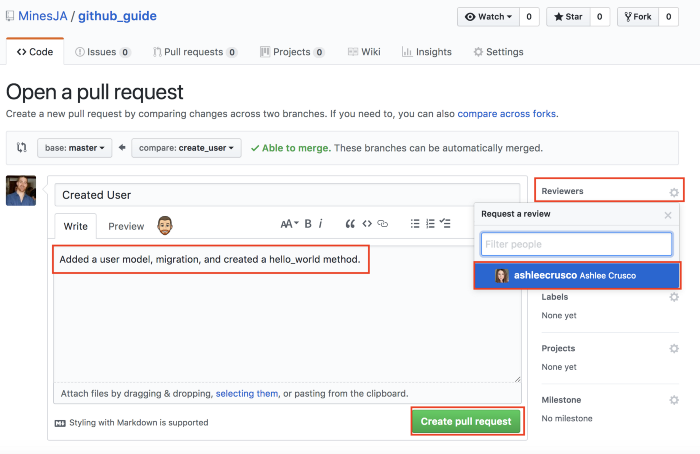
Now you submit a remote branch new_feature, click the pull request button
and send your reviewer a notification to check and merge branches.
Congratulations for finishing works 🎆
If you are the reviewer of this repository, sorry to inform that your works just begin. Ready to debug the PRs and handle the conflicts with the base branch?
-
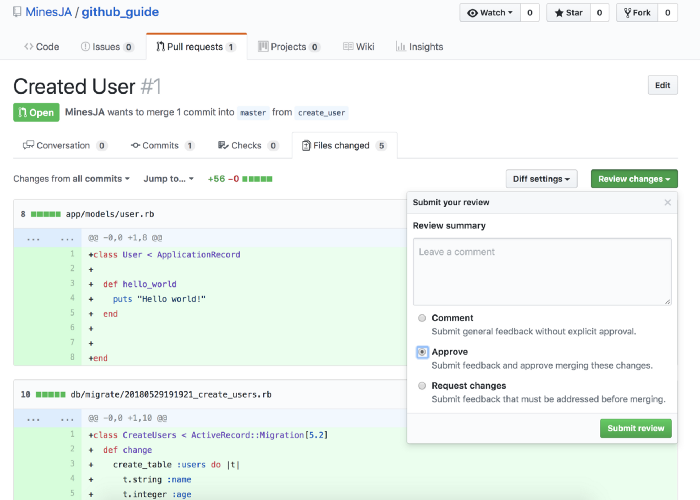
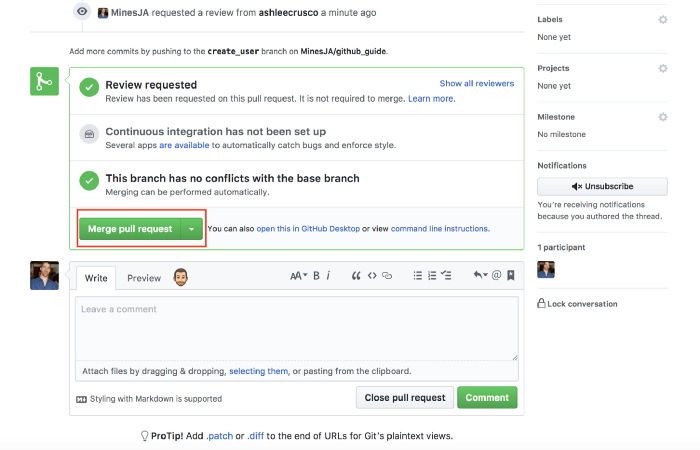
You can review and merge on the github page once receive the notification (shown as below).
-
Alternatively, you can fetch the branch to local and work with
Pycharm.-
Fetch/Pull the base branch to local, skip it if the local master already up to date;
git pull origin master -
open local repository in
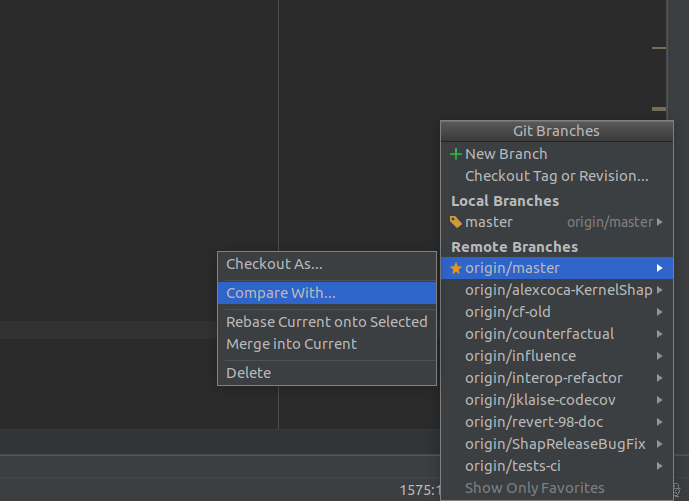
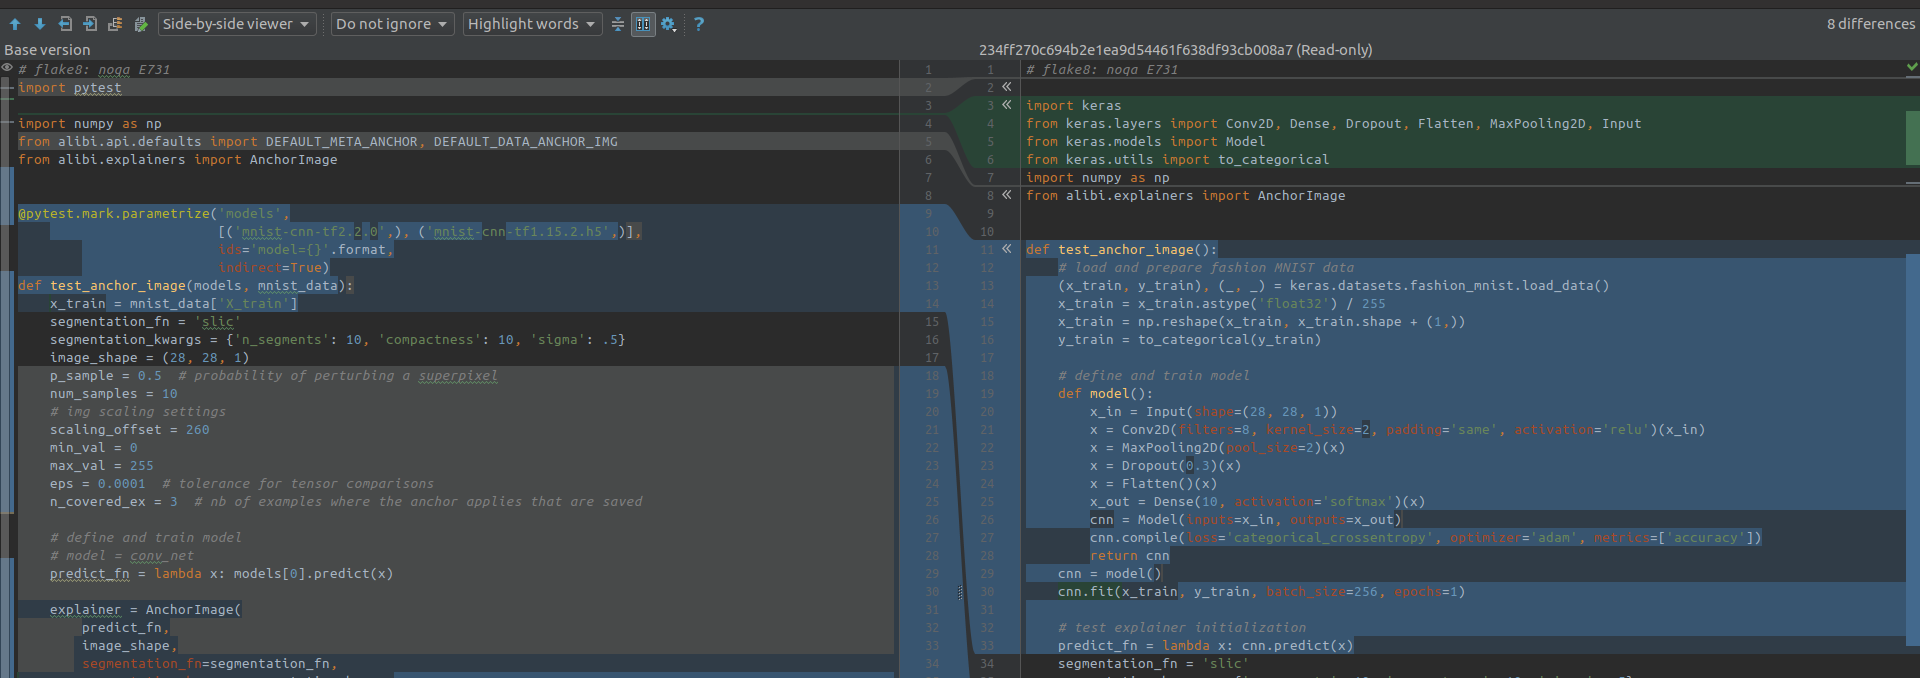
Pycharm, then go to Branches popup in the right-lower corner and click on a branch you want to check and choose Compare with currentclick in and you can see changes comparing with local master are highlighting.
-
merge remote branch to local master could be done in
Pycharm. Try this command for alternative way if you prefer merge withgit.git merge new_feature git push
For more about
git mergeand conflicts resolving, here provides a good solution. -
The branch could be delete if you don't need it anymore.
git branch -d new_feature
Above command could be execute when branch successfully merged to master. However, you can still
delete it without merging with captive -D:
git branch -D new_feature
Contributions are what make the open source community such an amazing place to be learn, inspire, and create. Any contributions you make are greatly appreciated.
- Fork the Project
- Create your Feature Branch (
git checkout -b feature/AmazingFeature) - Commit your Changes (
git commit -m 'Add some AmazingFeature') - Push to the Branch (
git push origin feature/AmazingFeature) - Open a Pull Request

