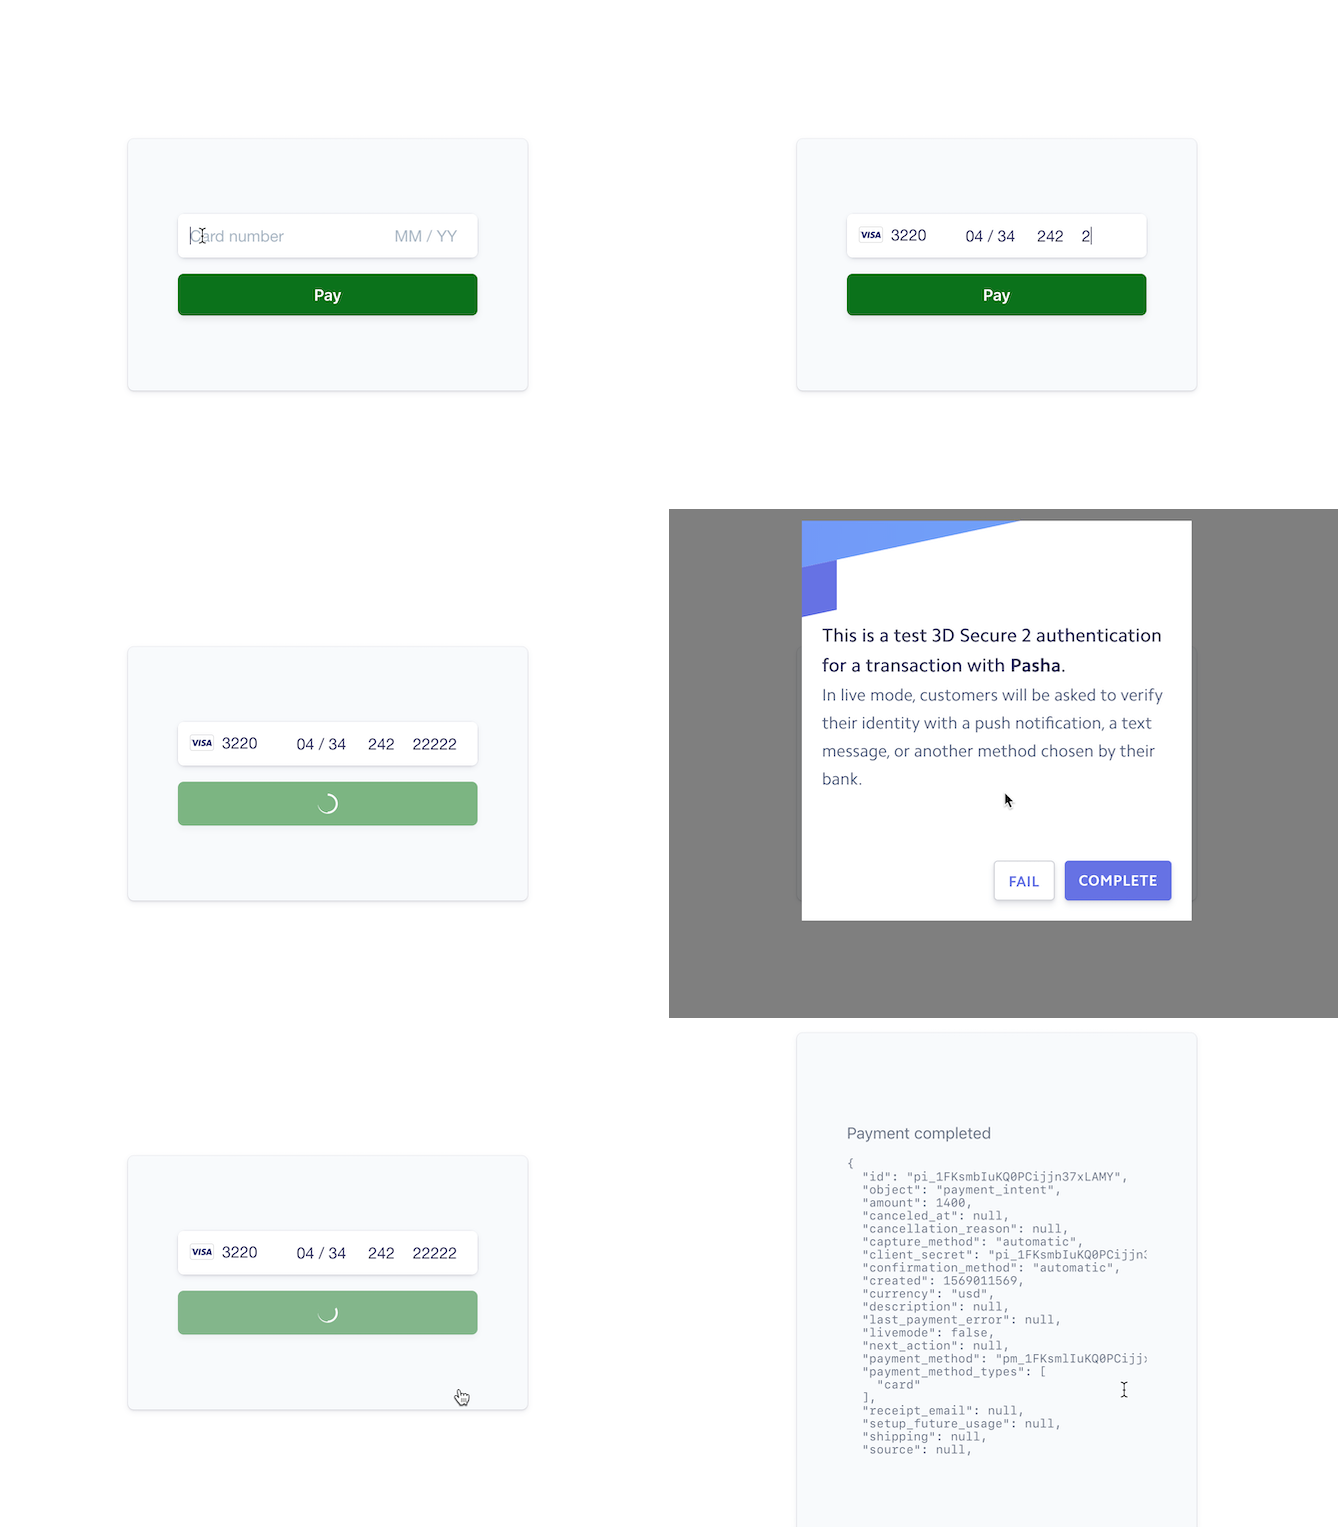
Cards are one of the most popular ways to pay online. Stripe offers several ways to accept card payments, depending on your business needs.
If you accept cards in regions like Europe and India, you will need to handle requests from banks to authenticate a purchase (commonly known as 3DS or OTP) and can choose between our using-webhooks and without-webhooks integrations.
If you only accept cards from U.S. and Canadian customers, you can use our integration that declines any bank requests for authentication but is much easier to integrate.
Read more about cards on Stripe in our docs.
| Using webhooks | Without webhooks | Declining on card authentication | |
|---|---|---|---|
| Recommended for | Businesses with a global customer base who want to add other payment methods | Businesses with a global customer base who only want to accept cards and don't want to use webhooks | Businesses who only have customers in the U.S. & Canada |
| Bank authentication requests | Automatically handles, no need for extra code | Requires extra code to handle authentication | Declines any payments that require authentication |
| Payment flow | Server -> Client | Client -> Server -> Client -> Server | Client -> Server |
| Webhooks for post-payment fulfillment | Recommended (scales better to future payment method) | Optional | Optional |
Demo
Web: See a hosted version of the sample or fork a copy on codesandbox.io
Mobile: Run the sample locally
All the samples run in test mode -- use the below test card numbers with any CVC code + a future expiration date to test for certain behavior.
| Test card number | Using webhooks | Without webhooks | Declining on card authentication |
|---|---|---|---|
| 4242424242424242 | Succeeds | Succeeds | Succeeds |
| 4000000000003220 | Displays a pop-up modal to authenticate | Displays a pop-up modal to authenticate | Declines and asks customer for new card |
Read more about testing on Stripe at https://stripe.com/docs/testing.
This sample includes several implementations of the same server in Node, Node Typescript, Ruby, Python, Java, PHP, and PHP (Slim) for the two integration types: using-webhooks and without-webhooks.
Follow the steps below to run locally.
1. Clone and configure the sample
The Stripe CLI is the fastest way to clone and configure a sample to run locally.
Using the Stripe CLI
If you haven't already installed the CLI, follow the installation steps in the project README. The CLI is useful for cloning samples and locally testing webhooks and Stripe integrations.
In your terminal shell, run the Stripe CLI command to clone the sample:
stripe samples create accept-a-card-payment
The CLI will walk you through picking your integration type, server and client languages, and configuring your .env config file with your Stripe API keys.
Installing and cloning manually
If you do not want to use the Stripe CLI, you can manually clone and configure the sample yourself:
git clone https://github.com/stripe-samples/accept-a-card-payment
Copy the .env.example file into a file named .env in the folder of the server you want to use. For example:
cp .env.example using-webhooks/server/node/.env
You will need a Stripe account in order to run the demo. Once you set up your account, go to the Stripe developer dashboard to find your API keys.
STRIPE_PUBLISHABLE_KEY=<replace-with-your-publishable-key>
STRIPE_SECRET_KEY=<replace-with-your-secret-key>
STATIC_DIR tells the server where the client files are located and does not need to be modified unless you move the server files.
2. Follow the server instructions on how to run:
Pick the server language you want and follow the instructions in the server folder README on how to run.
For example, if you want to run the Node server in using-webhooks:
cd using-webhooks/server/node # there's a README in this folder with instructions
npm install
npm start
3. [Optional] Run a webhook locally:
If you want to test the using-webhooks integration with a local webhook on your machine, you can use the Stripe CLI to easily spin one up.
First install the CLI and link your Stripe account.
stripe listen --forward-to localhost:4242/webhook
The CLI will print a webhook secret key to the console. Set STRIPE_WEBHOOK_SECRET to this value in your .env file.
You should see events logged in the console where the CLI is running.
When you are ready to create a live webhook endpoint, follow our guide in the docs on configuring a webhook endpoint in the dashboard.
4. [Mobile clients] Set up the client app:
Finally, choose a mobile client implementation and follow the instruction in the app's README (e.g. using-webhooks/client/ios/README.md) to run.
When the app is running, use 4242424242424242 as a test card number with any CVC code + a future expiration date.
Use the 4000000000003220 test card number to trigger a 3D Secure challenge flow.
Read more about testing on Stripe at https://stripe.com/docs/testing.
Q: Why did you pick these frameworks?
A: We chose the most minimal framework to convey the key Stripe calls and concepts you need to understand. These demos are meant as an educational tool that helps you roadmap how to integrate Stripe within your own system independent of the framework.
Q: Can you show me how to build X?
A: We are always looking for new sample ideas, please email dev-samples@stripe.com with your suggestion!
