
The DevOps Platform is a tools environment for continuously testing, releasing and maintaining applications. Reference code, delivery pipelines, automated testing and environments can be loaded in via the concept of Cartridges.
Once you have a stack up and running, please log in with the username and password created upon startup.
These instructions will spin up an instance in a single server in AWS (for evaluation purposes).
- Create a VPC using the VPC wizard in the AWS console by selecting the first option with 1 public subnet
- Note the VPC ID (e.g. vpc-1ed3sfgw)
- Clone this repository and then in a terminal window (this has been tested in GitBash) run:
$ ./startup.sh
Usage: ./startup.sh -m <MACHINE_NAME>
                    -c <VPC_ID>
                    -r <REGION>(optional)
                    -a <AWS_ACCESS_KEY>(optional)
                    -s <AWS_SECRET_ACCESS_EY>(optional)
                    -v <VOLUME_DRIVER>(optional)
                    -n <CUSTOM_NETWORK_NAME>(optional)
                    -l LOGGING_DRIVER(optional)
                    -f path/to/additional_override1.yml(optional)
                    -f path/to/additional_override2.yml(optional)
                    -u <INITIAL_ADMIN_USER>
-p <INITIAL_ADMIN_PASSWORD_PLAIN>(optional) ...- You will need to supply:
- a machine name (anything you want)
- the target VPC
- If you don't have your AWS credentials and default region stored locally in ~/.aws you will also need to supply:
- your AWS key and your secret access key (see getting your AWS access key) via command line options, environment variables or using aws configure
- the AWS region id in this format: eu-west-1
- a username and password (optional) to act as credentials for the initial admin user (you will be prompted to re-enter your password if it is considered weak)
For example (if you don't have ~/.aws set up)
./startup.sh -m adop1 -a AAA -s BBB -c vpc-123abc -r eu-west-1 -u userName -p userPassword- If all goes well you will see the following output and you can view the DevOps Platform in your browser
##########################################################

SUCCESS, your new ADOP instance is ready!

Run these commands in your shell:
  eval \"$(docker-machine env $MACHINE_NAME)\"
  source credentials.generate.sh
  source env.config.sh

Navigate to http://11.22.33.44 in your browser to use your new DevOps Platform!- Log in using the username and password you created in the startup script:
<INITIAL_ADMIN_USER>/ <INITIAL_ADMIN_PASSWORD_PLAIN>The platform is designed to run on any container platform.
-
Create a VPC using the VPC wizard in the AWS console by selecting the first option with 1 public subnet
-
Create a Docker Engine in AWS:
docker-machine create --driver amazonec2 --amazonec2-access-key YOUR\_ACCESS\_KEY --amazonec2-secret-key YOUR\_SECRET\_KEY --amazonec2-vpc-id vpc-YOUR_ID --amazonec2-instance-type t2.large --amazonec2-region REGION IN THIS FORMAT: eu-west-1 YOUR\_MACHINE\_NAME-
Update the docker-machine security group to permit inbound http traffic on port 80 (from the machine(s) from which you want to have access only), also UDP on 25826 and 12201 from 127.0.0.1/32
-
Set your local environment variables to point docker-machine to your new instance
Create a docker machine and set up your local environment variables to point docker-machine to your new instance
Create a Docker Swarm that has a publicly accessible Engine with the label "tier=public" to bind Nginx and Logstash to that node
- Run: export TARGET_HOST=<IP_OF_PUBLIC_HOST>
- Run: export CUSTOM_NETWORK_NAME=<CUSTOM_NETWORK_NAME>
- Create a custom network: docker network create $CUSTOM_NETWORK_NAME
- Run: docker-compose -f compose/elk.yml up -d
- Run: export LOGSTASH_HOST=<IP_OF_LOGSTASH_HOST>
- Run: source credentials.generate.sh [This creates a file containing your generated passwords, platform.secrets.sh, which is sourced. If the file already exists, it will not be created.]
- platform.secrets.sh should not be uploaded to a remote repository hence do not remove this file from the .gitignore file
- Run: source env.config.sh
- If you delete platform.secrets.sh or if you edit any of the variables manually, you will need to re-run credentials.generate.sh in order to recreate the file or re-source the variables.
- If you change the values in platform.secrets.sh, you will need to remove your existing docker containers and re-run docker-compose in order to re-create the containers with the new password values.
- When creating a new instance of ADOP, you must delete platform.secrets.sh and regenerate it using credentials.generate.sh, else your old environment variables will get sourced as opposed to the new ones.
- Choose a volume driver - either "local" or "nfs" are provided, and if the latter is chosen then an NFS server is expected along with the NFS_HOST environment variable
- Pull the images first (this is because we can't set dependencies in Compose yet so we want everything to start at the same time): docker-compose pull
- Run (logging driver file optional): docker-compose -f docker-compose.yml -f etc/volumes/<VOLUME_DRIVER>/default.yml -f etc/logging/syslog/default.yml up -d
- MACHINE_NAME the name of your docker machine
- TARGET_HOST the dns/ip of proxy
- LOGSTASH_HOST the dns/ip of logstash
- CUSTOM_NETWORK_NAME: The name of the pre-created custom network to use
- [OPTIONAL] NFS_HOST: The DNS/IP of your NFS server
Create ssl certificate for jenkins to allow connectivity with docker engine.
- RUN : credentials.generate.sh
- RUN : source env.config.sh
- RUN : ./generate_client_certs.sh ${DOCKER_CLIENT_CERT_PATH}
Note : For windows run the generate_client_certs.sh script from a terminal (Git Bash) as administrator.
- Access the target host url
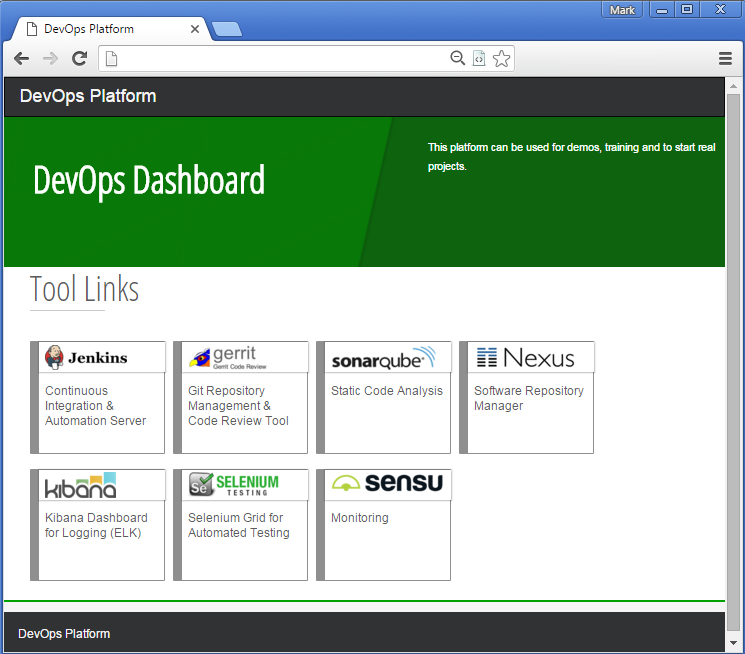
http://<TARGET_HOST>with the your username and password - This page presents the links to all the tools.
- Click: Jenkins link.
- Run: Load_Platform job
- Once the Load_Platform job and other downstream jobs are finished your platform is ready to be used.
- This job generates a example workspace folder, example project folder and jenkins jobs/pipelines for java reference application.
- Create environment to deploy the reference application
- Navigate to
http://<TARGET_HOST>/jenkins/job/ExampleWorkspace/job/ExampleProject/job/Create_Environment - Build with Parameters keeping the default value.
- Run Example pipeline
- Navigate to
http://<TARGET_HOST>/jenkins/job/ExampleWorkspace/job/ExampleProject/view/Java_Reference_Application/ - Click on run.
- Browse the environment
- Click on the url for your environment from deploy job.
- You should be able to see the spring petclinic application.
- Now, you can clone the repository from gerrit and make a code change to see the example pipeline triggered automatically.
Kibana 4 does not provide a configuration property that allow to define the default index pattern so the following manual procedure should be adopted in order to define an index pattern:
- Navidate to Settings > Indices using Kibana dashboard
- Set index name or pattern as "logstash-*"
- For the below drop-down select @timestamp for the Time-field name
- Click on create button
Documentation can be found under the docker-library/docs GitHub repo. Be sure to familiarize yourself with the repository's README.md file before attempting a pull request.
If you have any problems with or questions about this image, please contact us through a GitHub issue.
You are invited to contribute new features, fixes, or updates, large or small; we are always thrilled to receive pull requests, and do our best to process them as fast as we can.
Before you start to code, we recommend discussing your plans through a GitHub issue, especially for more ambitious contributions. This gives other contributors a chance to point you in the right direction, give you feedback on your design, and help you find out if someone else is working on the same thing.